Aftermarket 4x4 Parts and Accessories
Expedition & Overland Preparation
Outdoor, Camping & Bushcraft Products


Categories Fourby USB Clock Installation
Fourby USB Clock Installation
Fourby Multifunction clock installation:
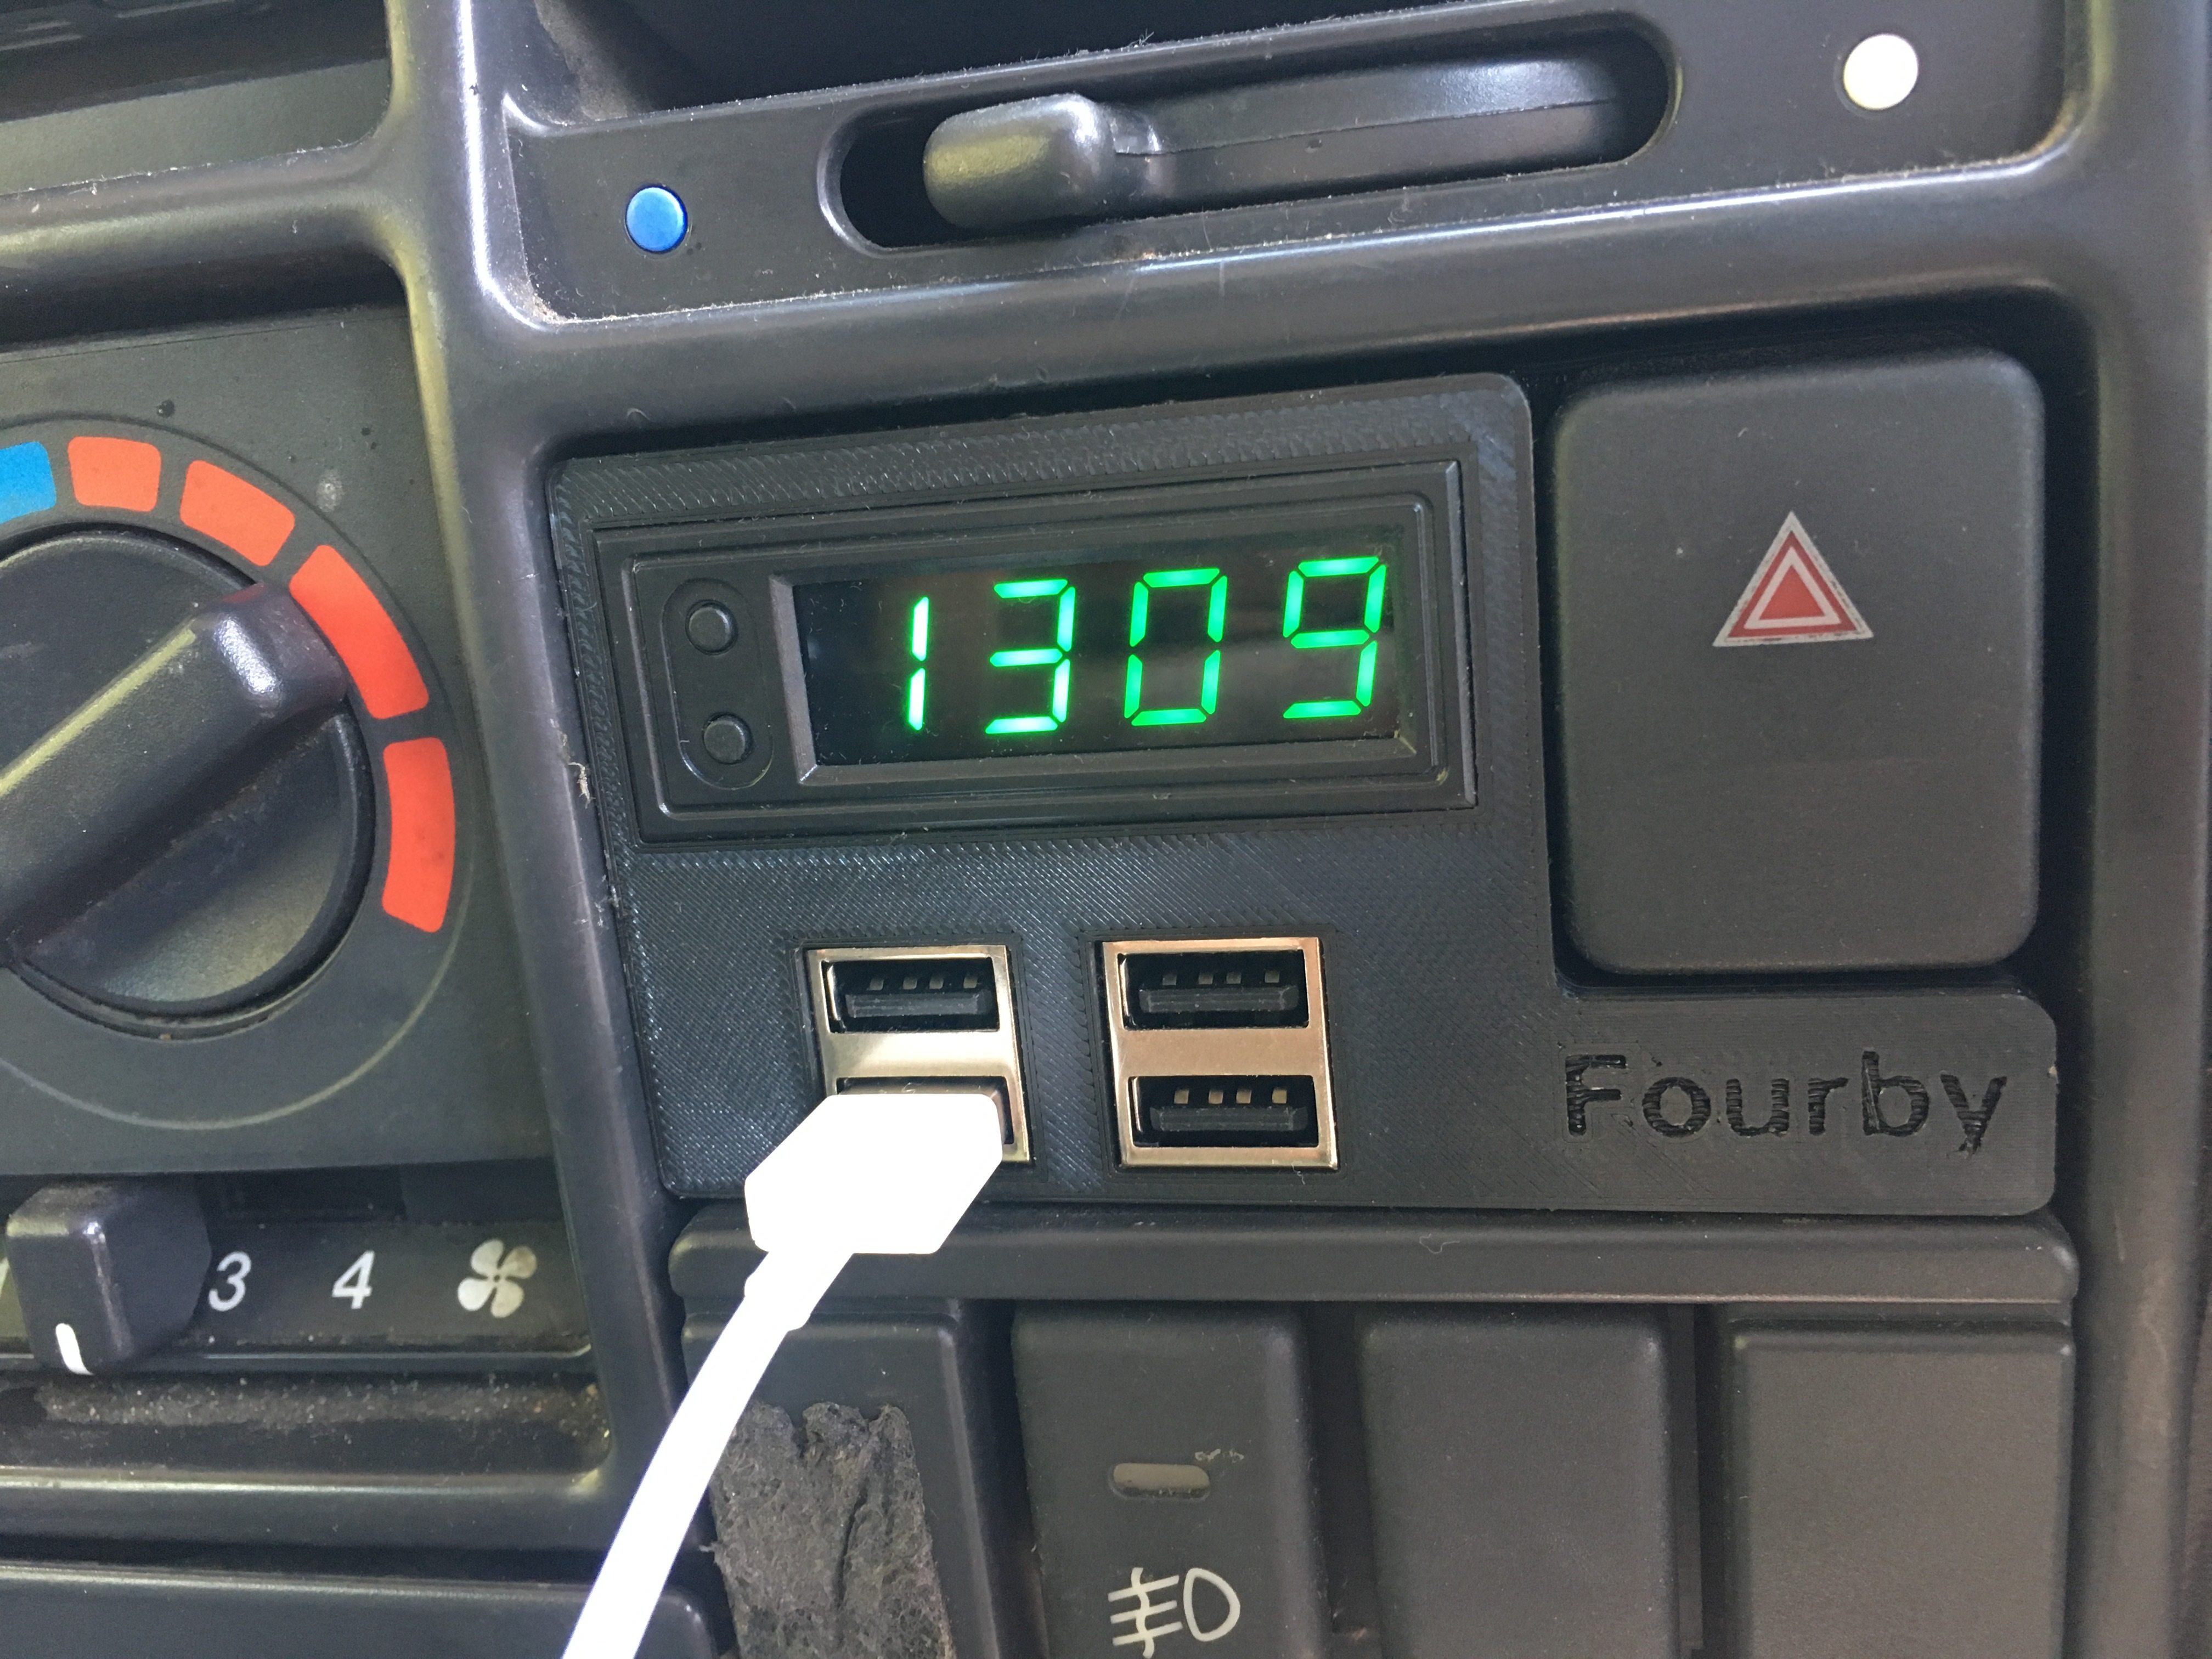
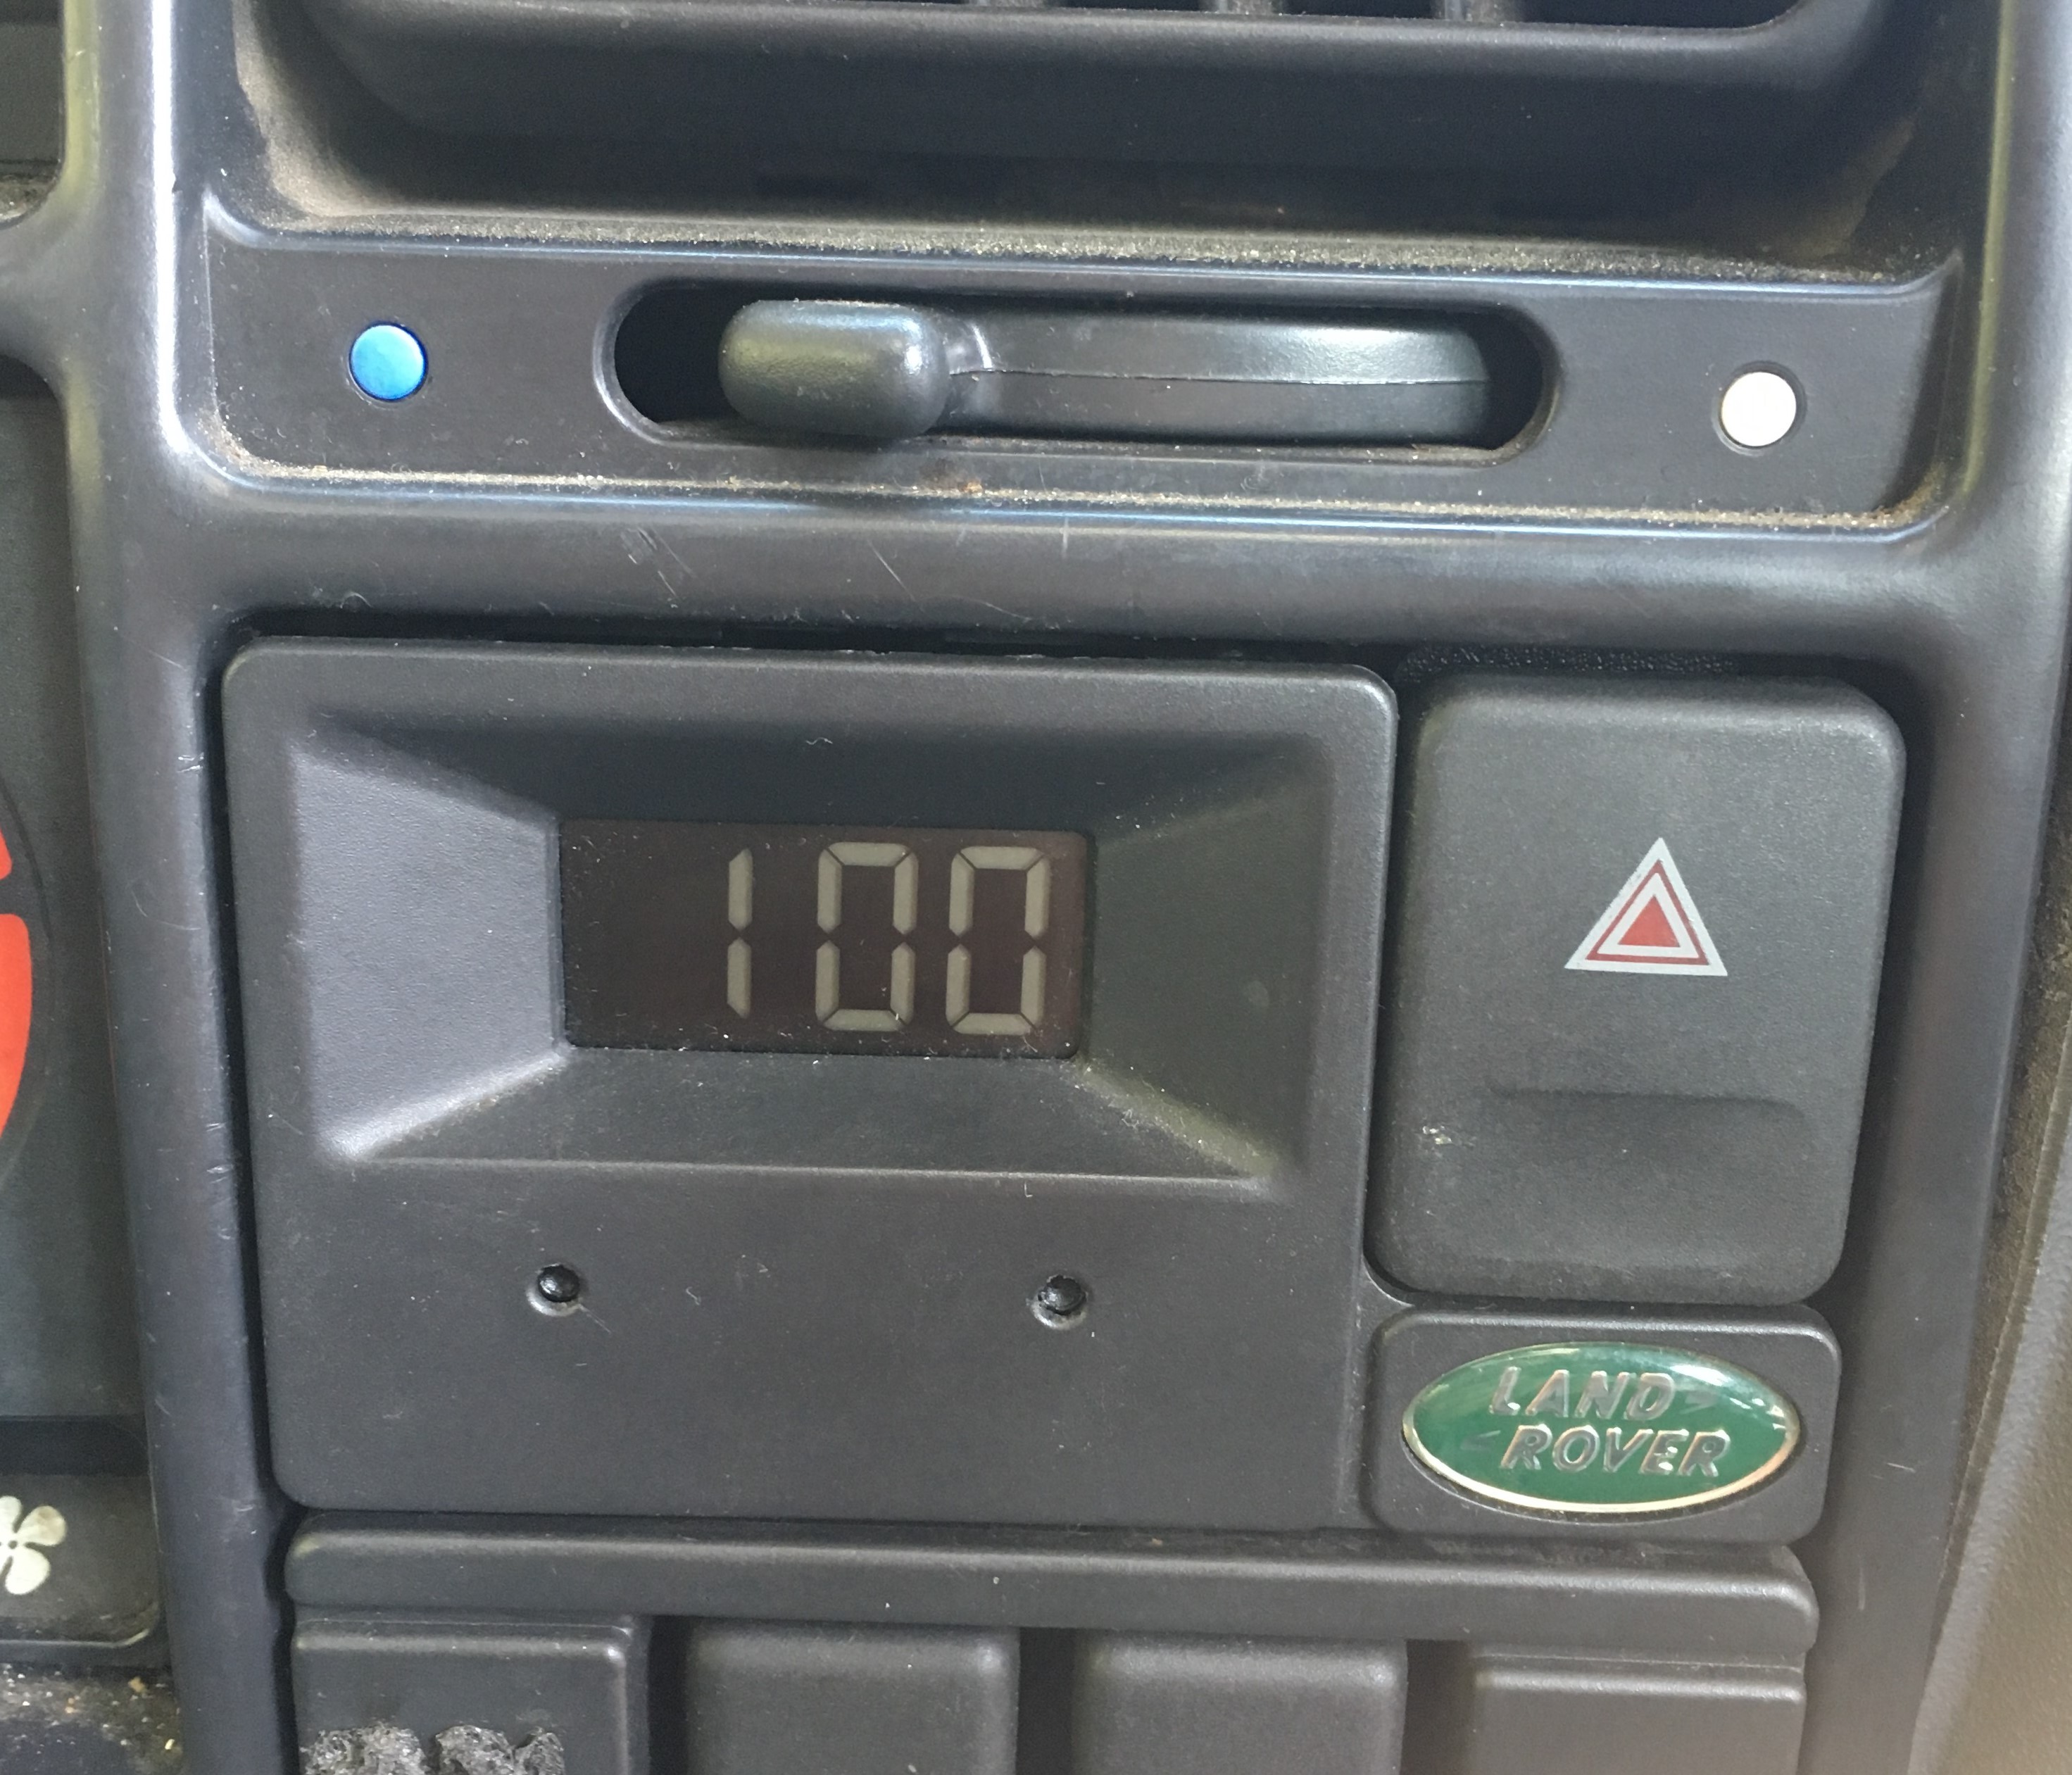
These Instructions will show you how to replace your original Land Rover clock with the Fourby multifunction clock
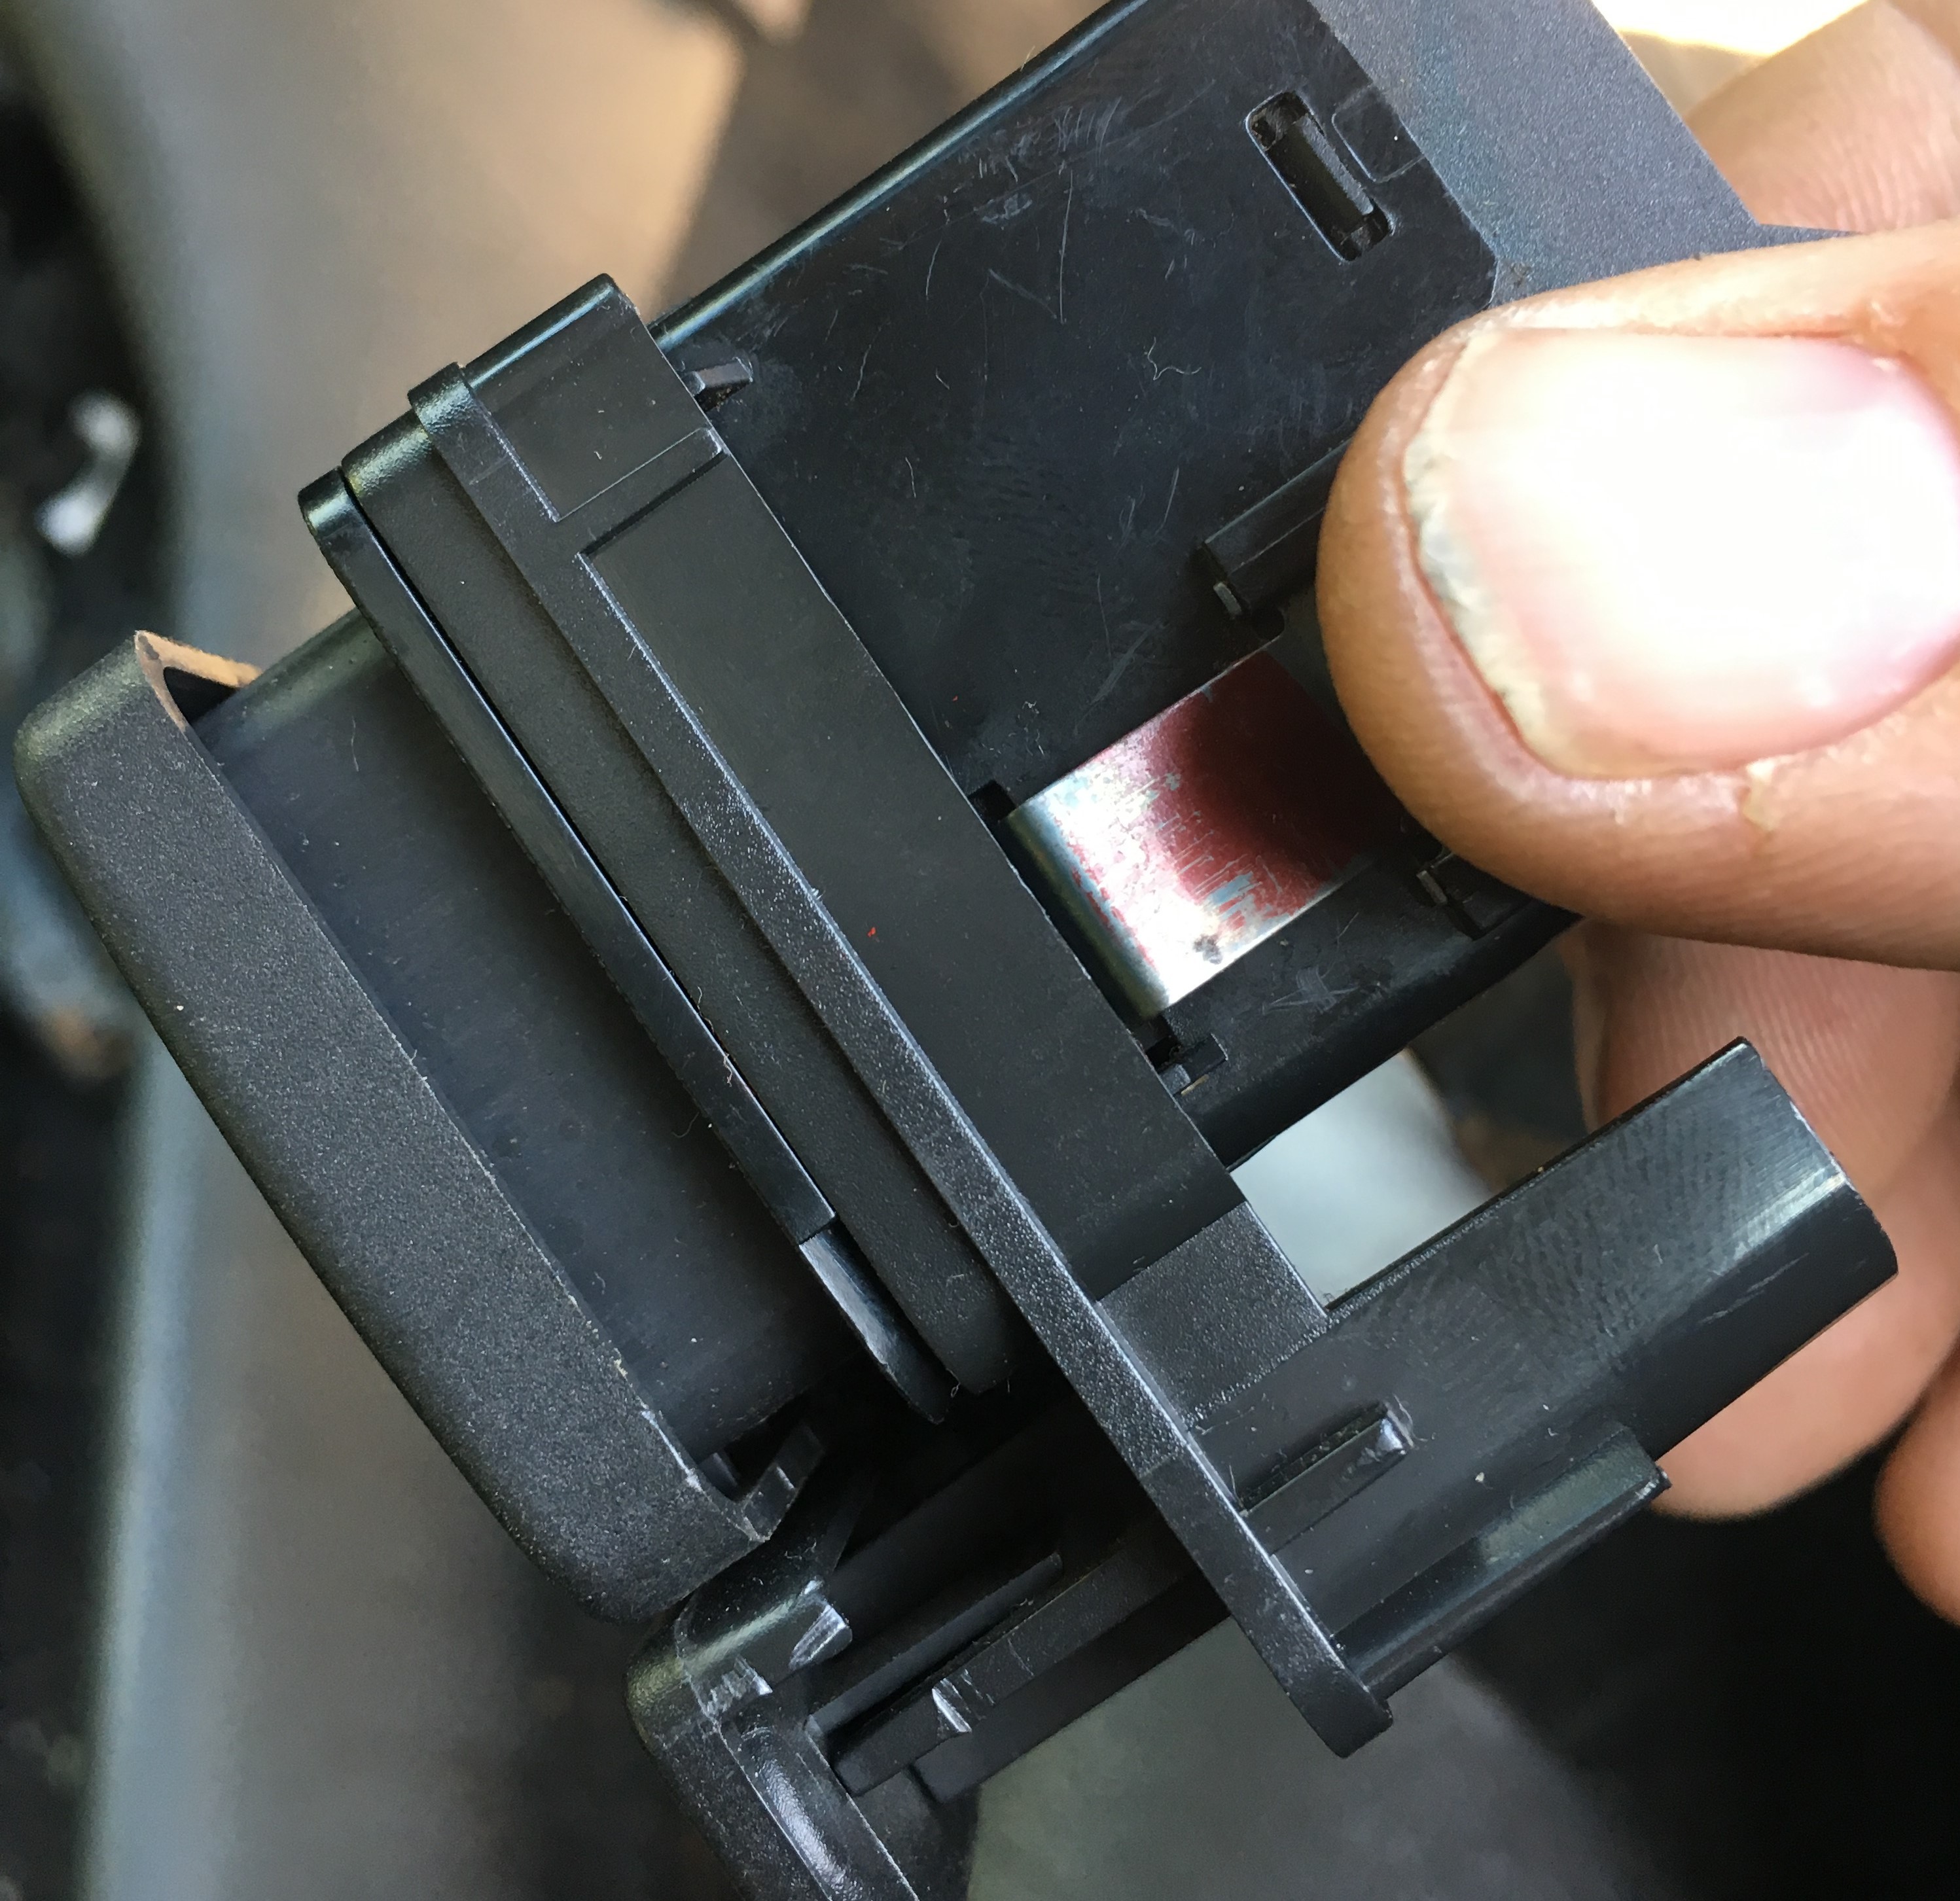
Use shims in these locations to push the retaining tabs up to assist the removal of the original clock, a feeler gauge makes a great set of shims.
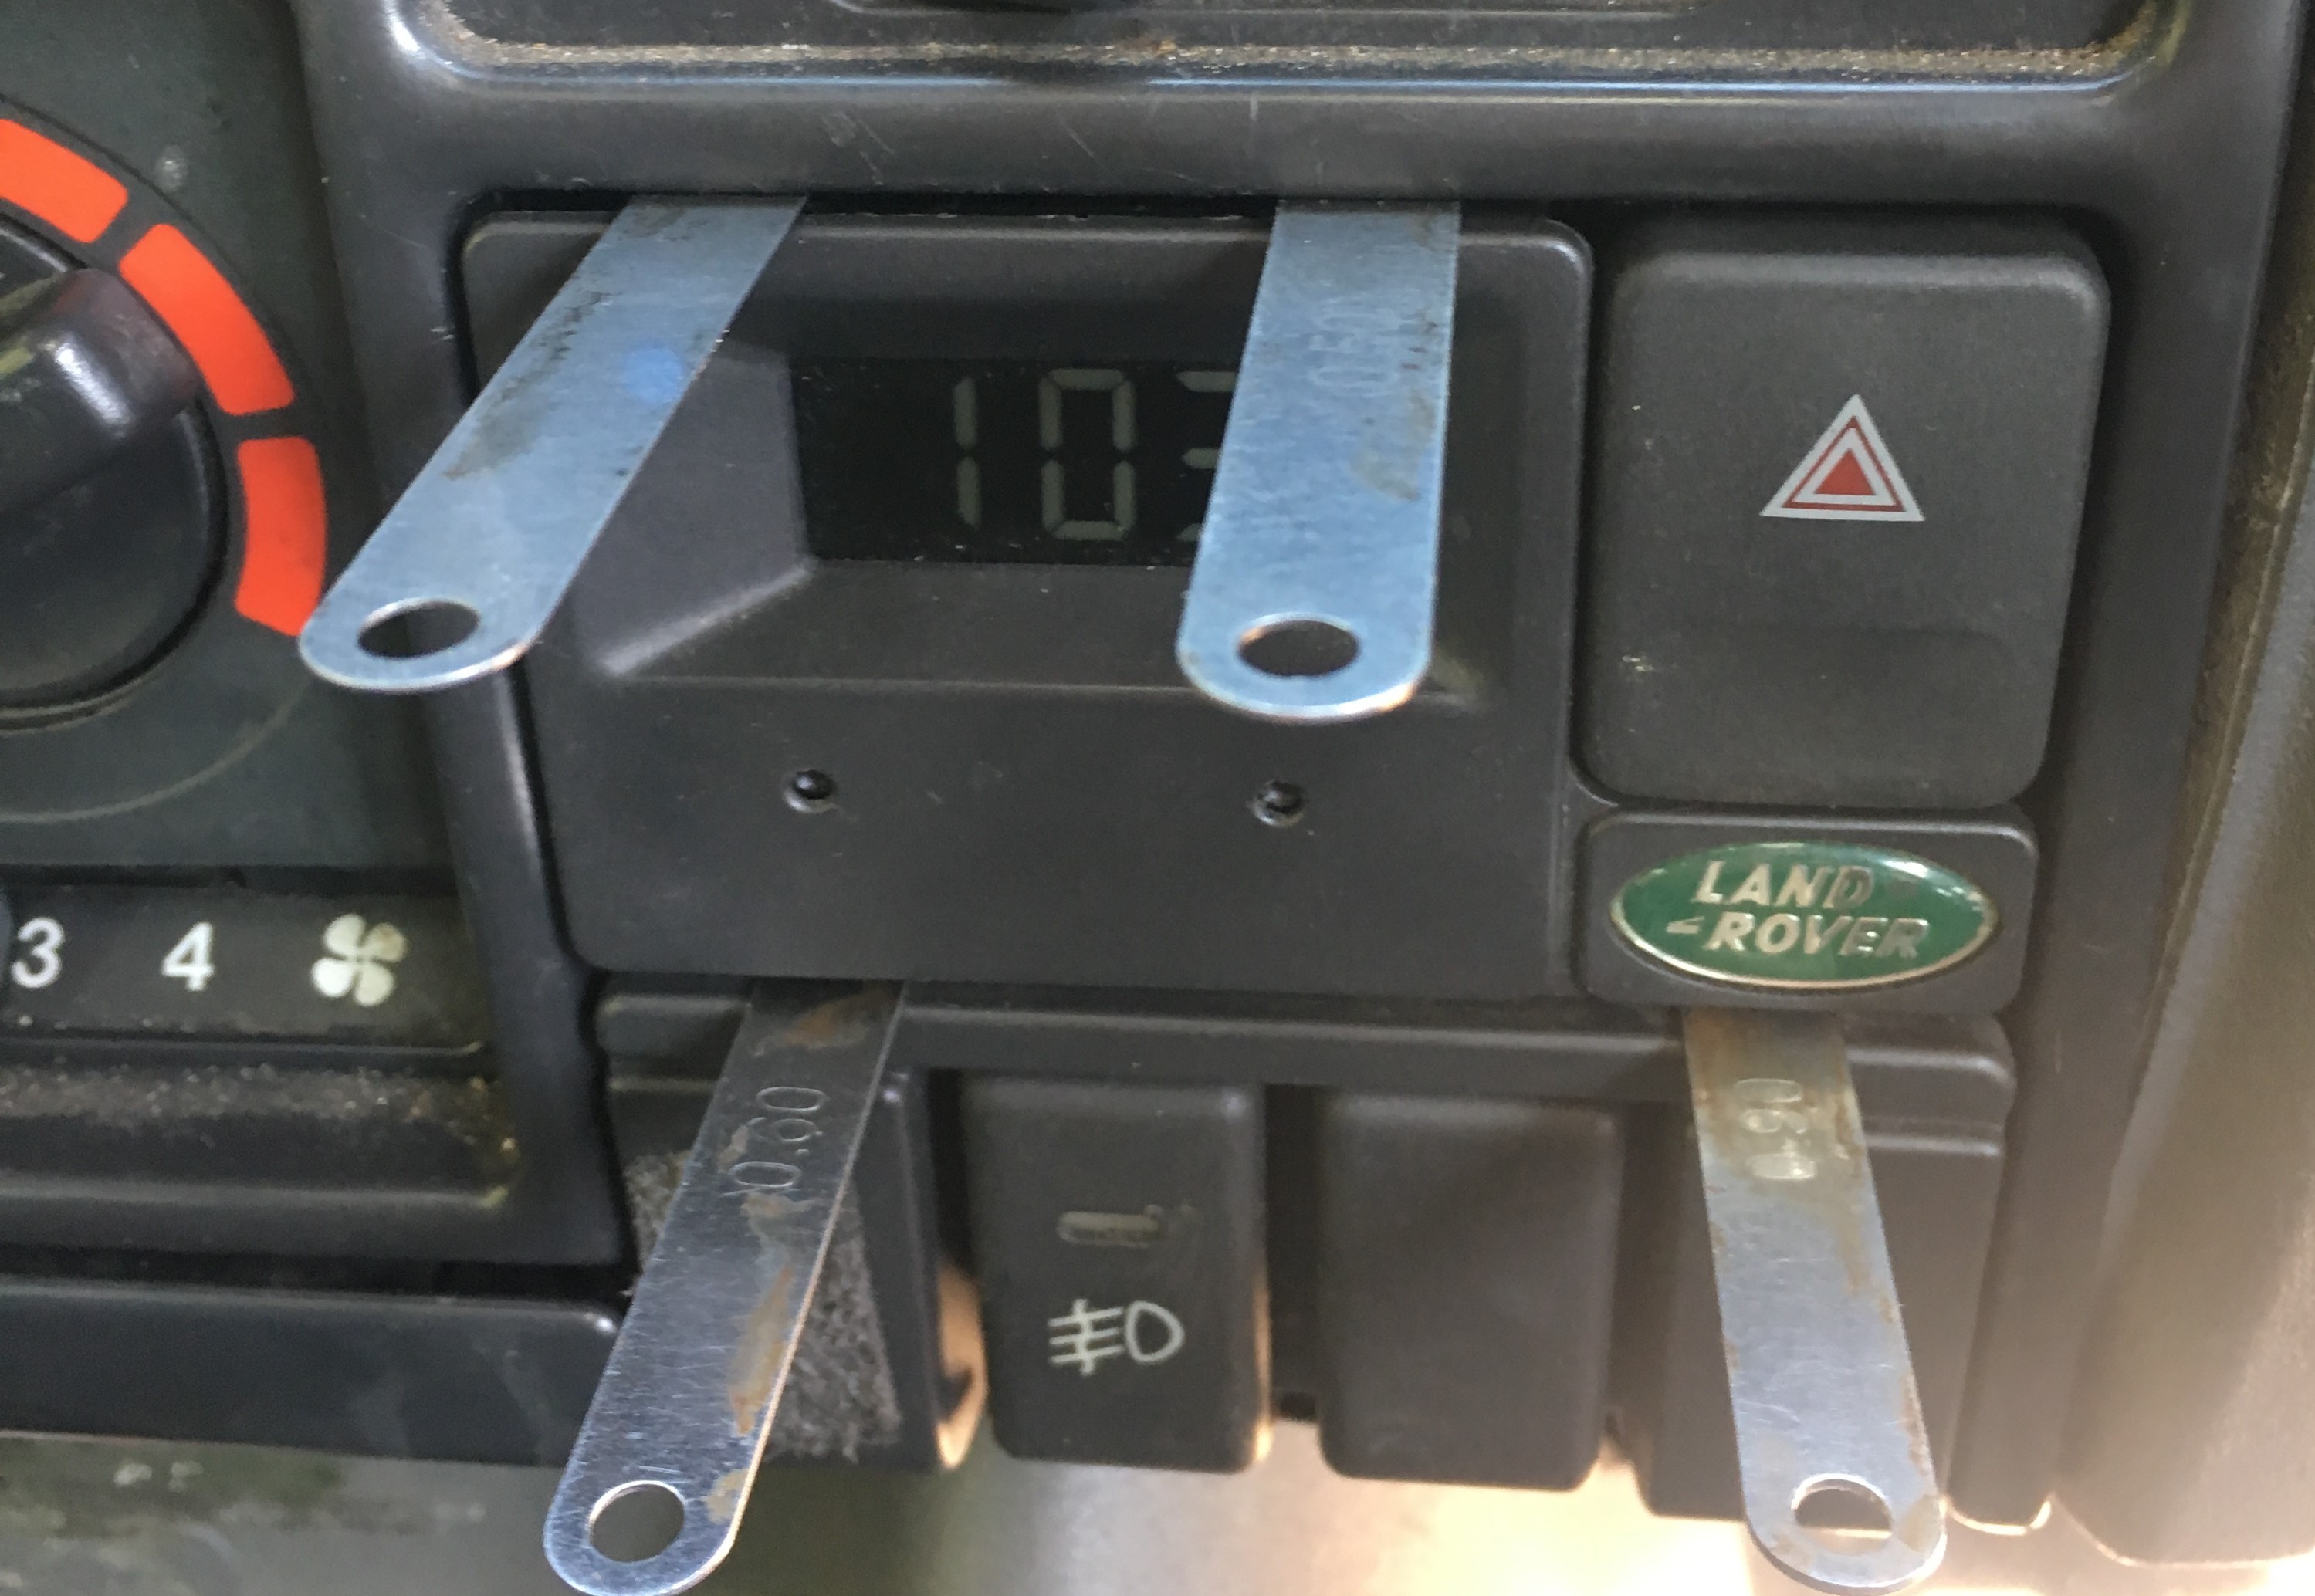
If you get the shims in the right spots you will be able to extract the clock. Feel around either side of the tab to locate it, then push the shims forwards from the front into center of the tabs to unlock. There are 4 Tabs
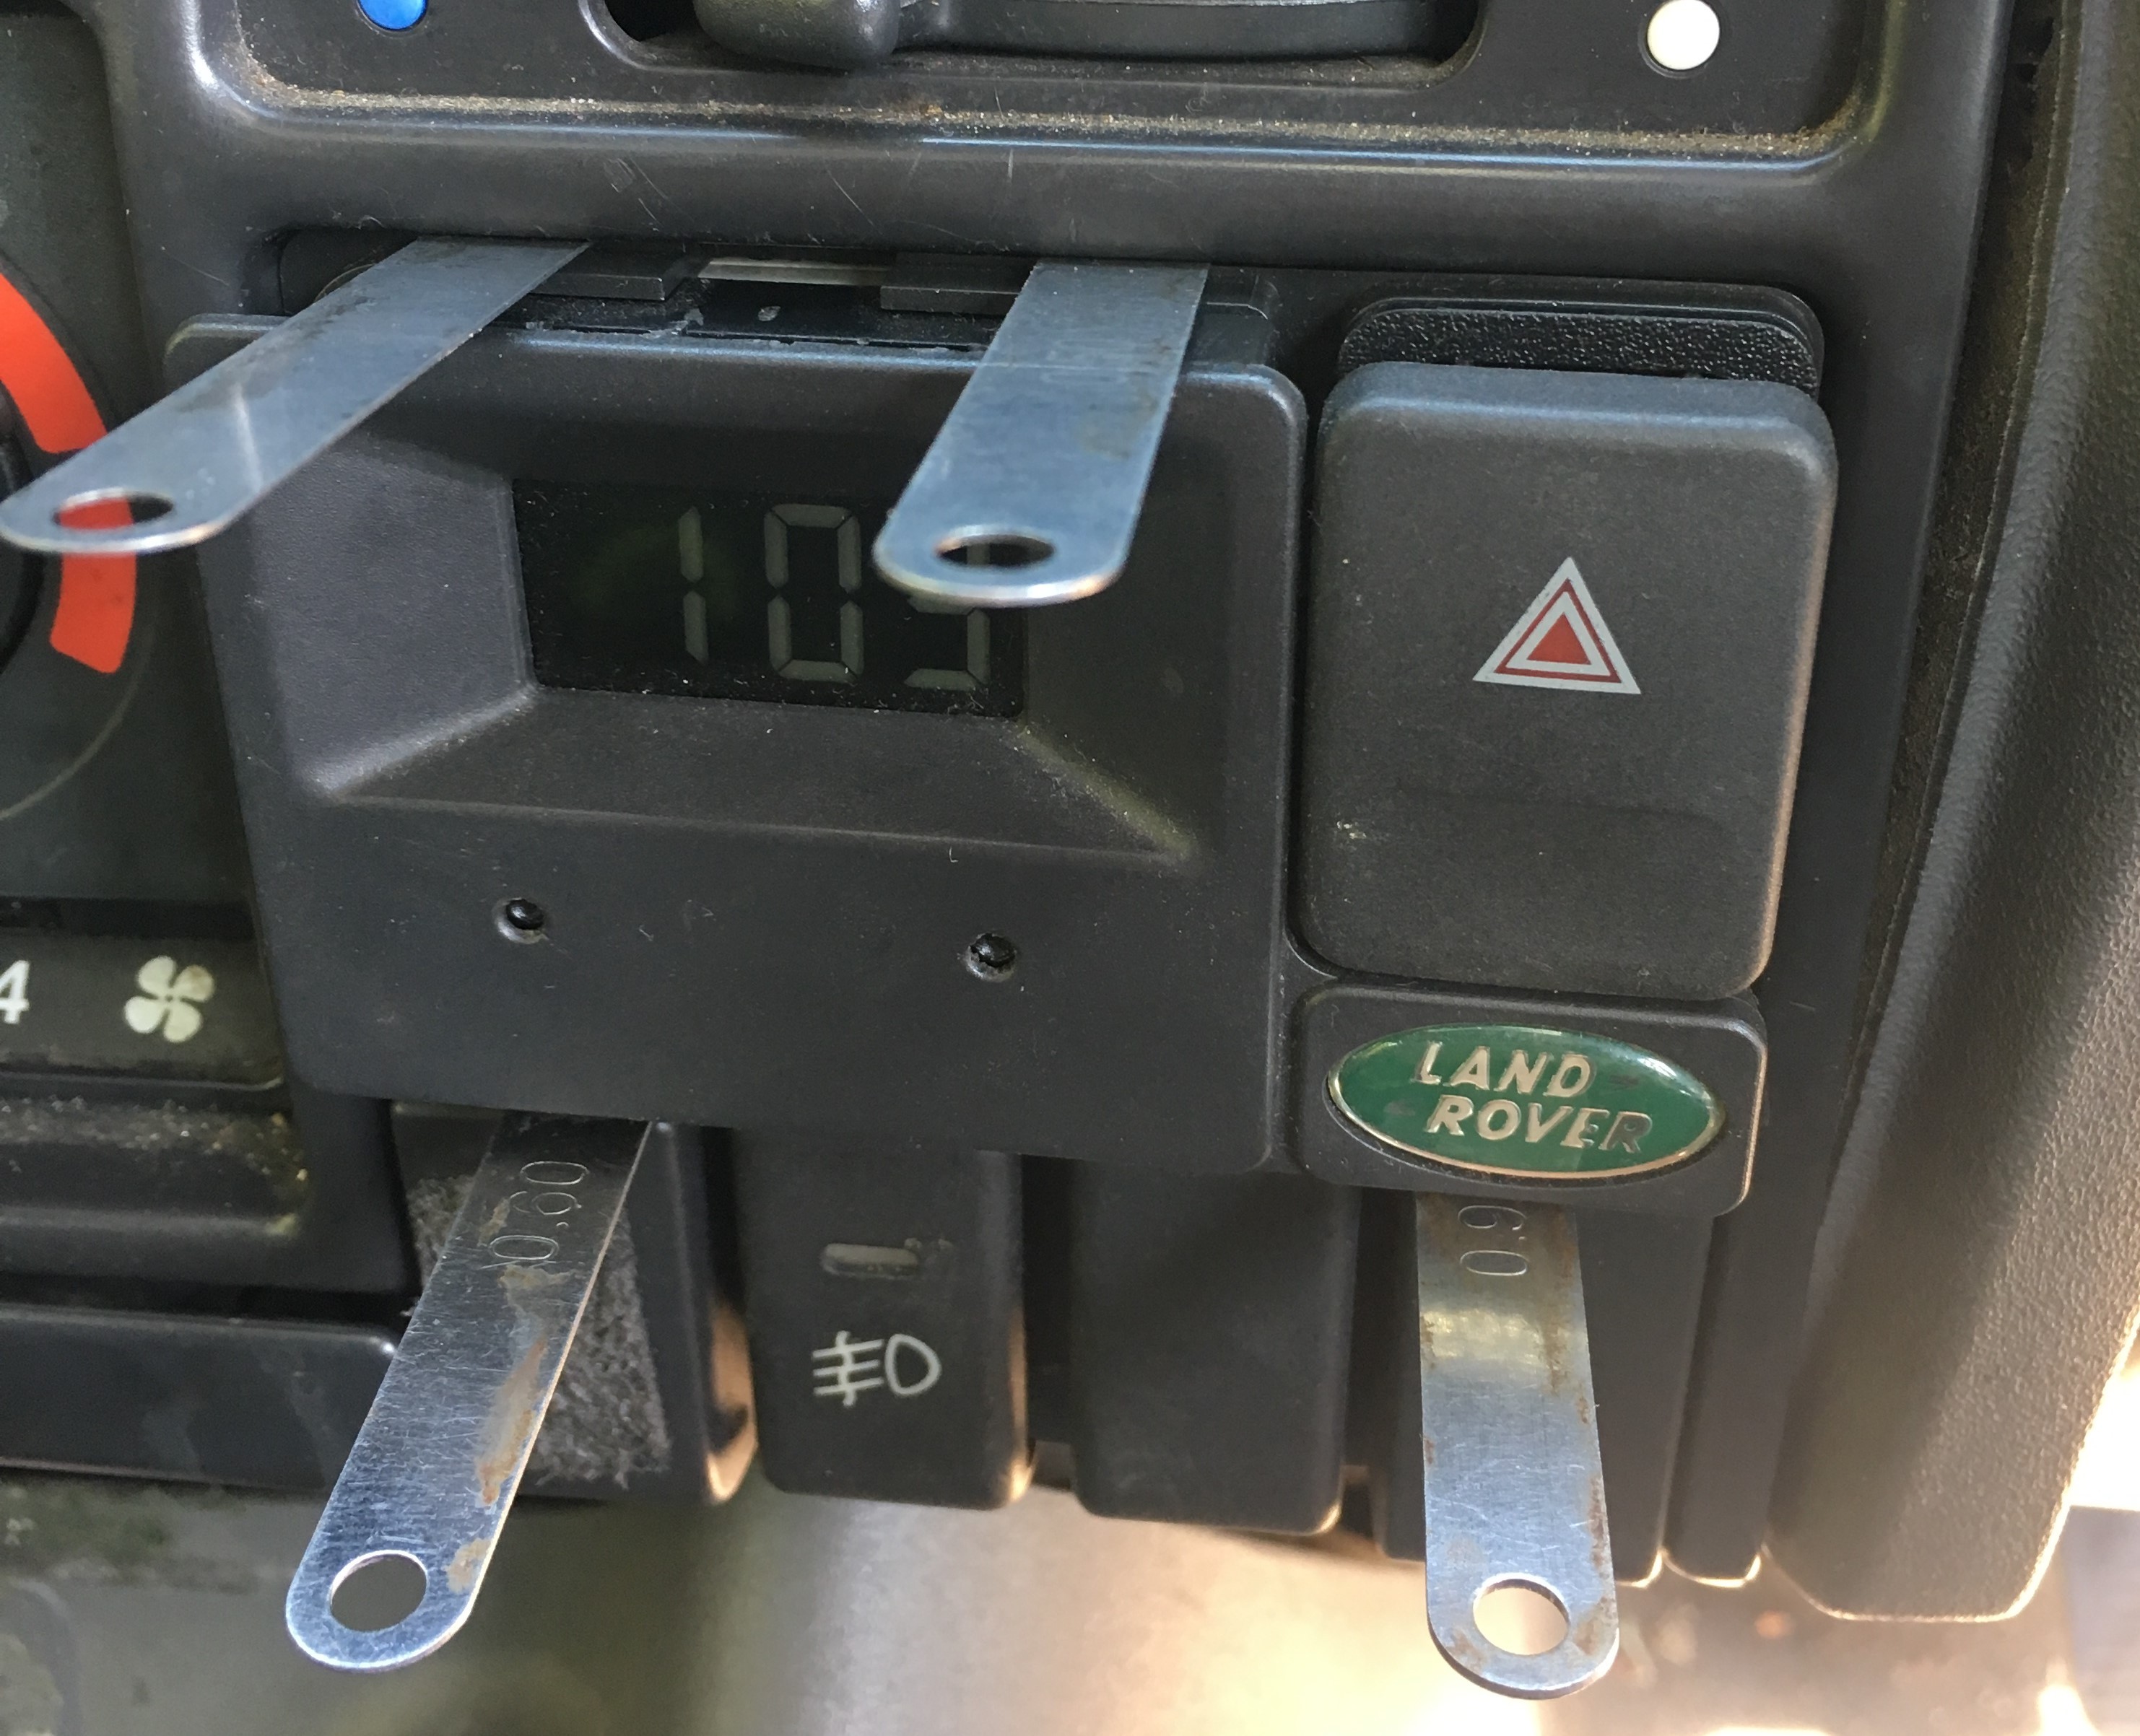
The clock should just easily prise out of the surround
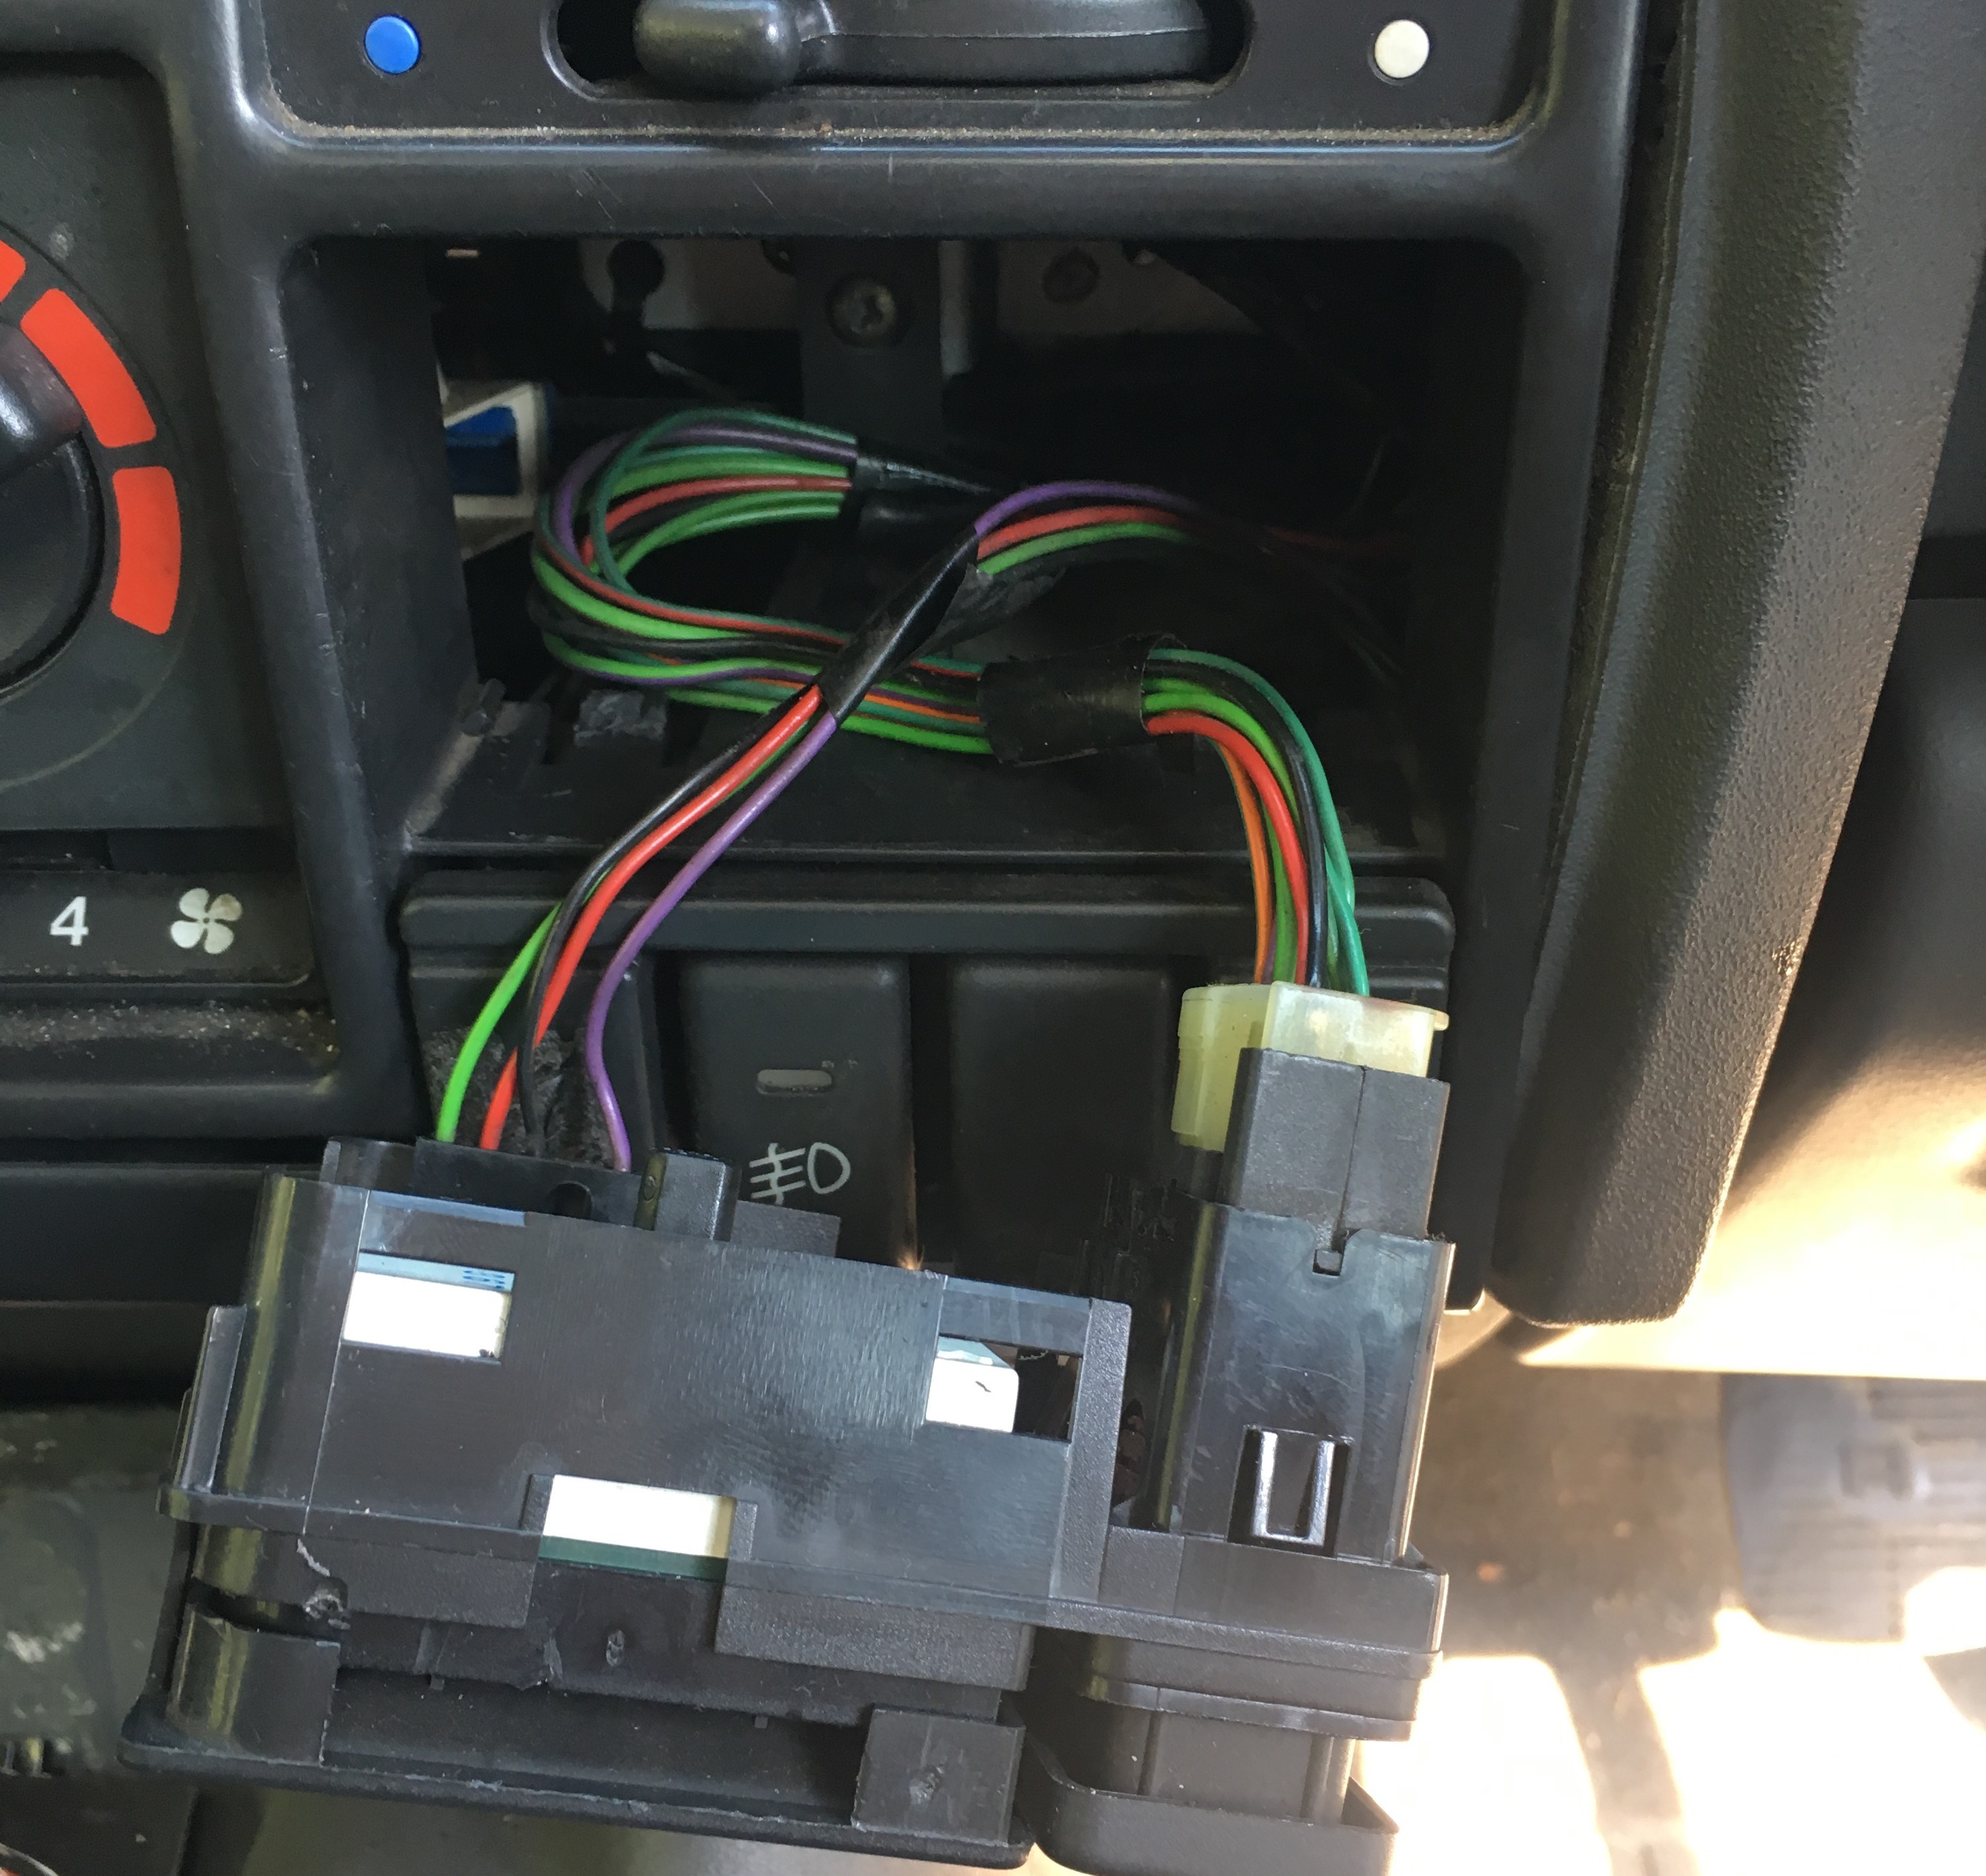
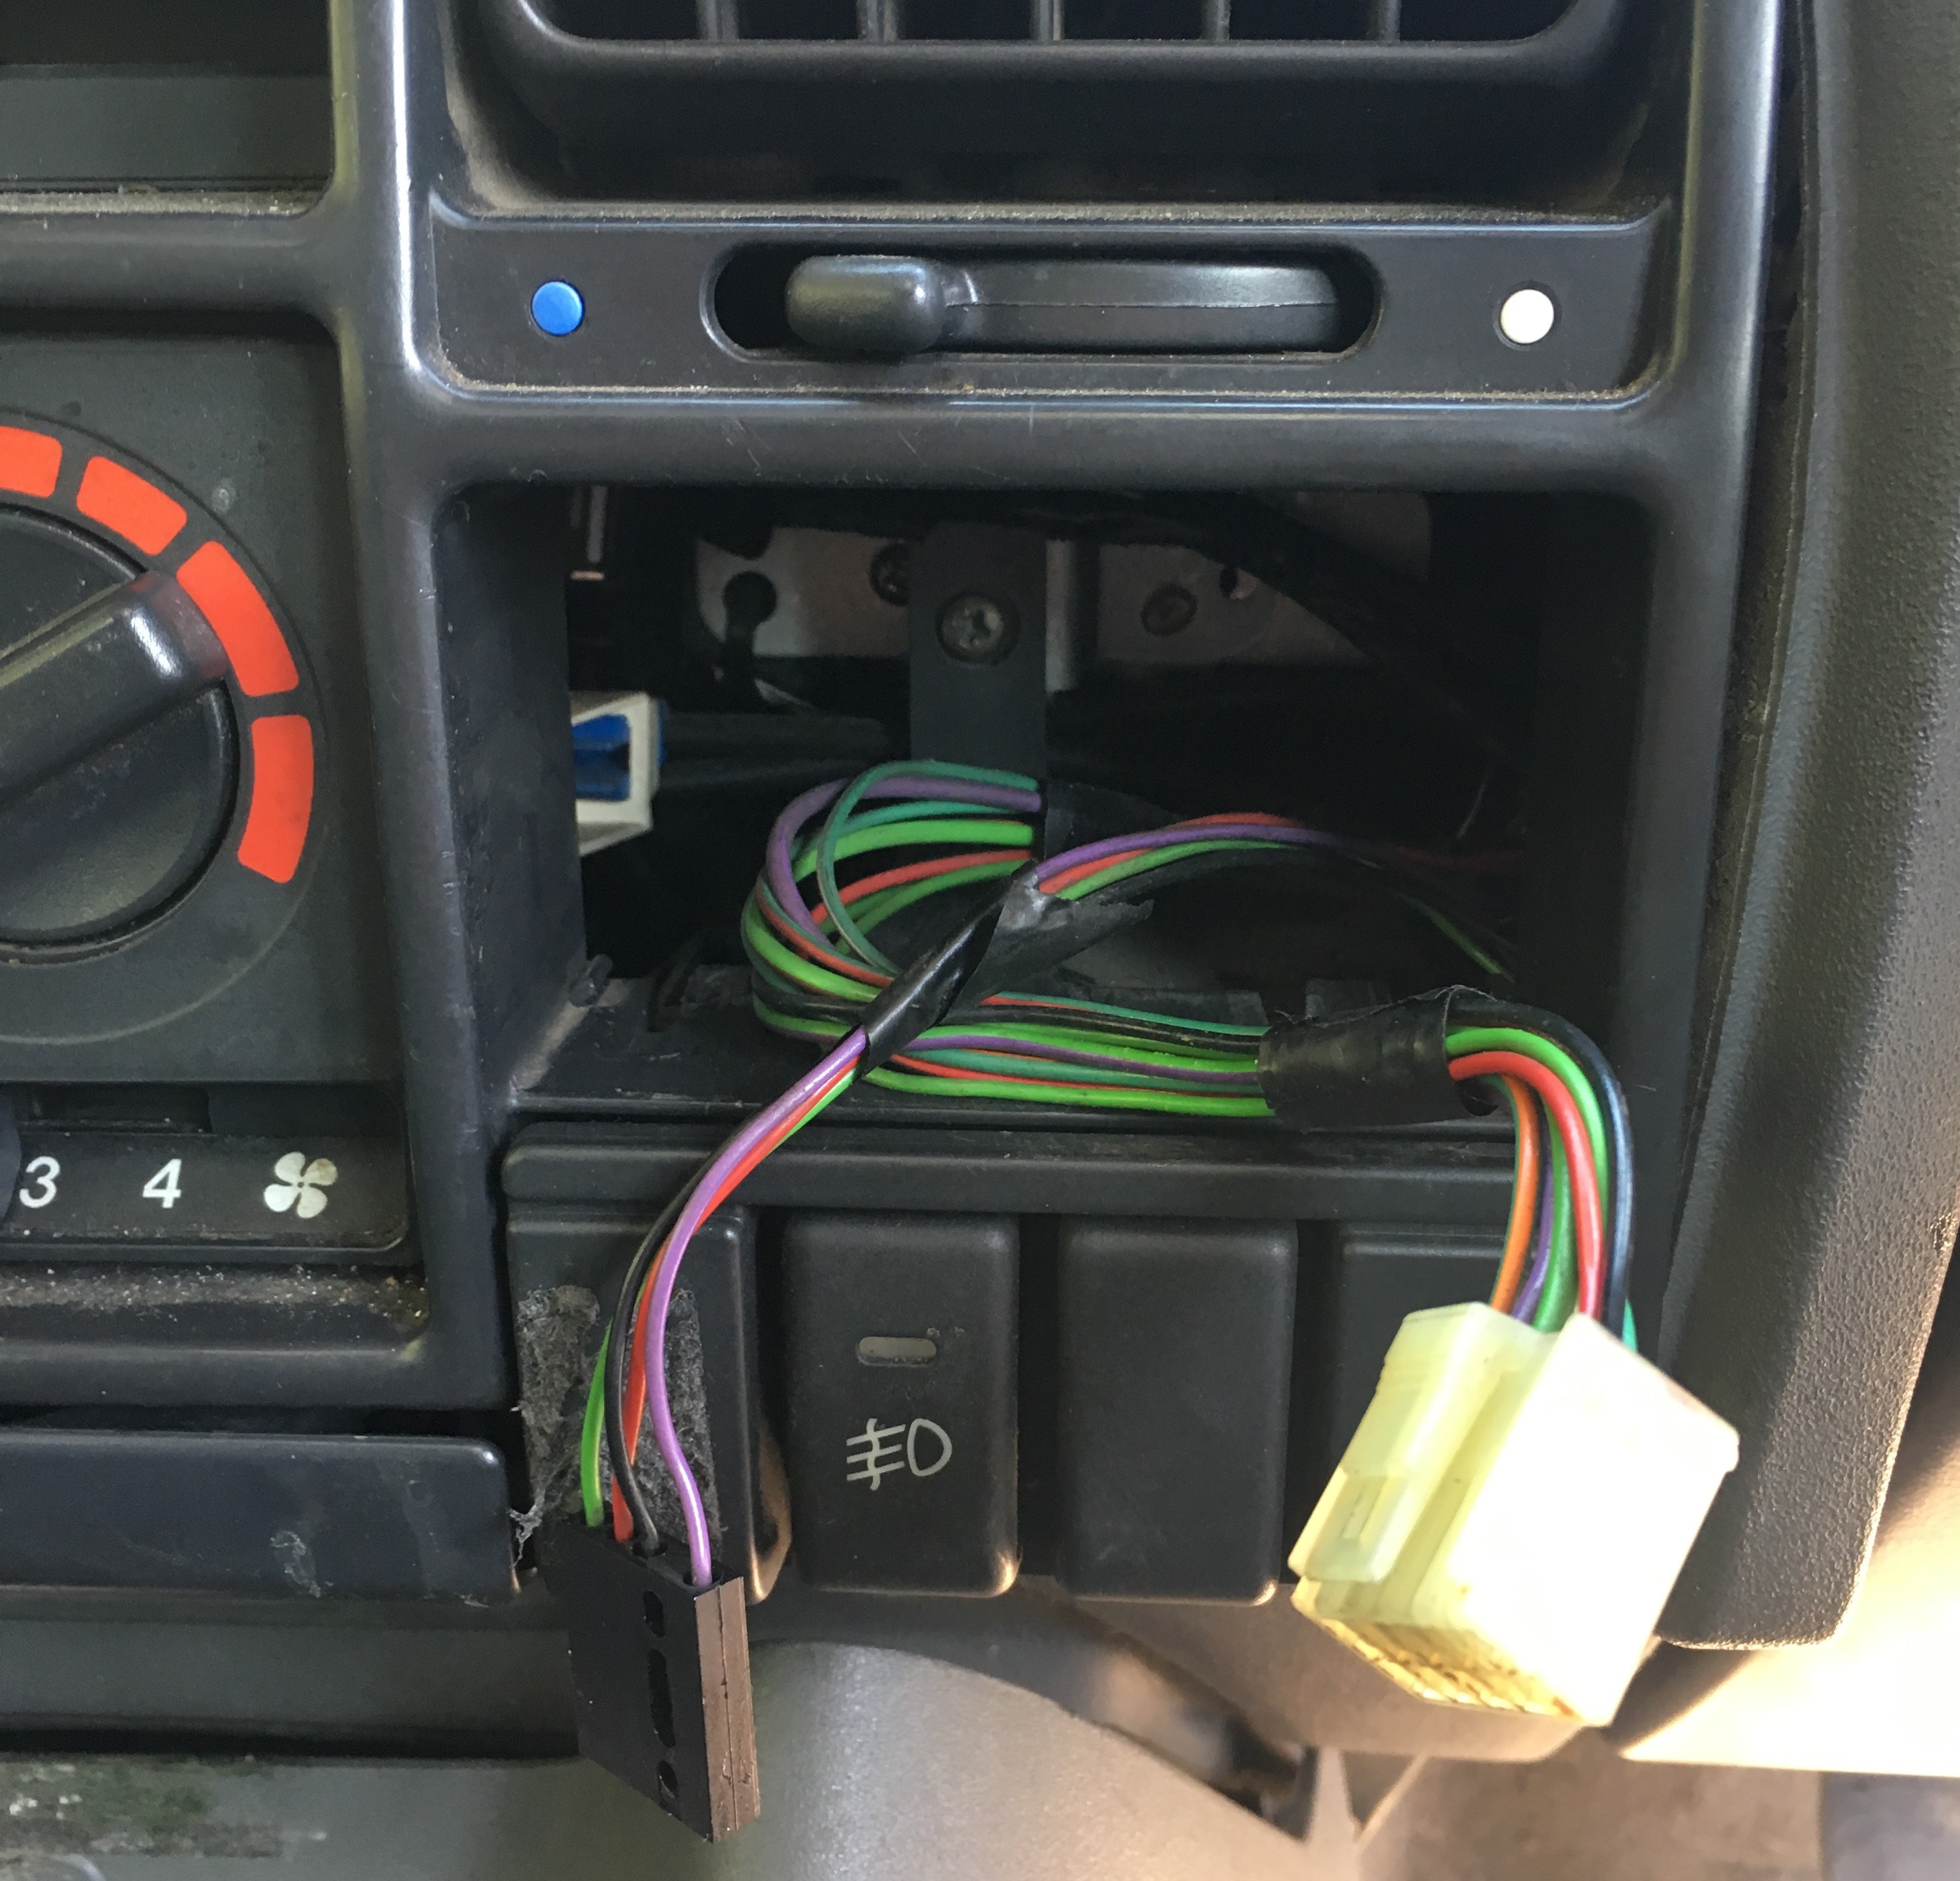
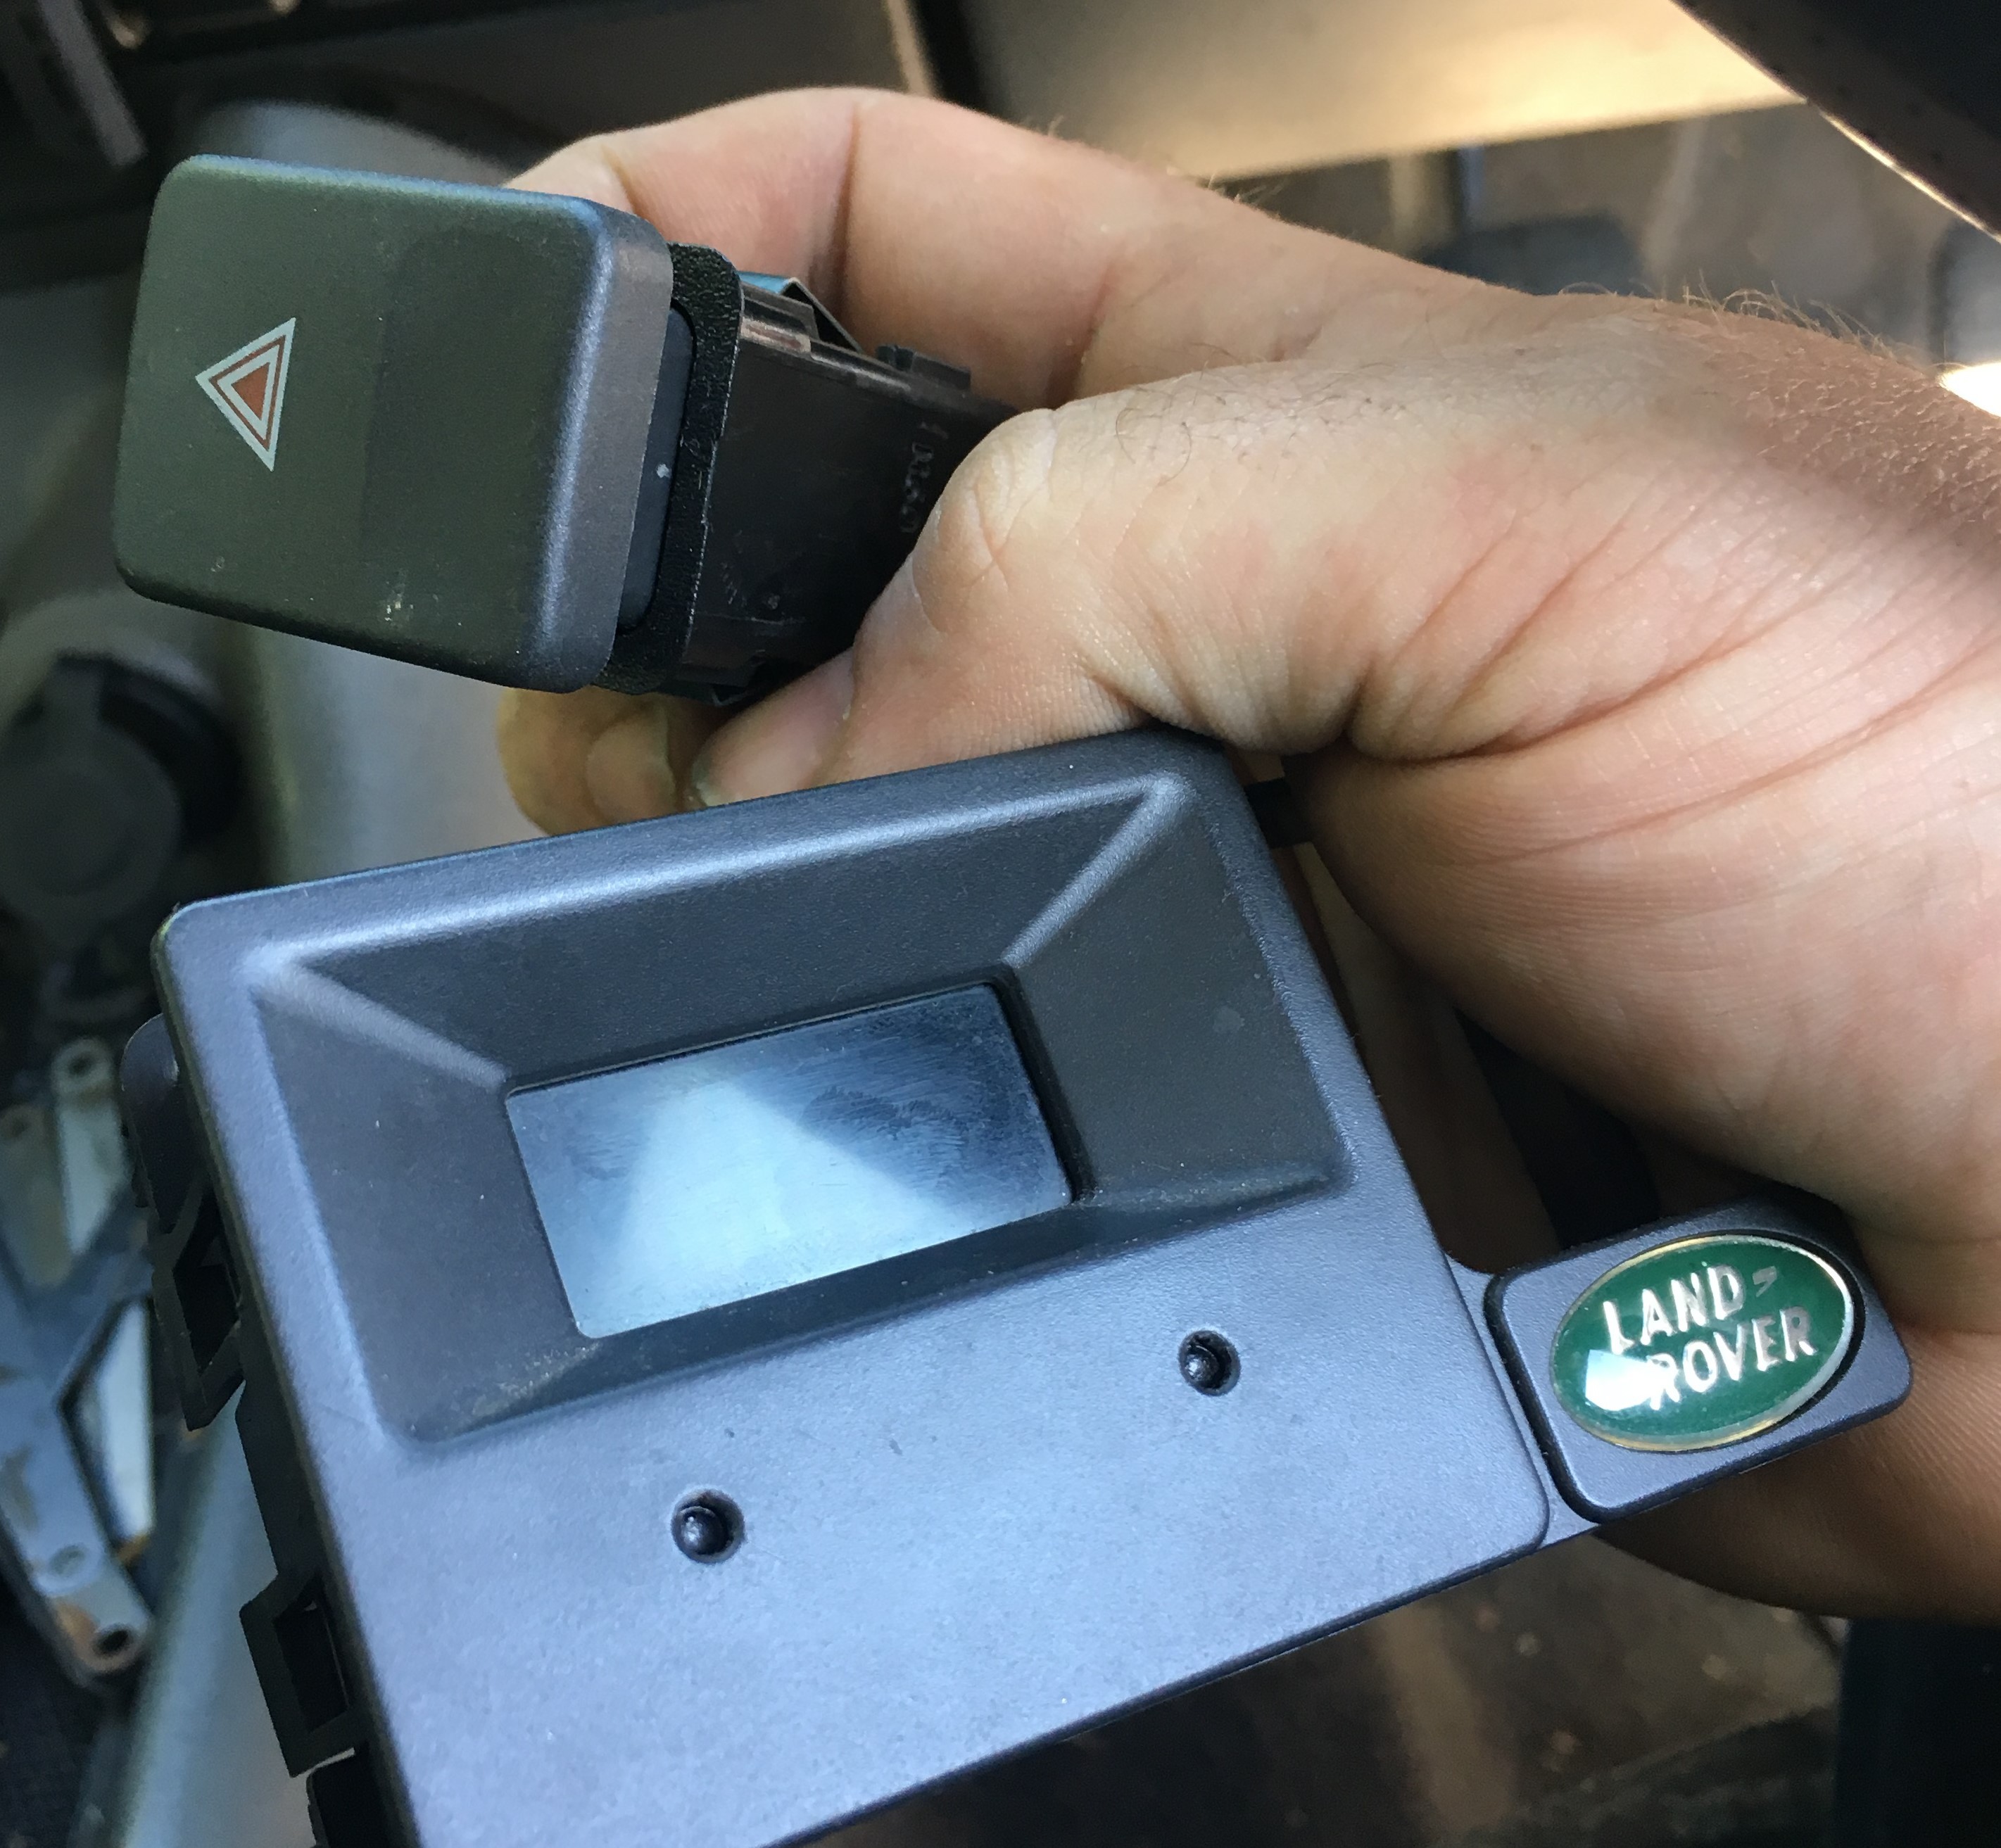
use your thumb and forefinger to squeeze the connector to relase the hazzard light multiplug
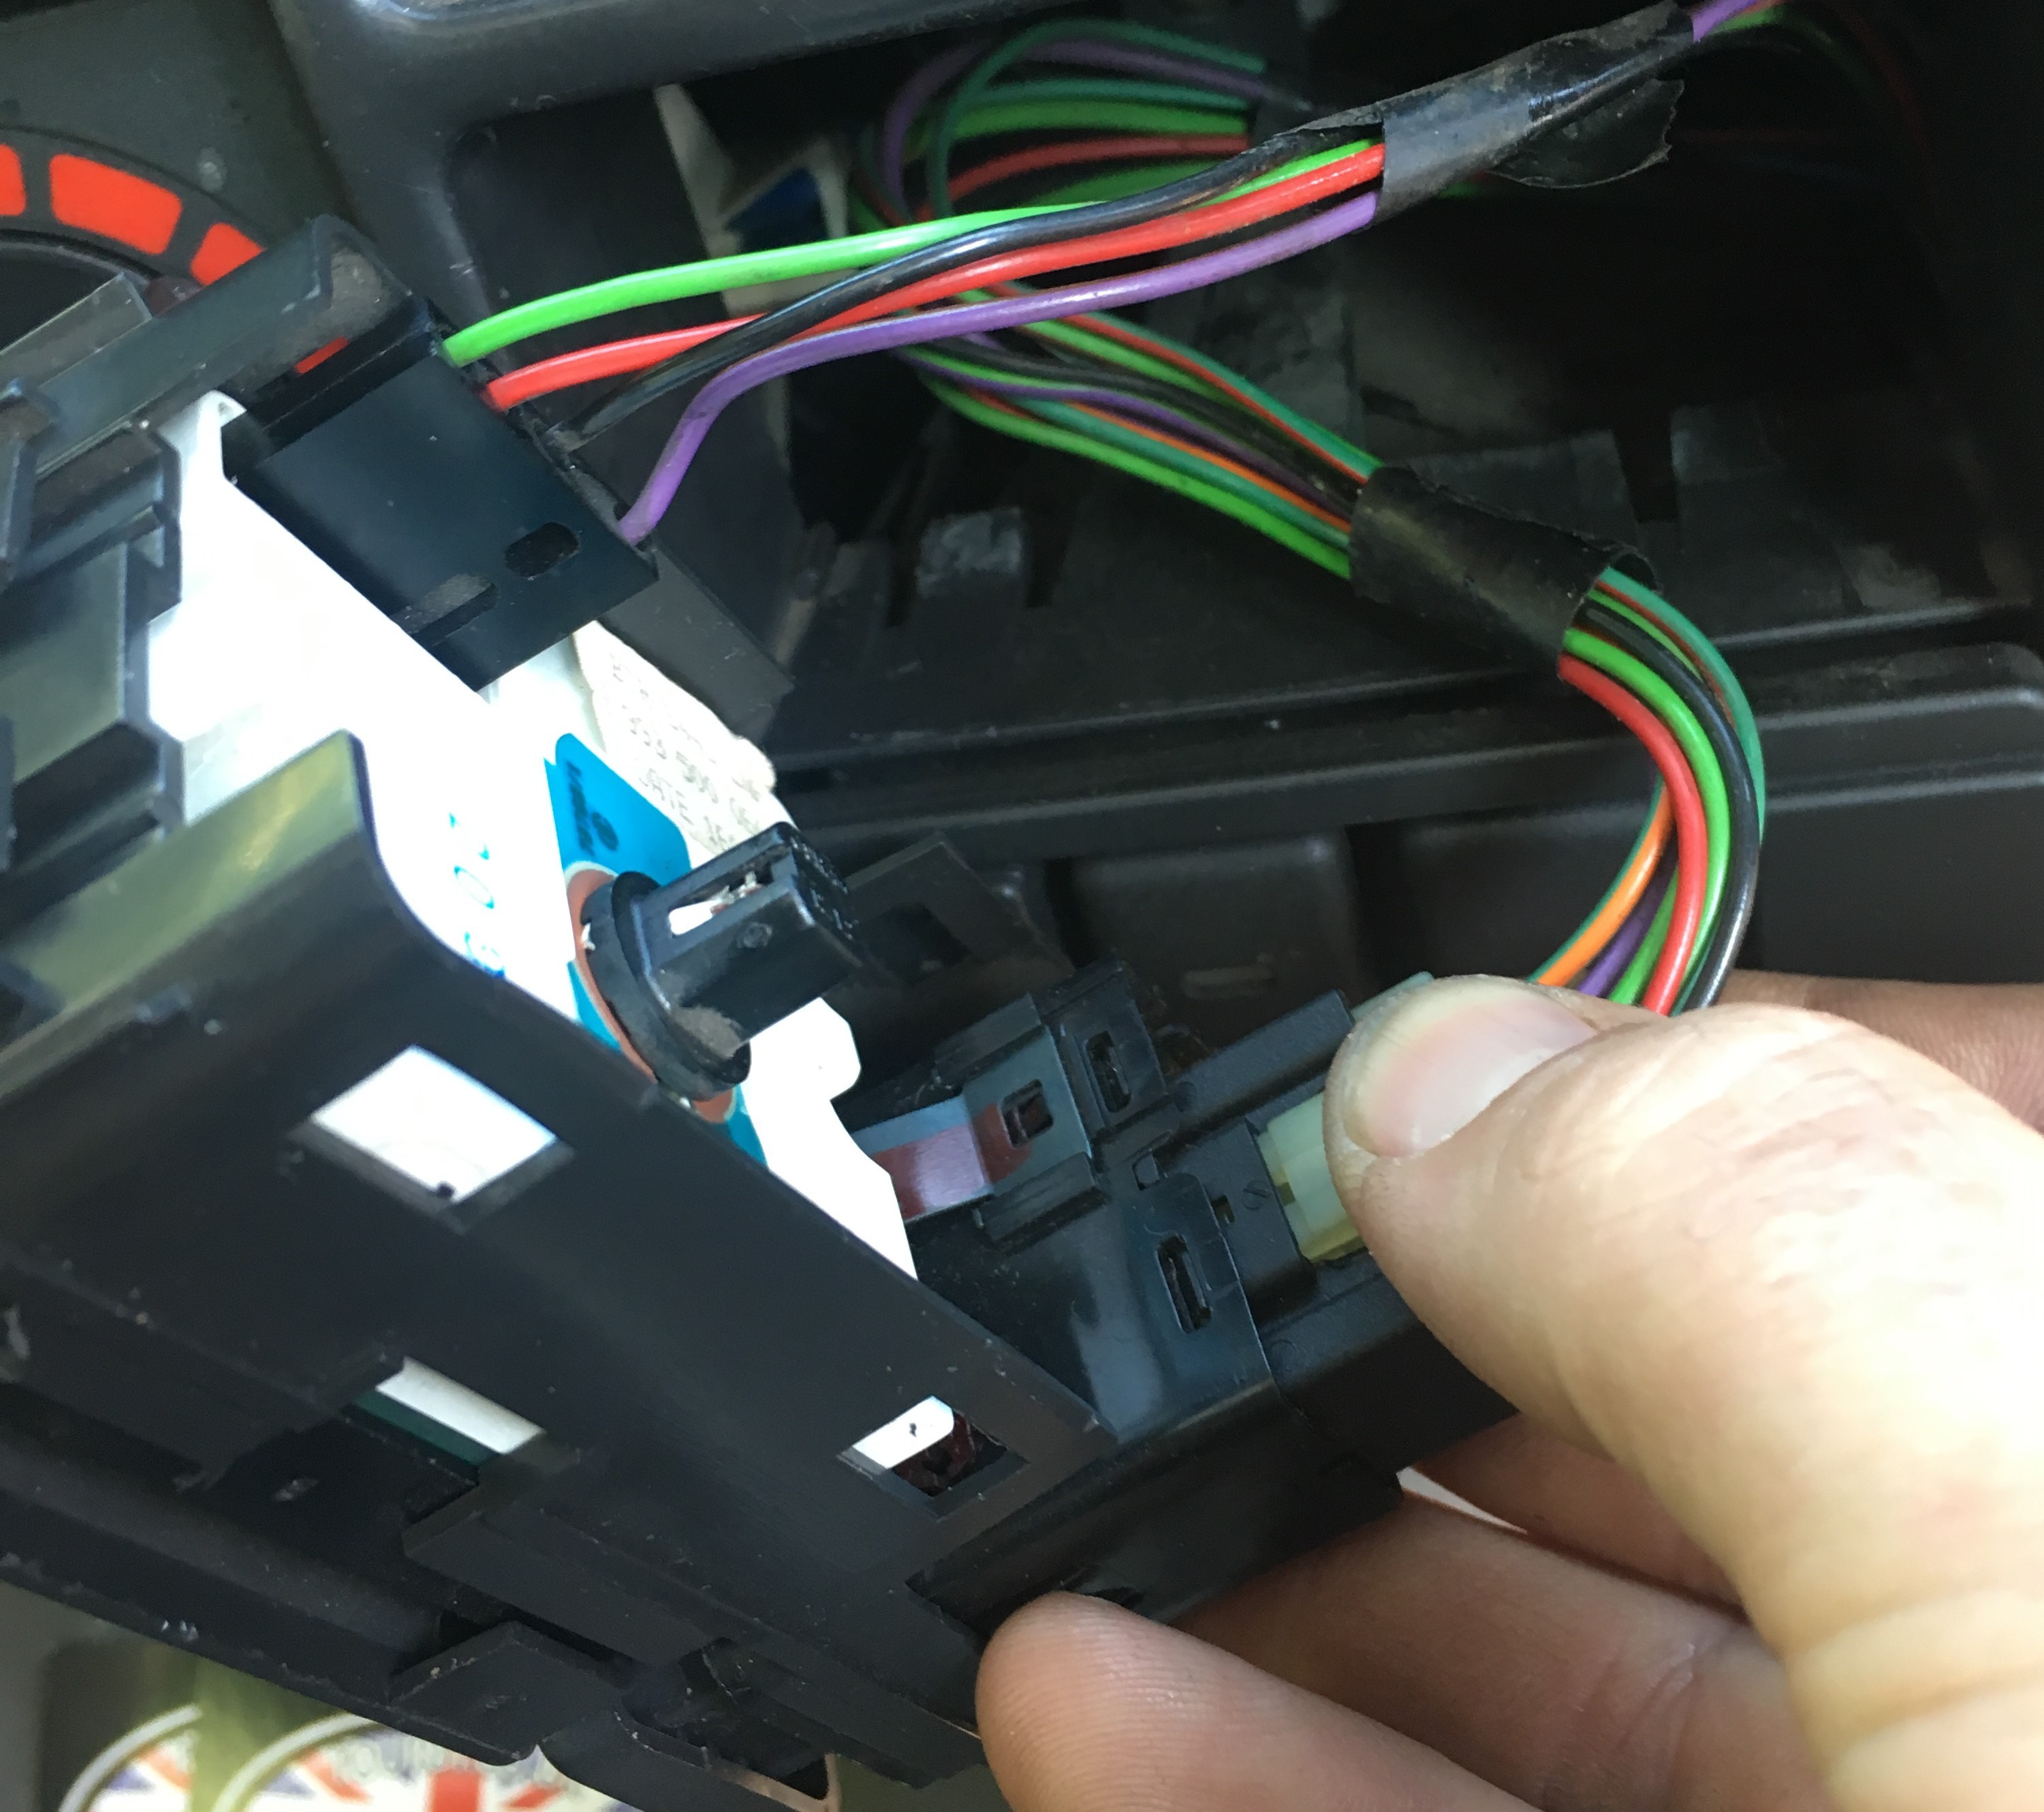
Simply pull up on the smaller power connector multiplug and remove
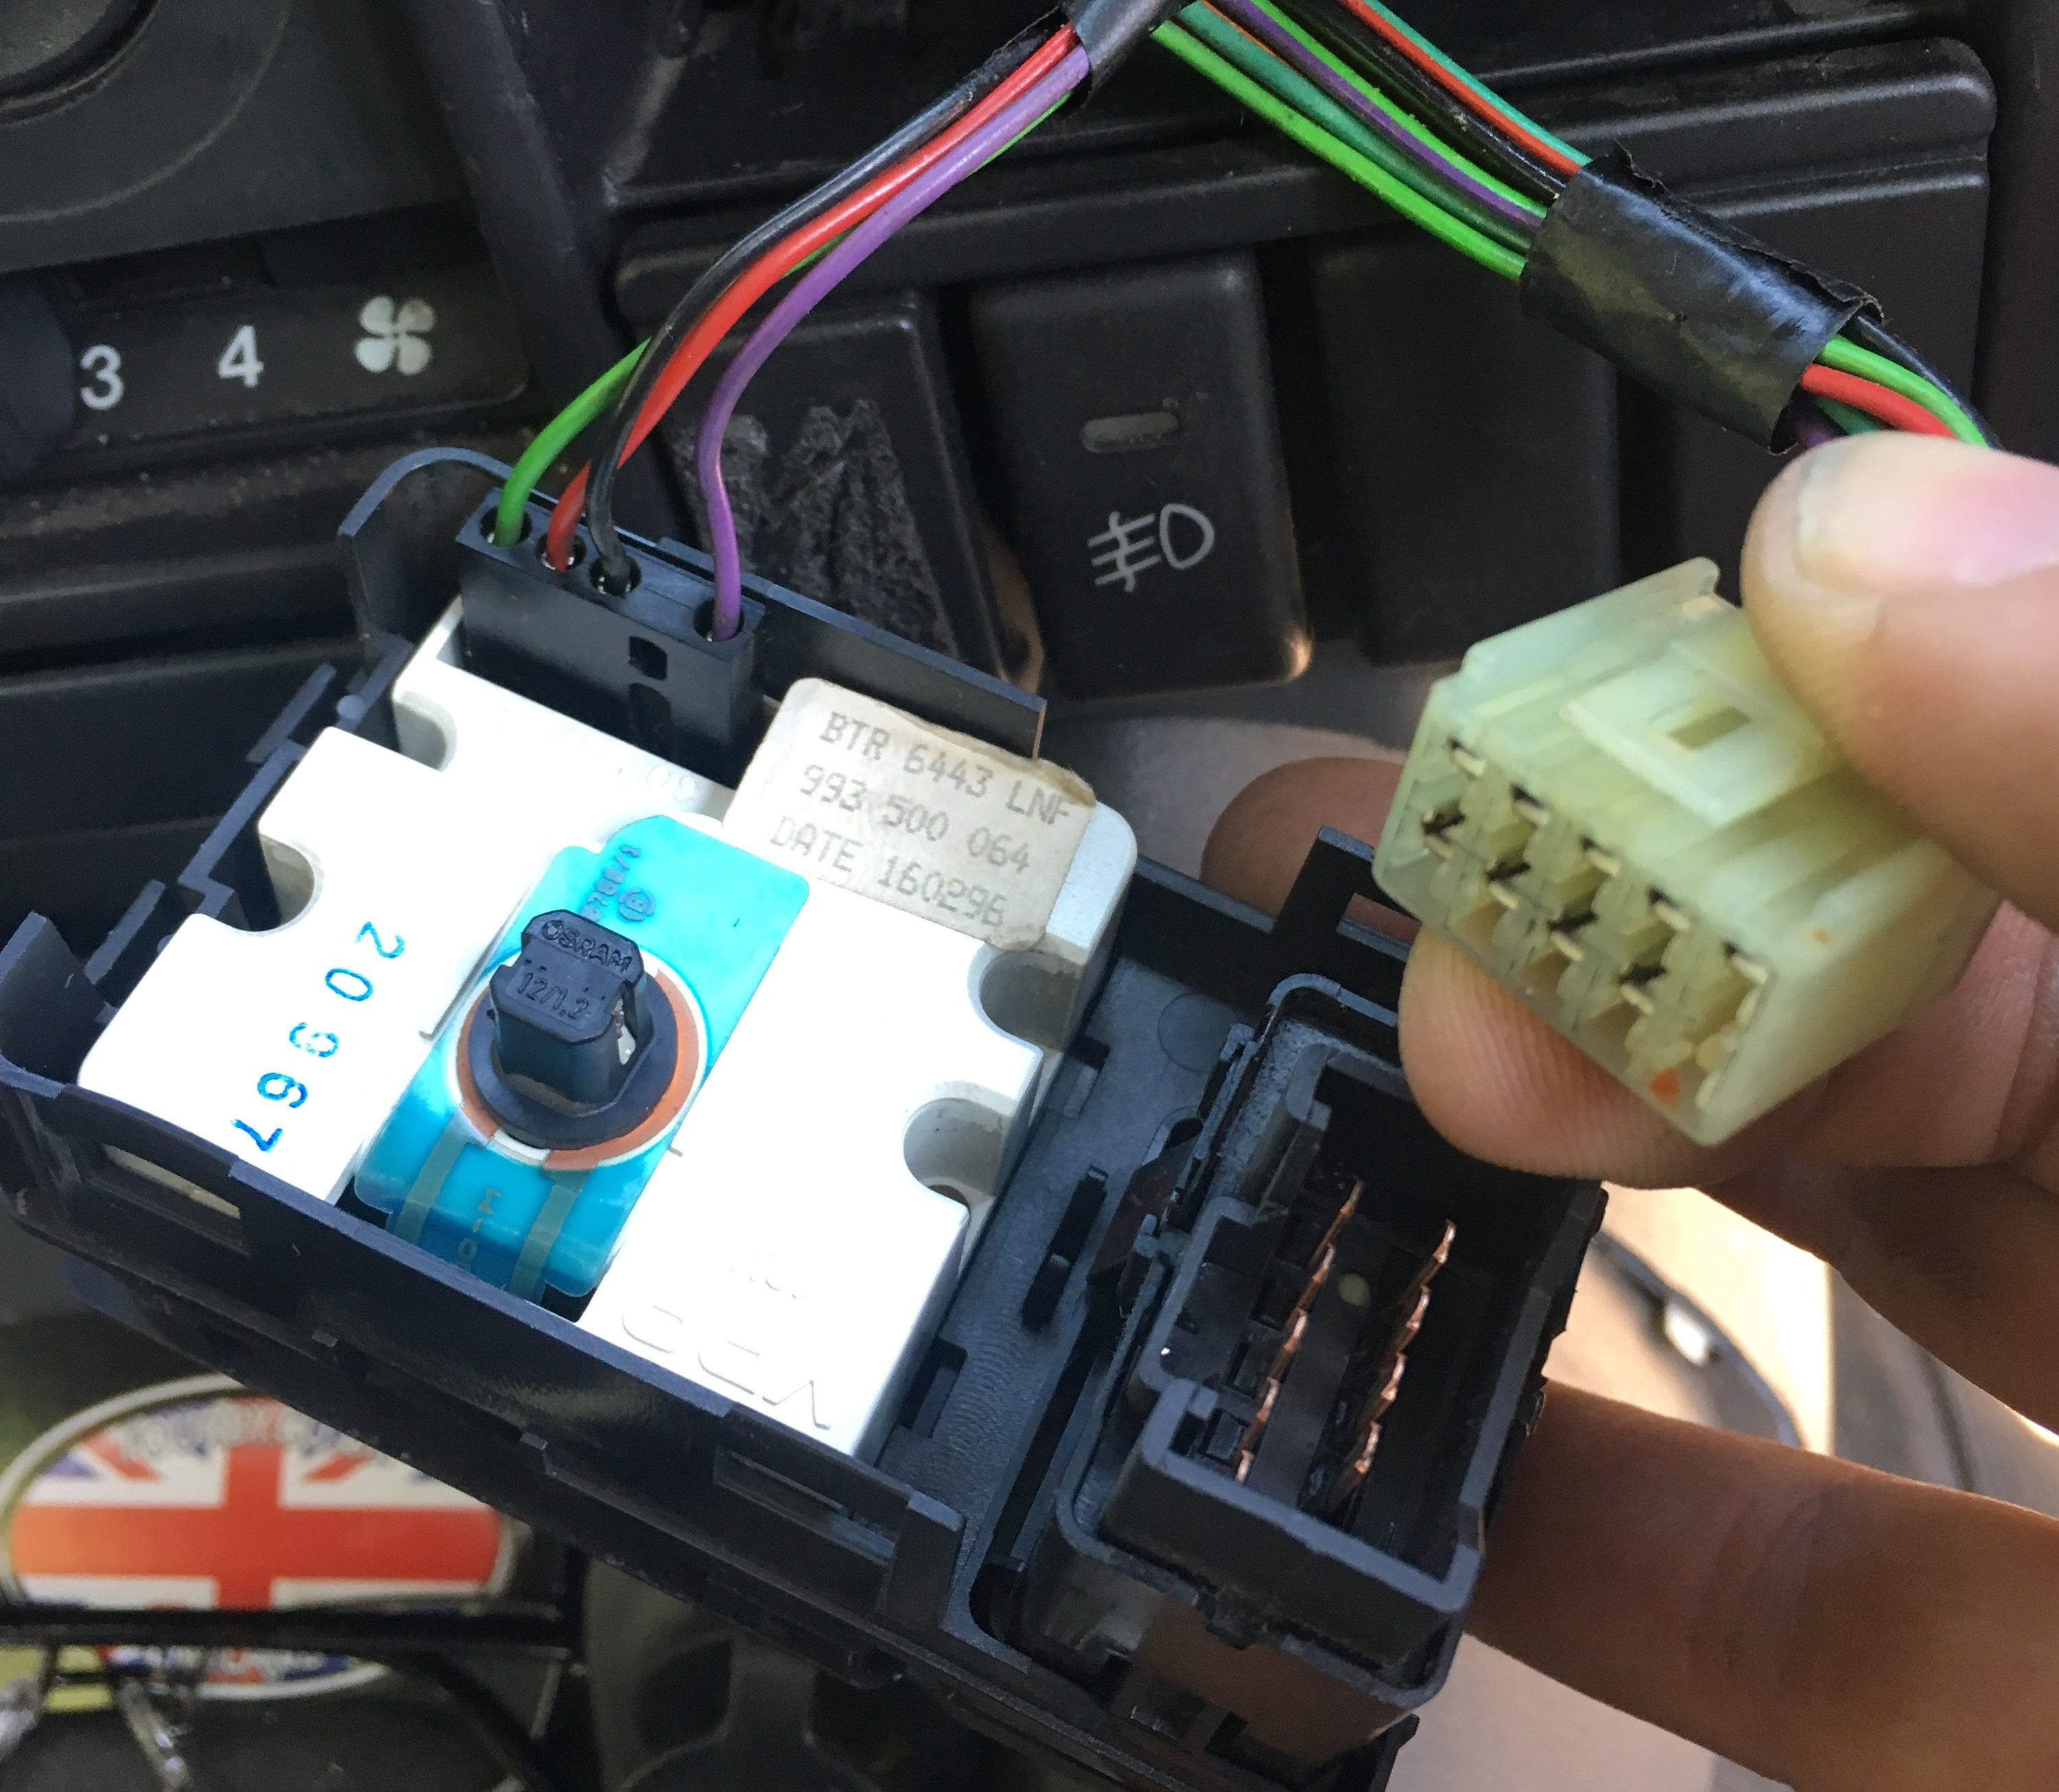
Your Original clock should now be free from the dashboard
Locate the tabs on either side of the Hazzard lights switch and squeeze them to release the switch from the original clock
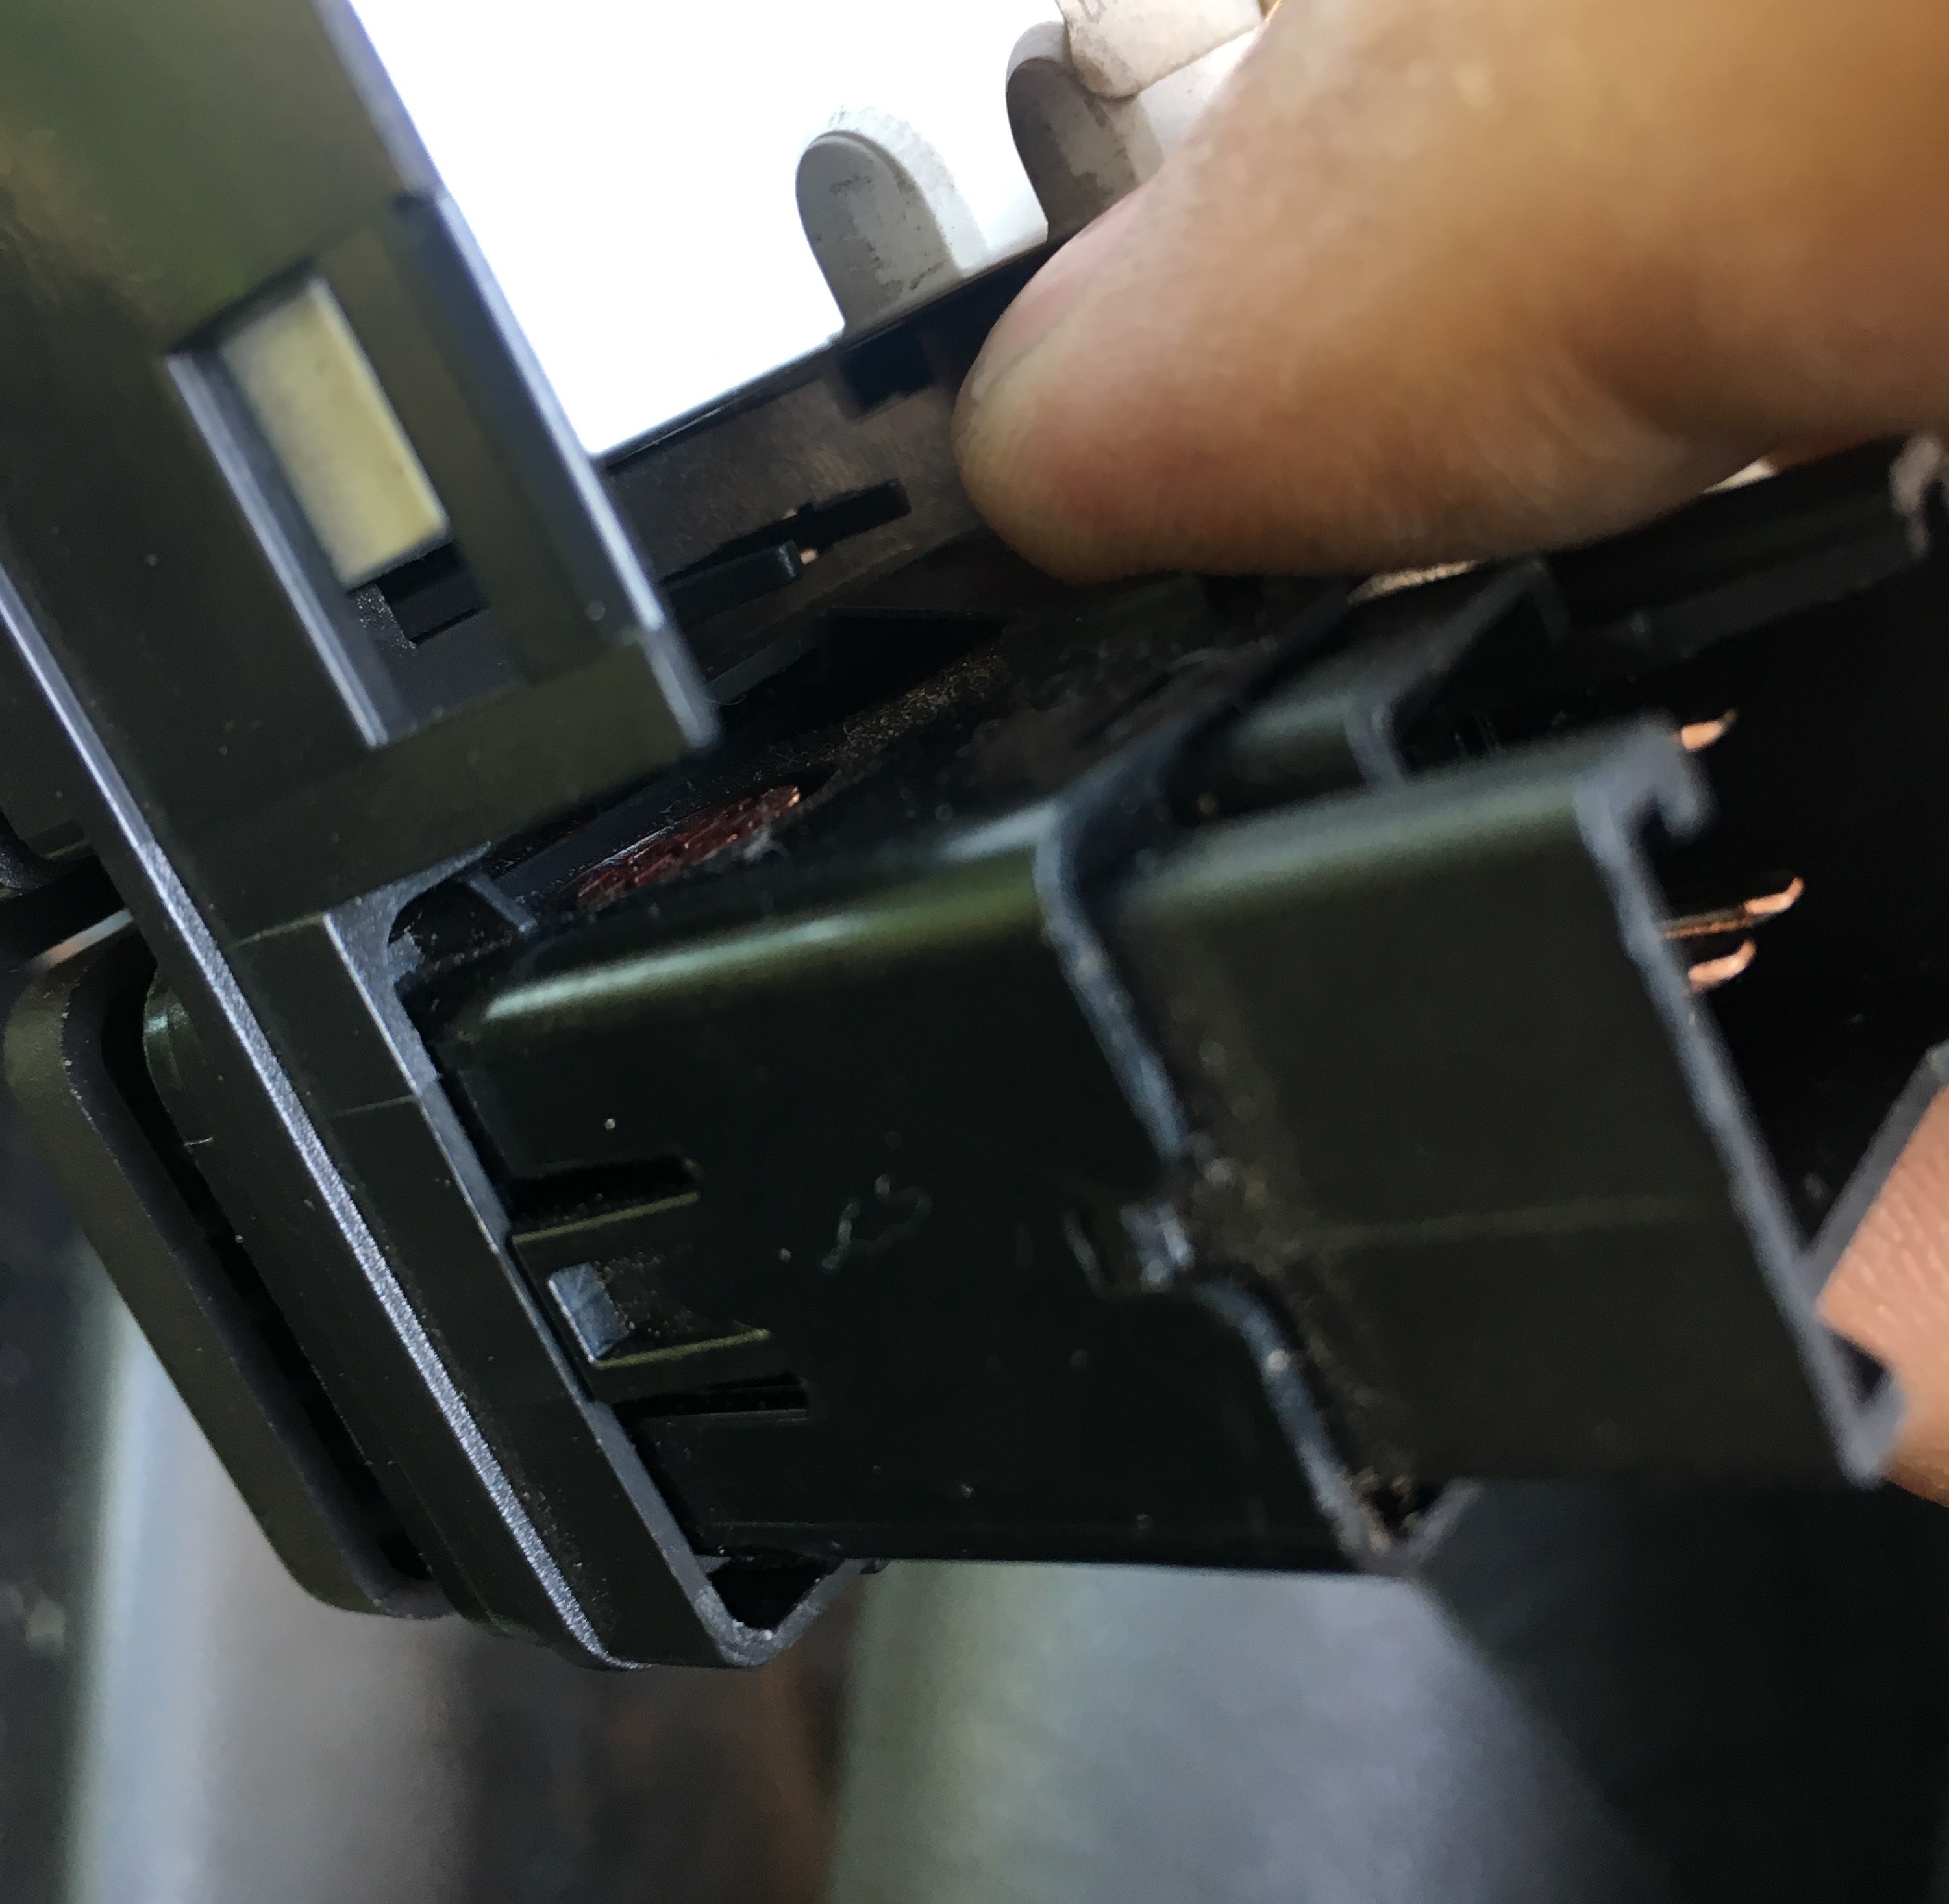
The switch will push out
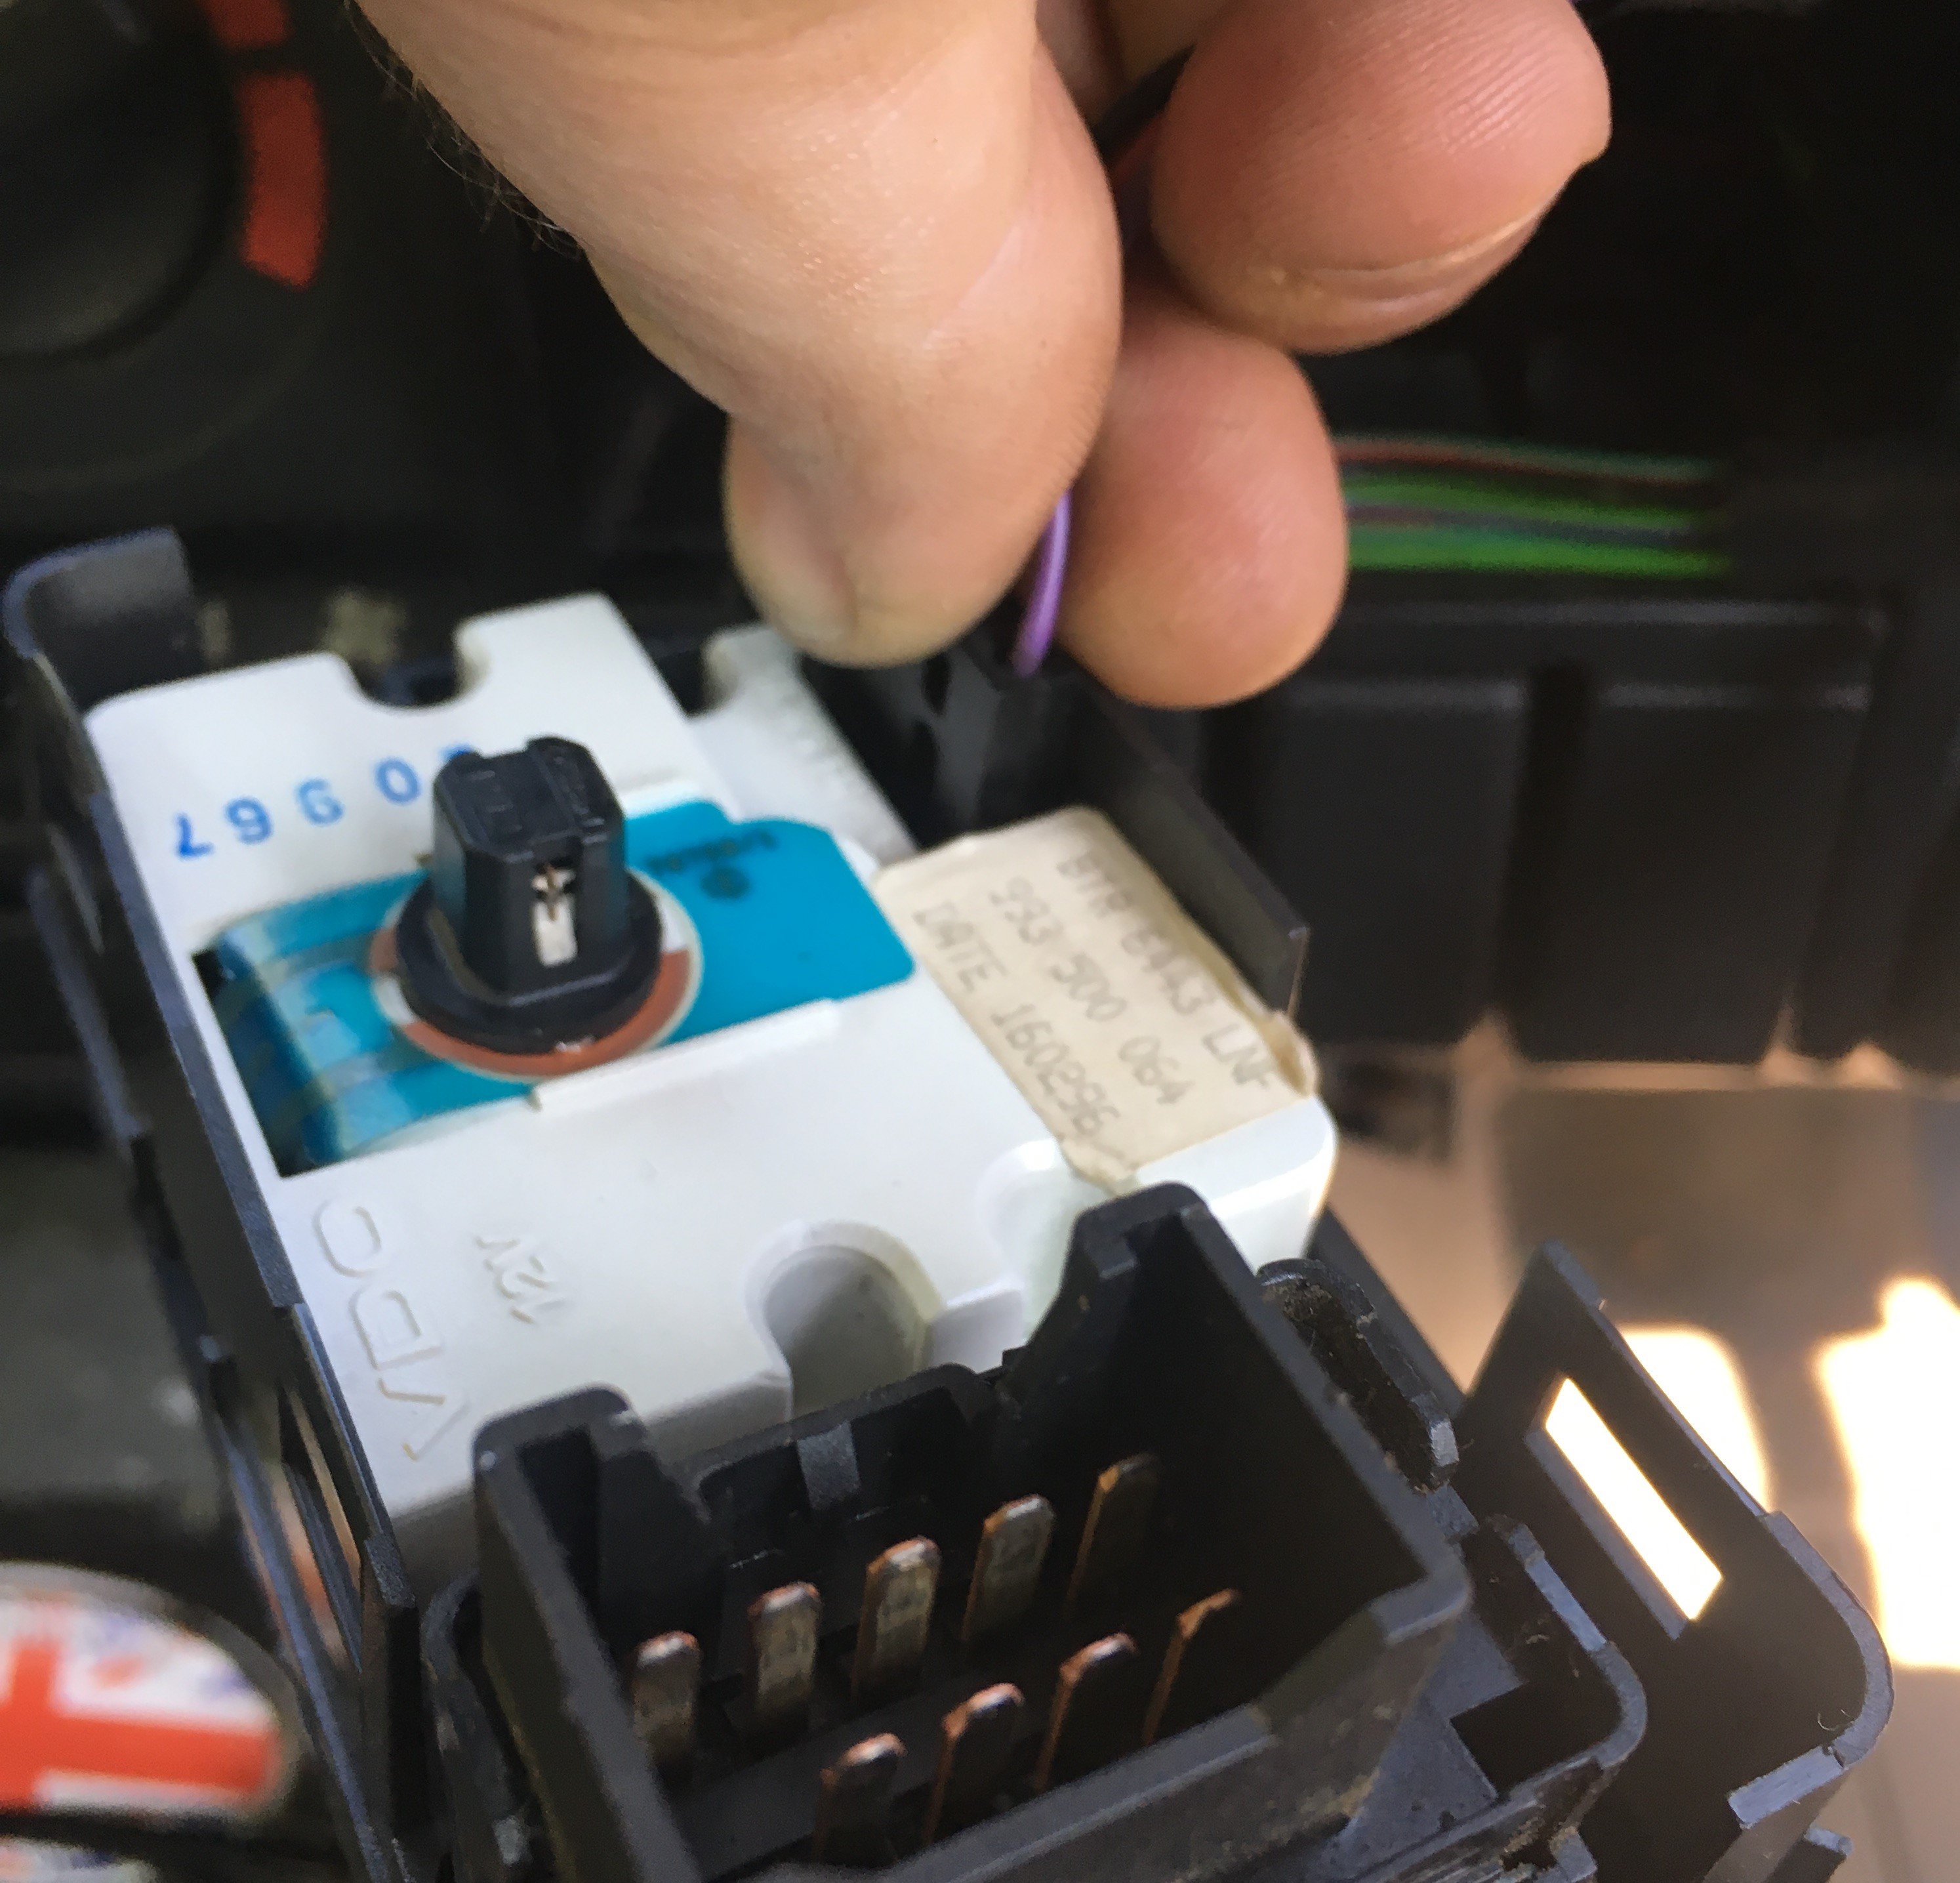
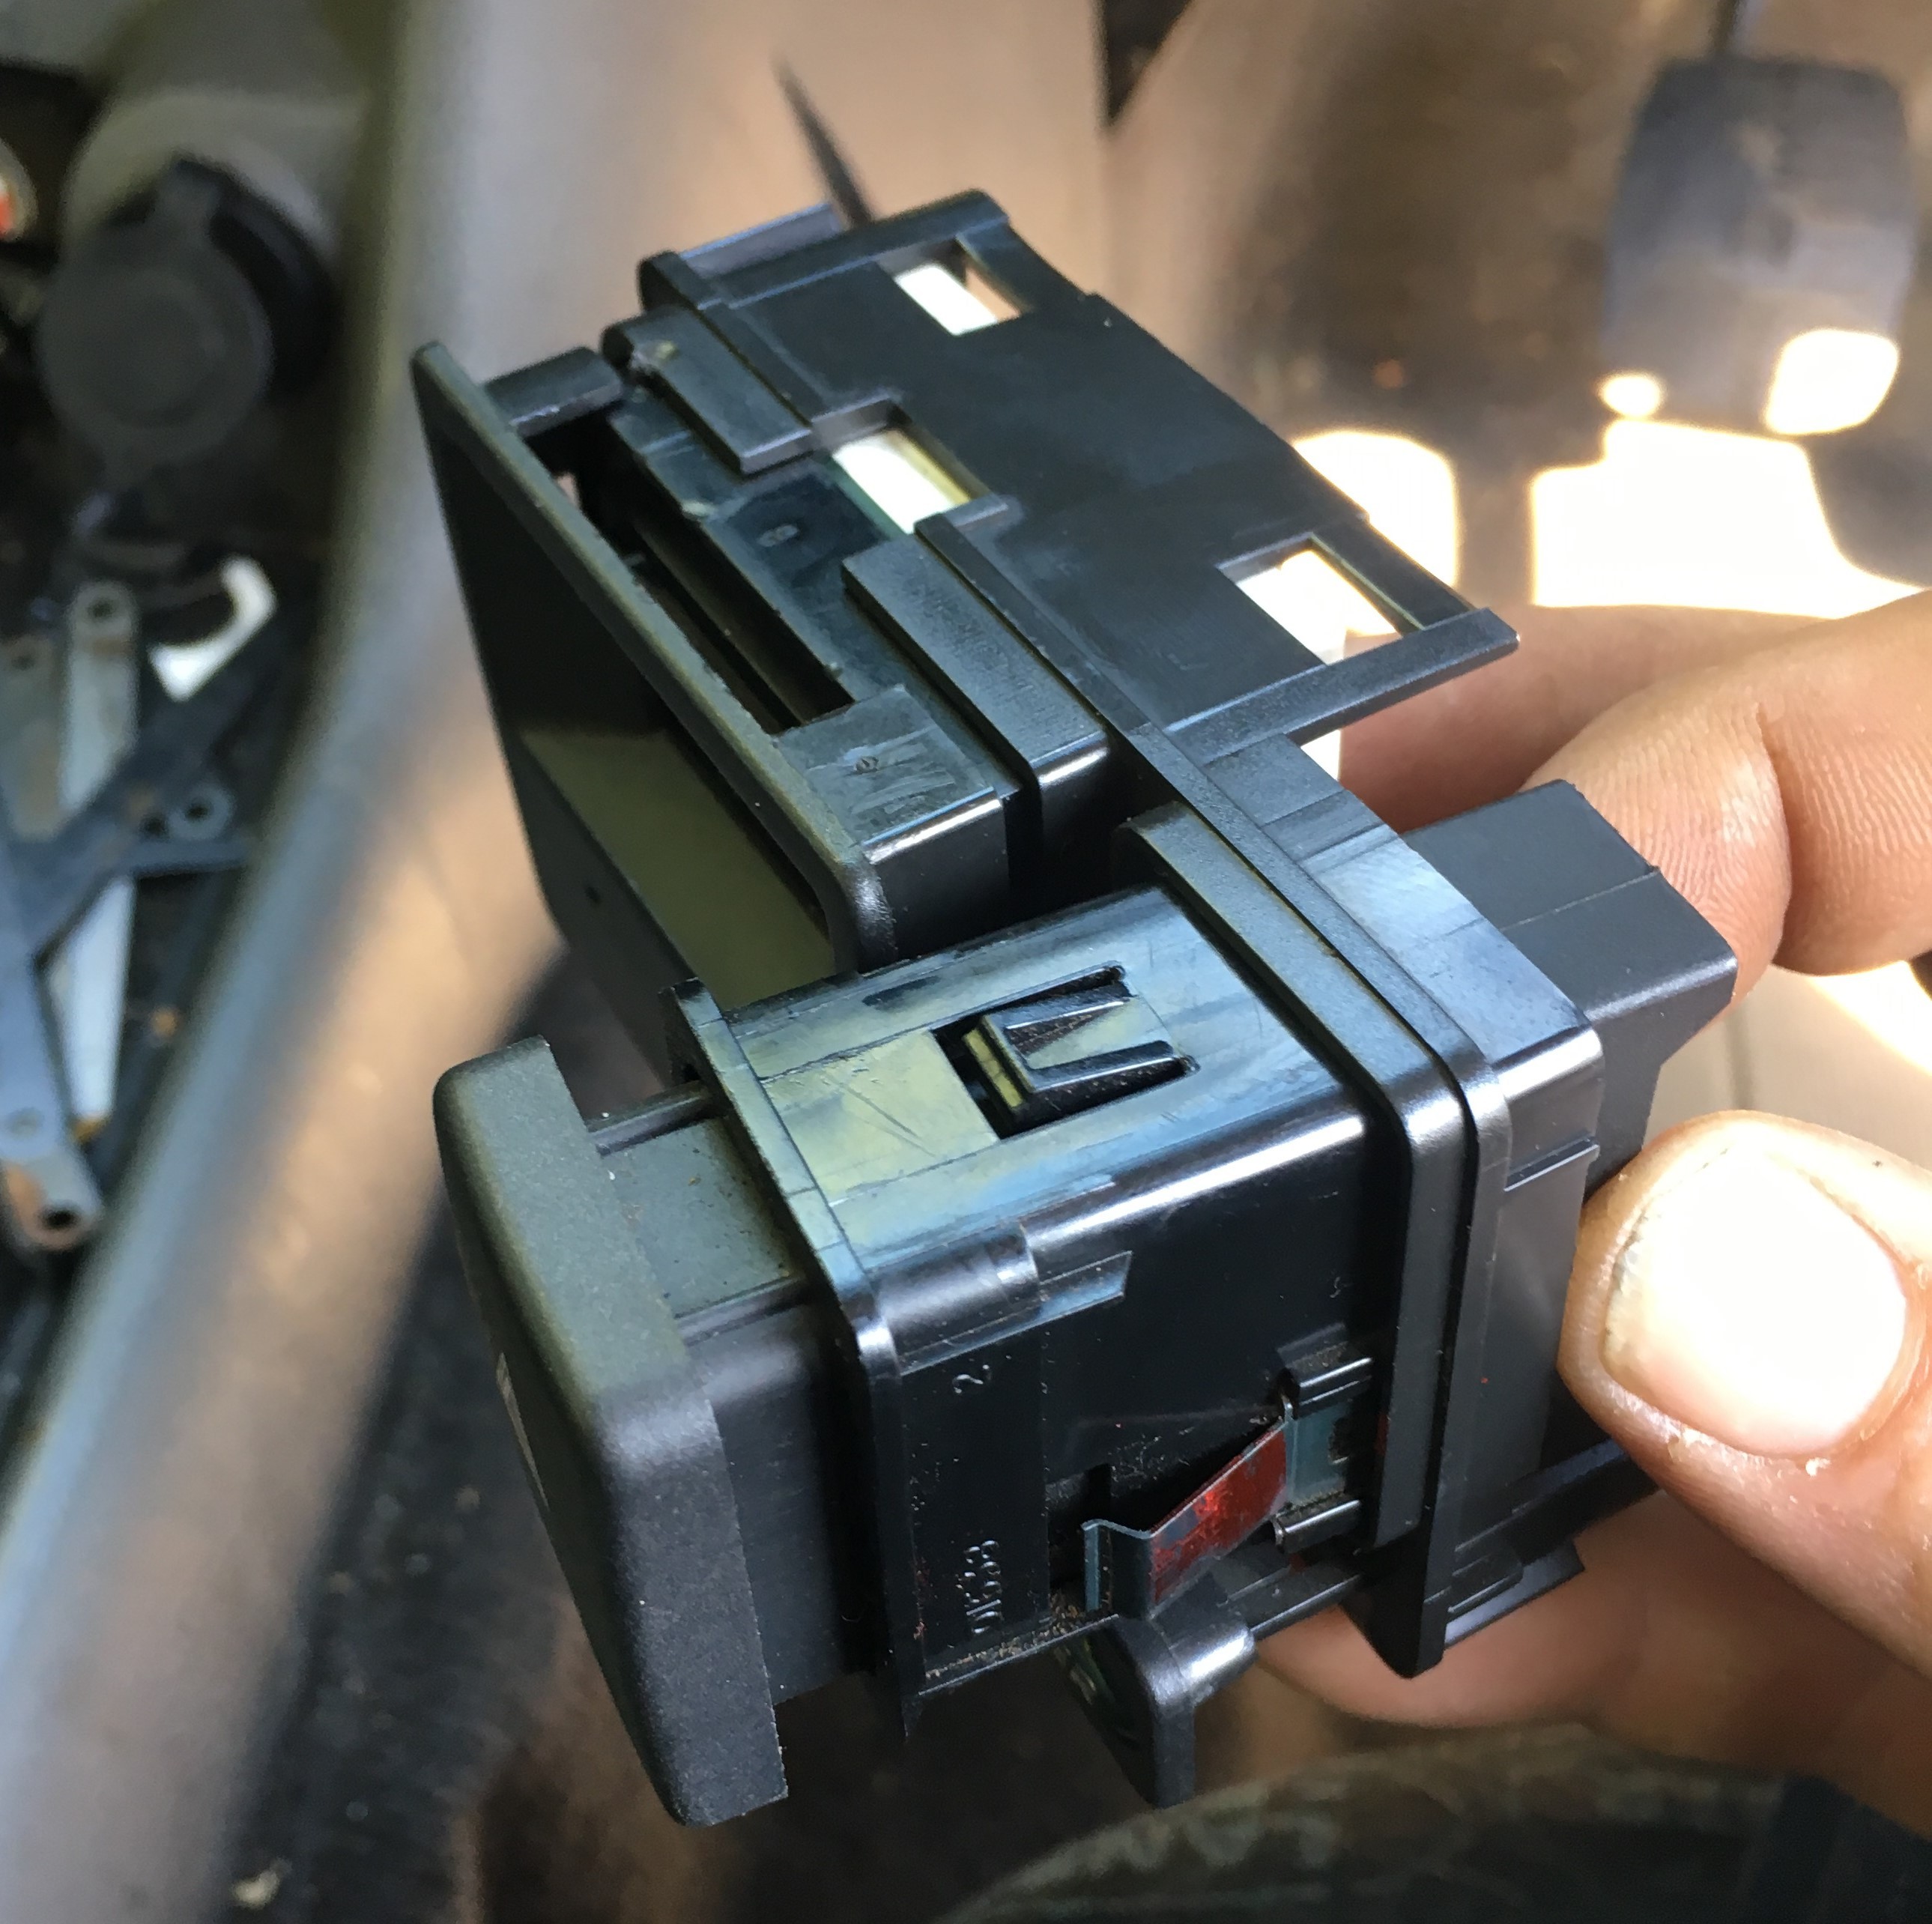
Insert this switch into your new Fourby multifuction clock
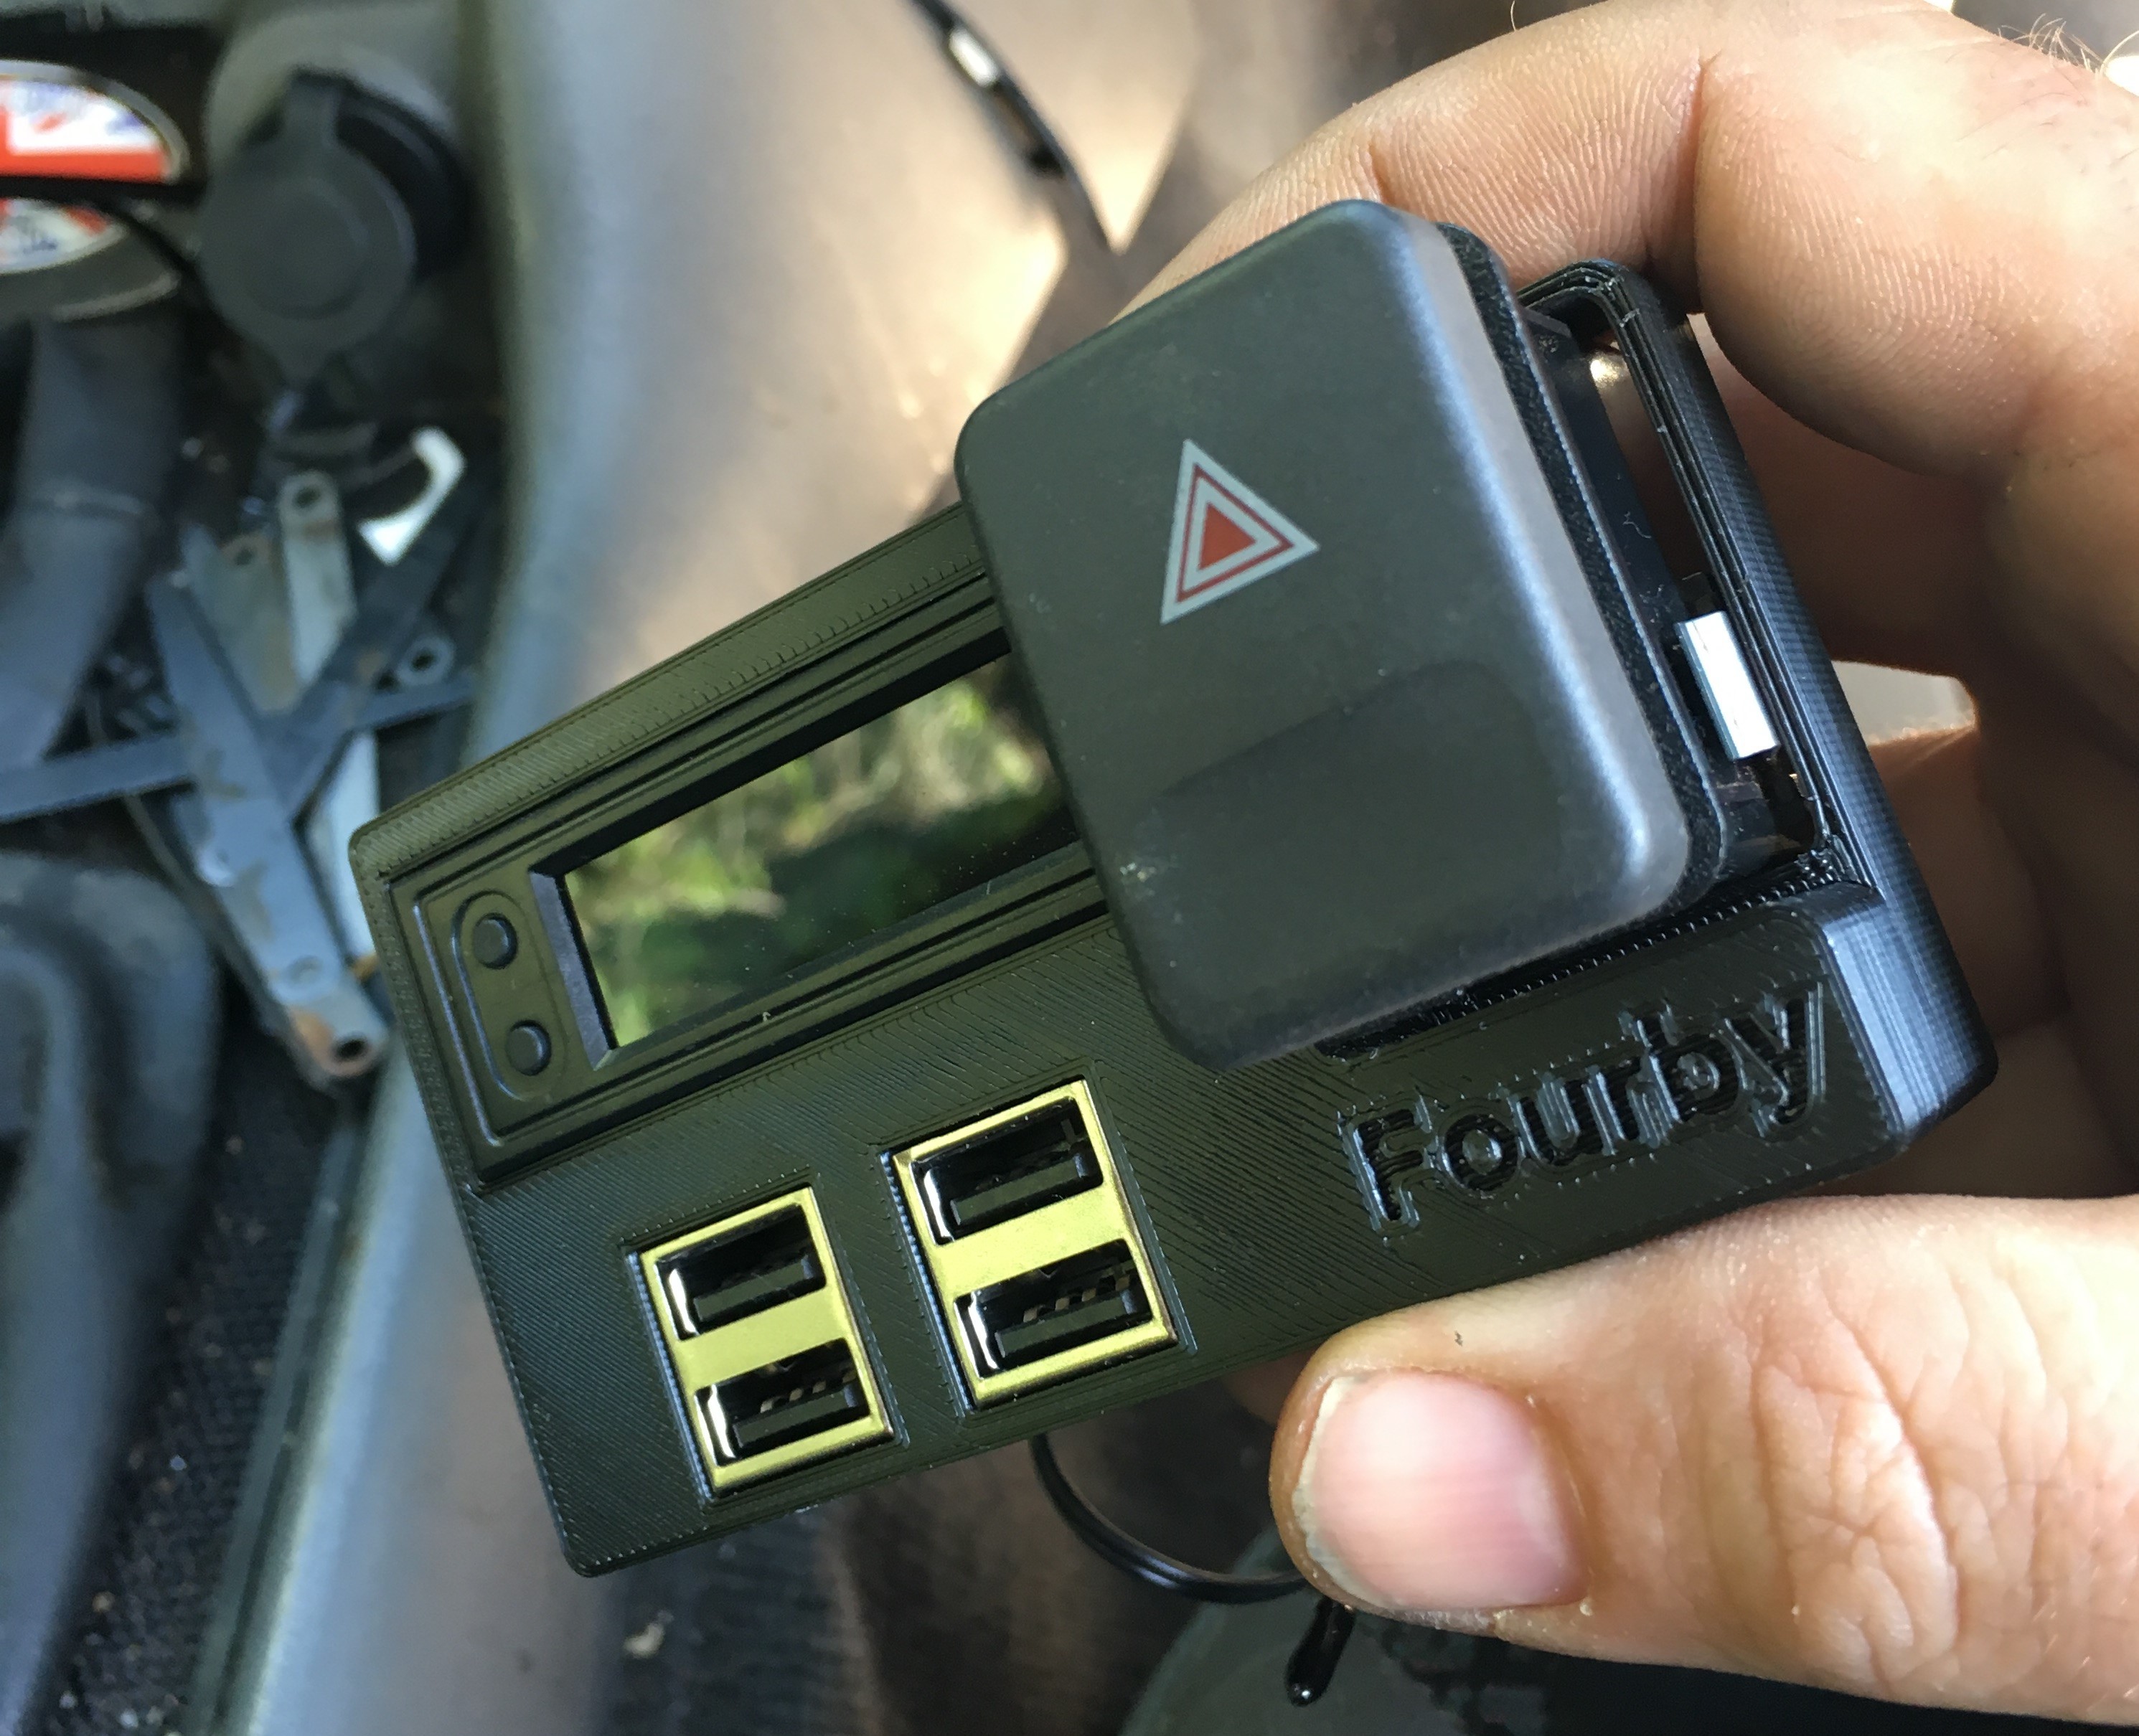
Click the switch home into the new Fourby Multifunction Clock
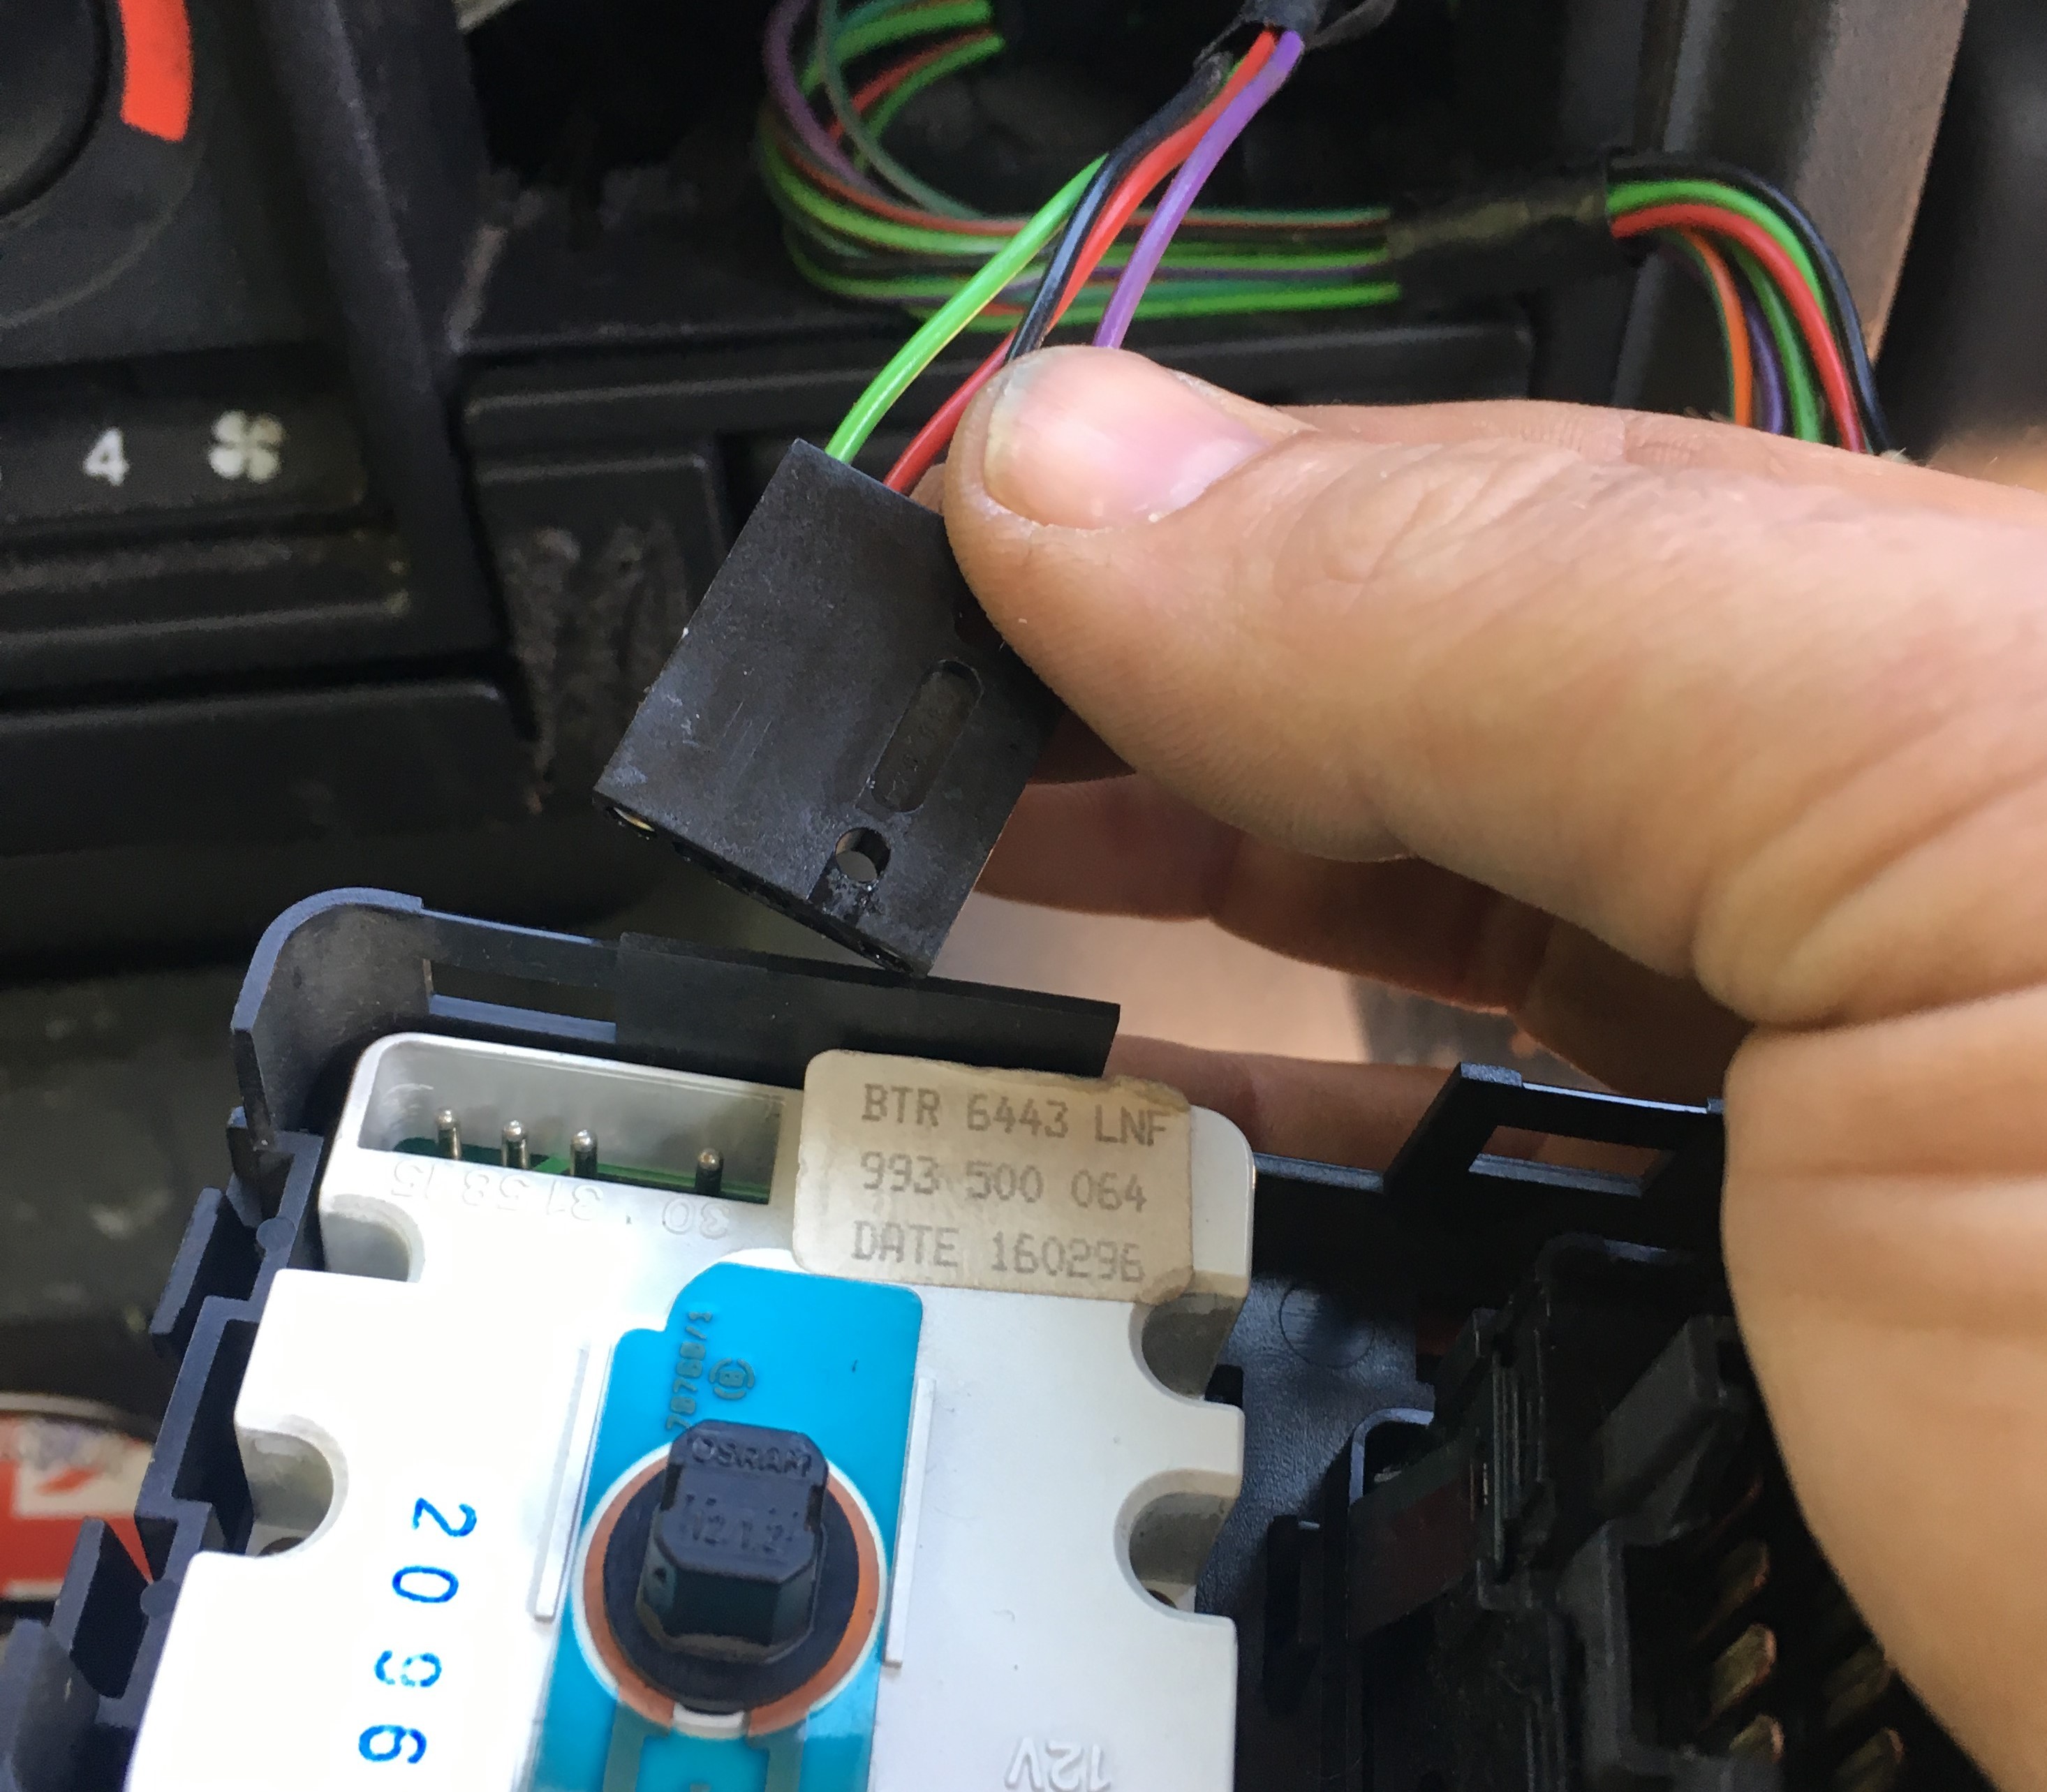
Insert the multiplug back into the hazzard light switch and route any thermal temp sensors.
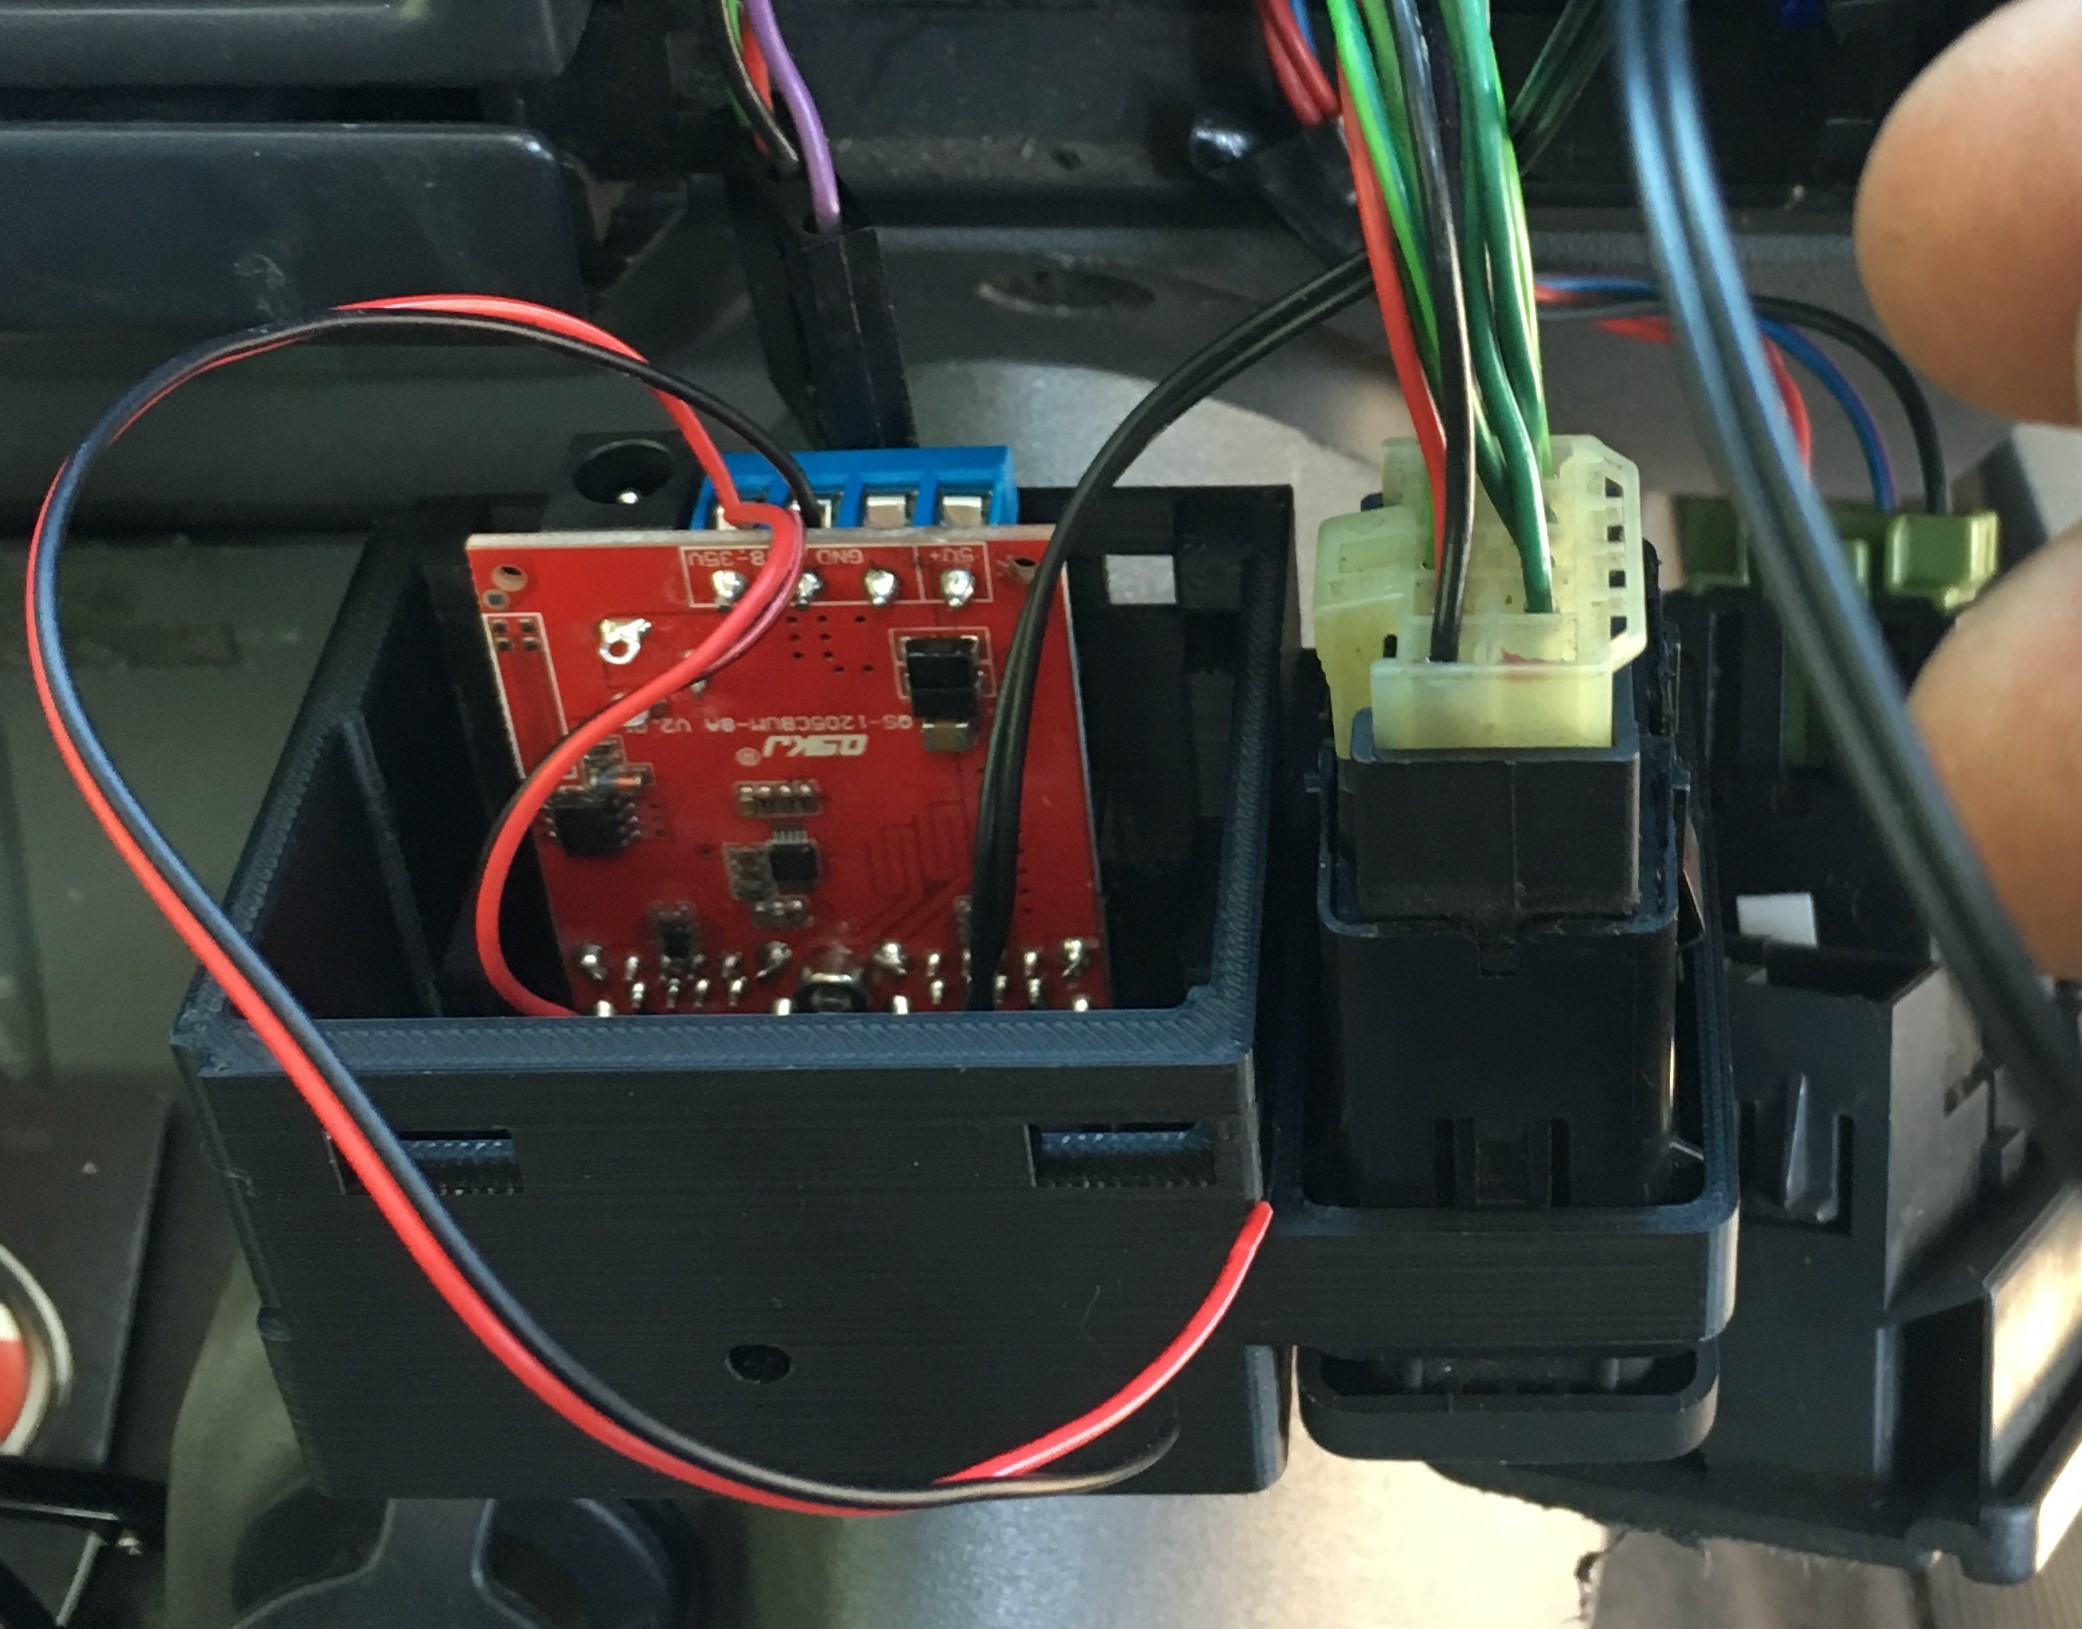
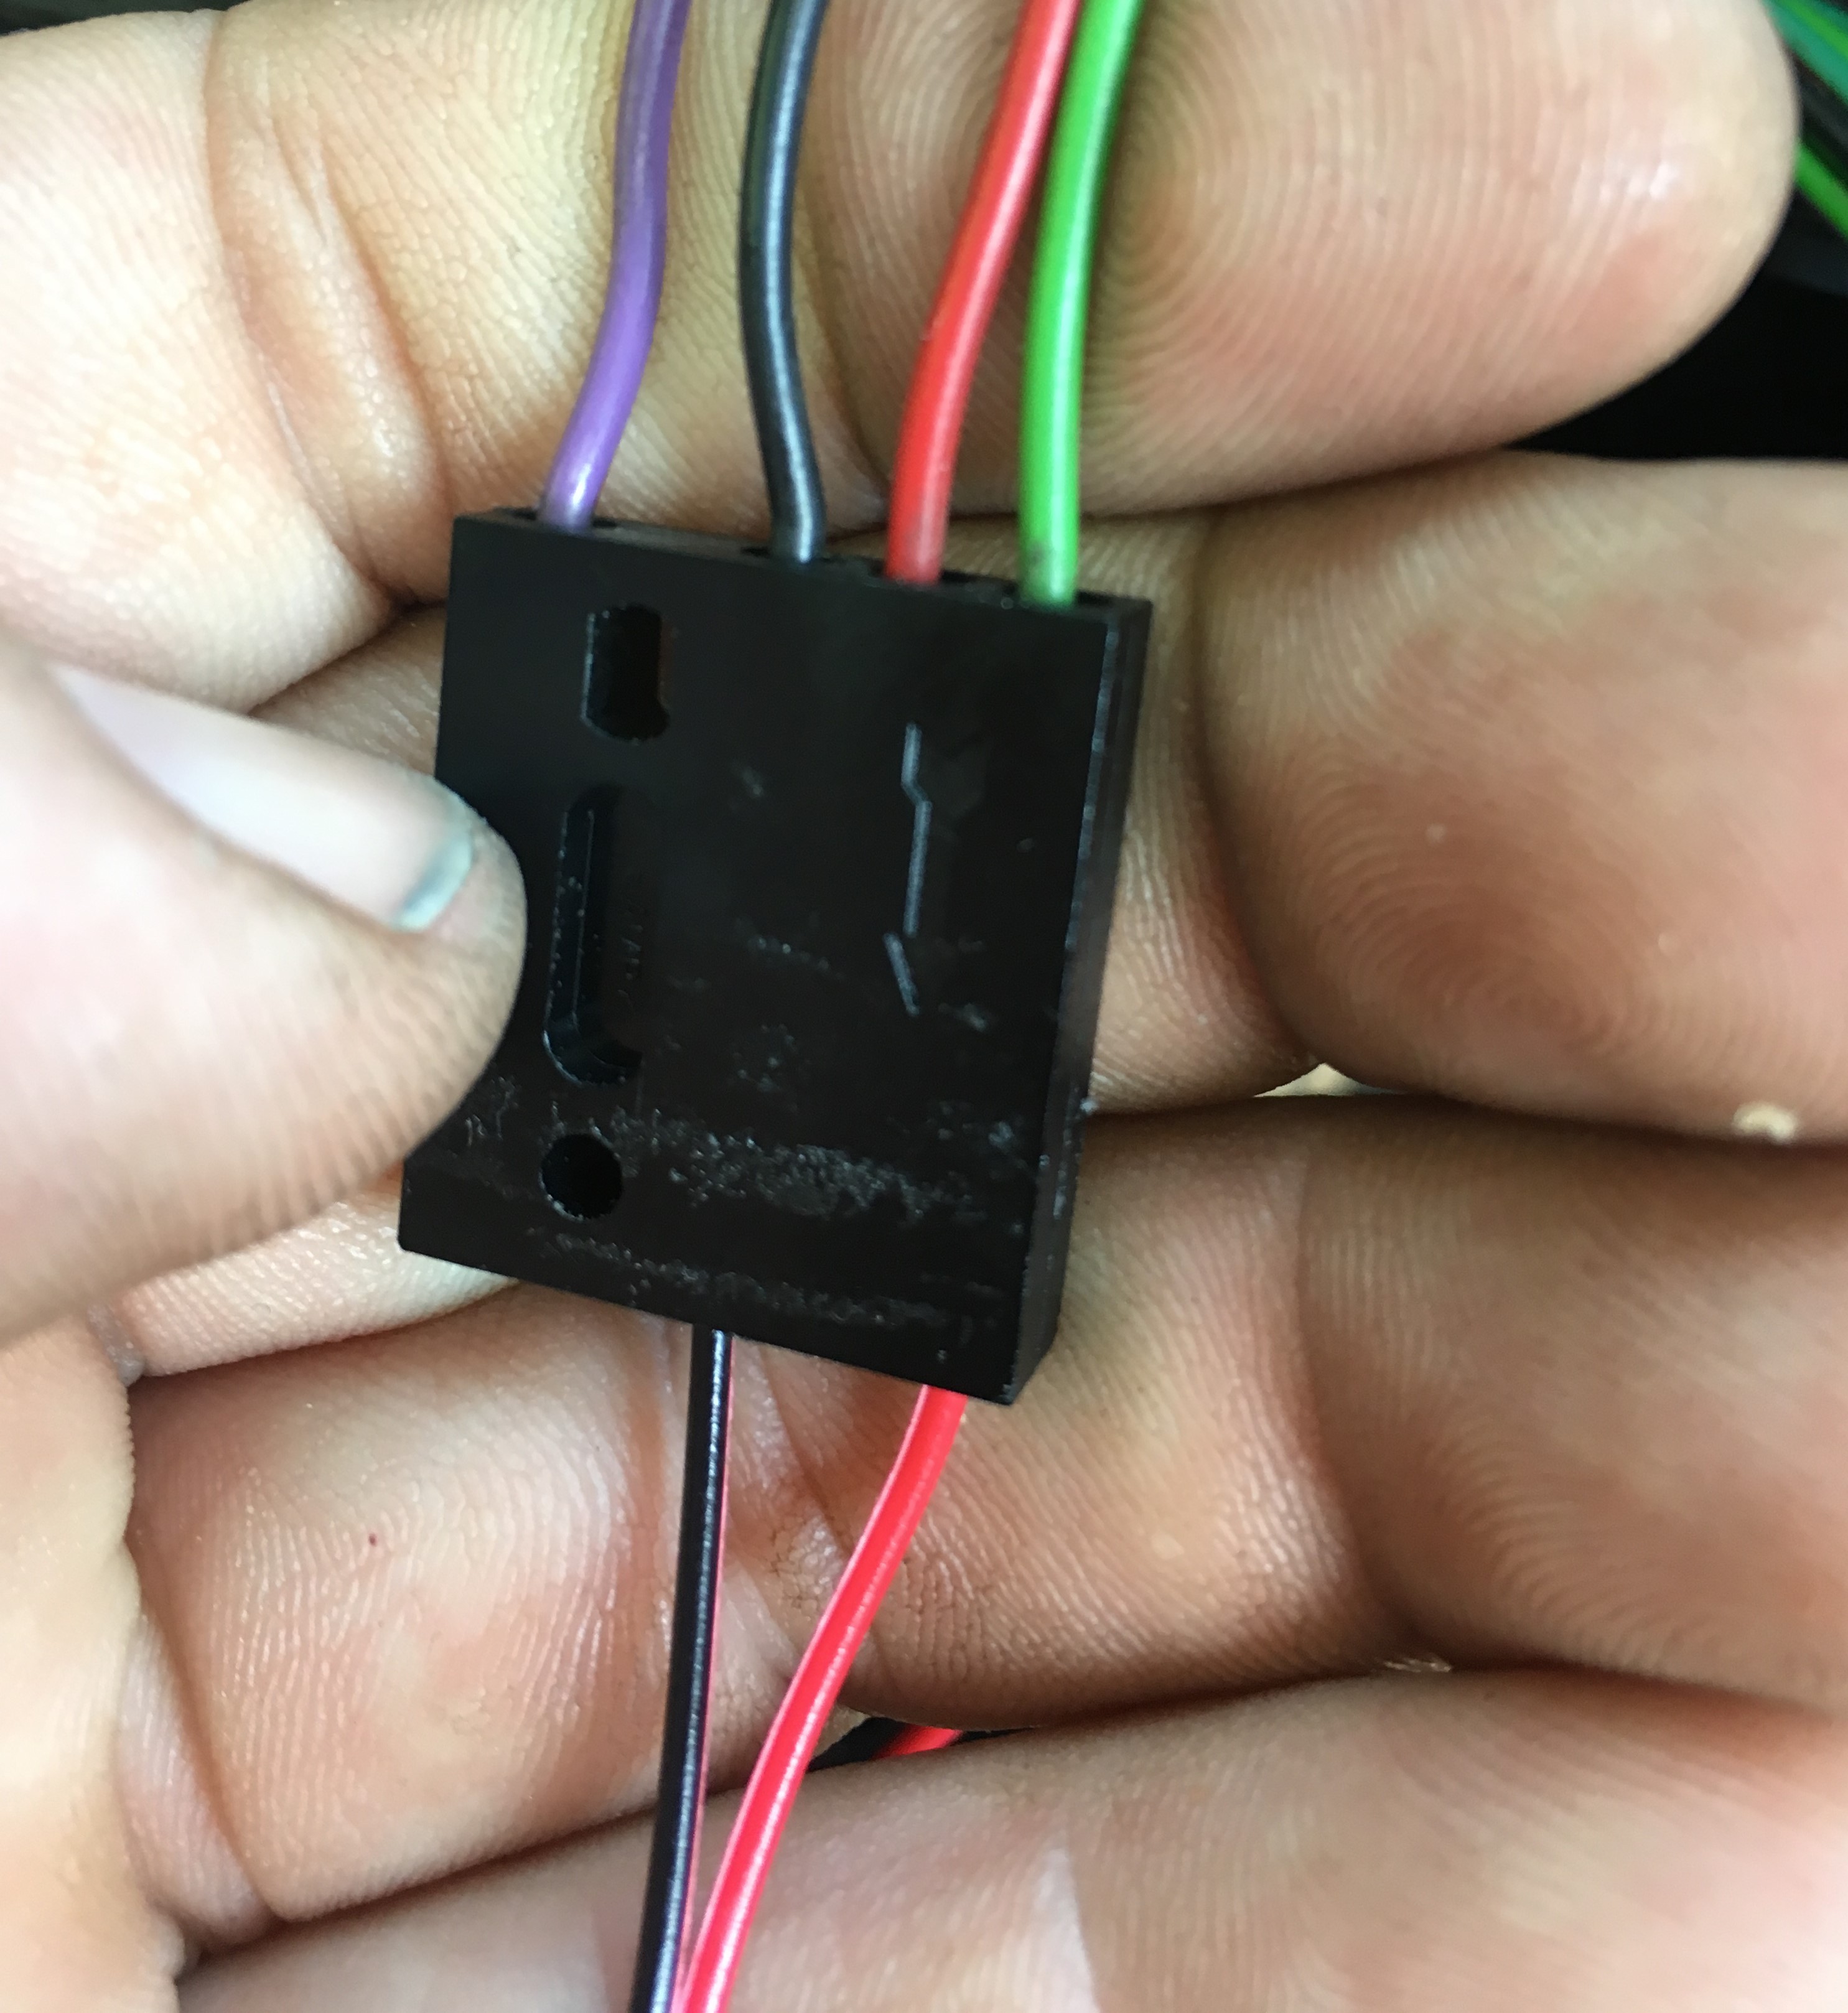
observe the following wires:
connect the BLACK wire from your new clock to the BLACK wire of the original wiring loom via the multiplug
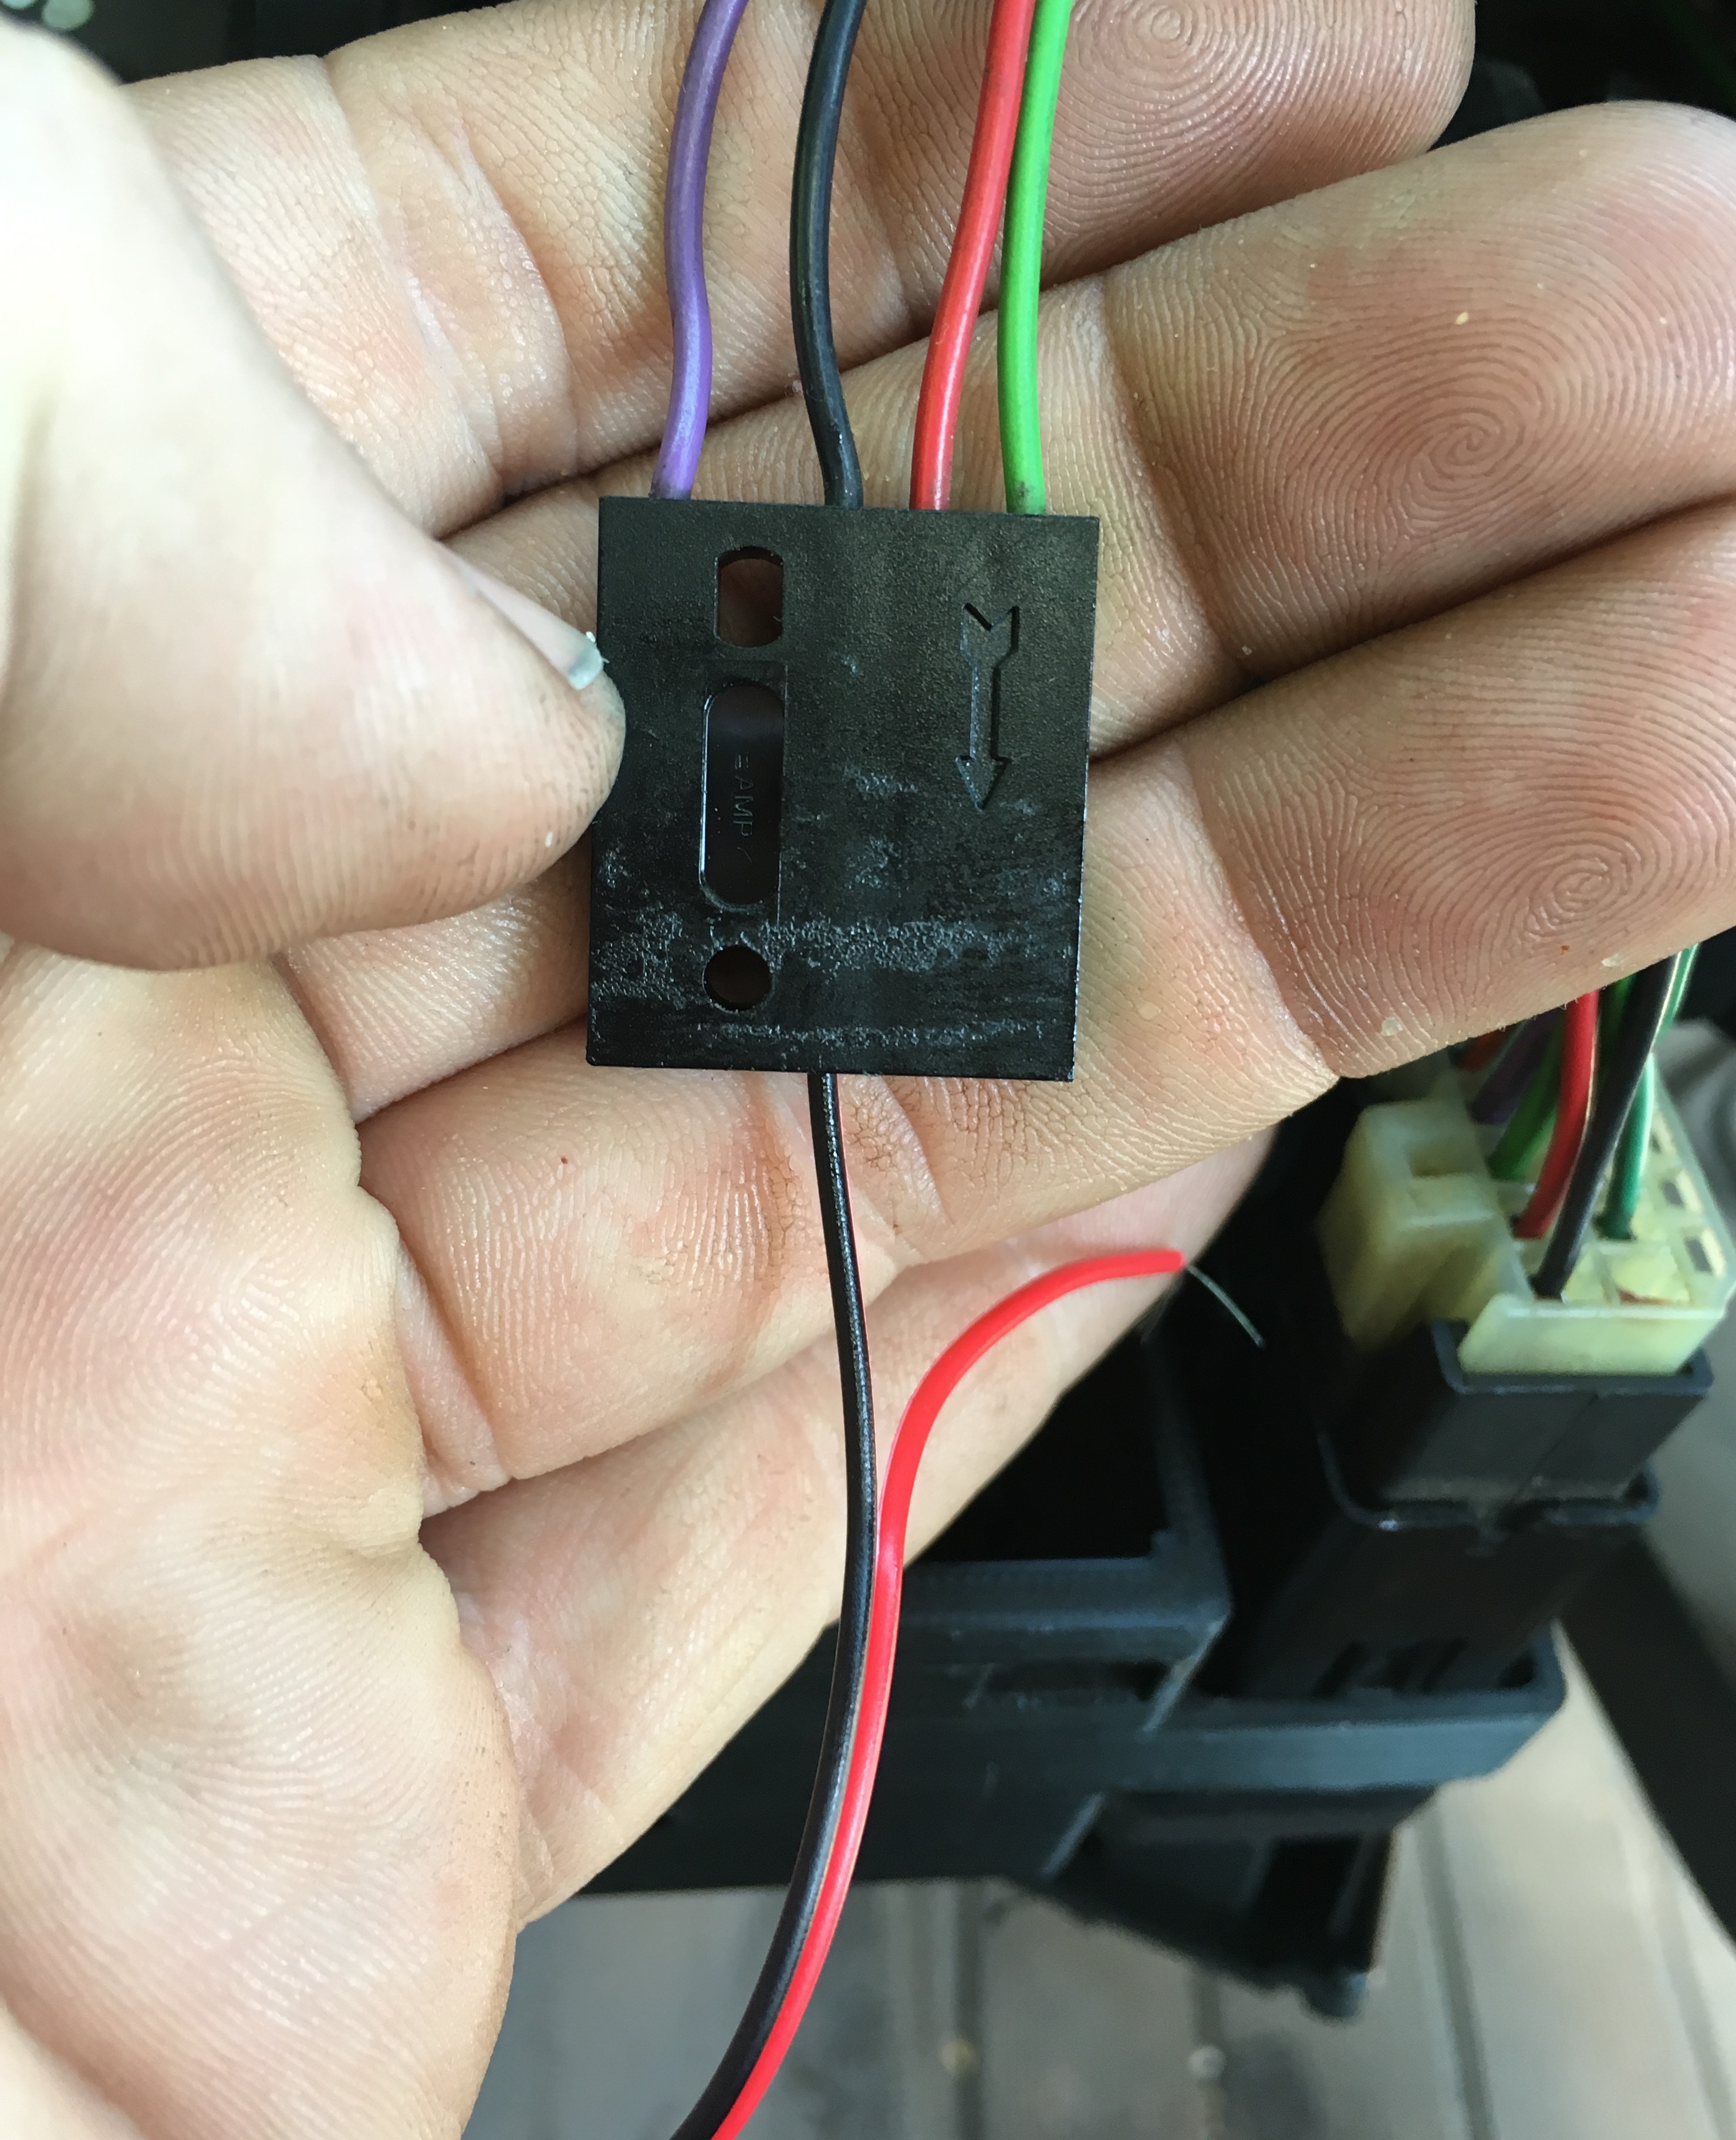
connect the red wire from your new clock to the GREEN wire of the original wiring loom via the multiplug
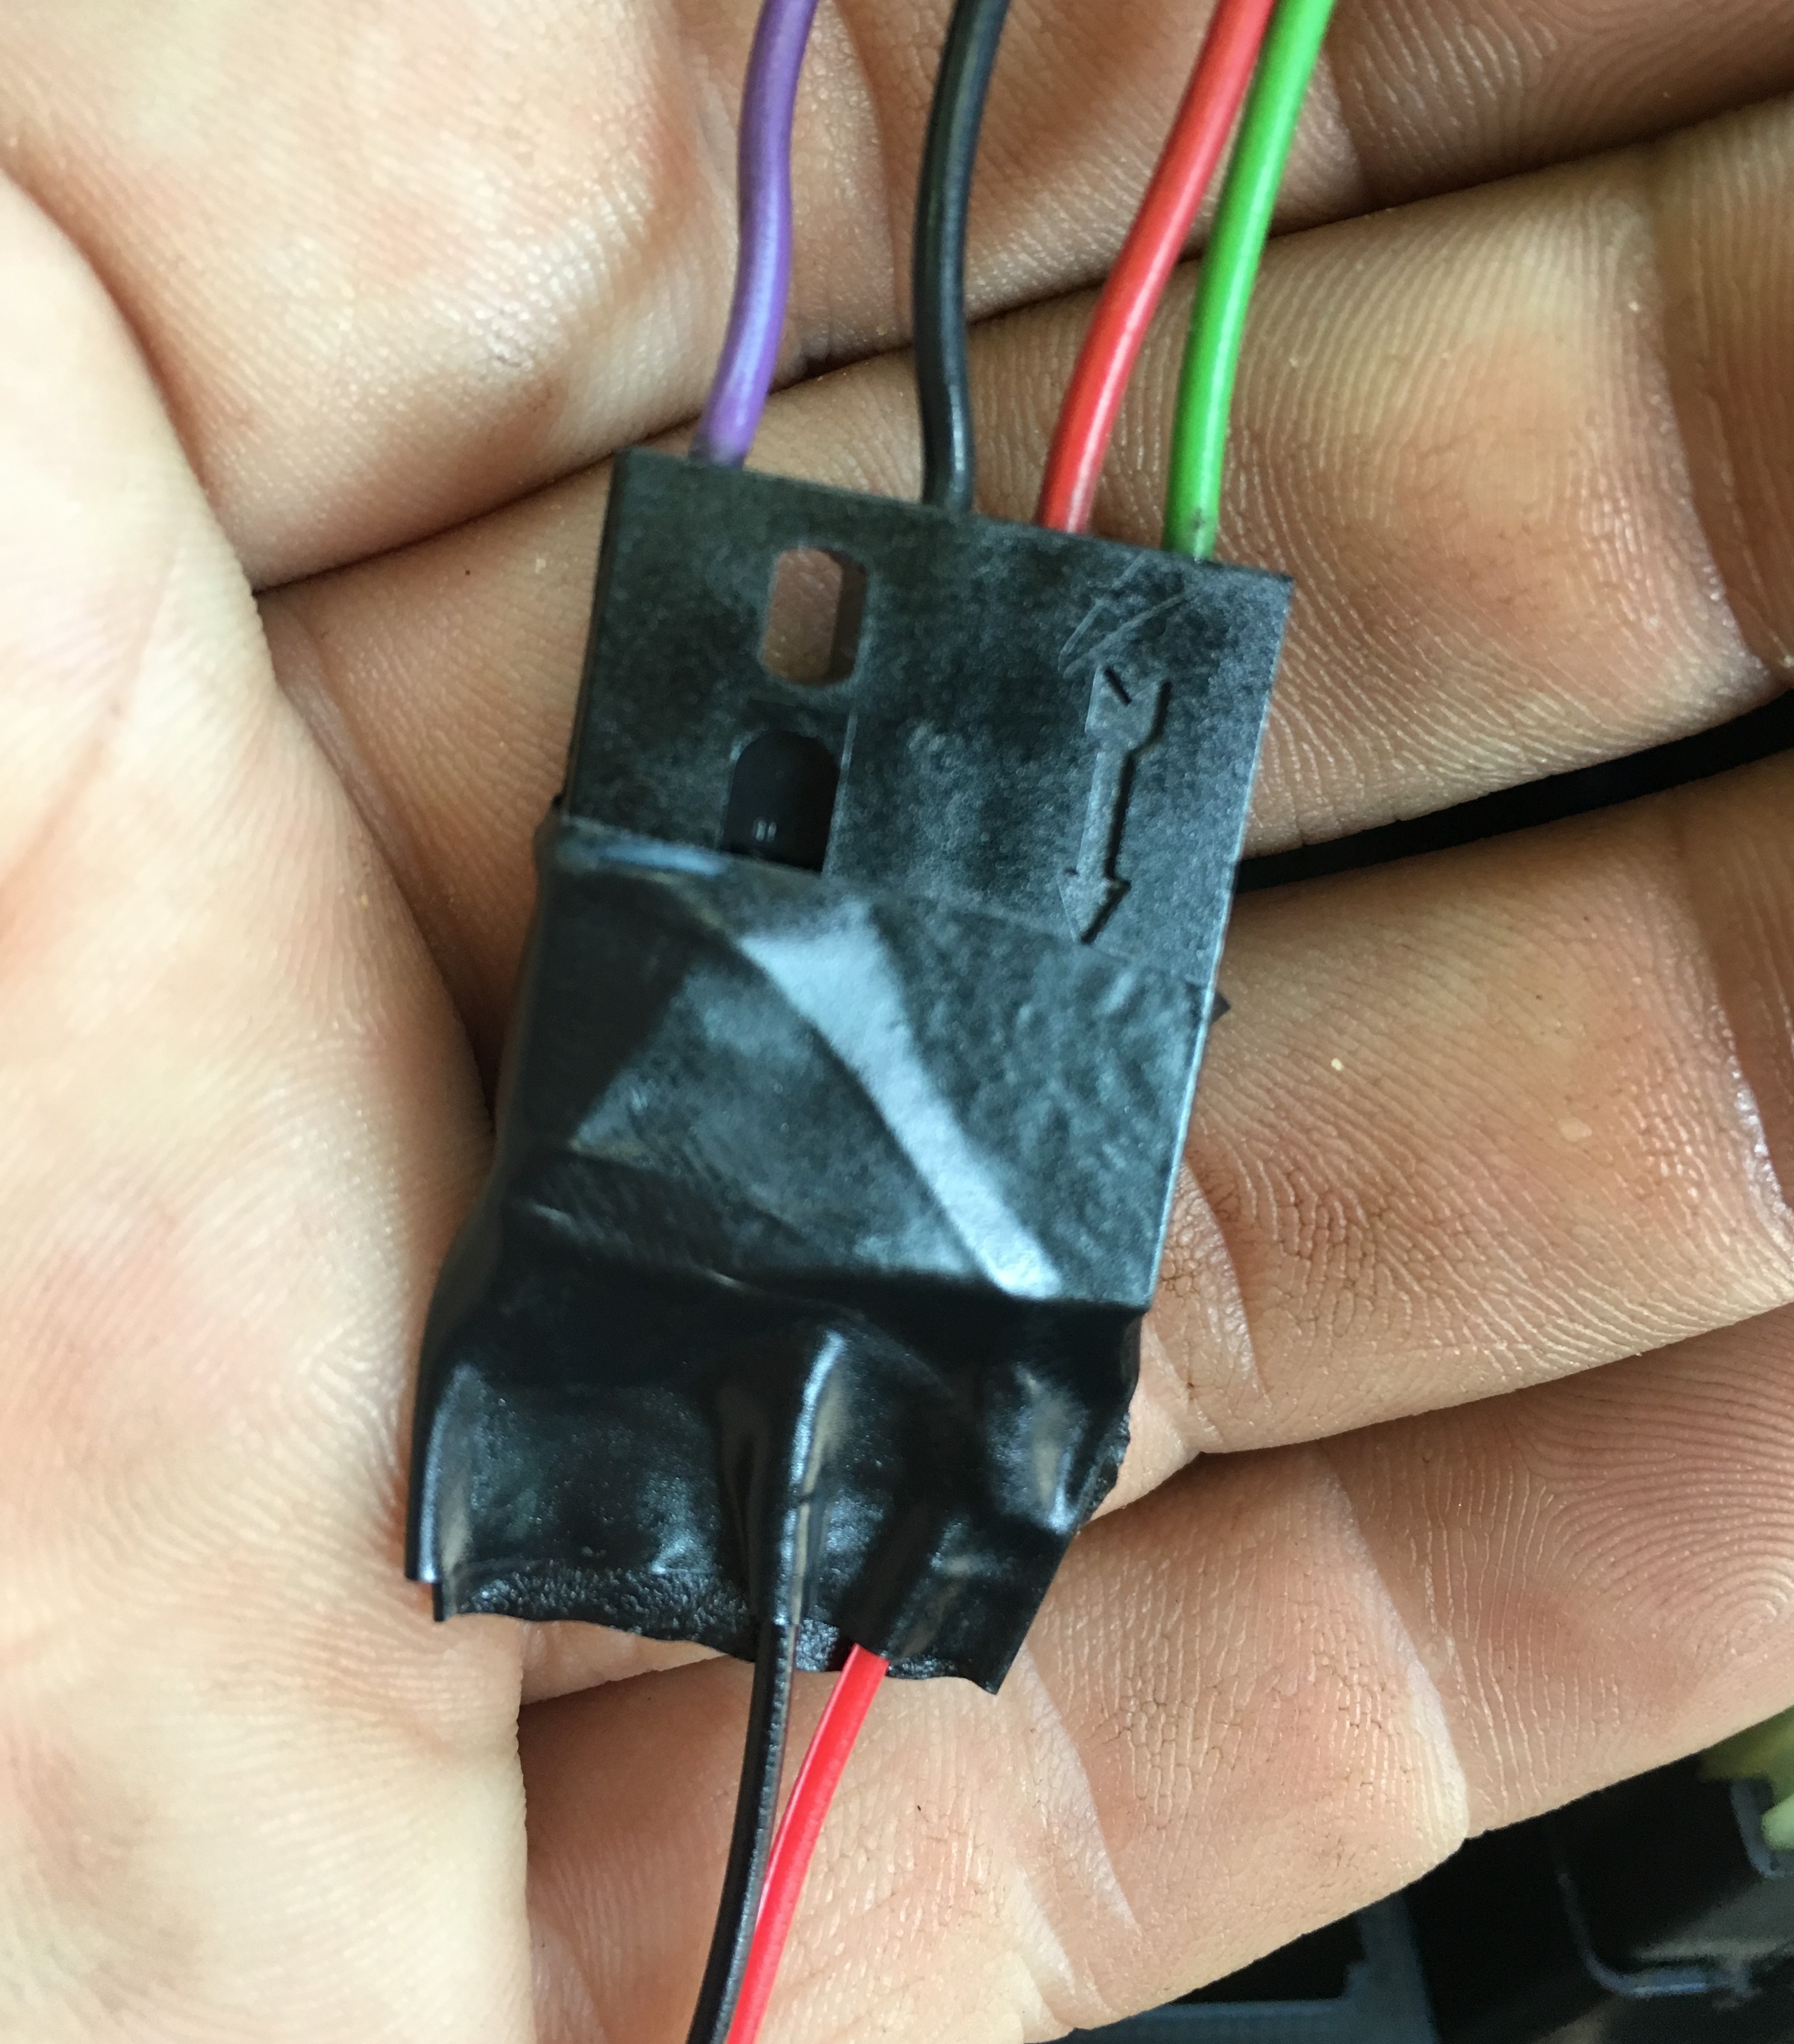
Use tape to secure the wires.
Taping the connector might not be your idea of making a sound connection, we understand that. So use any method you wish to connect the wires, you could cut the cars loom and use crimp connectors or solder, or you could bring the original wiring loom connetors to the screw terminal block on the USB module. it's up to you....
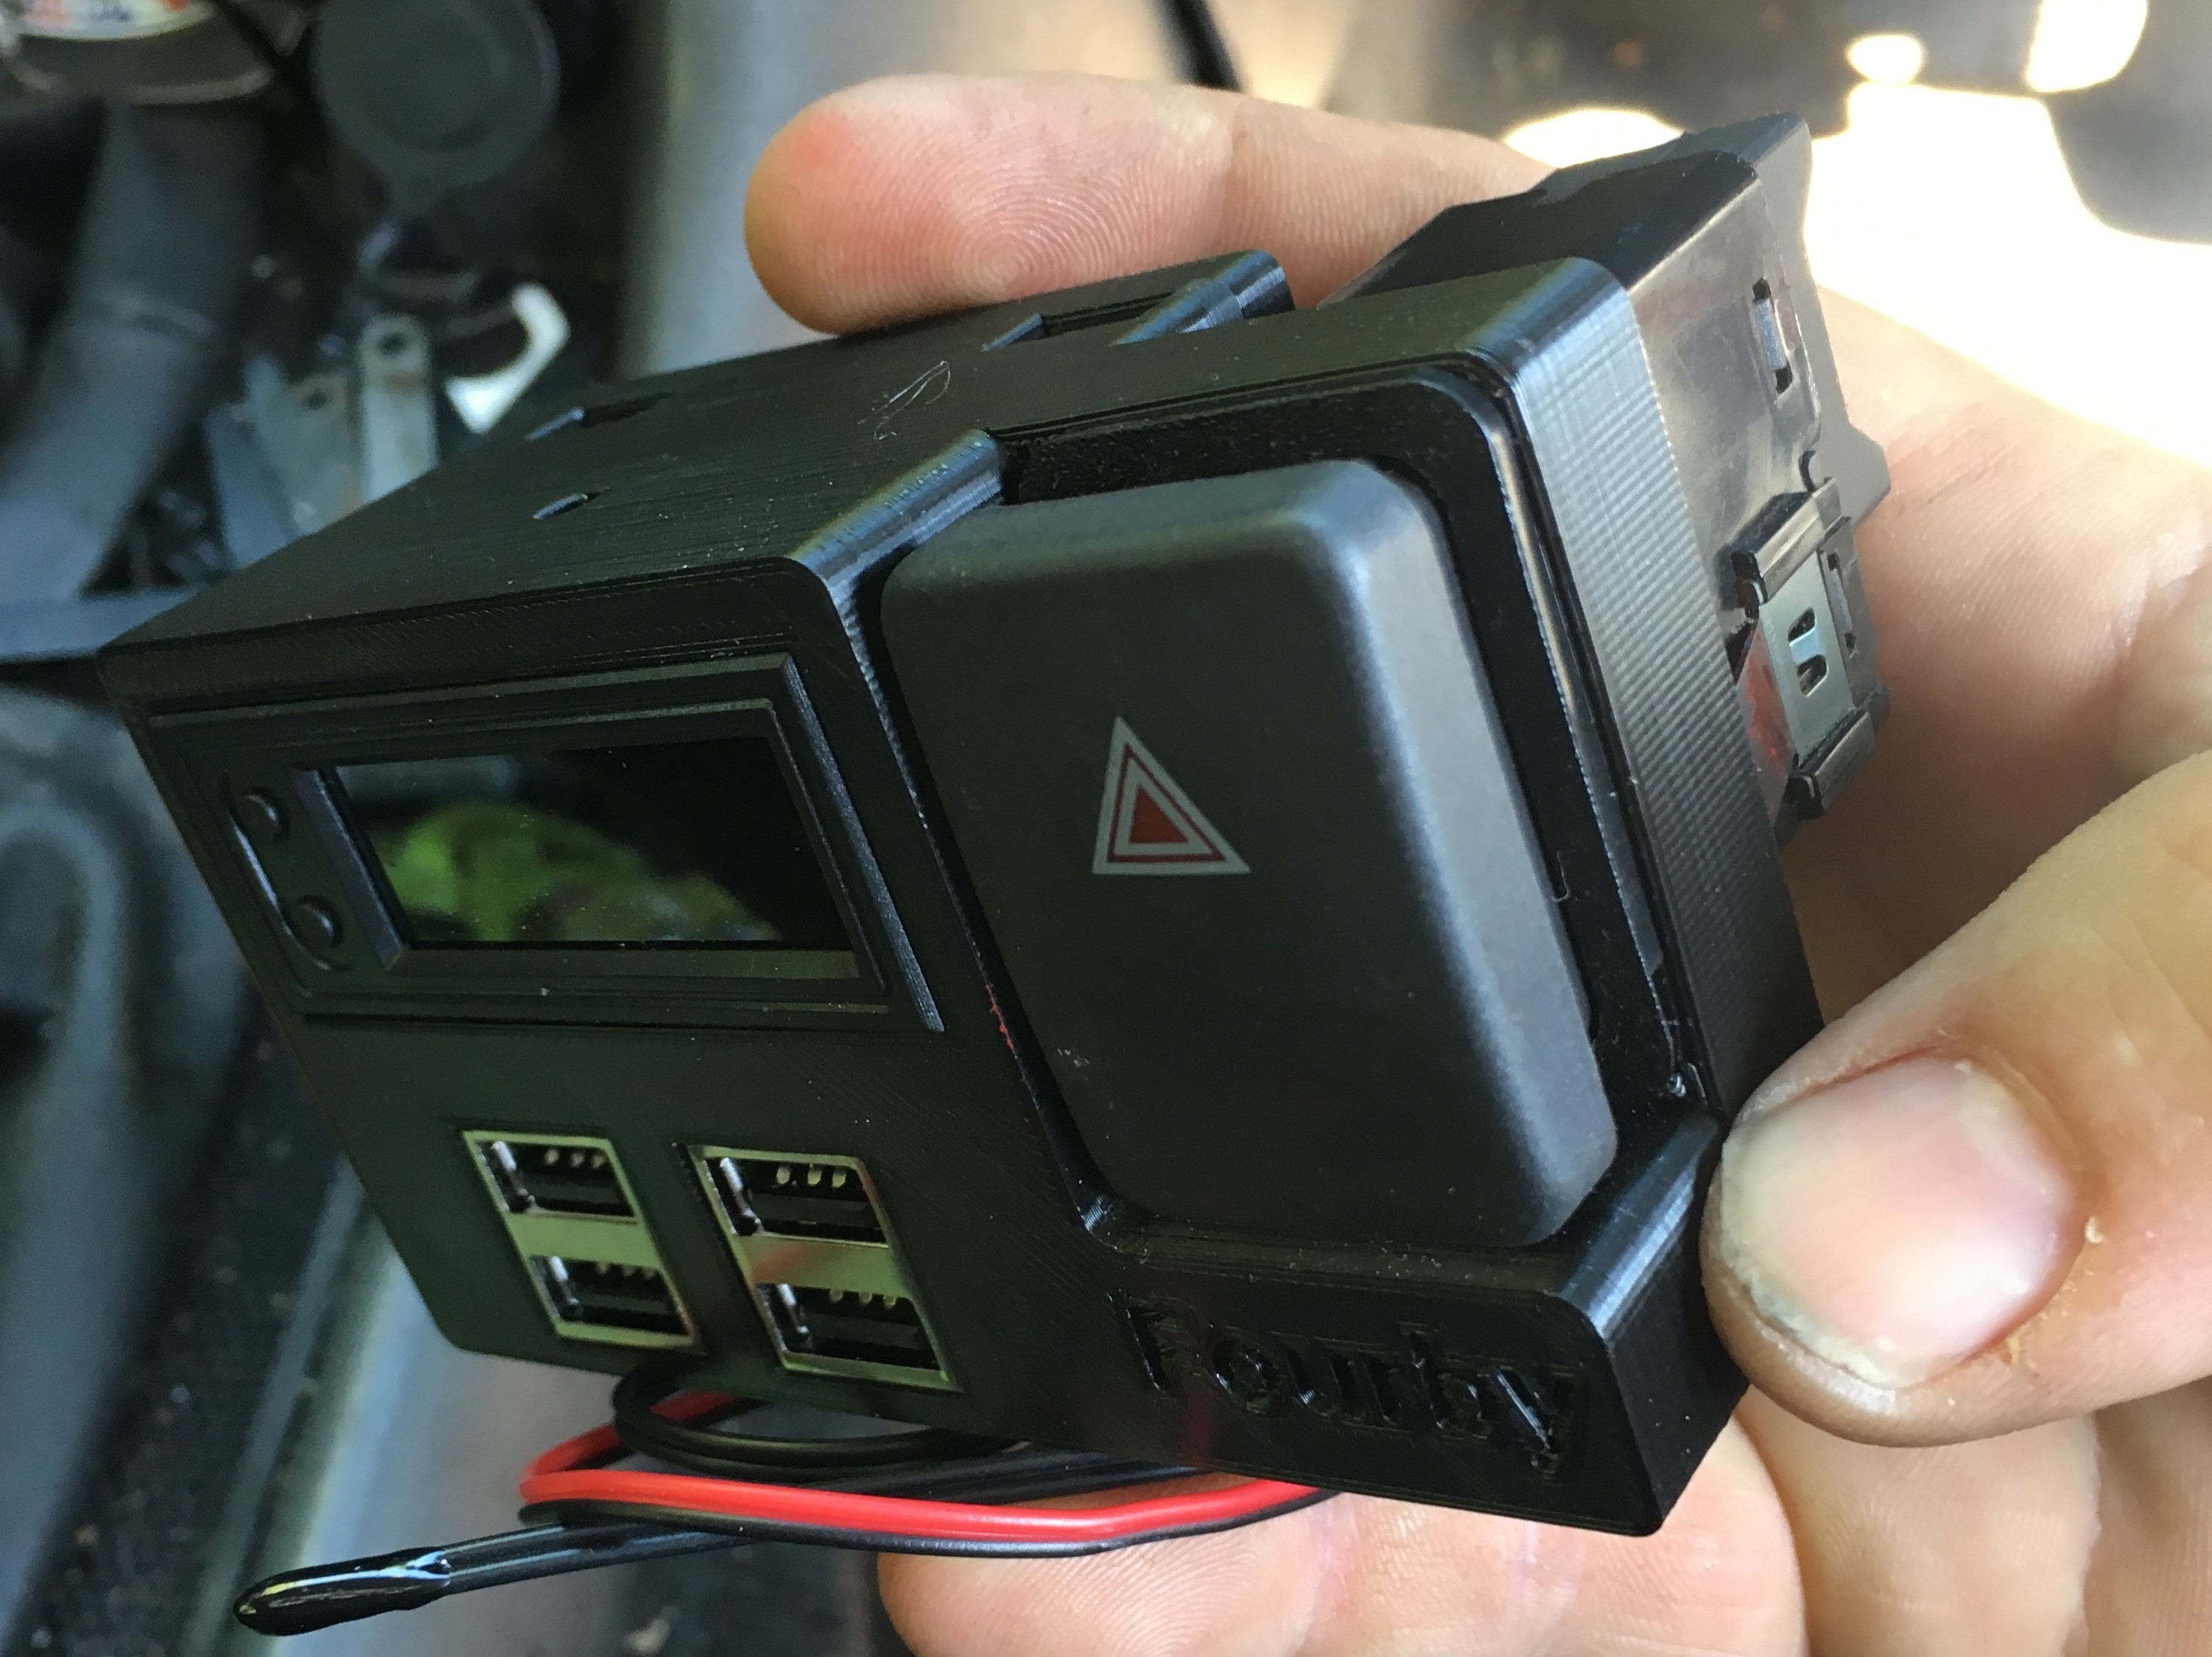
test the clock's connections by keying up the ignition, the clock should light up when your key is in and turned. Then offer the new clock up the dashboard,
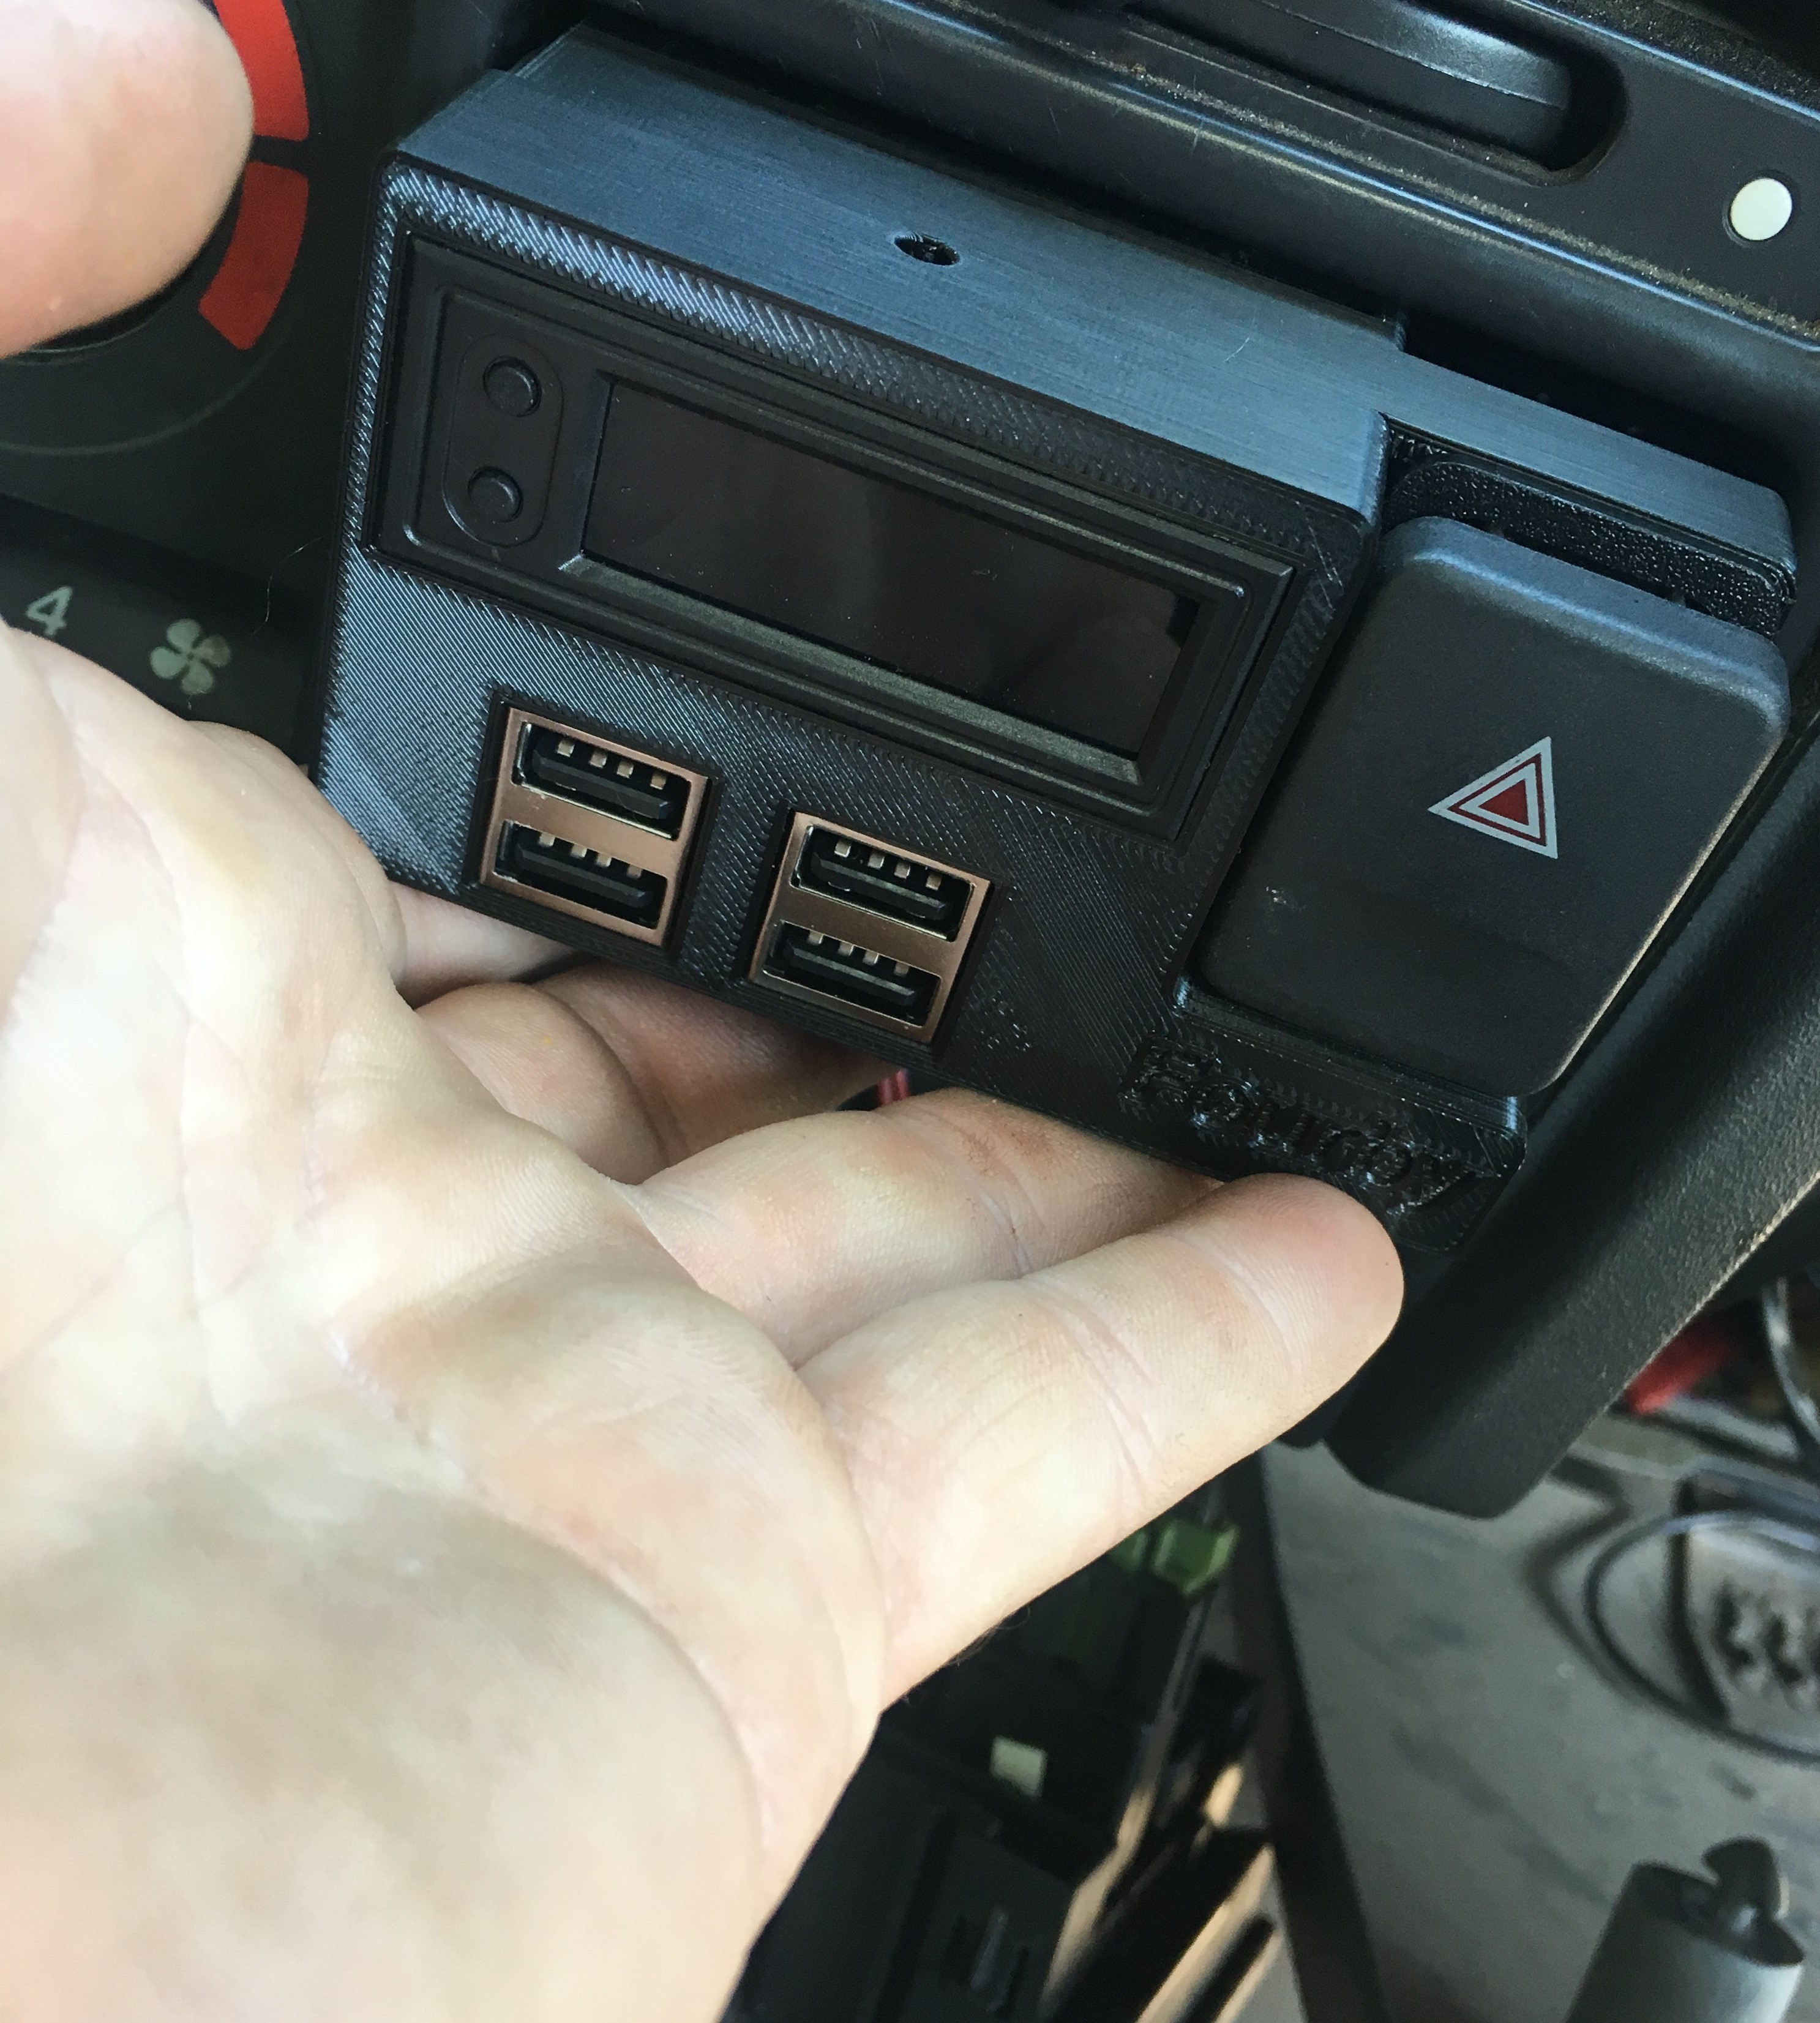
make sure there are no wires obstructiong the new clock from the back and push to click it into place in the dashboard
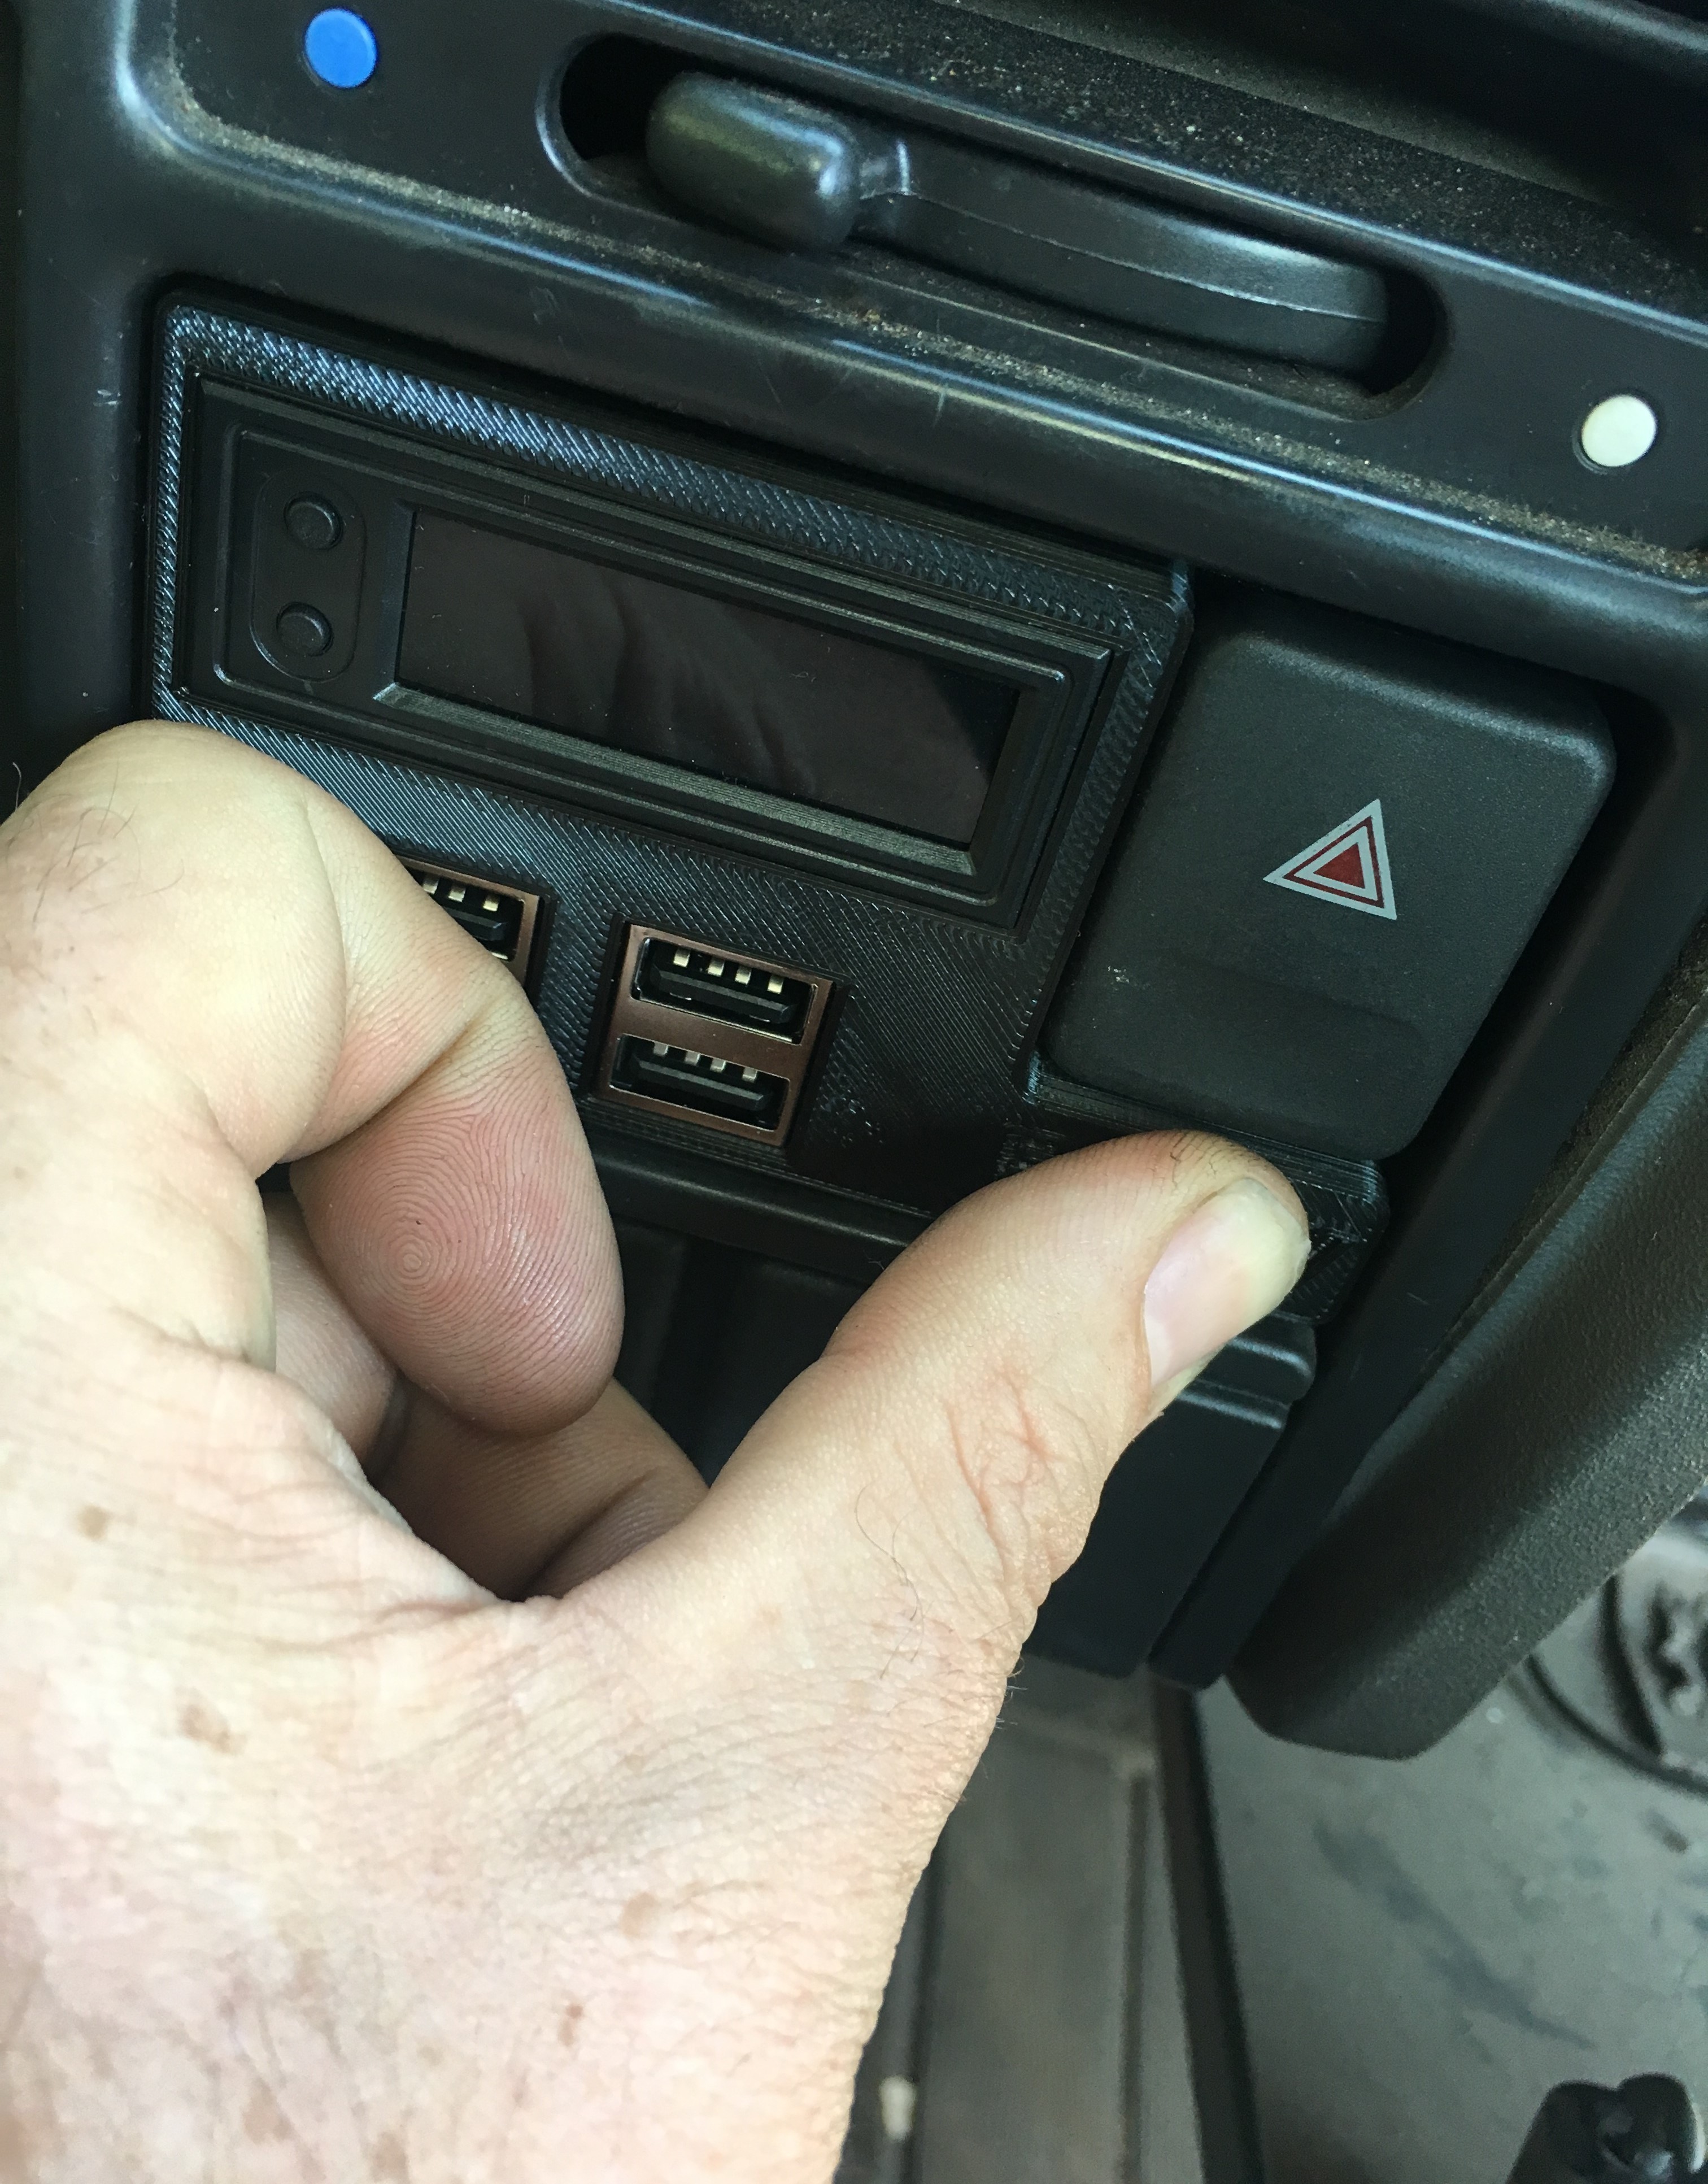
your new Fourby Multifunction Clock is ready for Programming
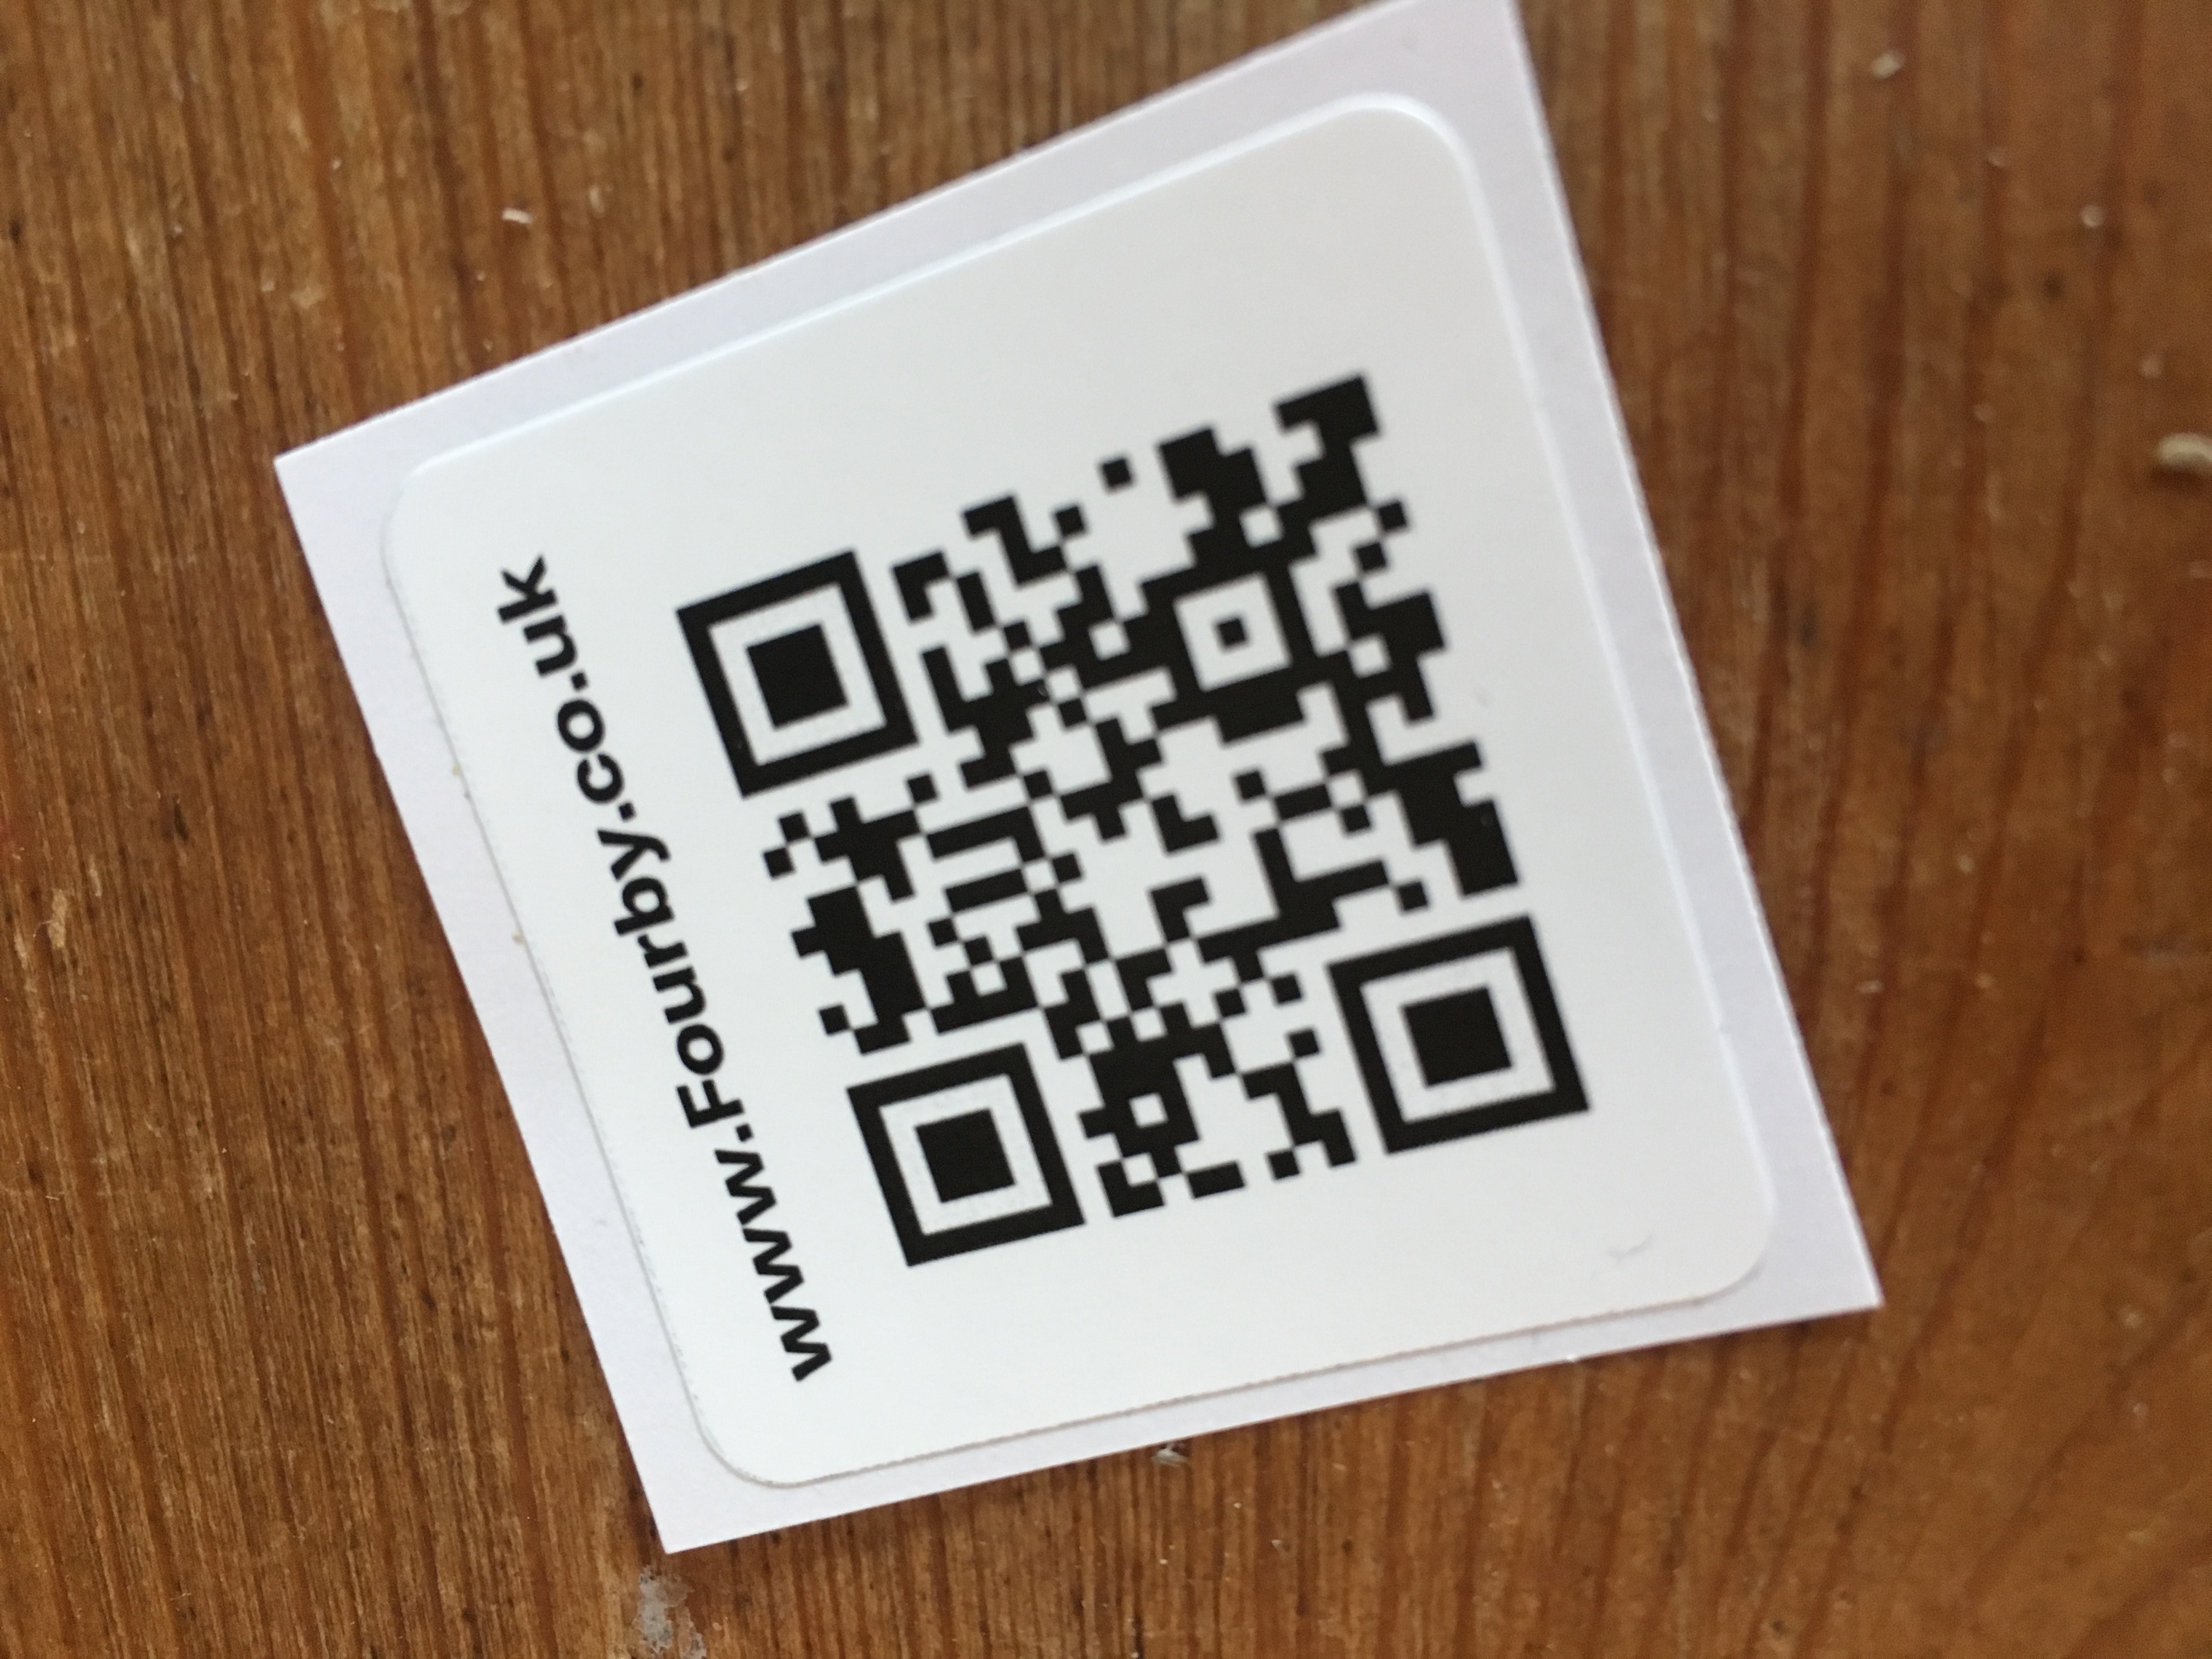
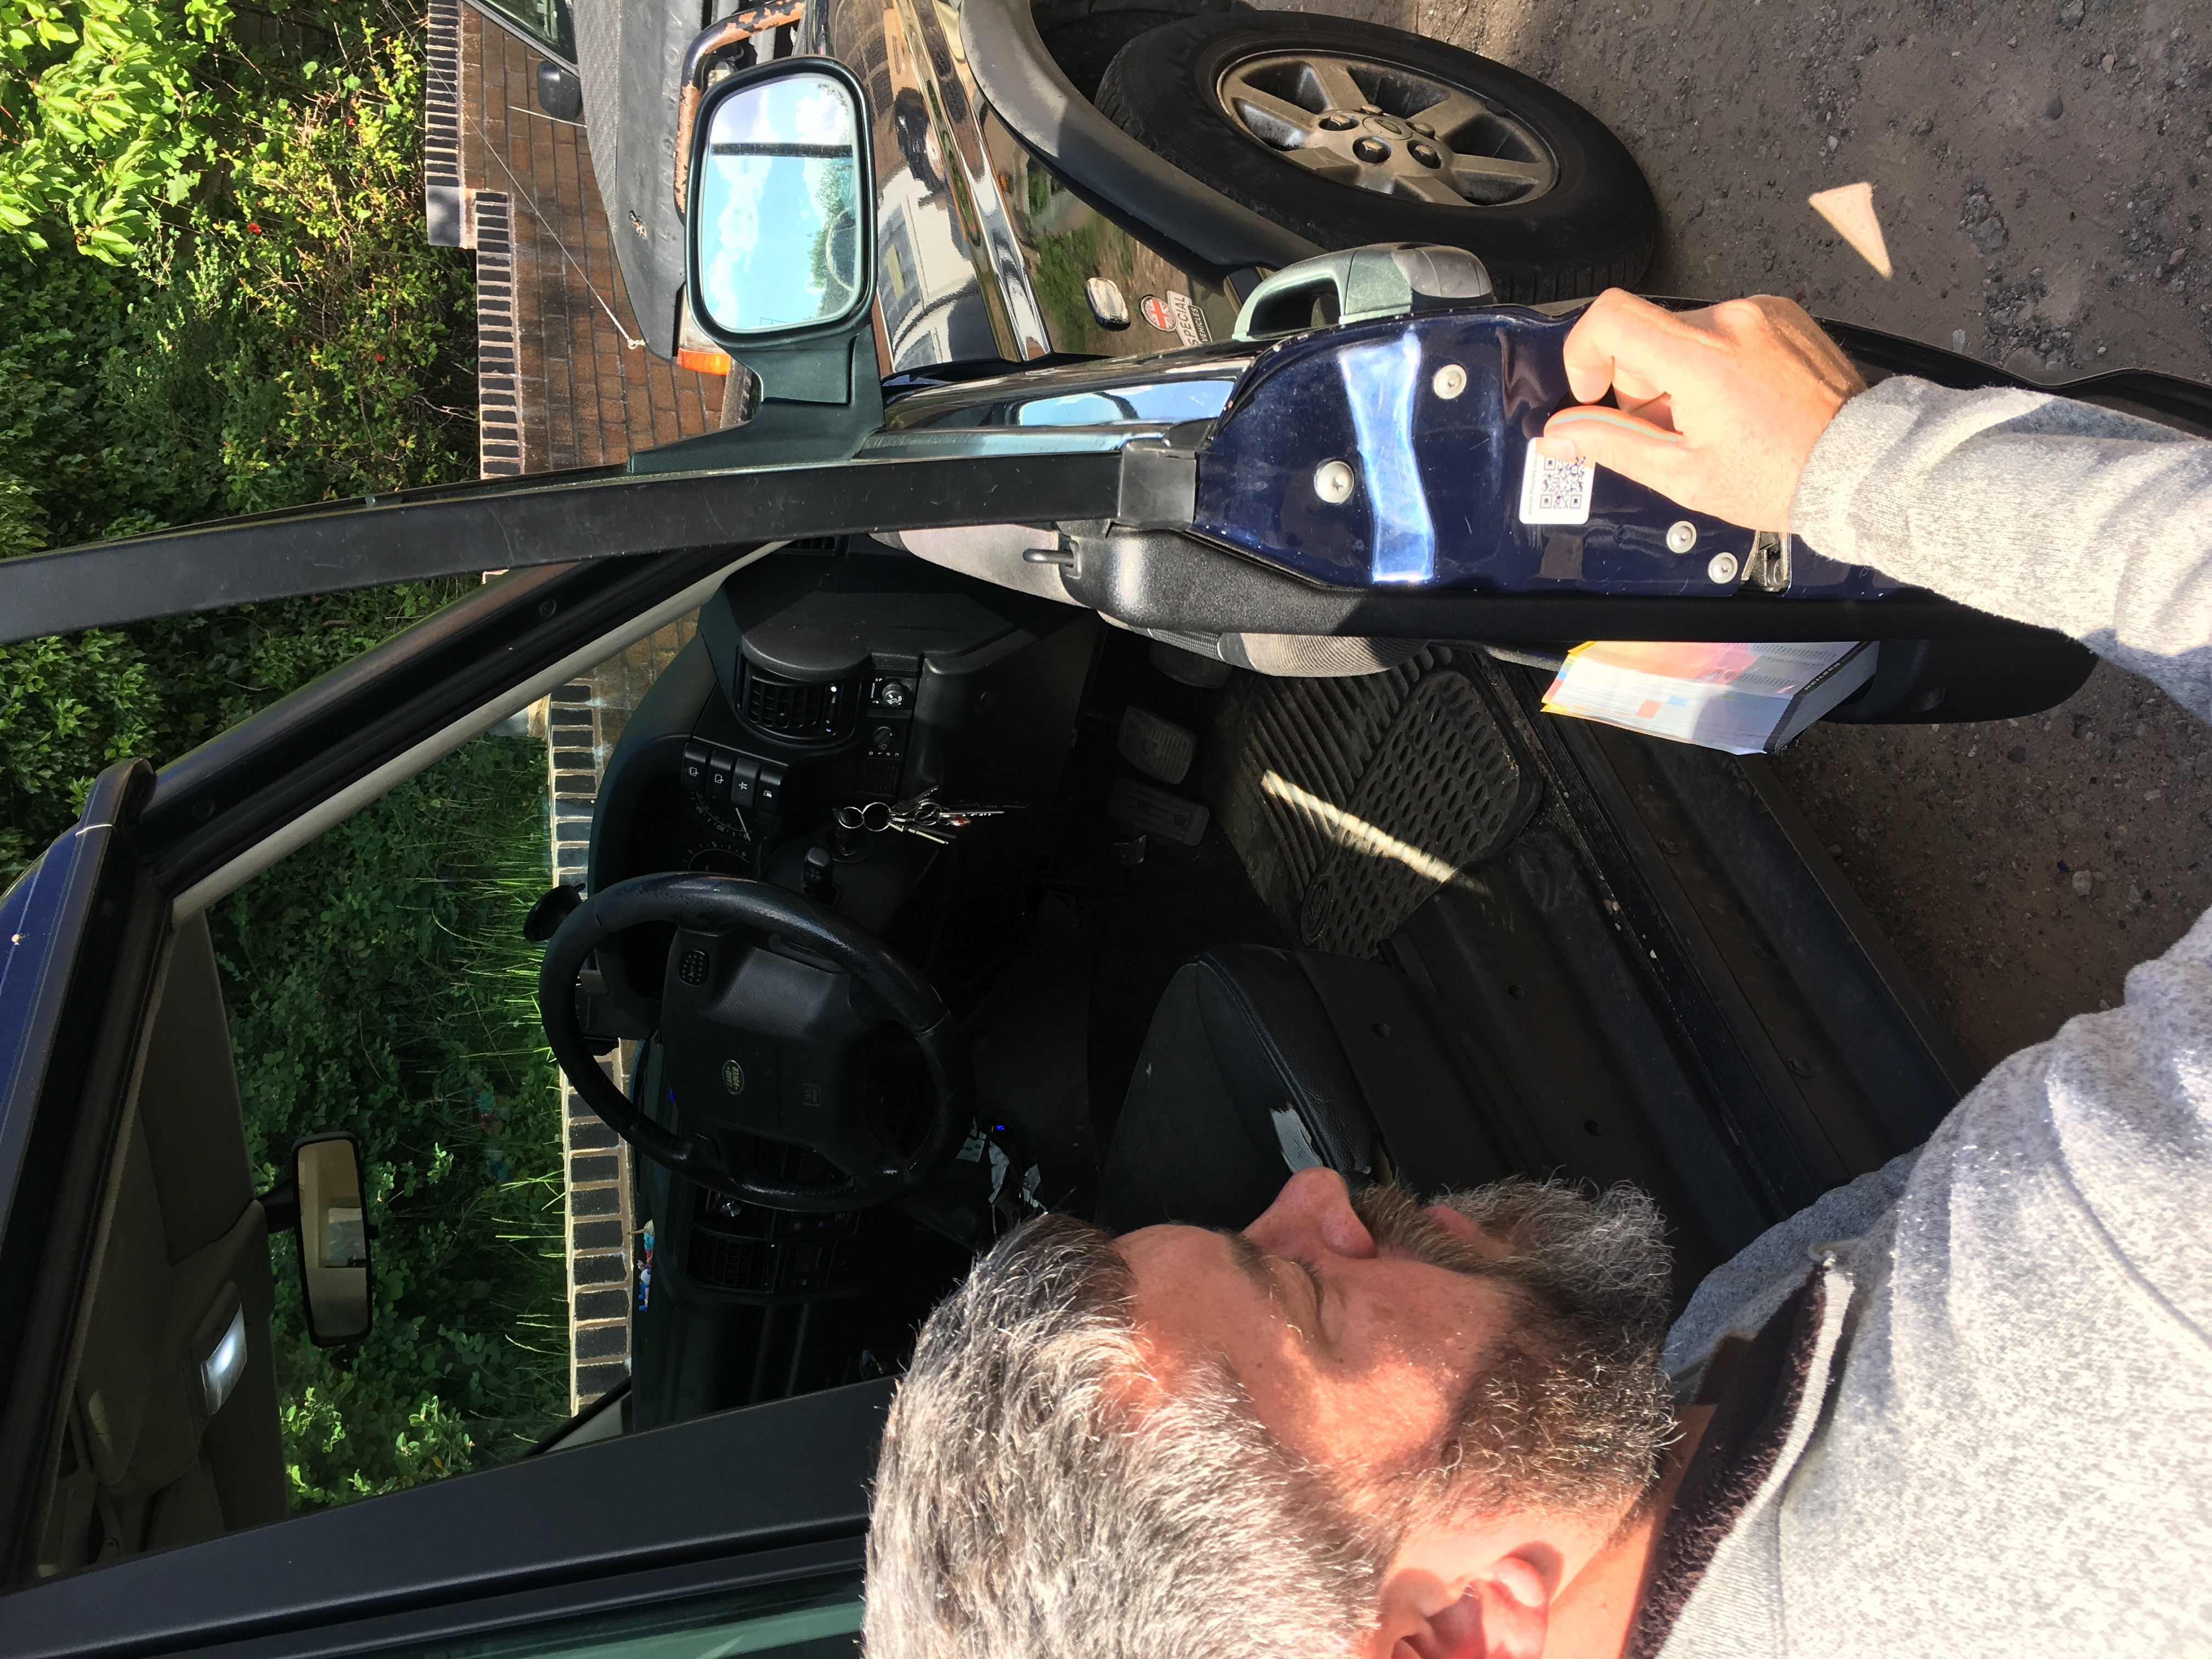
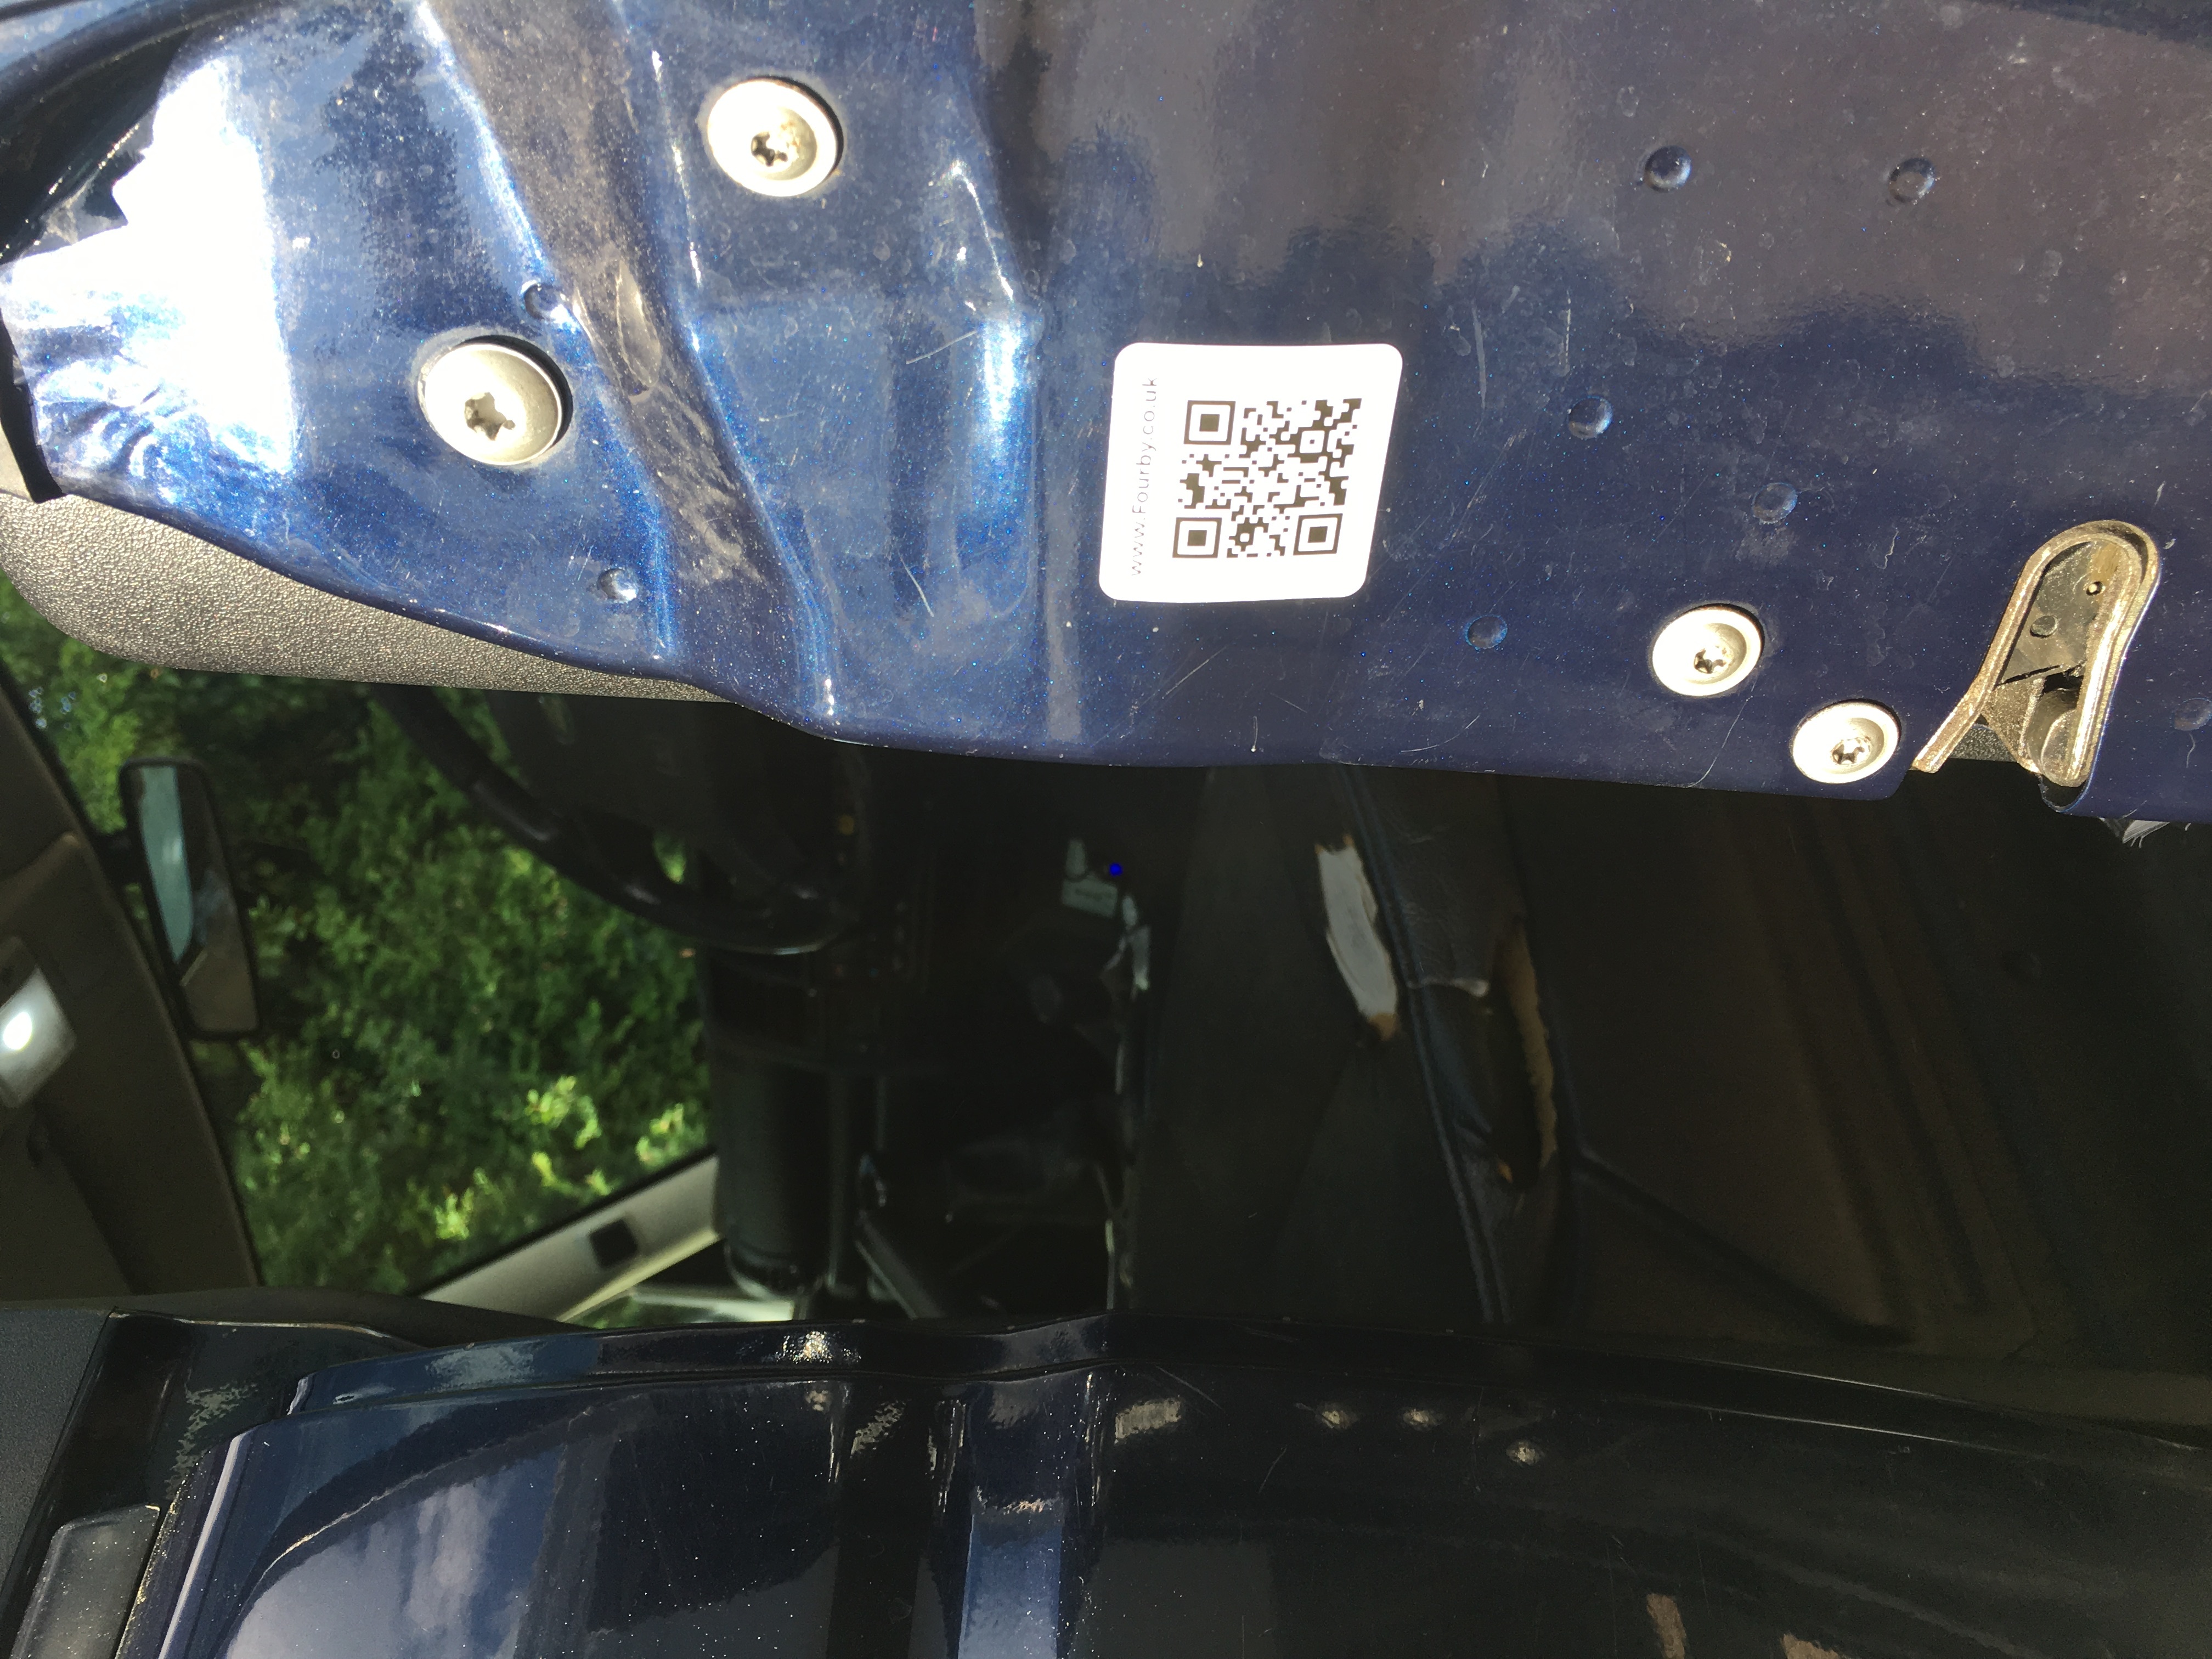
You will find a sticker in your parts box.
this is a QR link code to the programming instructions.
Add the sticker to your door jam, this will allow you to bring up the programming instructions on your phone at any time. you'll never be without the instructions in your Disco if you do this.
or click the link below.
Fourby USB Clock Setup, Programming and Calibration instructions.
")