Aftermarket 4x4 Parts and Accessories
Expedition & Overland Preparation
Outdoor, Camping & Bushcraft Products


Categories D1 Clock
D1 Clock
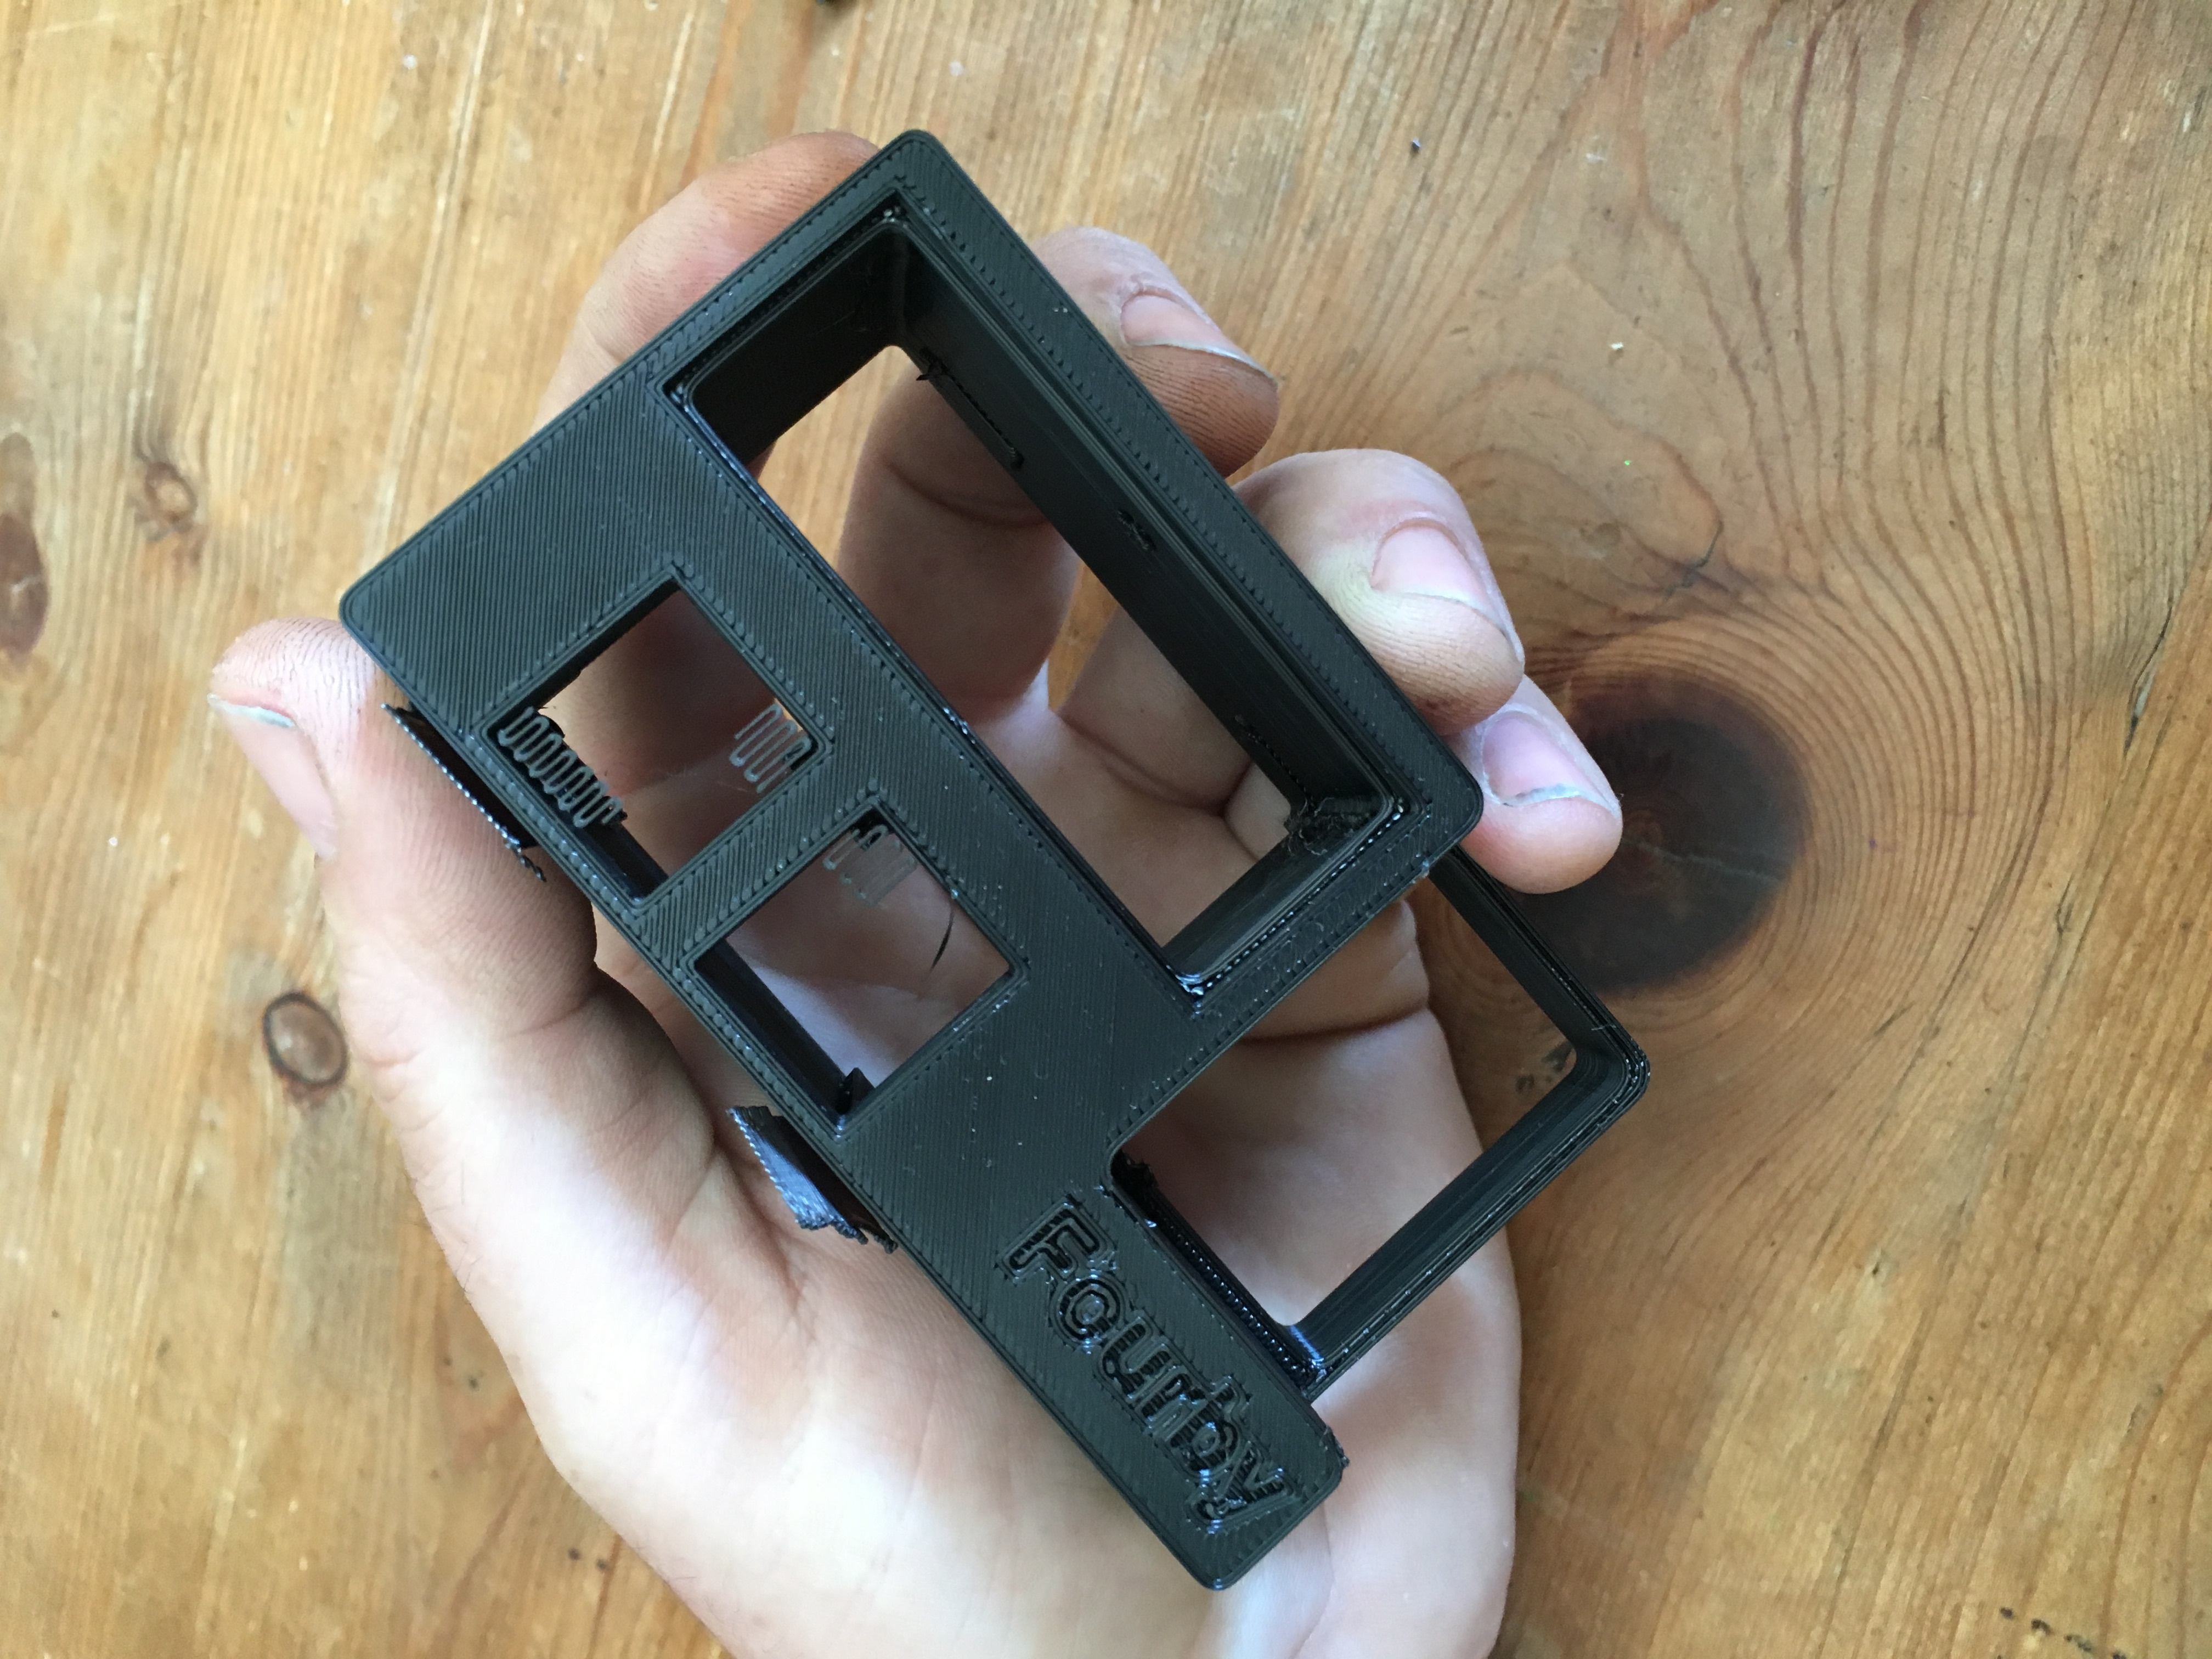
Building your Fourby Multifunction Clock kit.
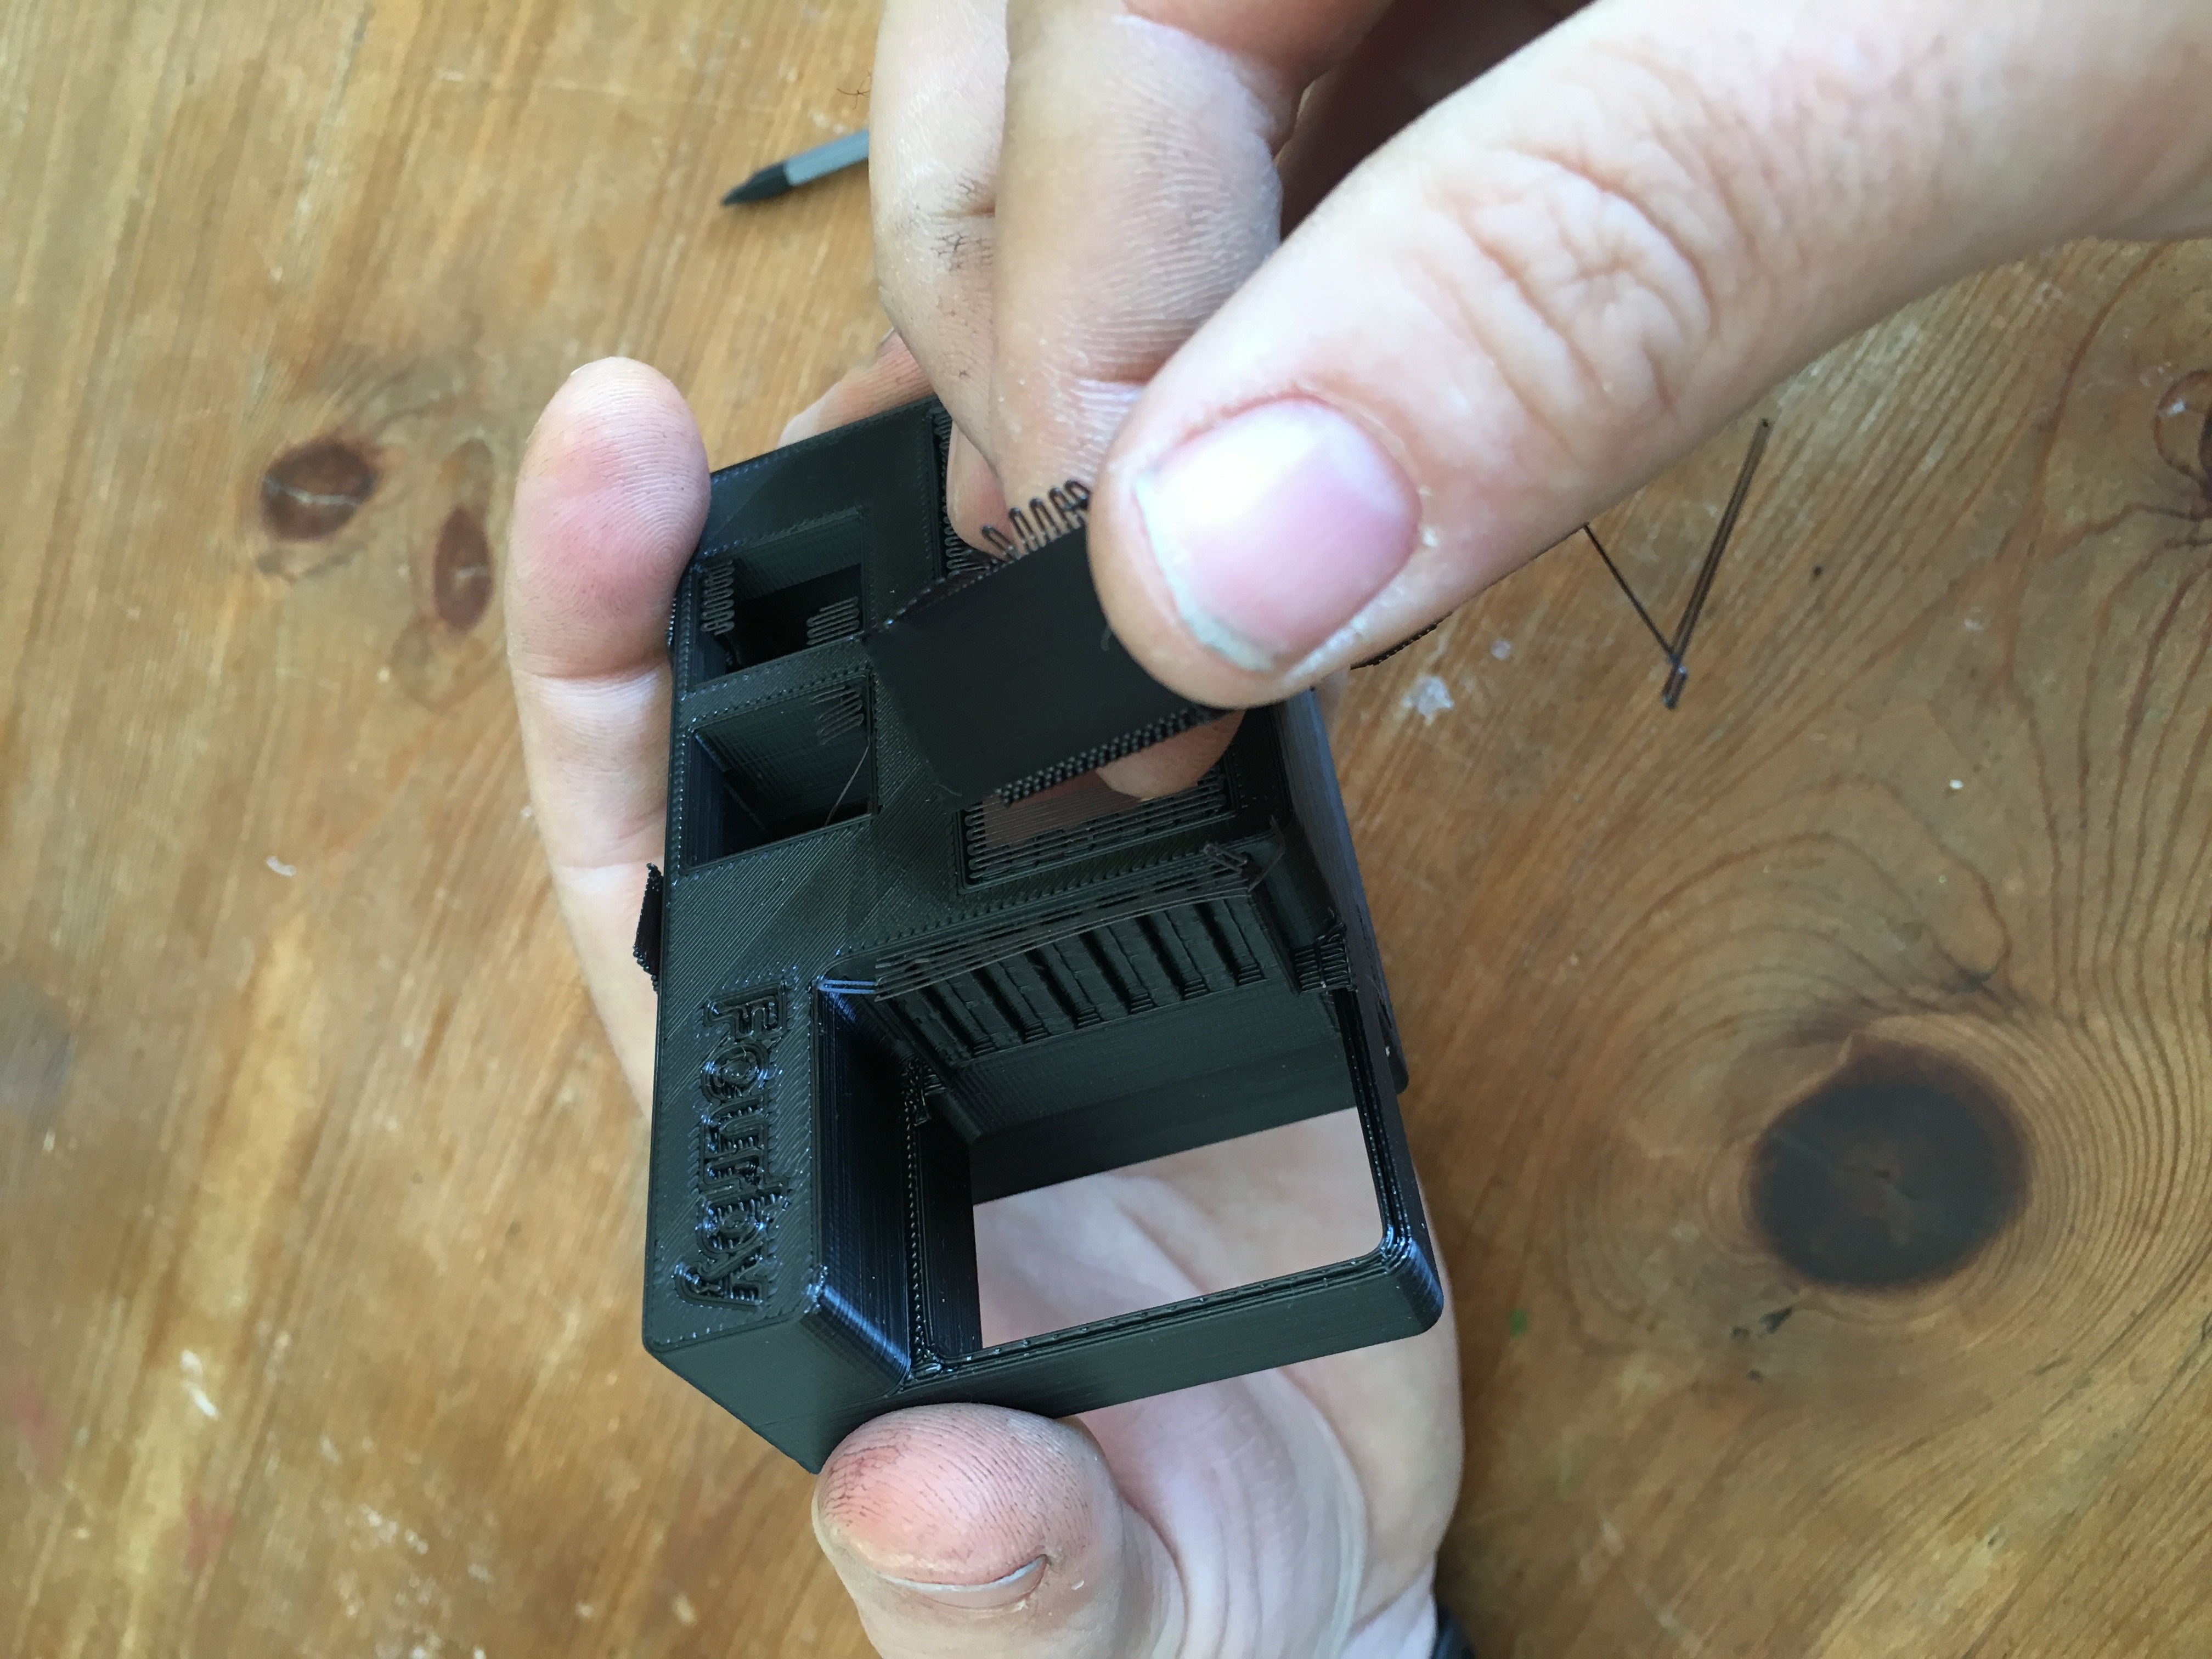
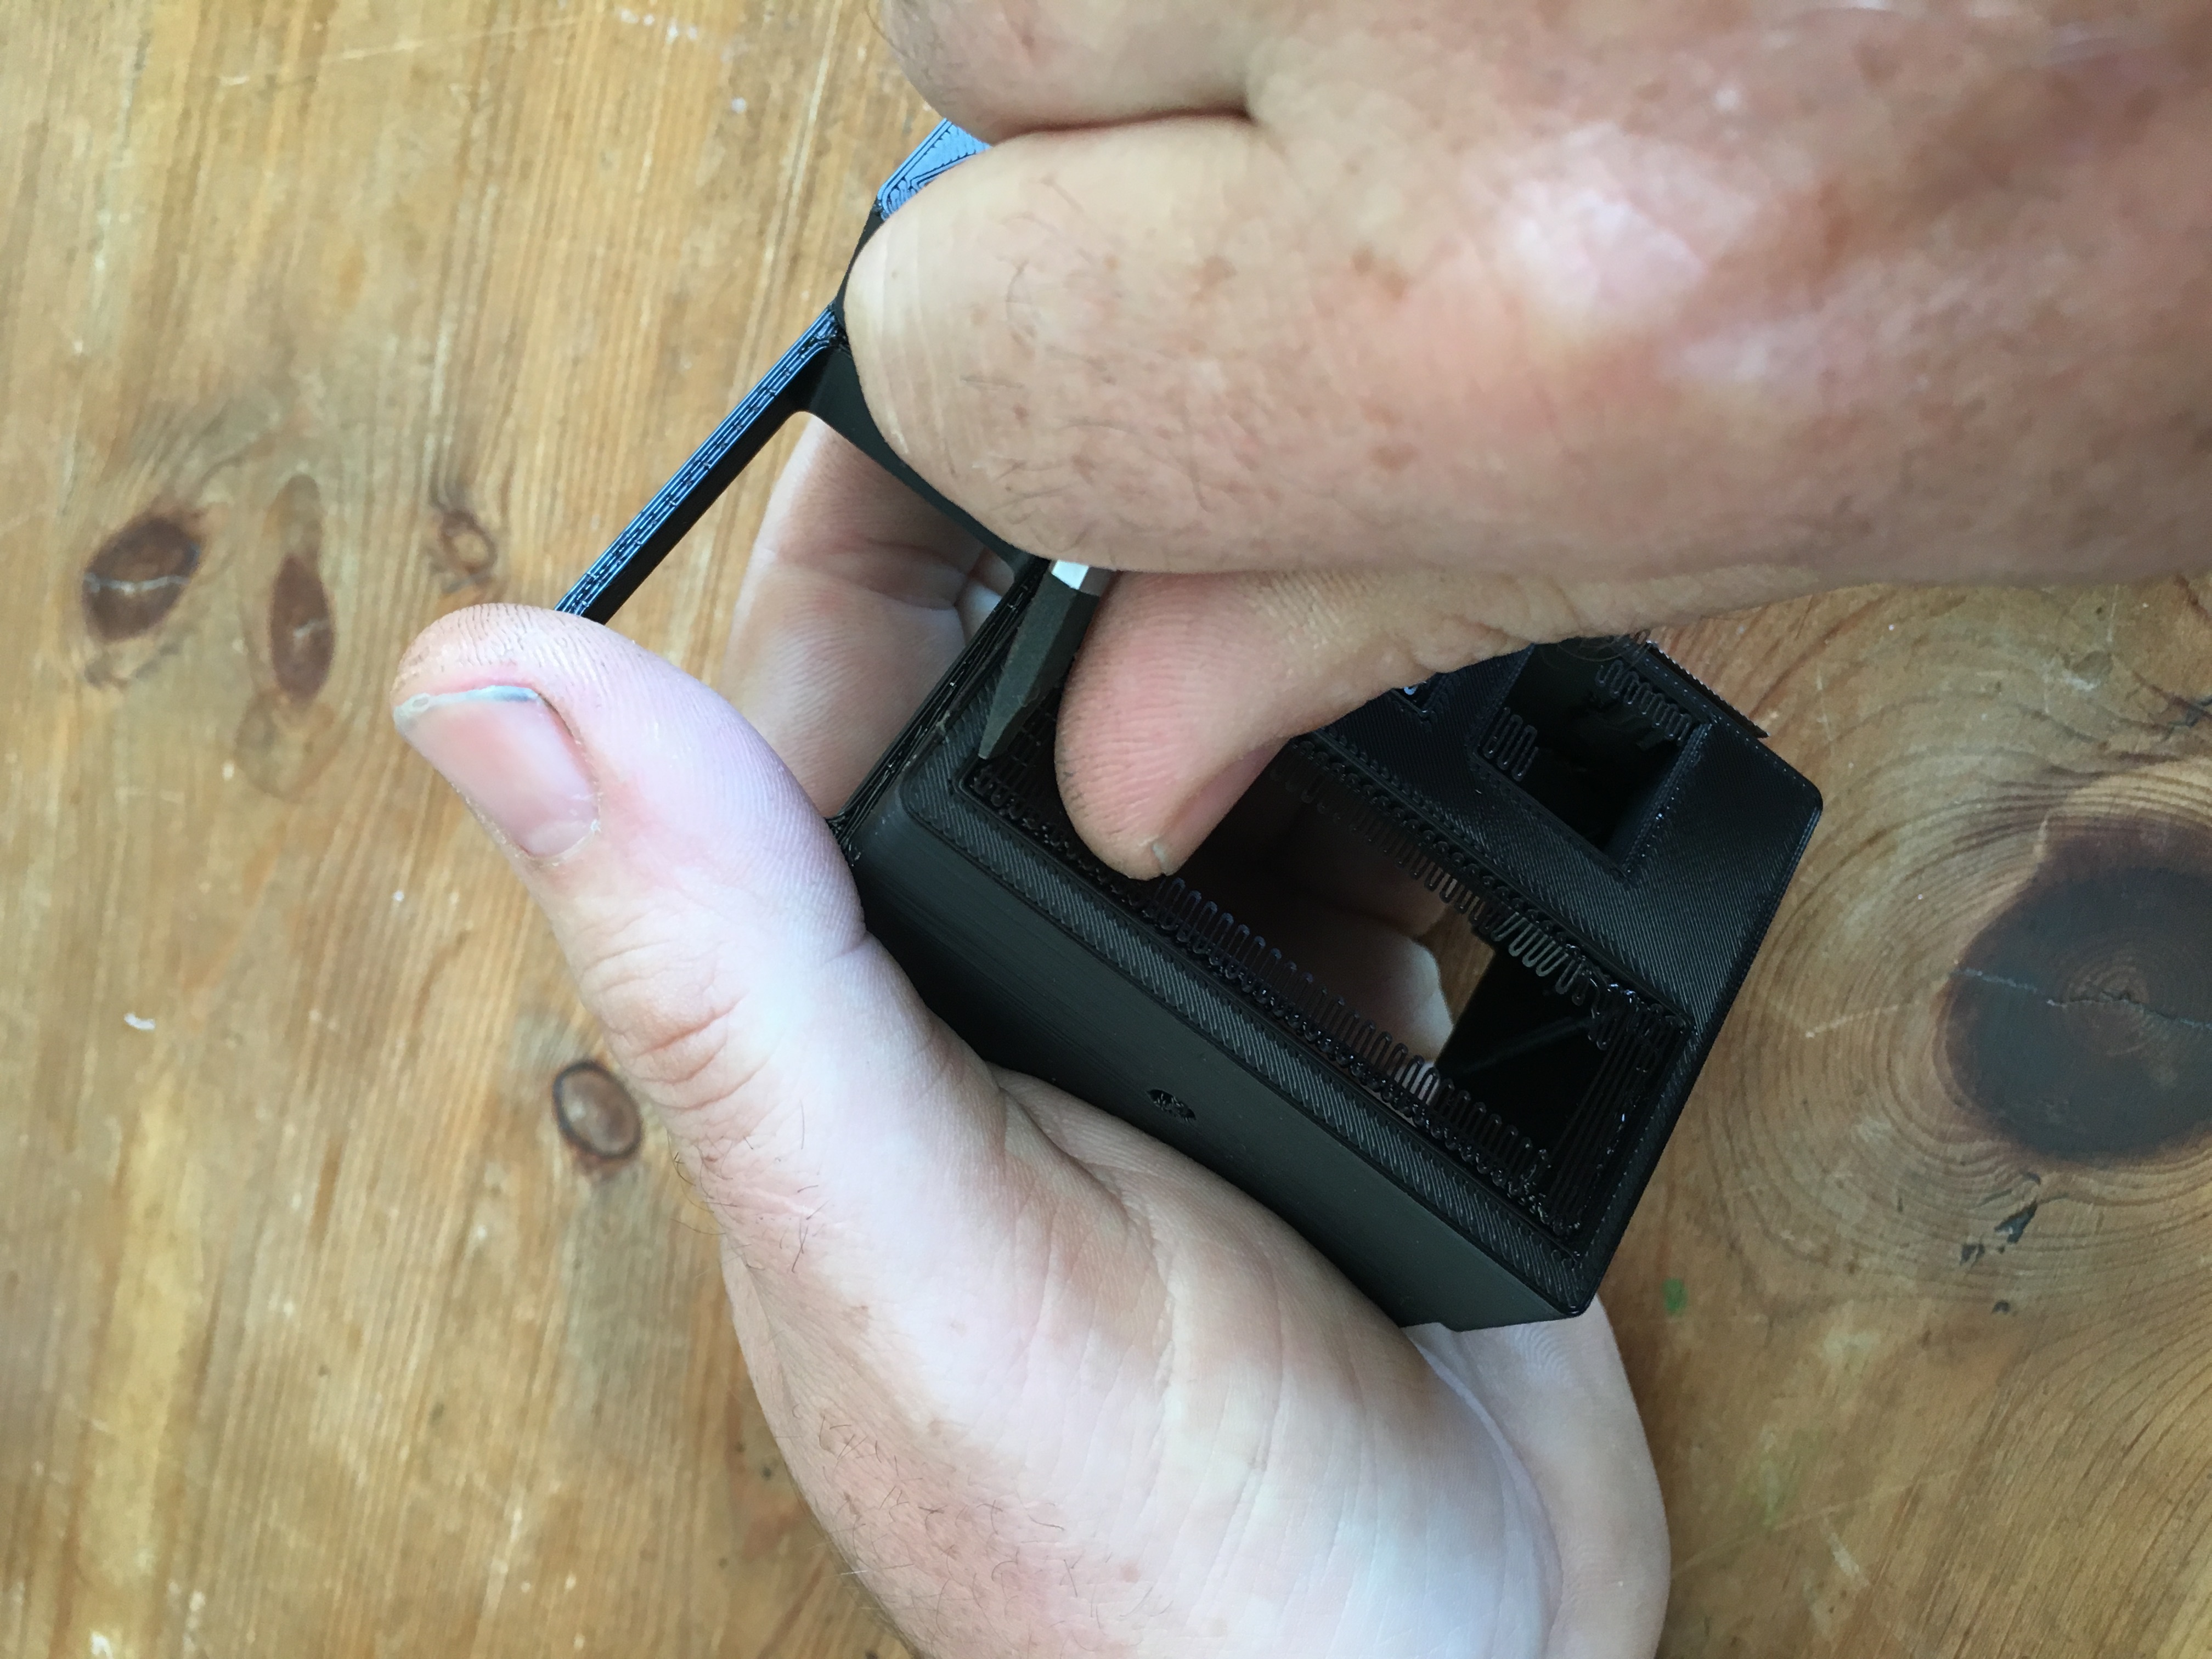
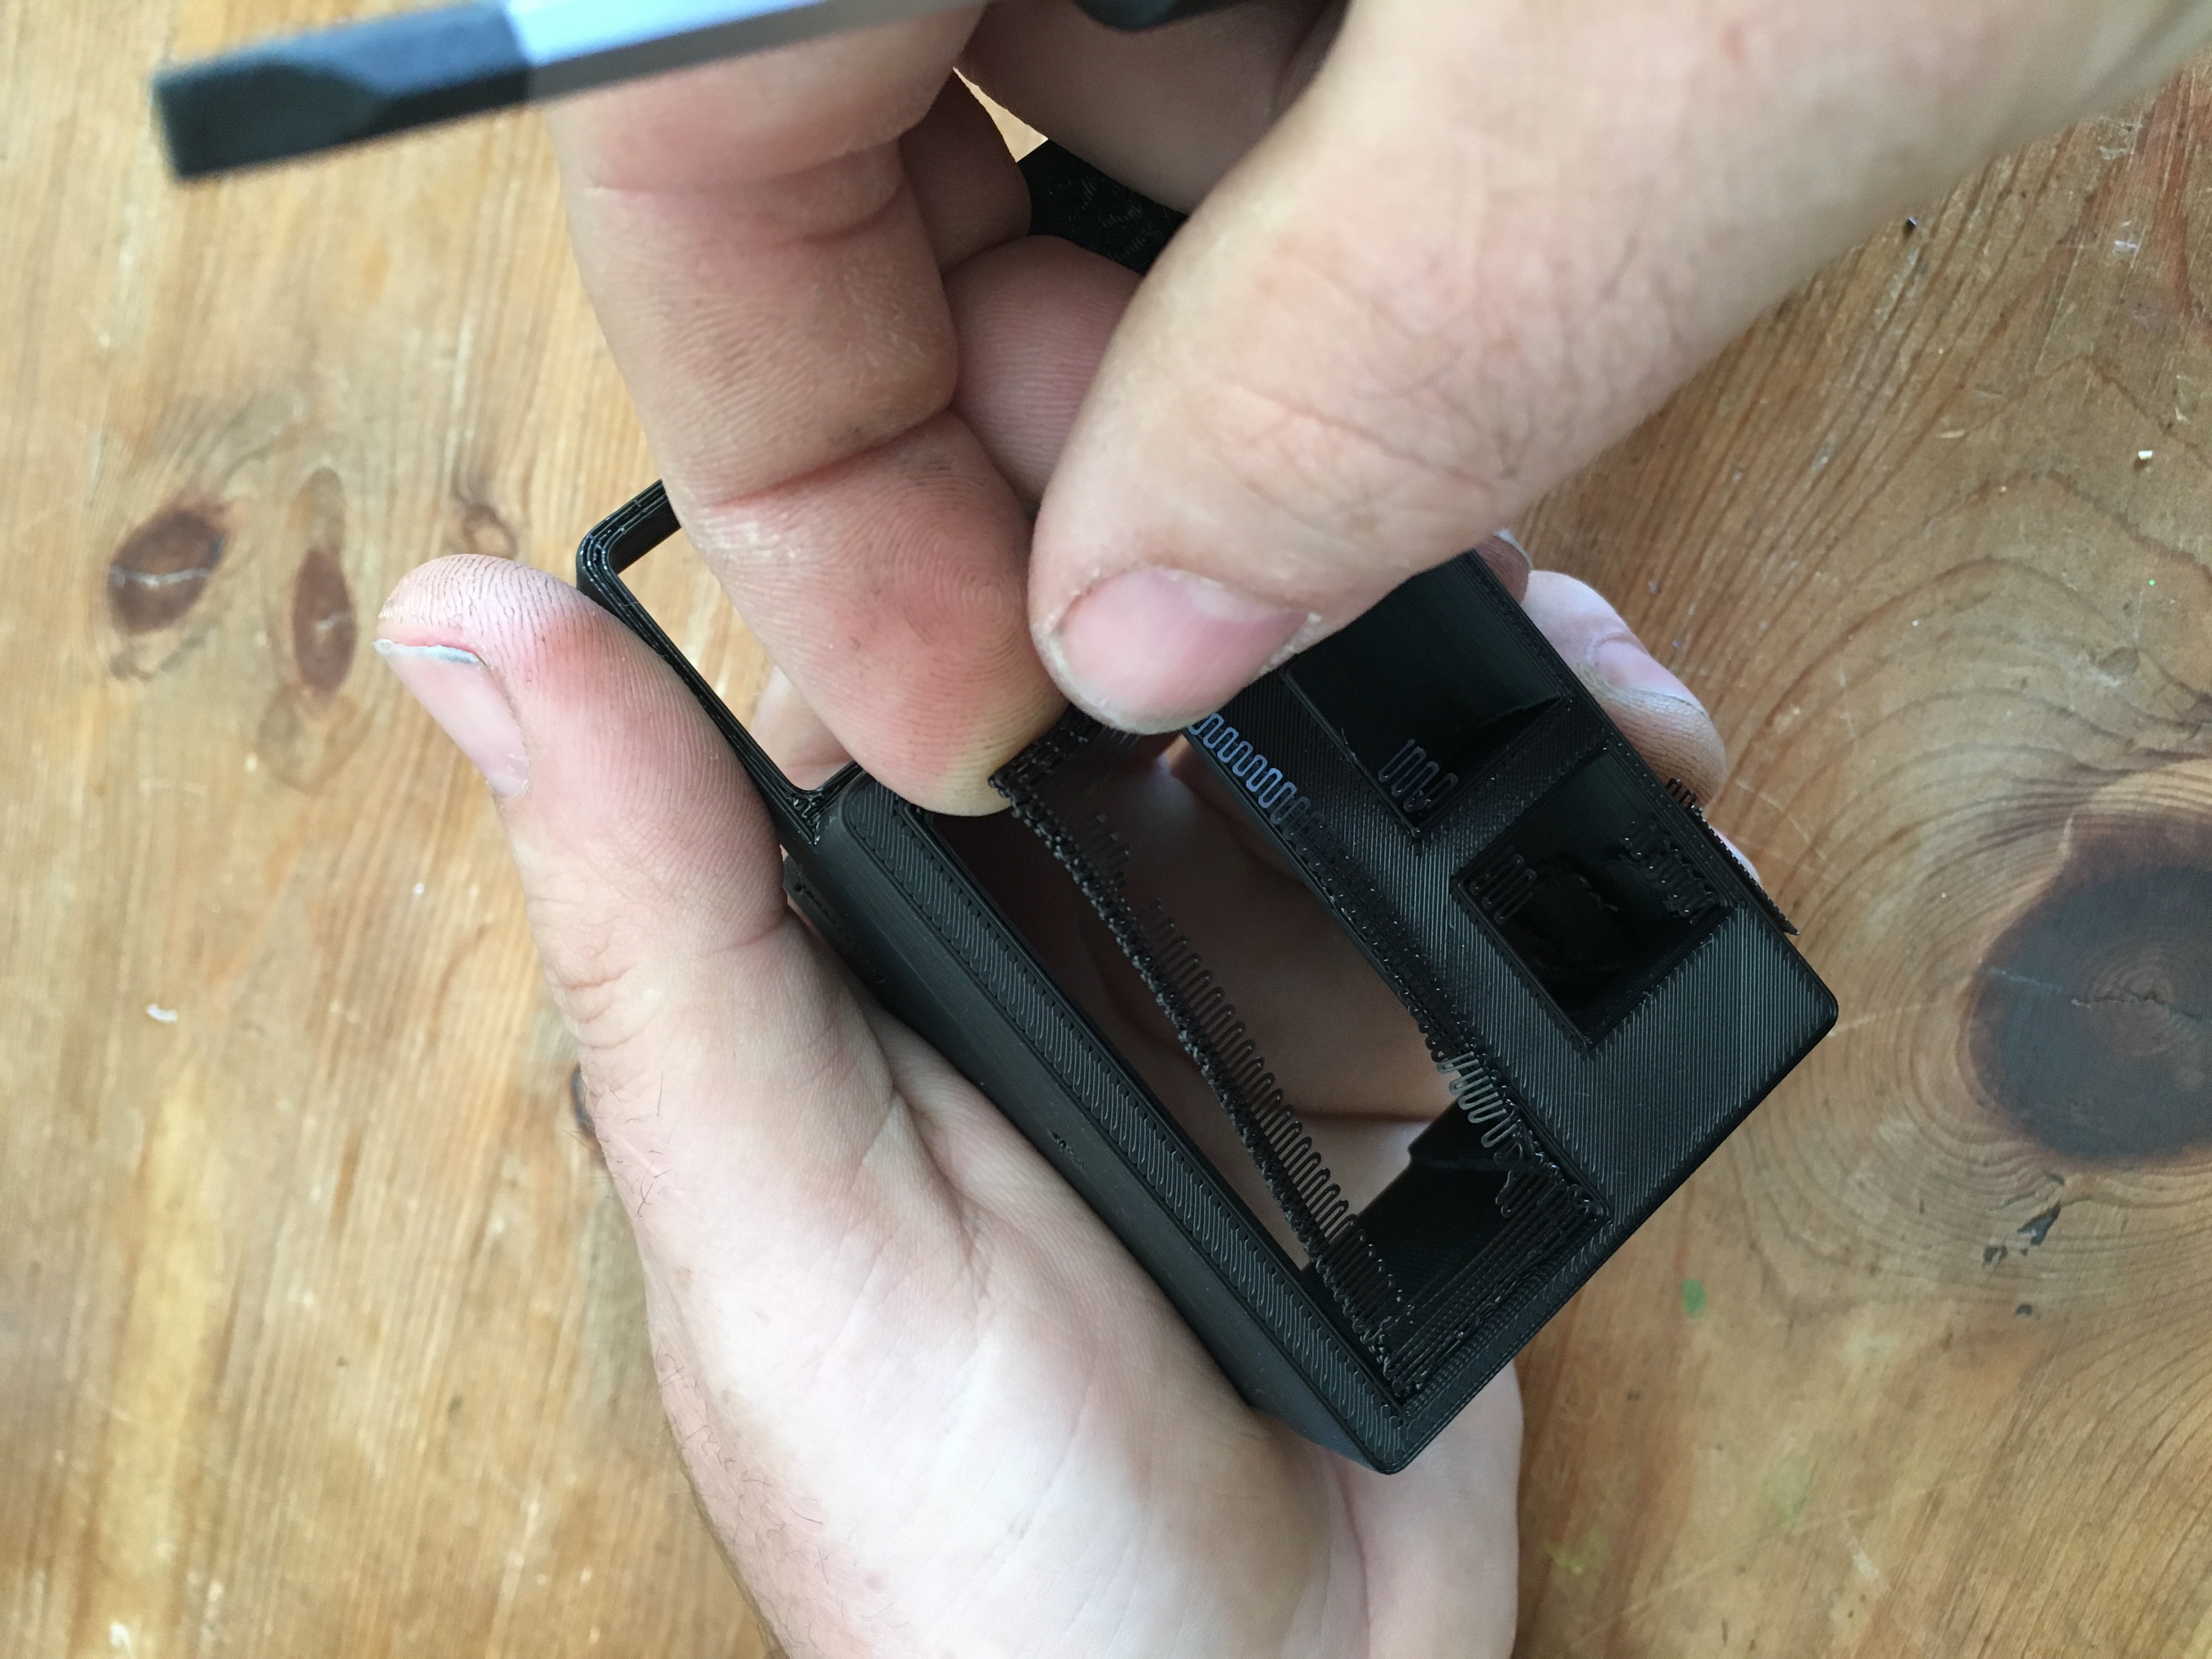
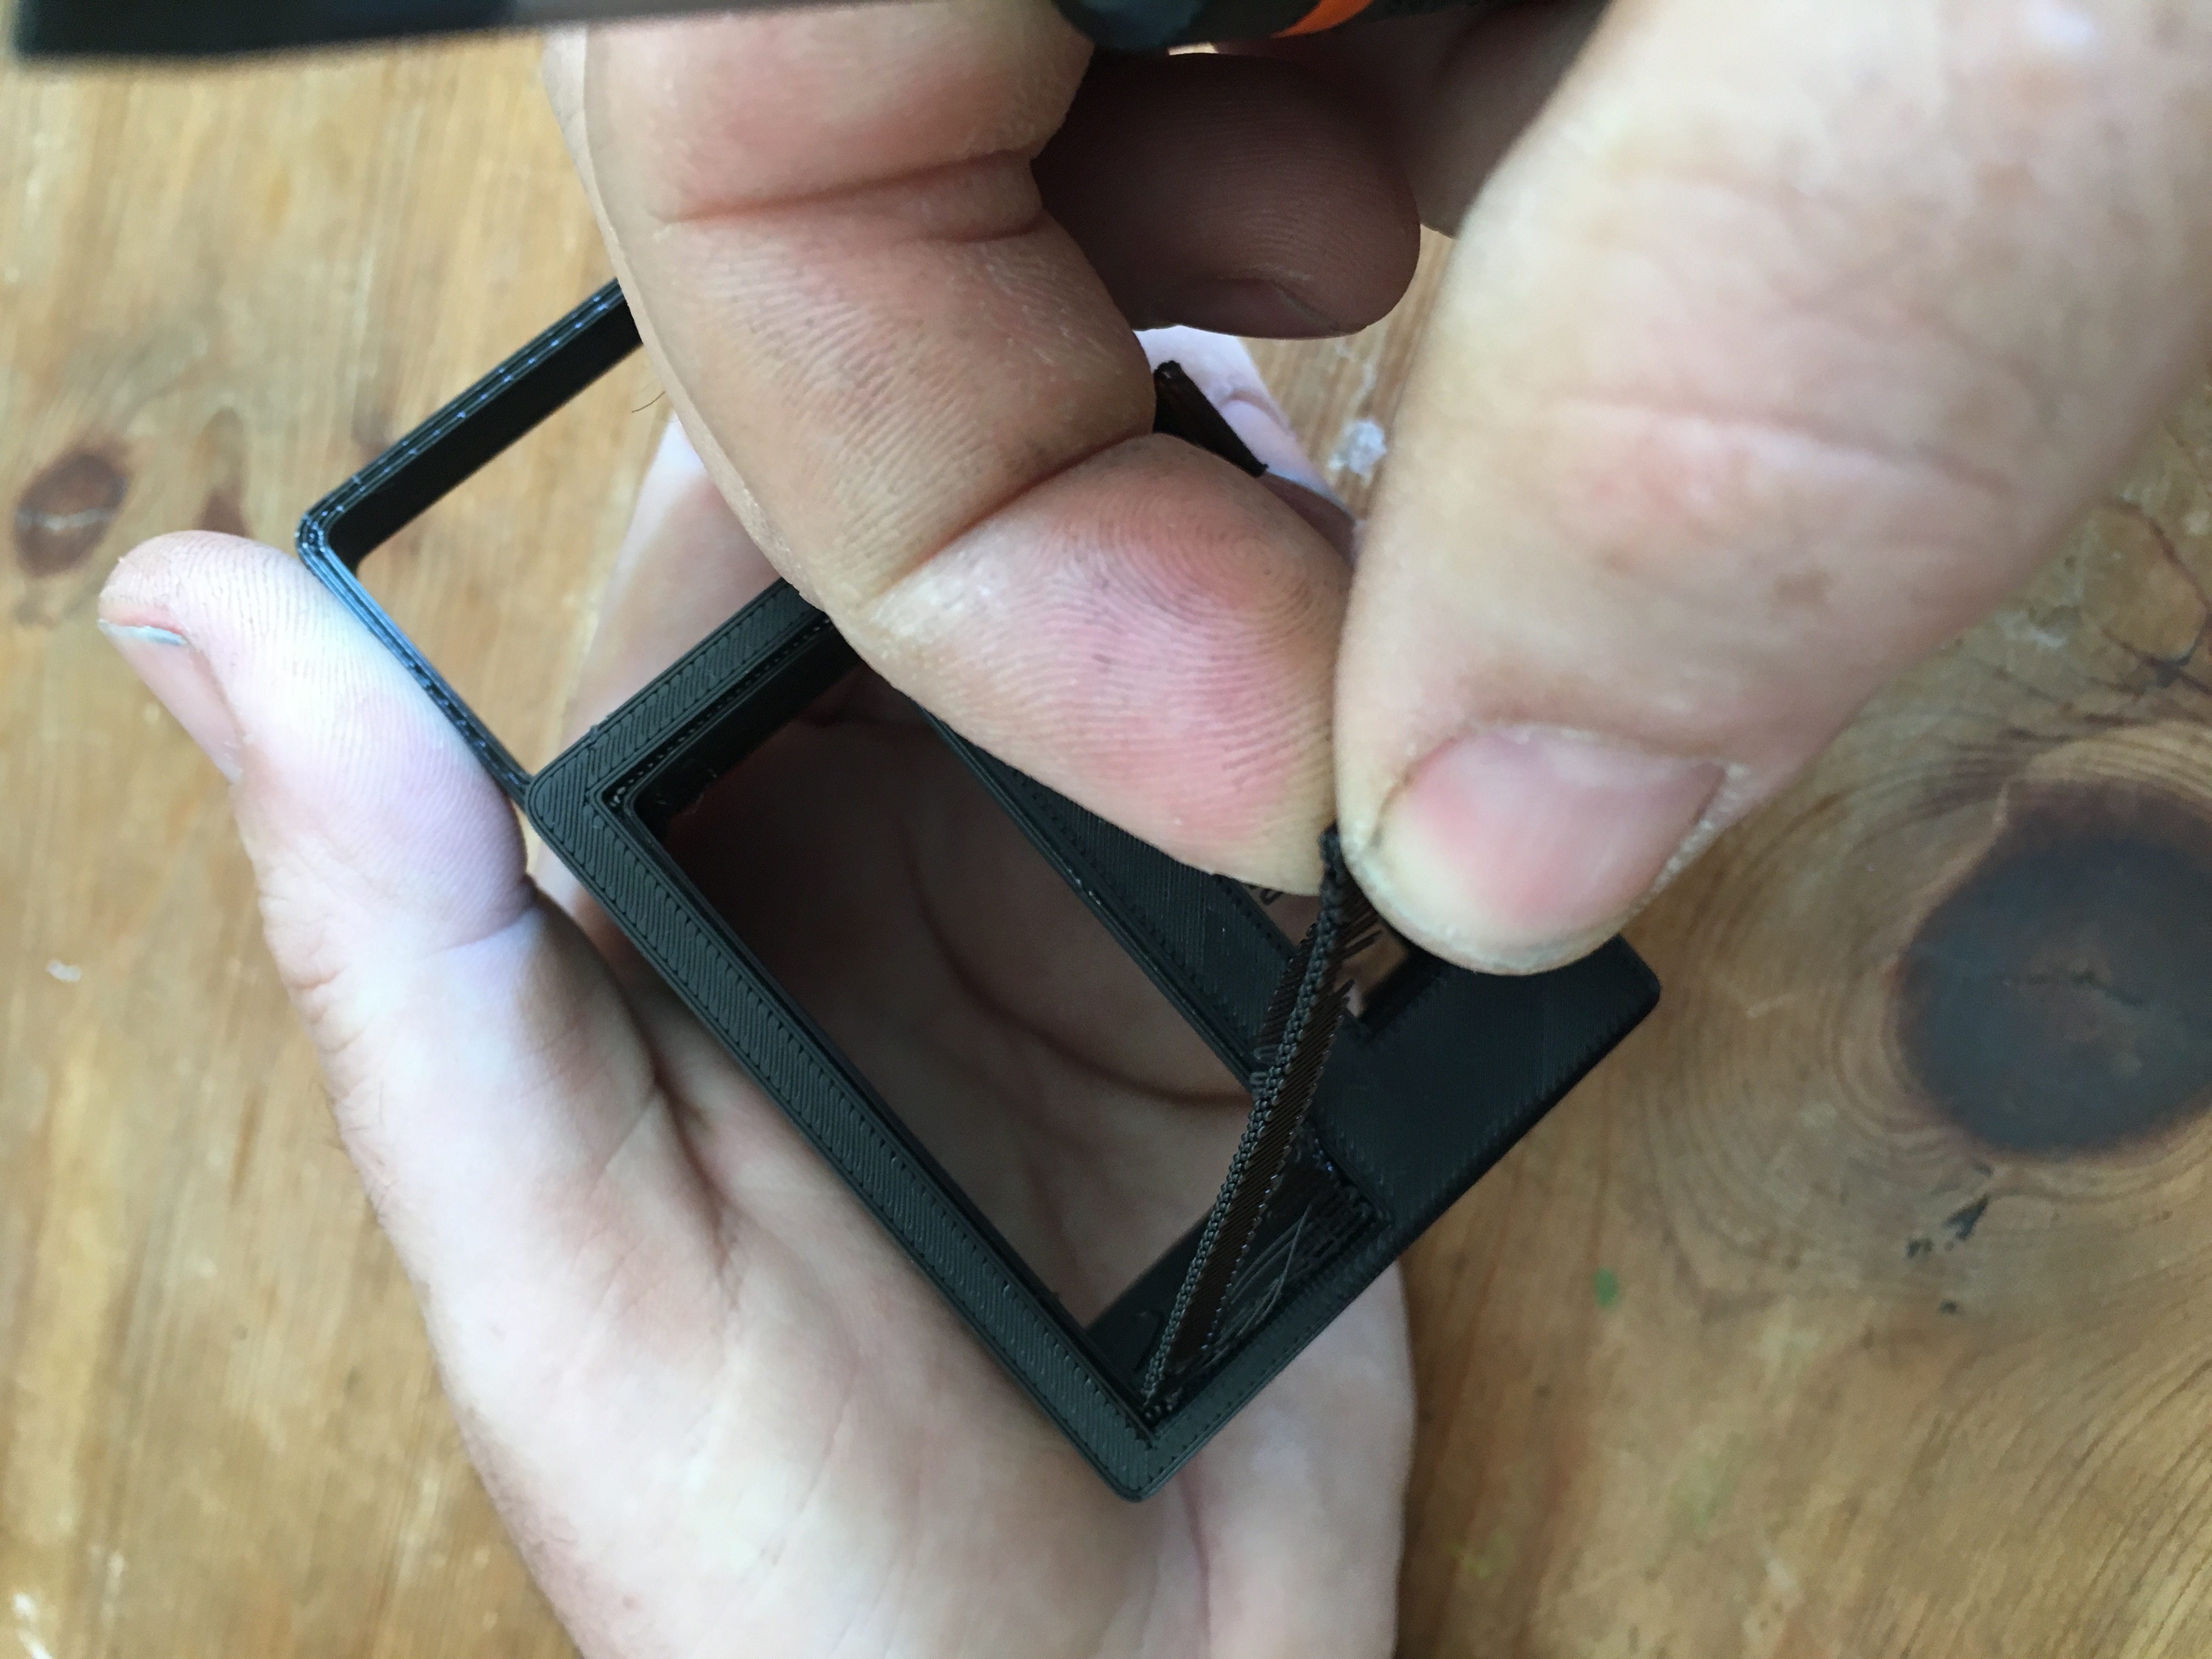
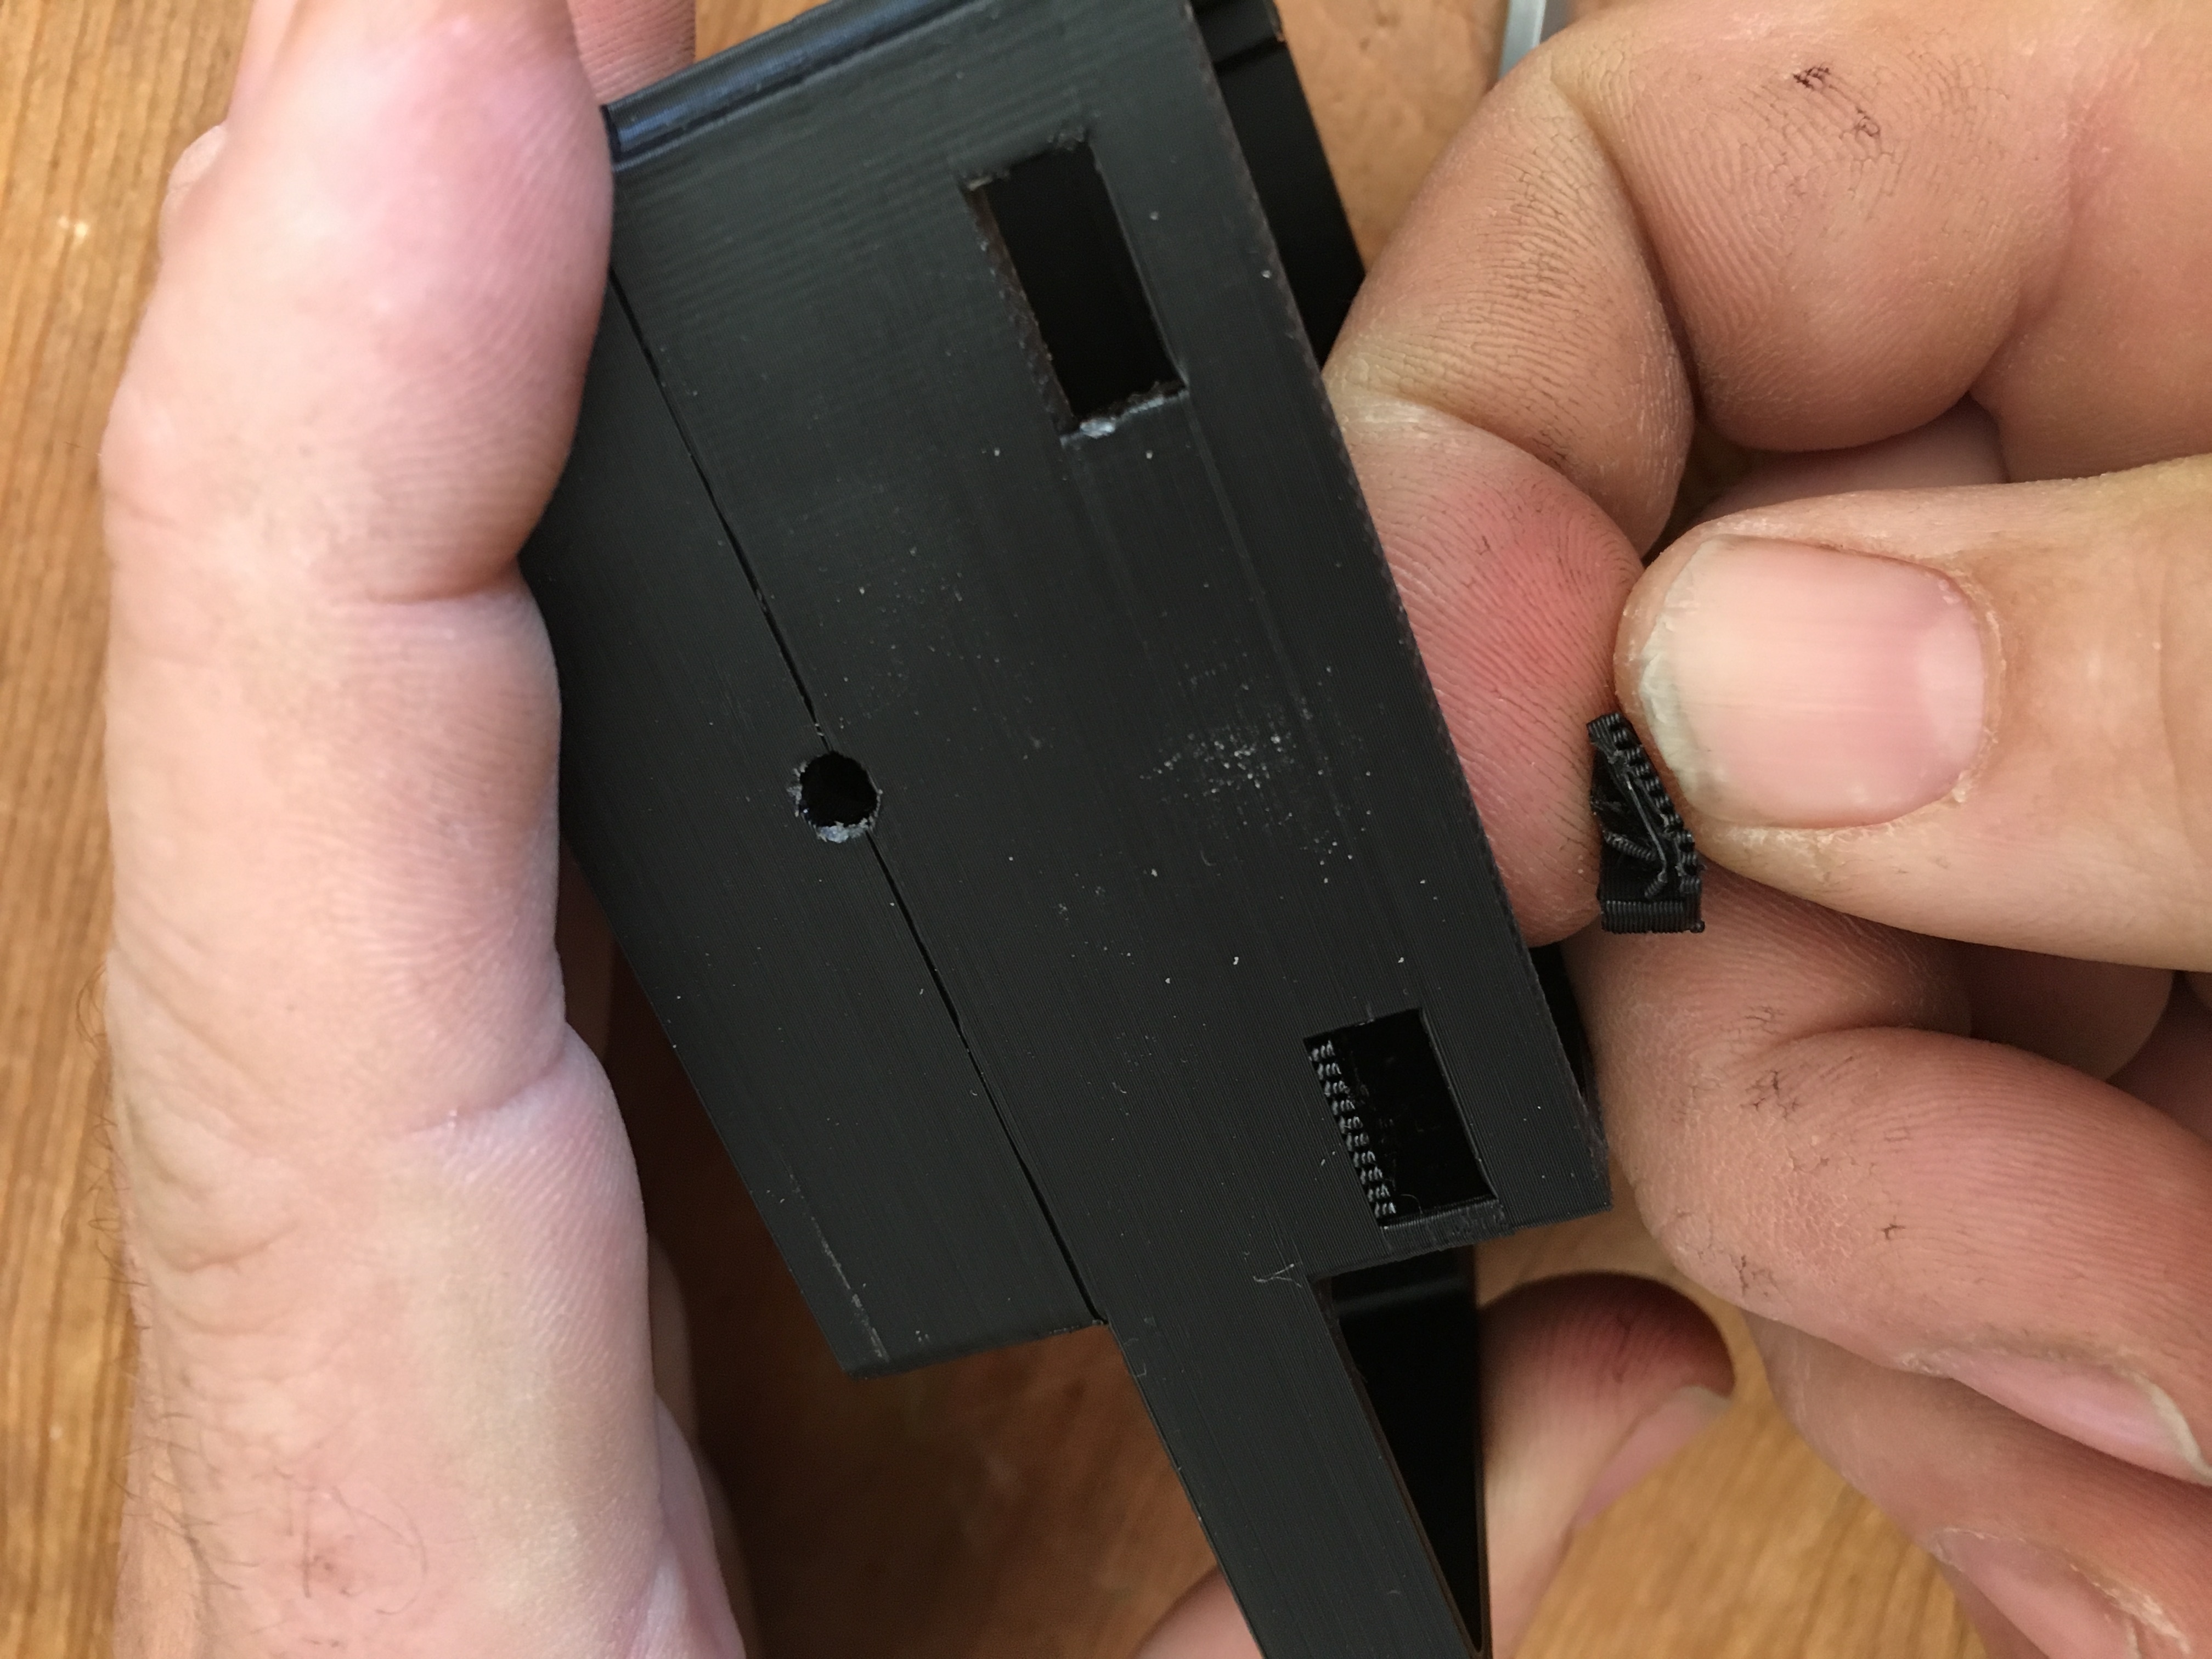
Your Fourby Multifunction USB clock is 3D printed, we will need to do some clean up of the print before we can assemble the electronics.
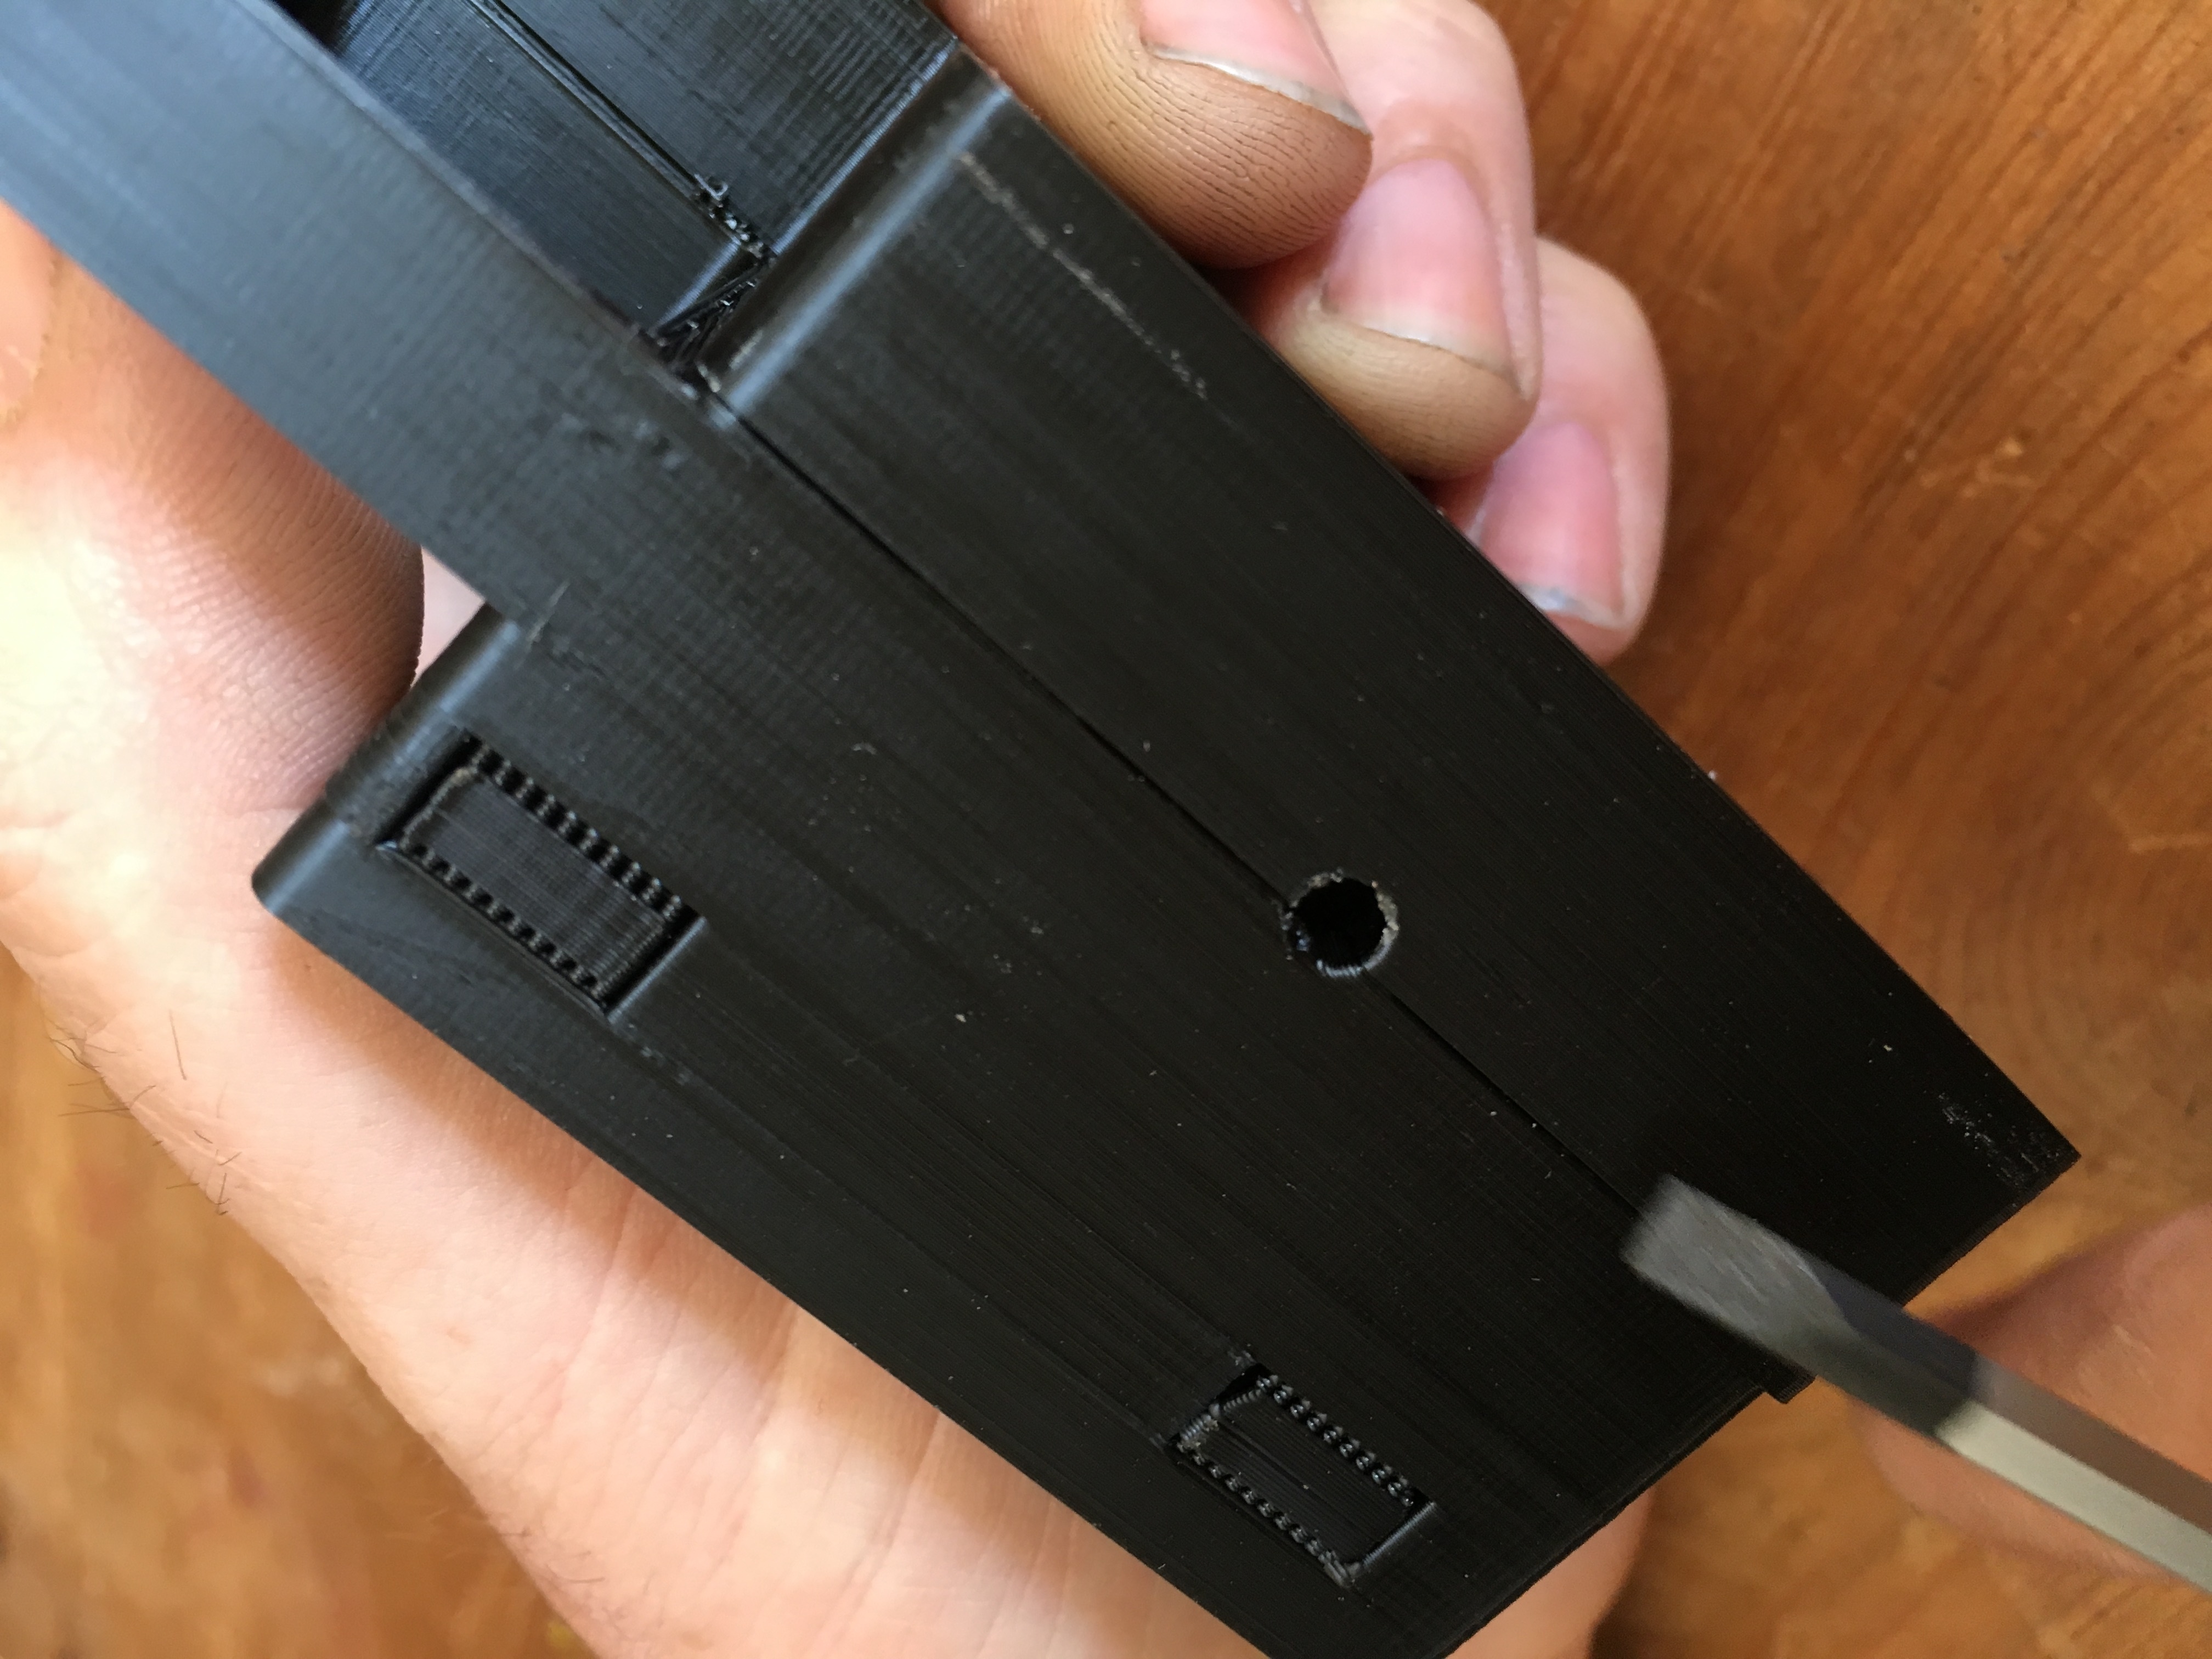
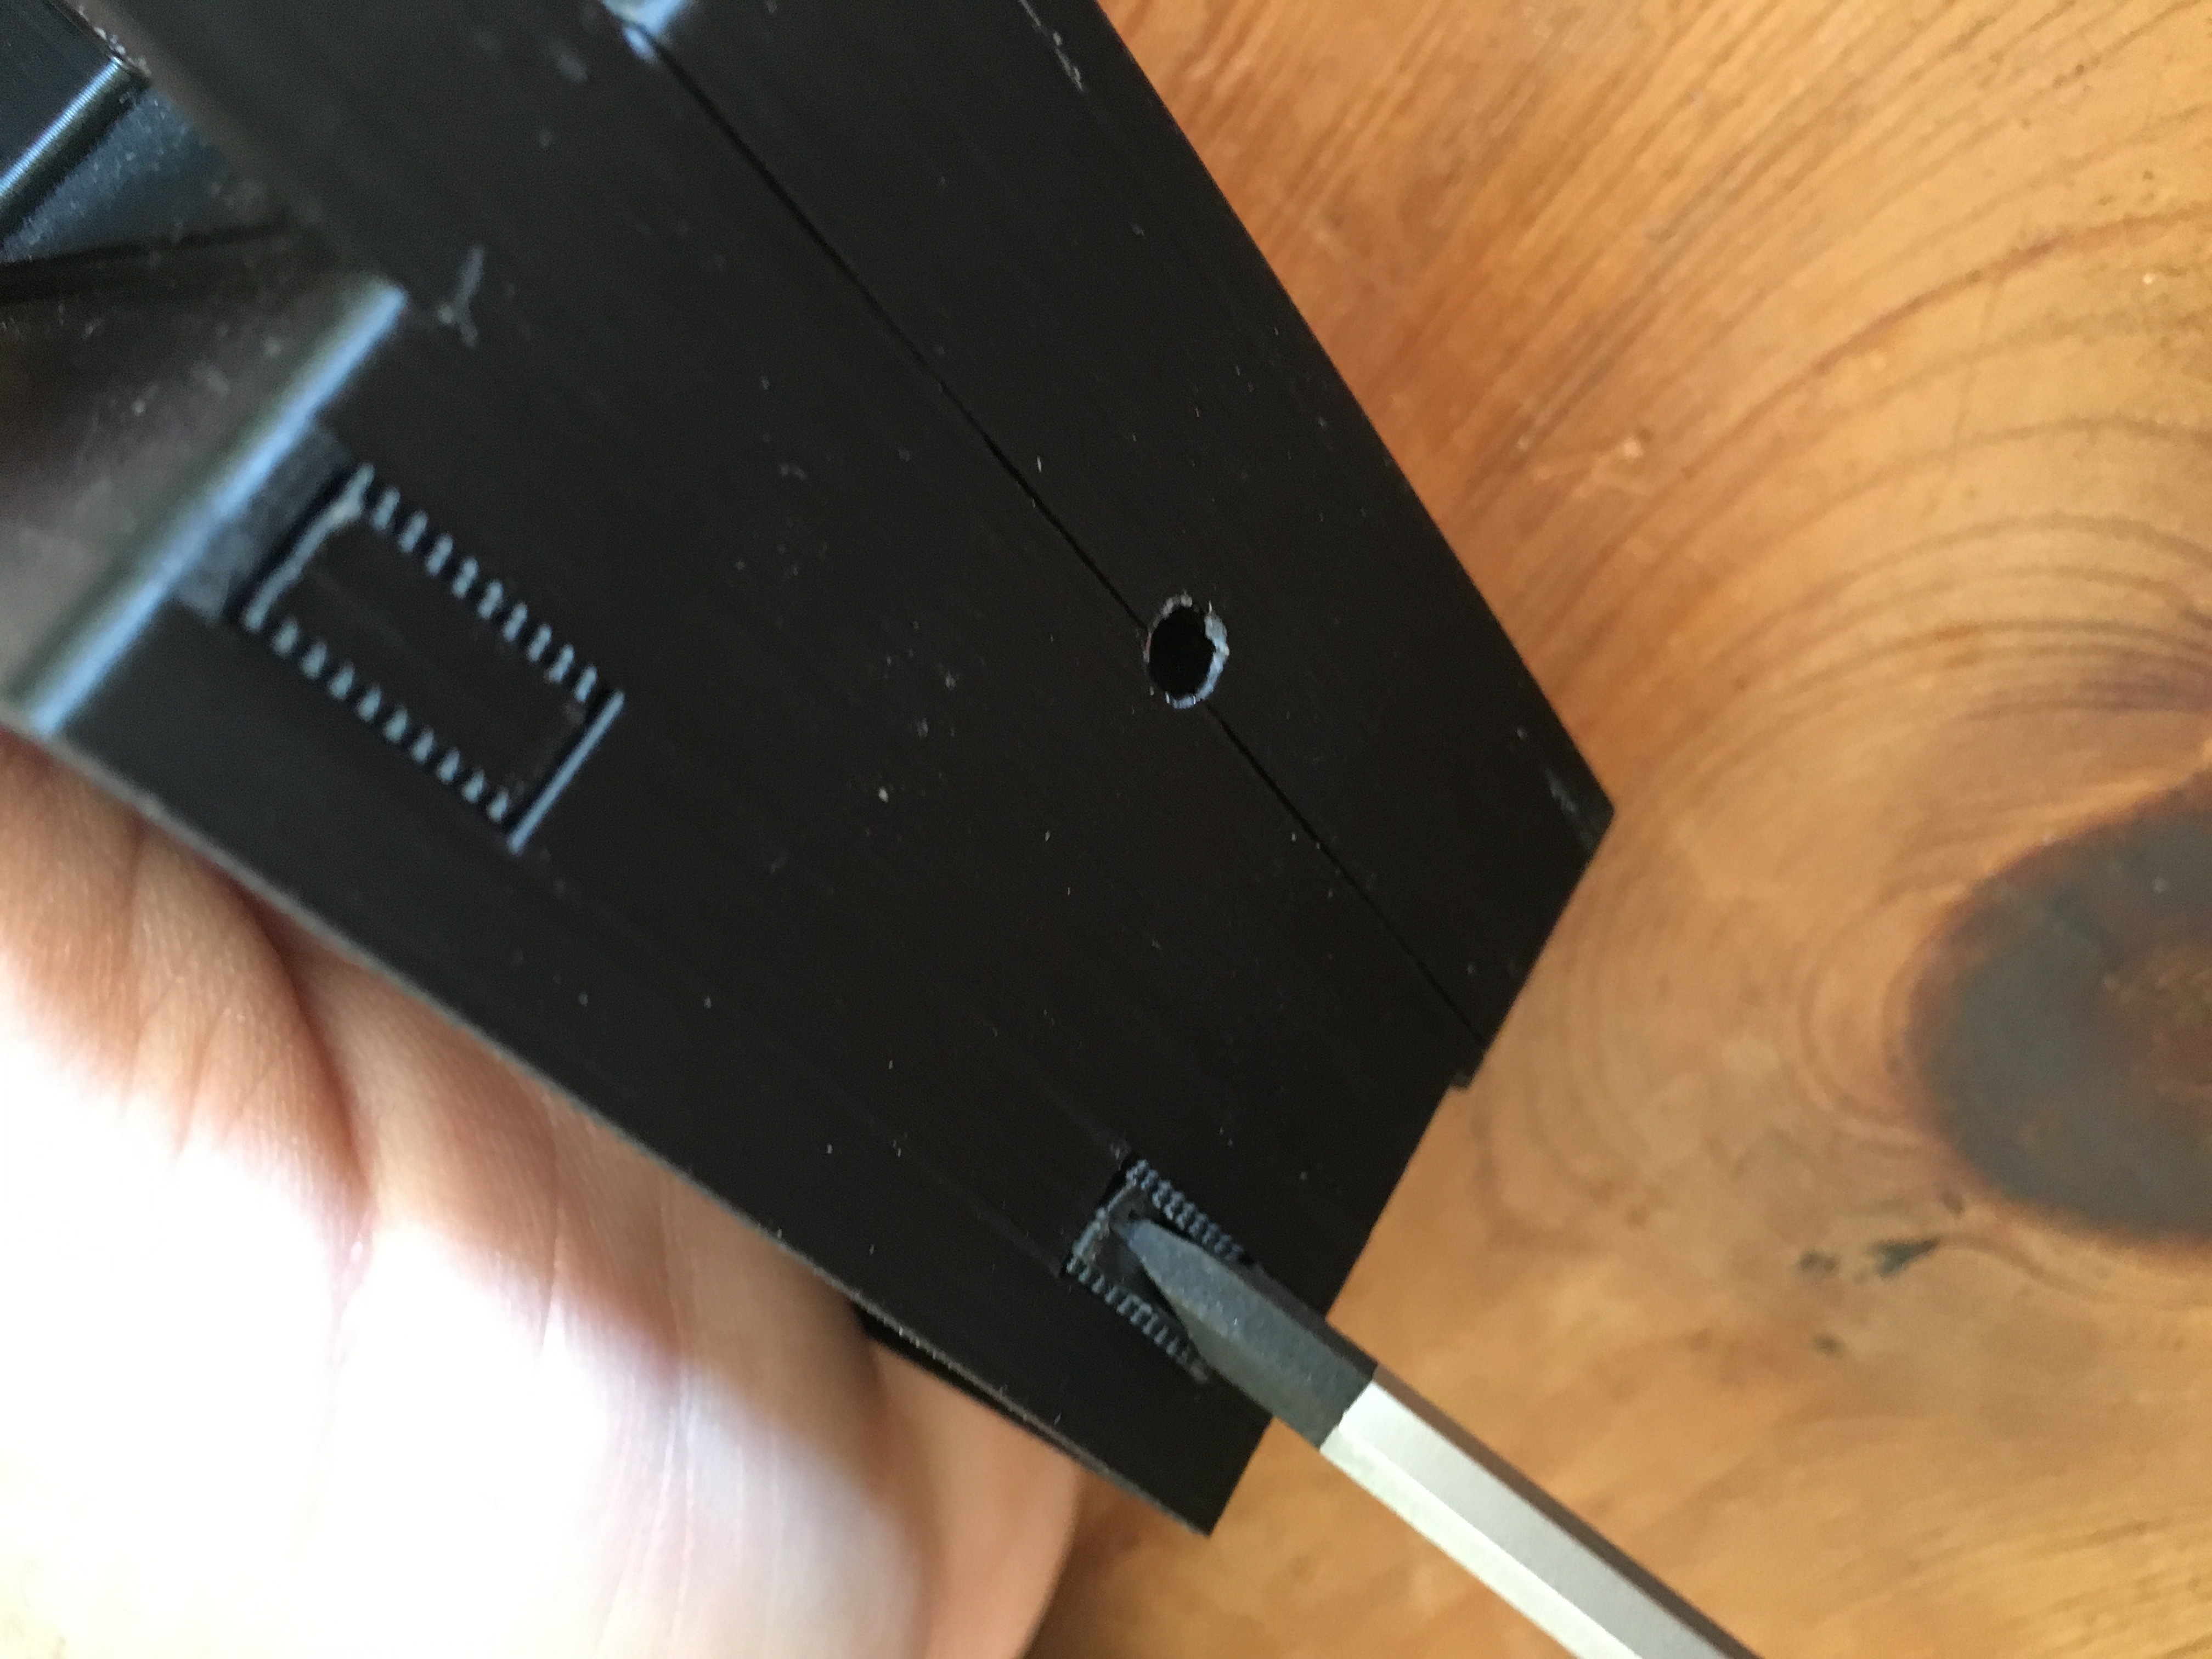
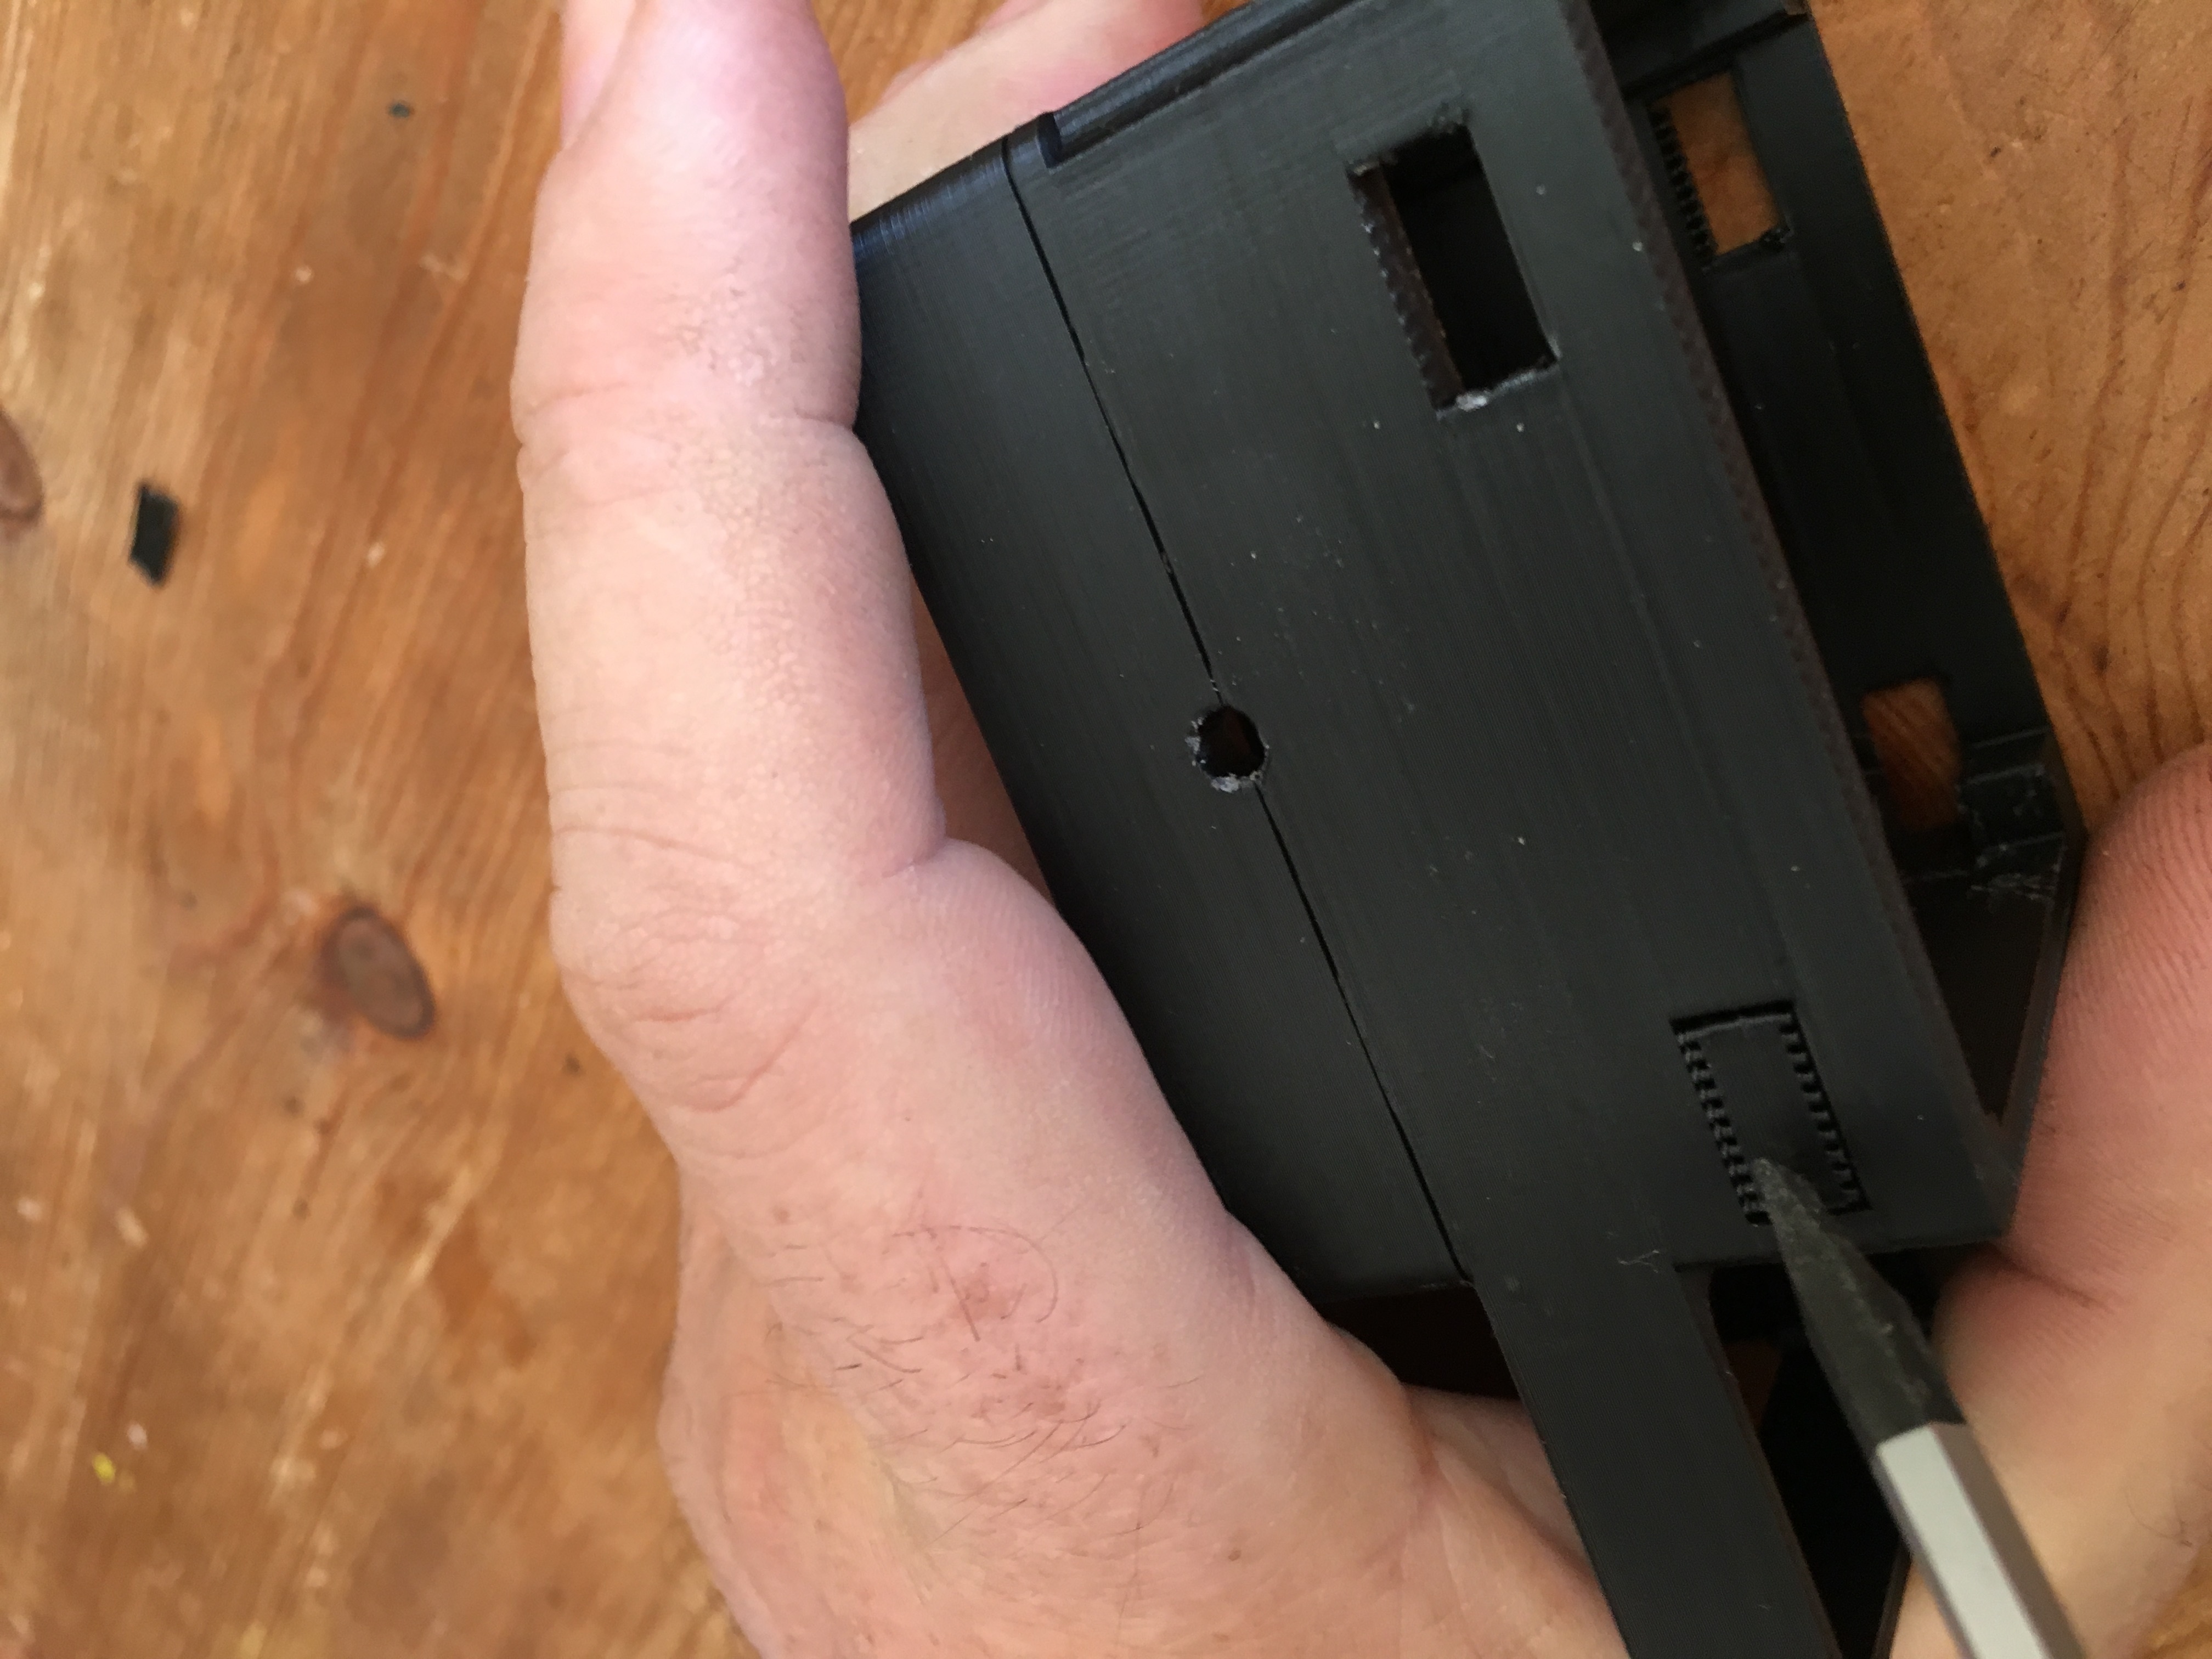
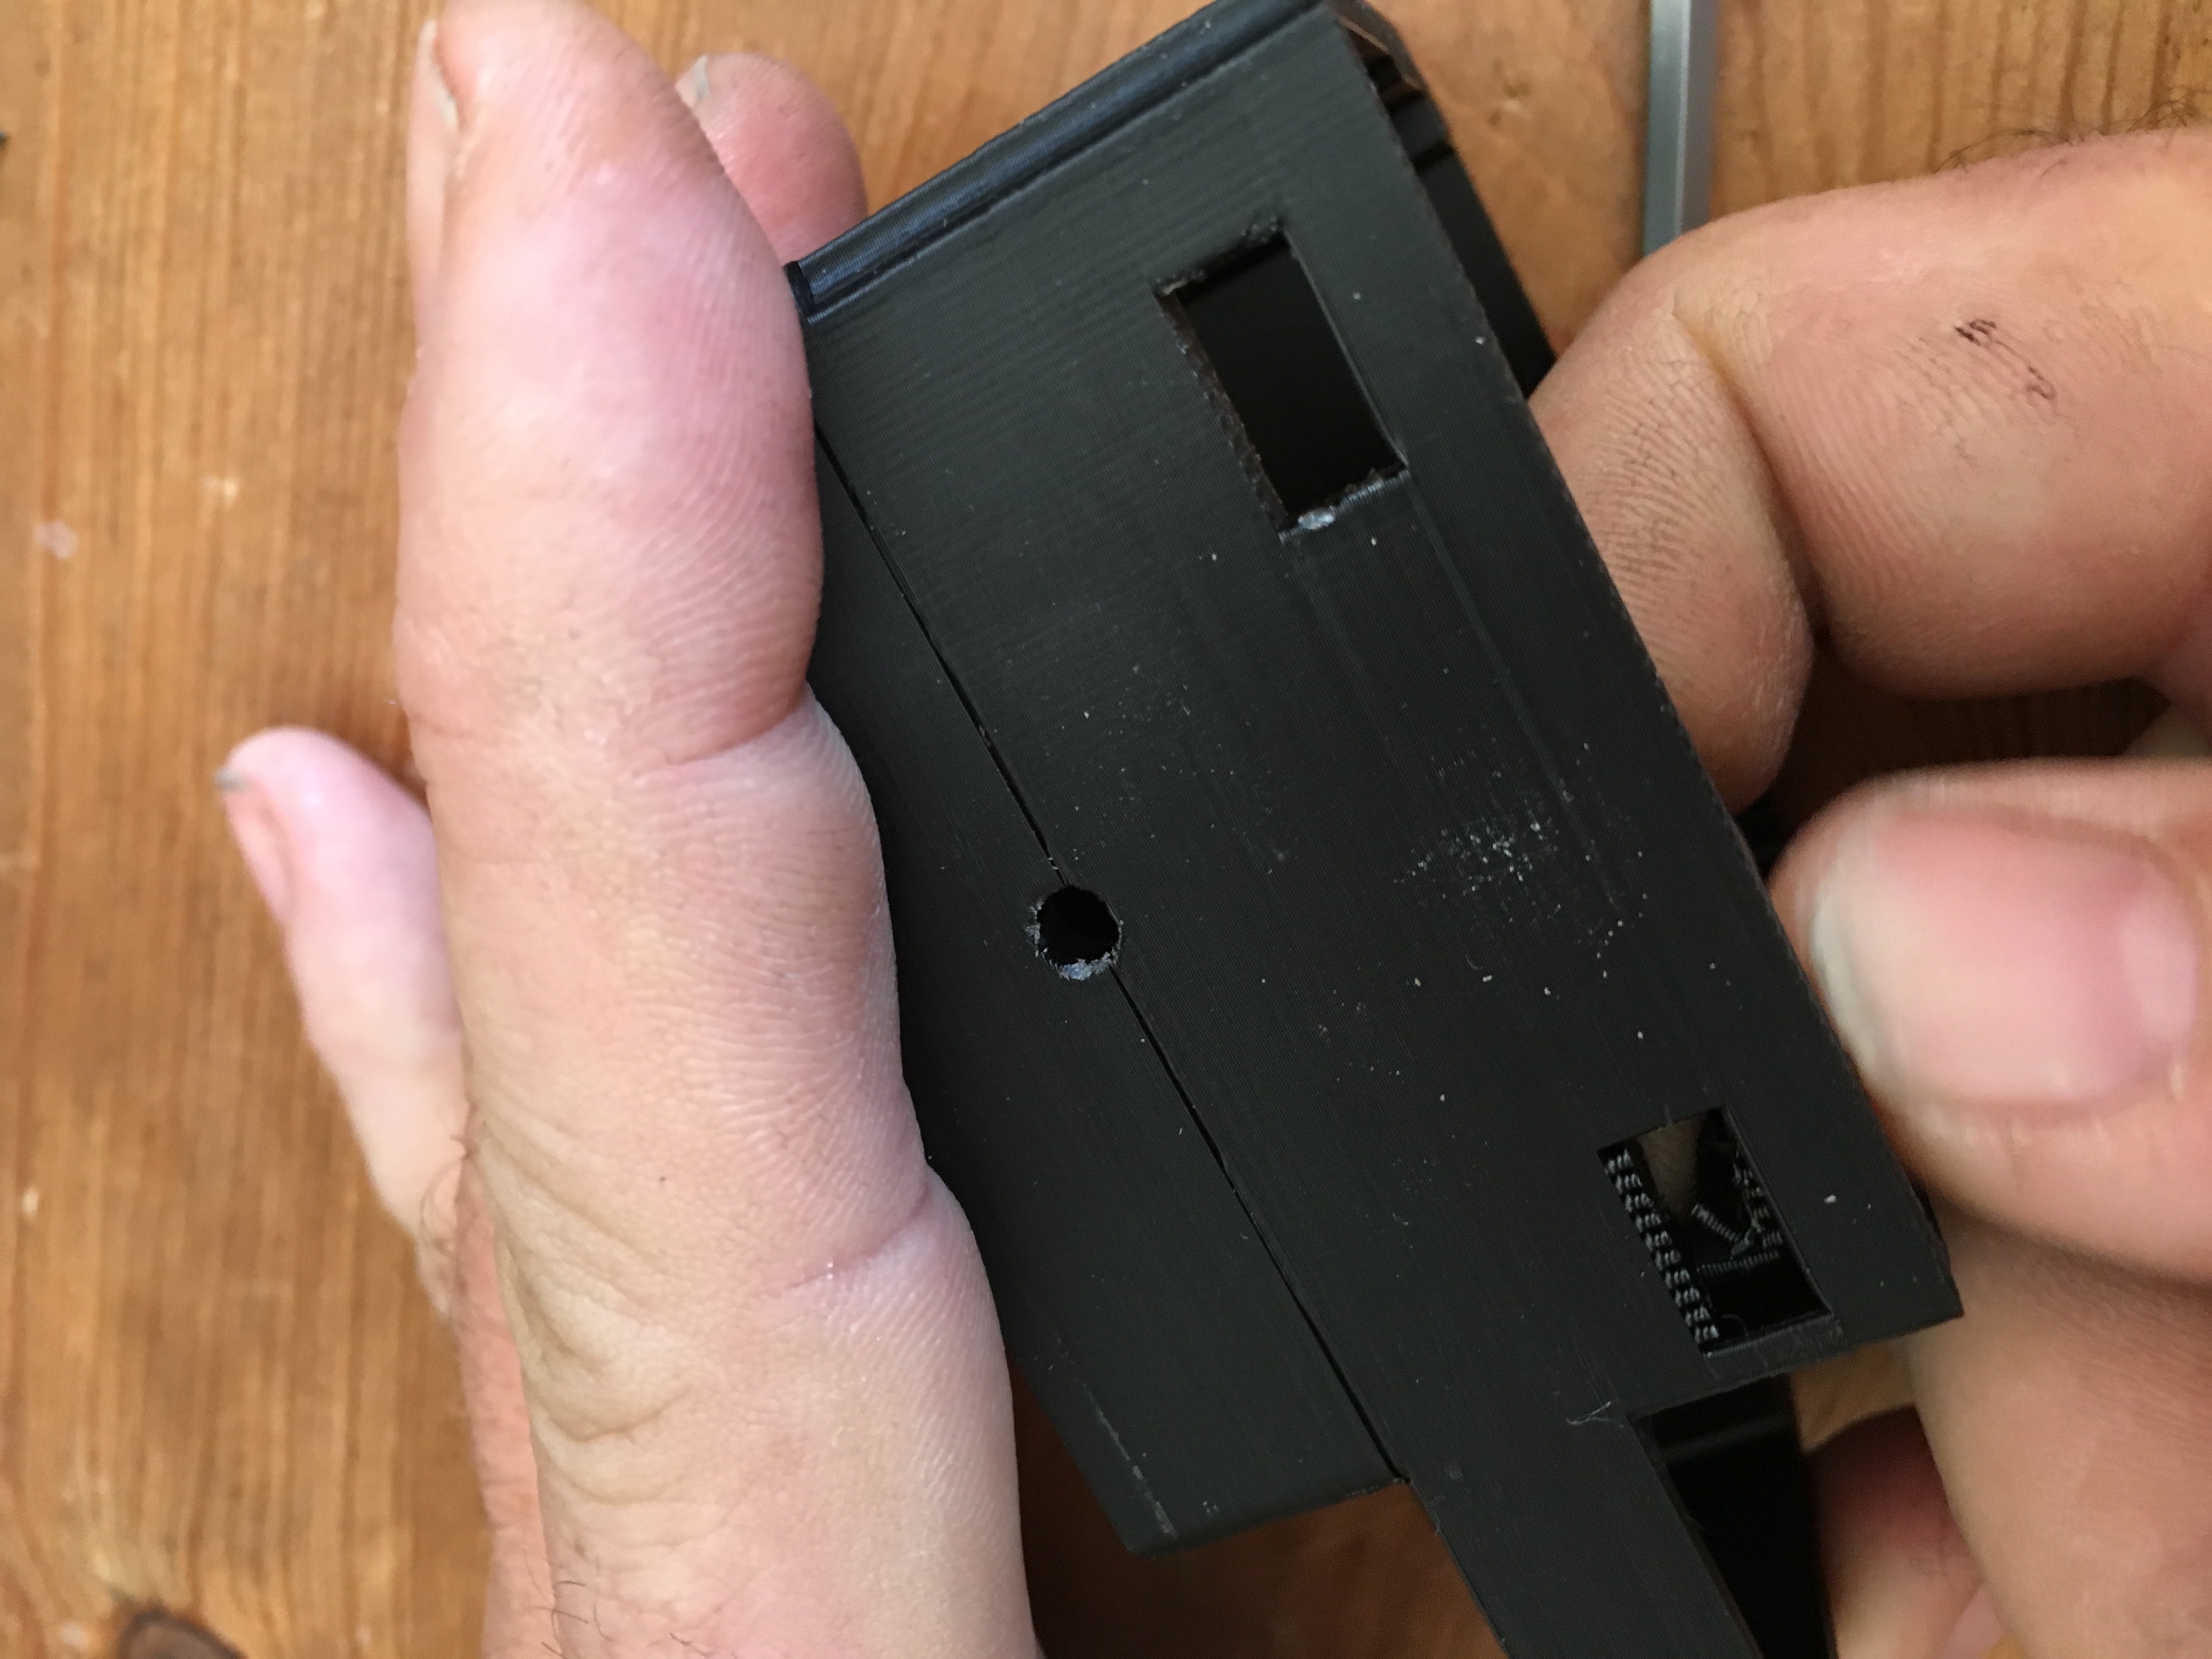
Follow the pictures below to remove the support material created during the printing phase.
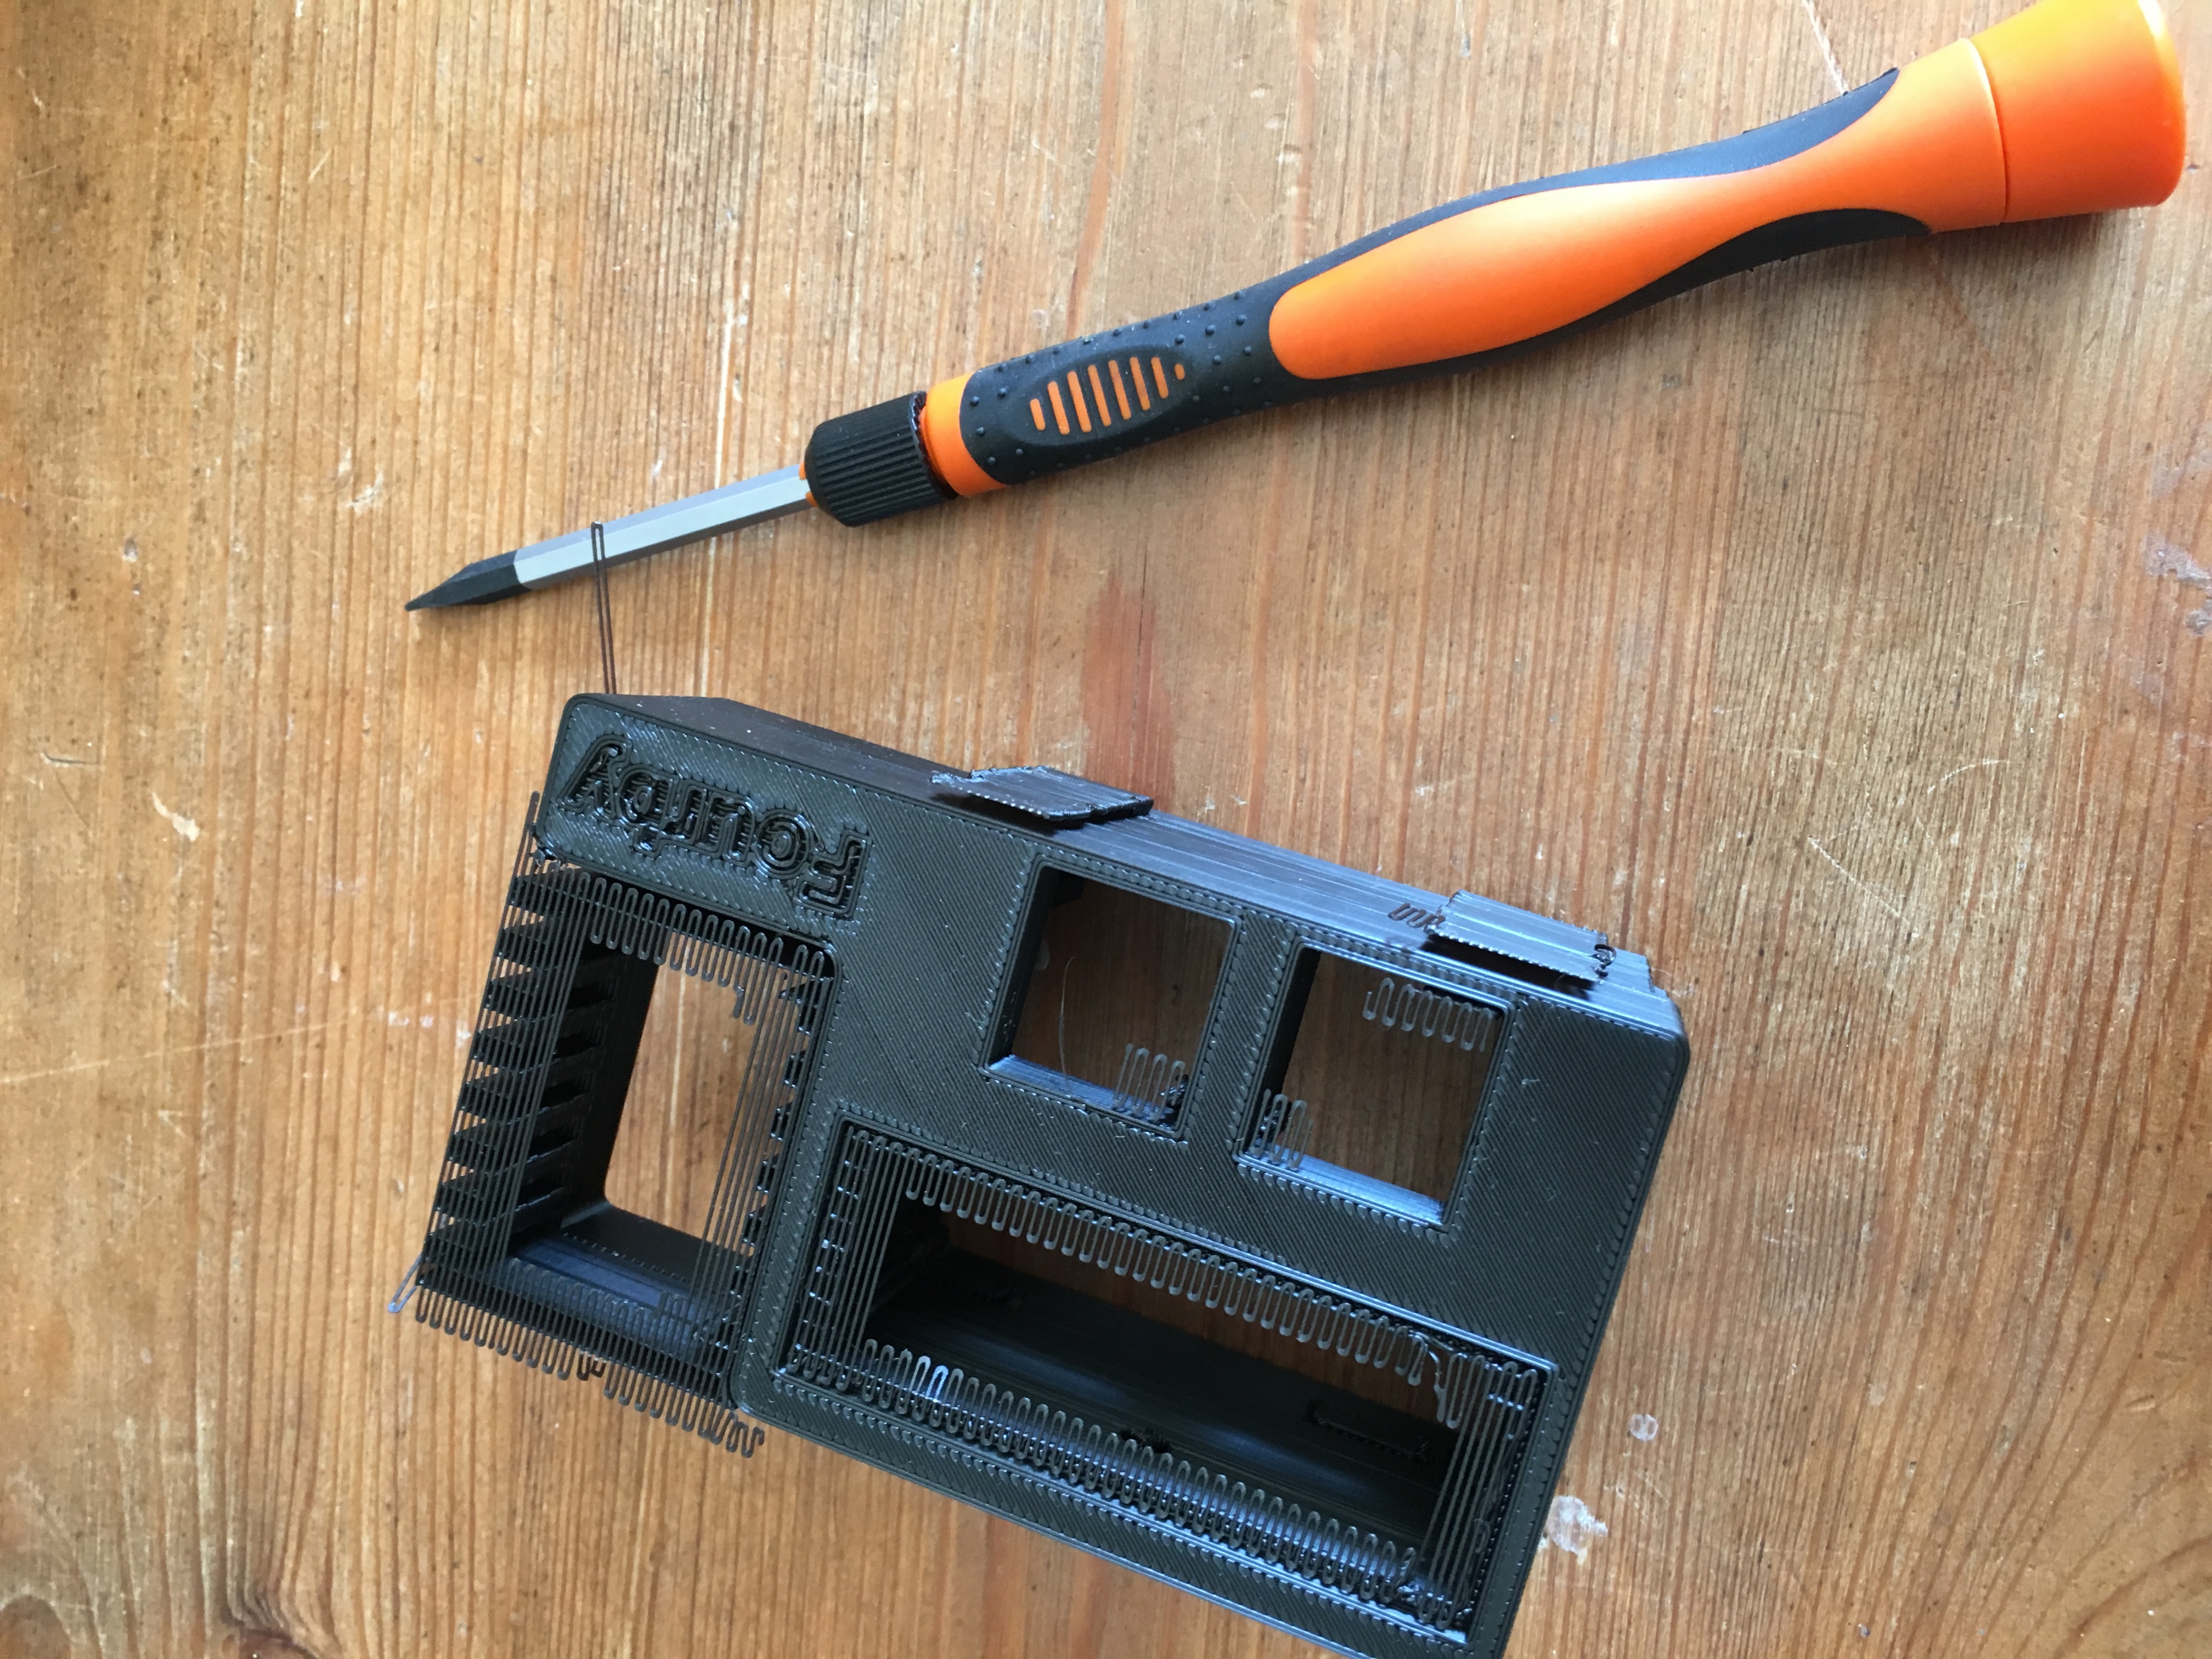
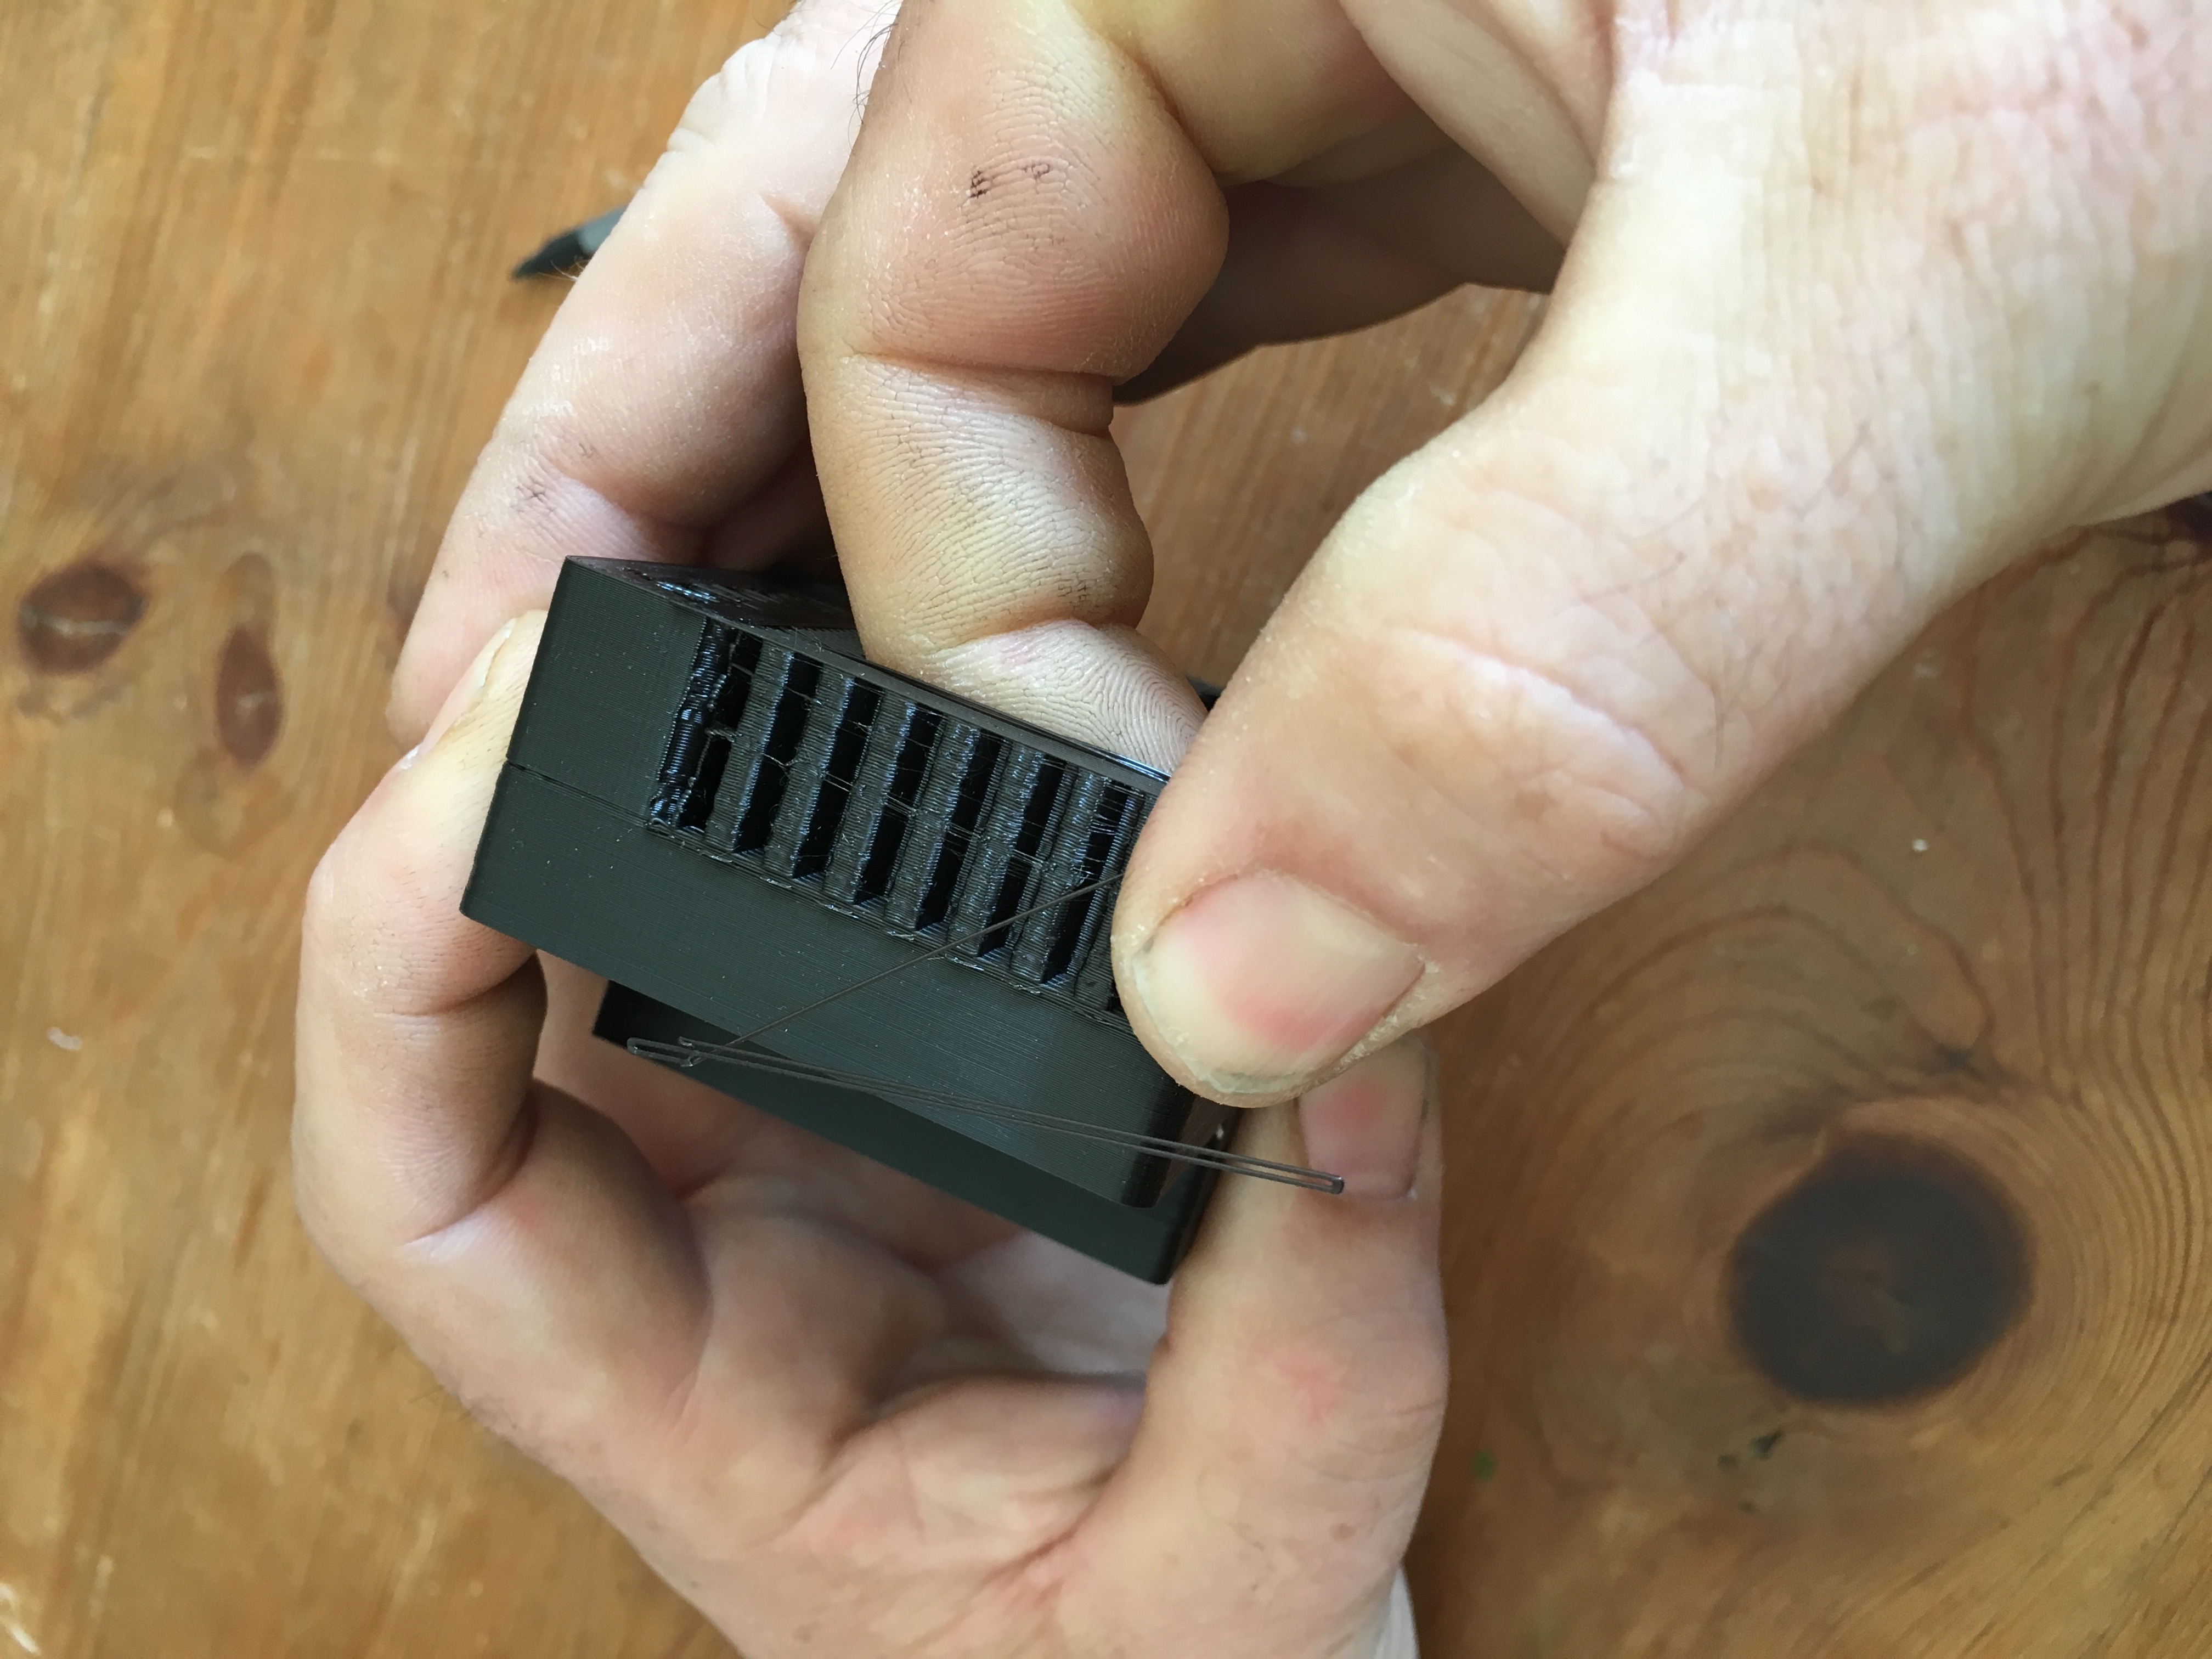
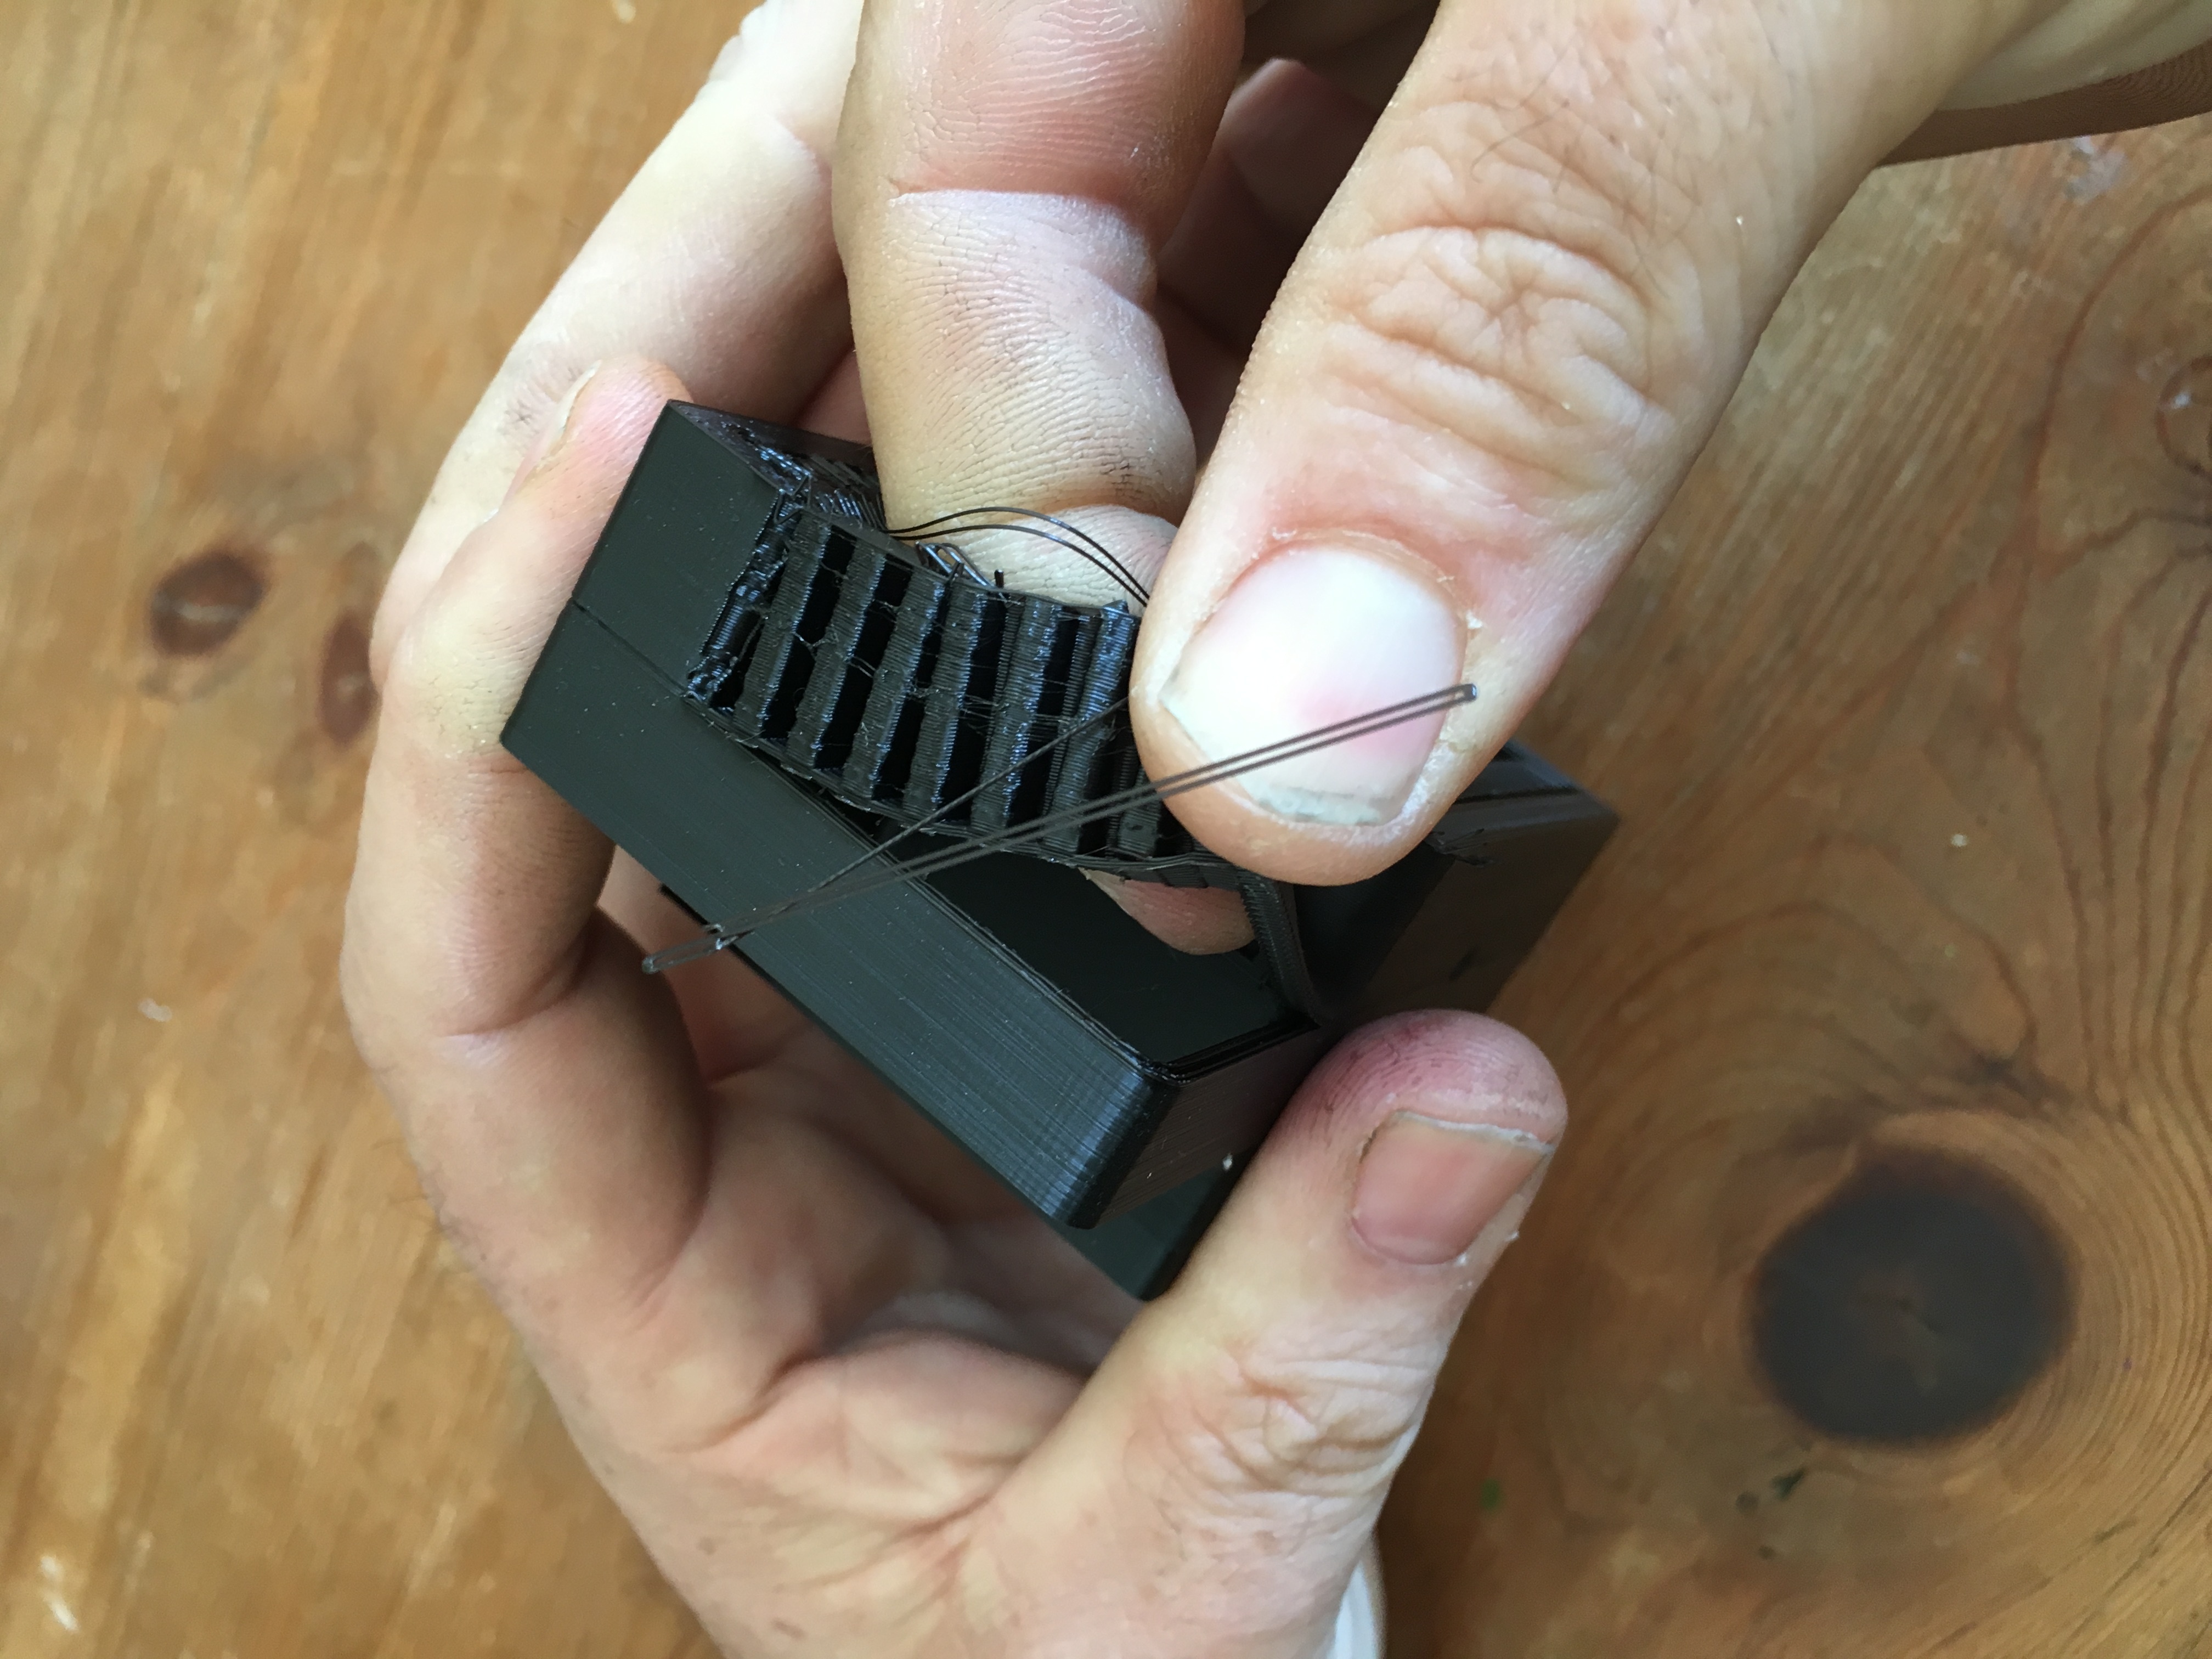

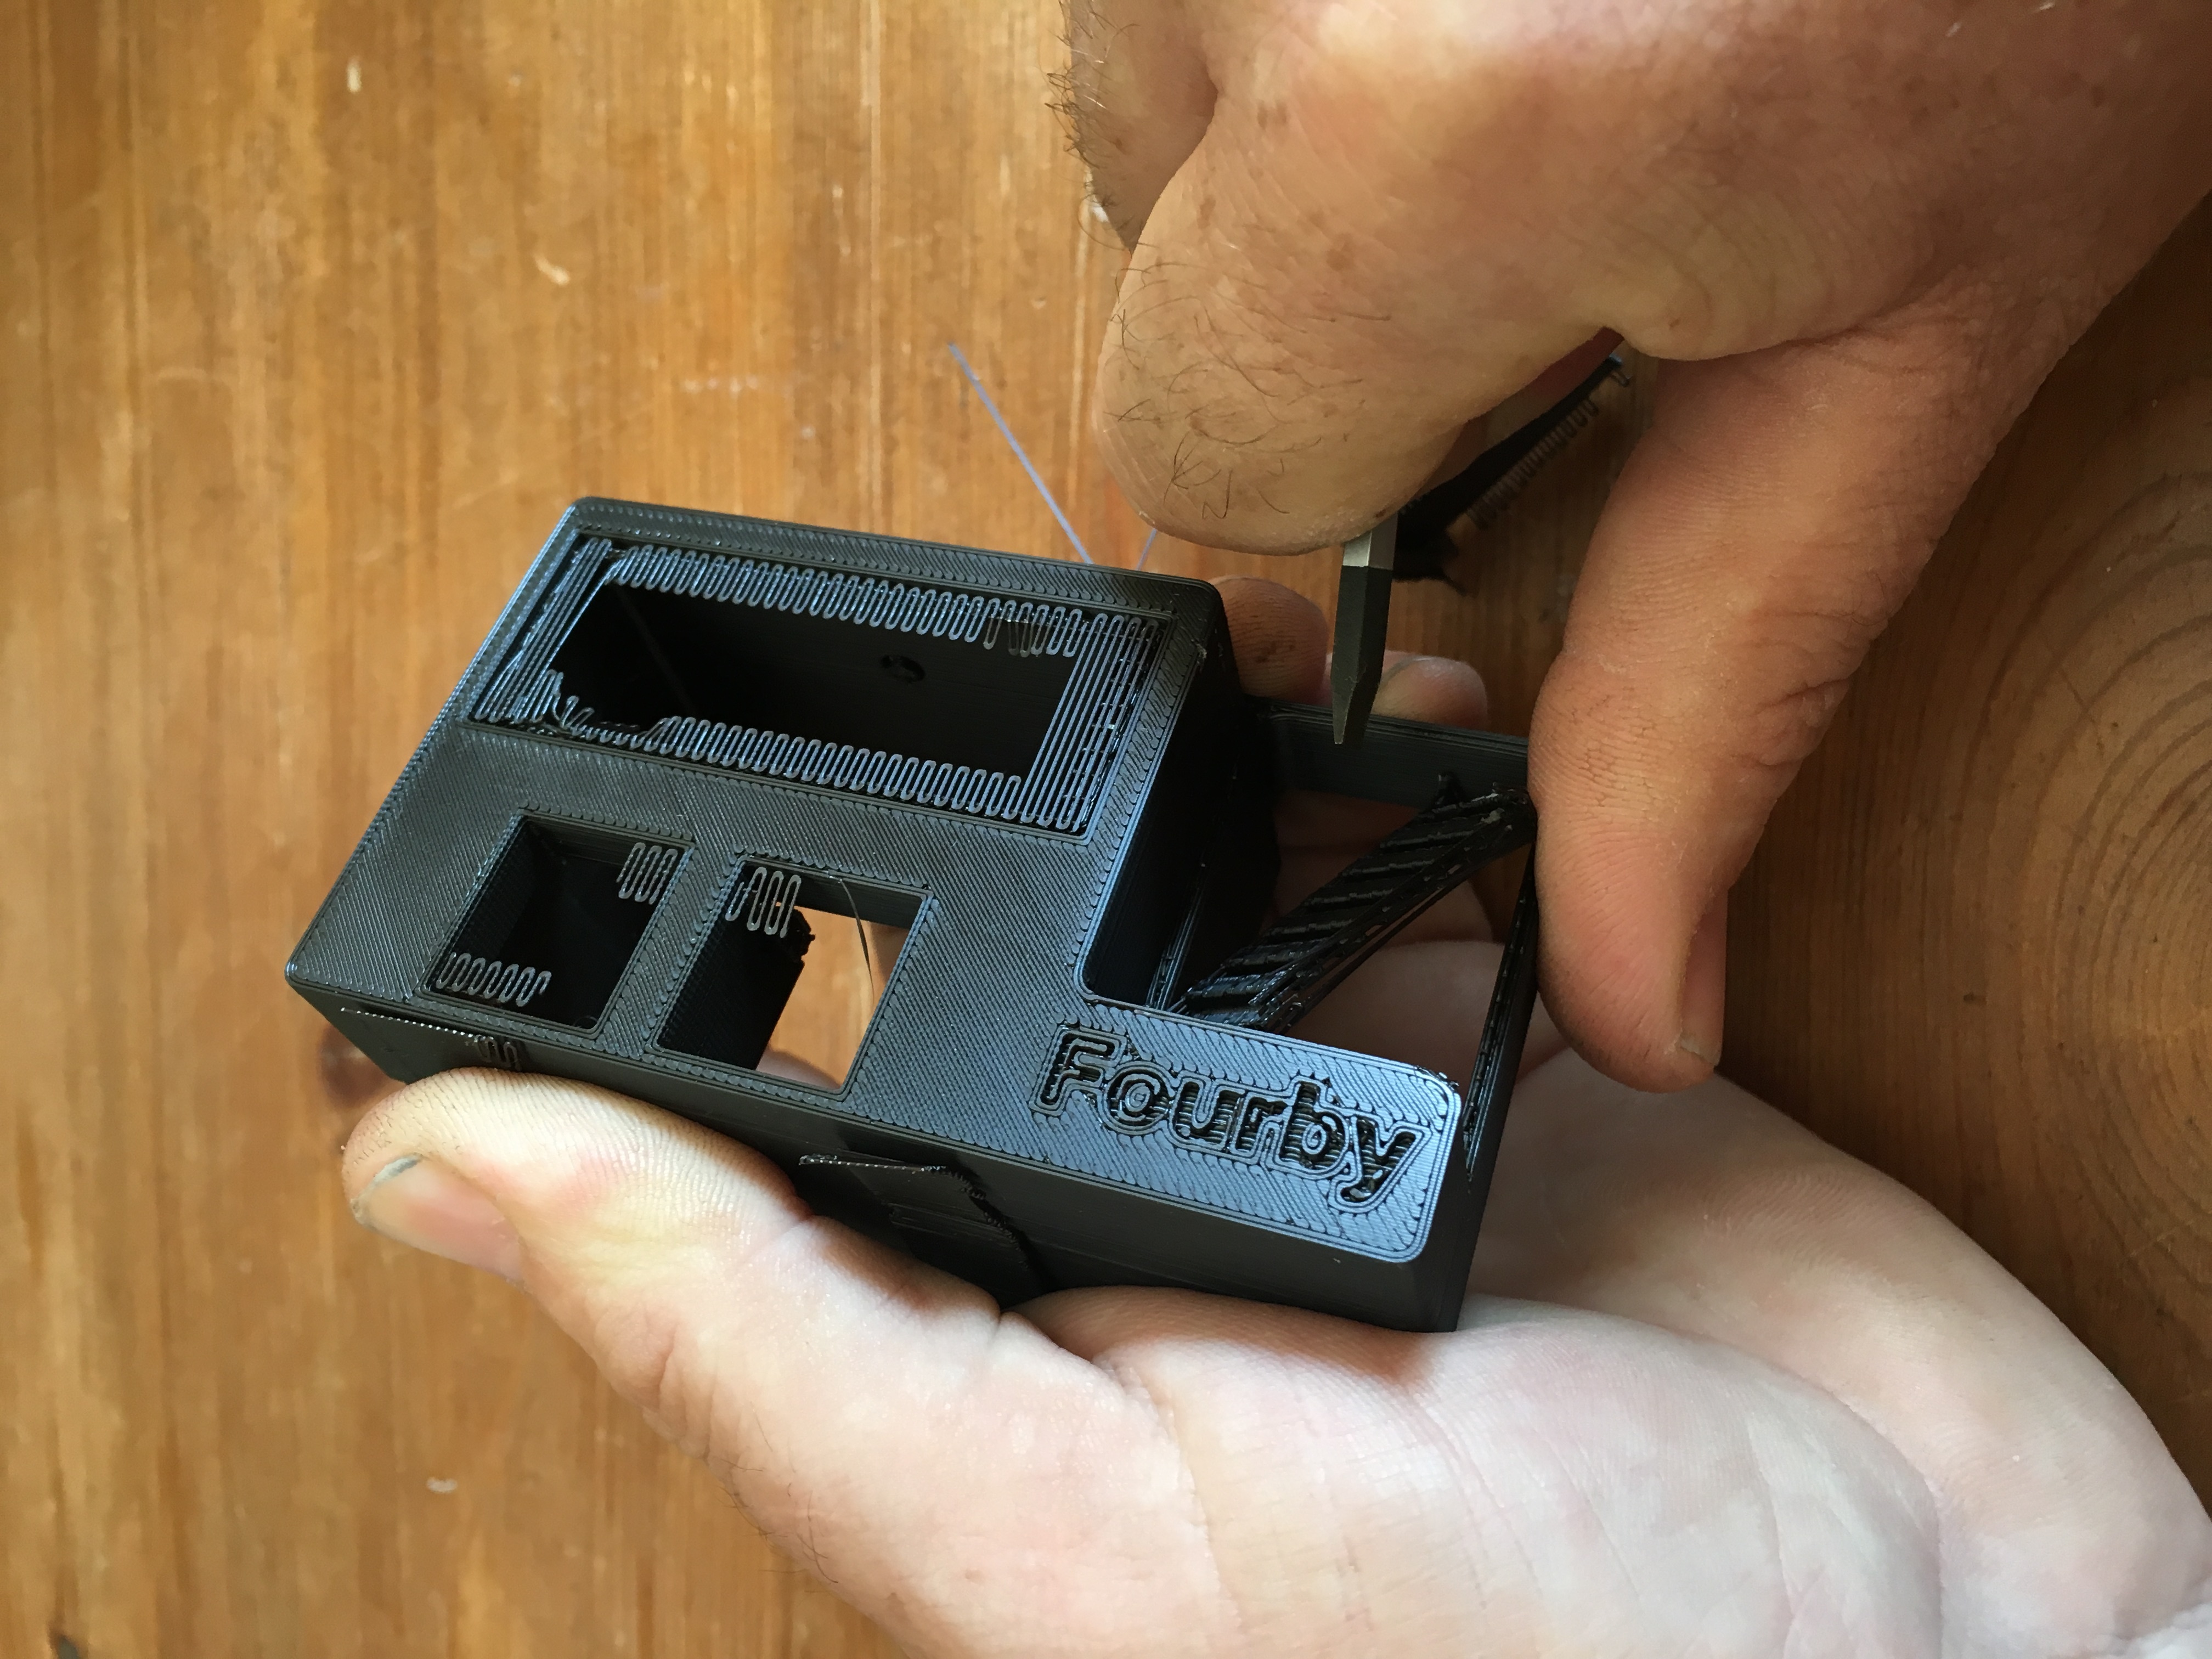
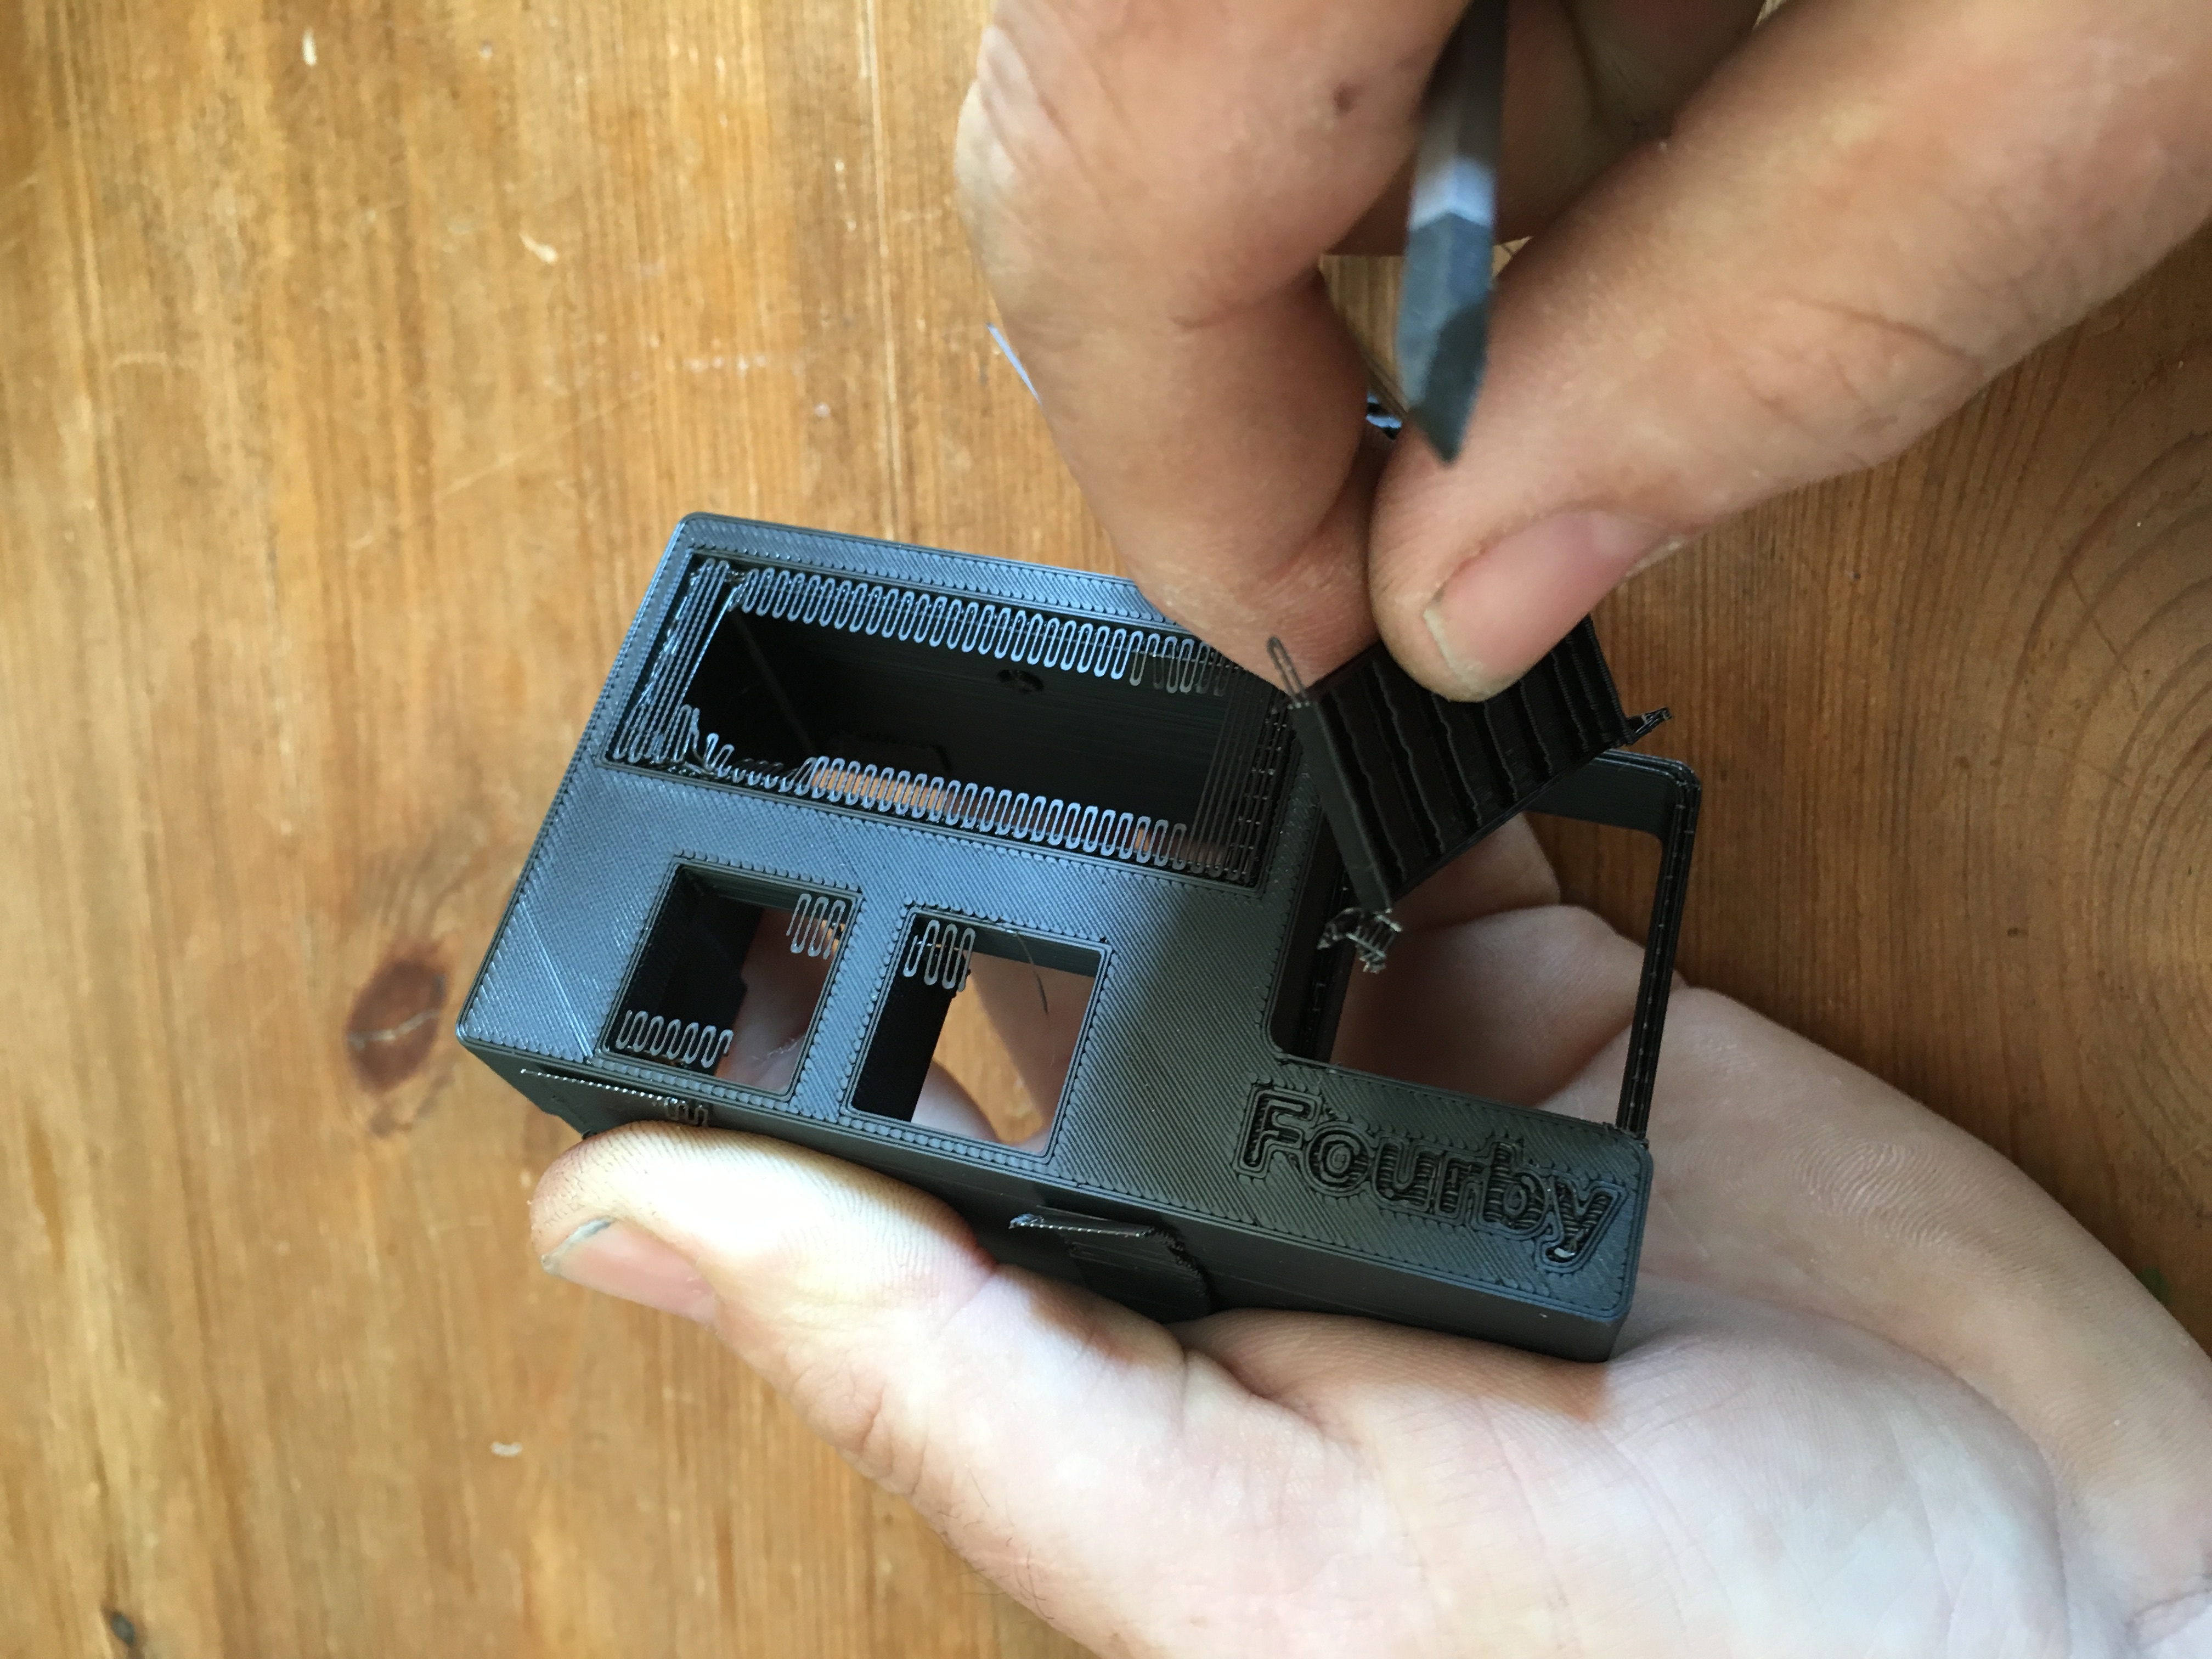
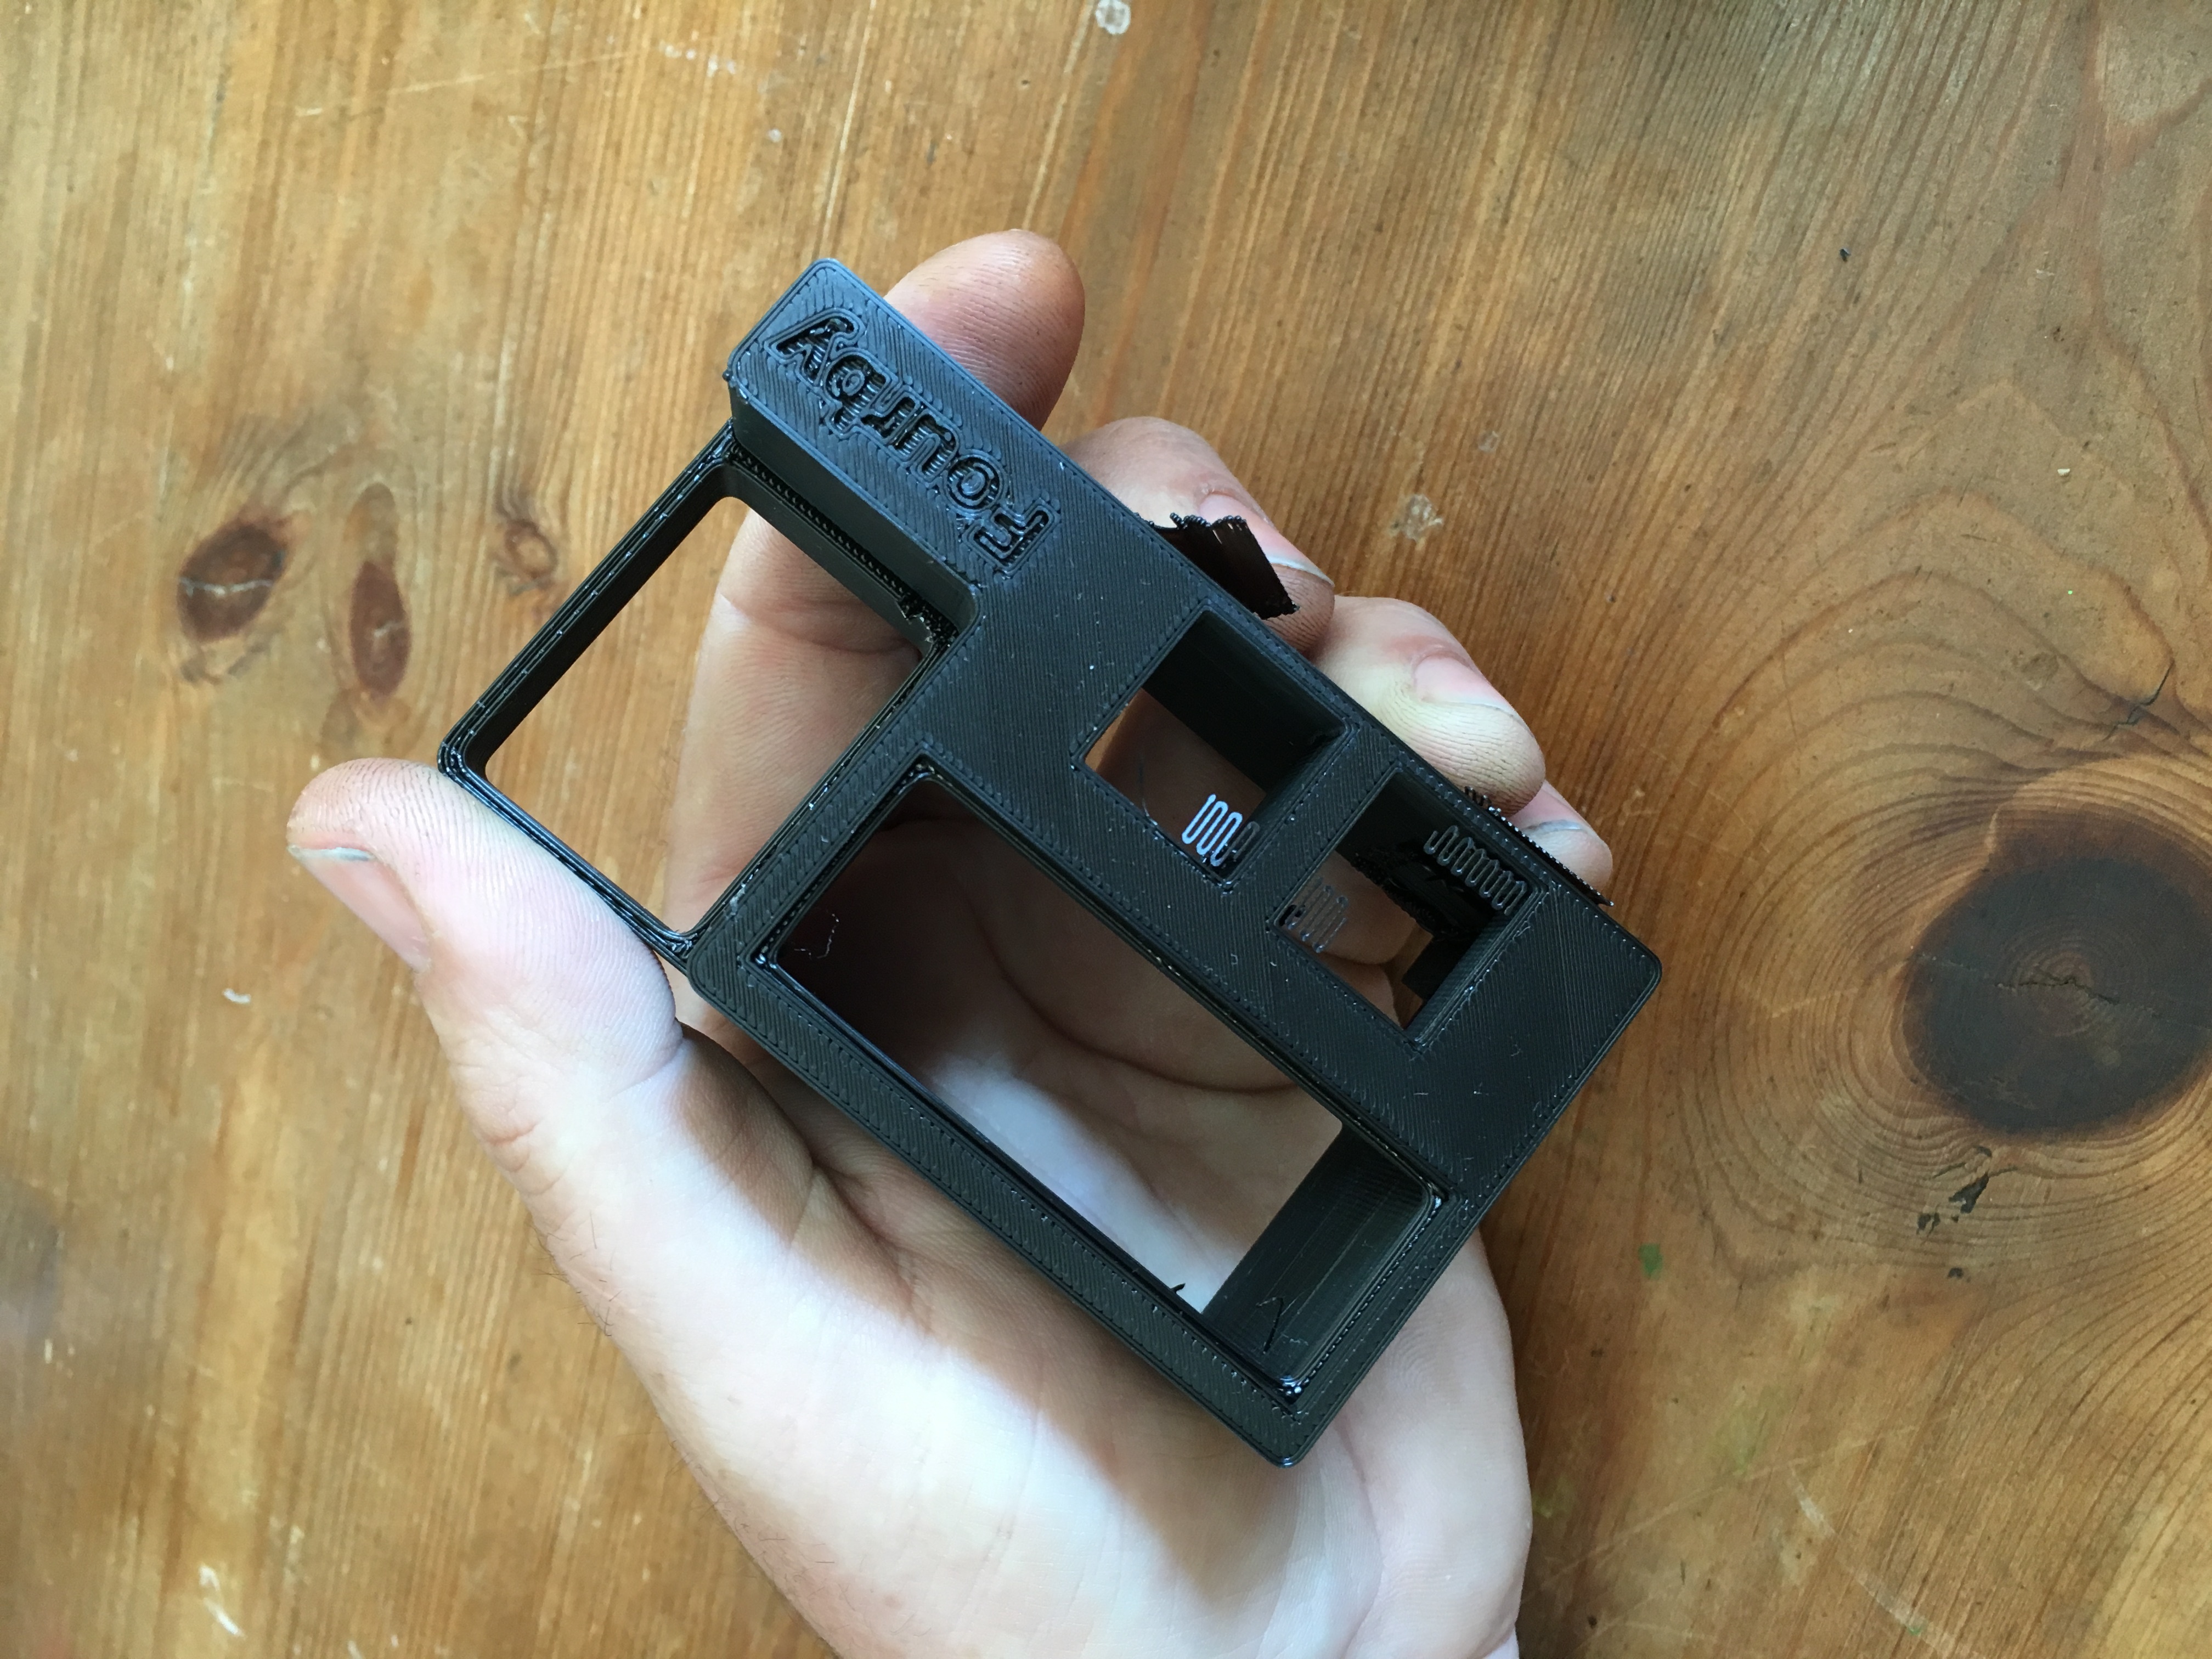
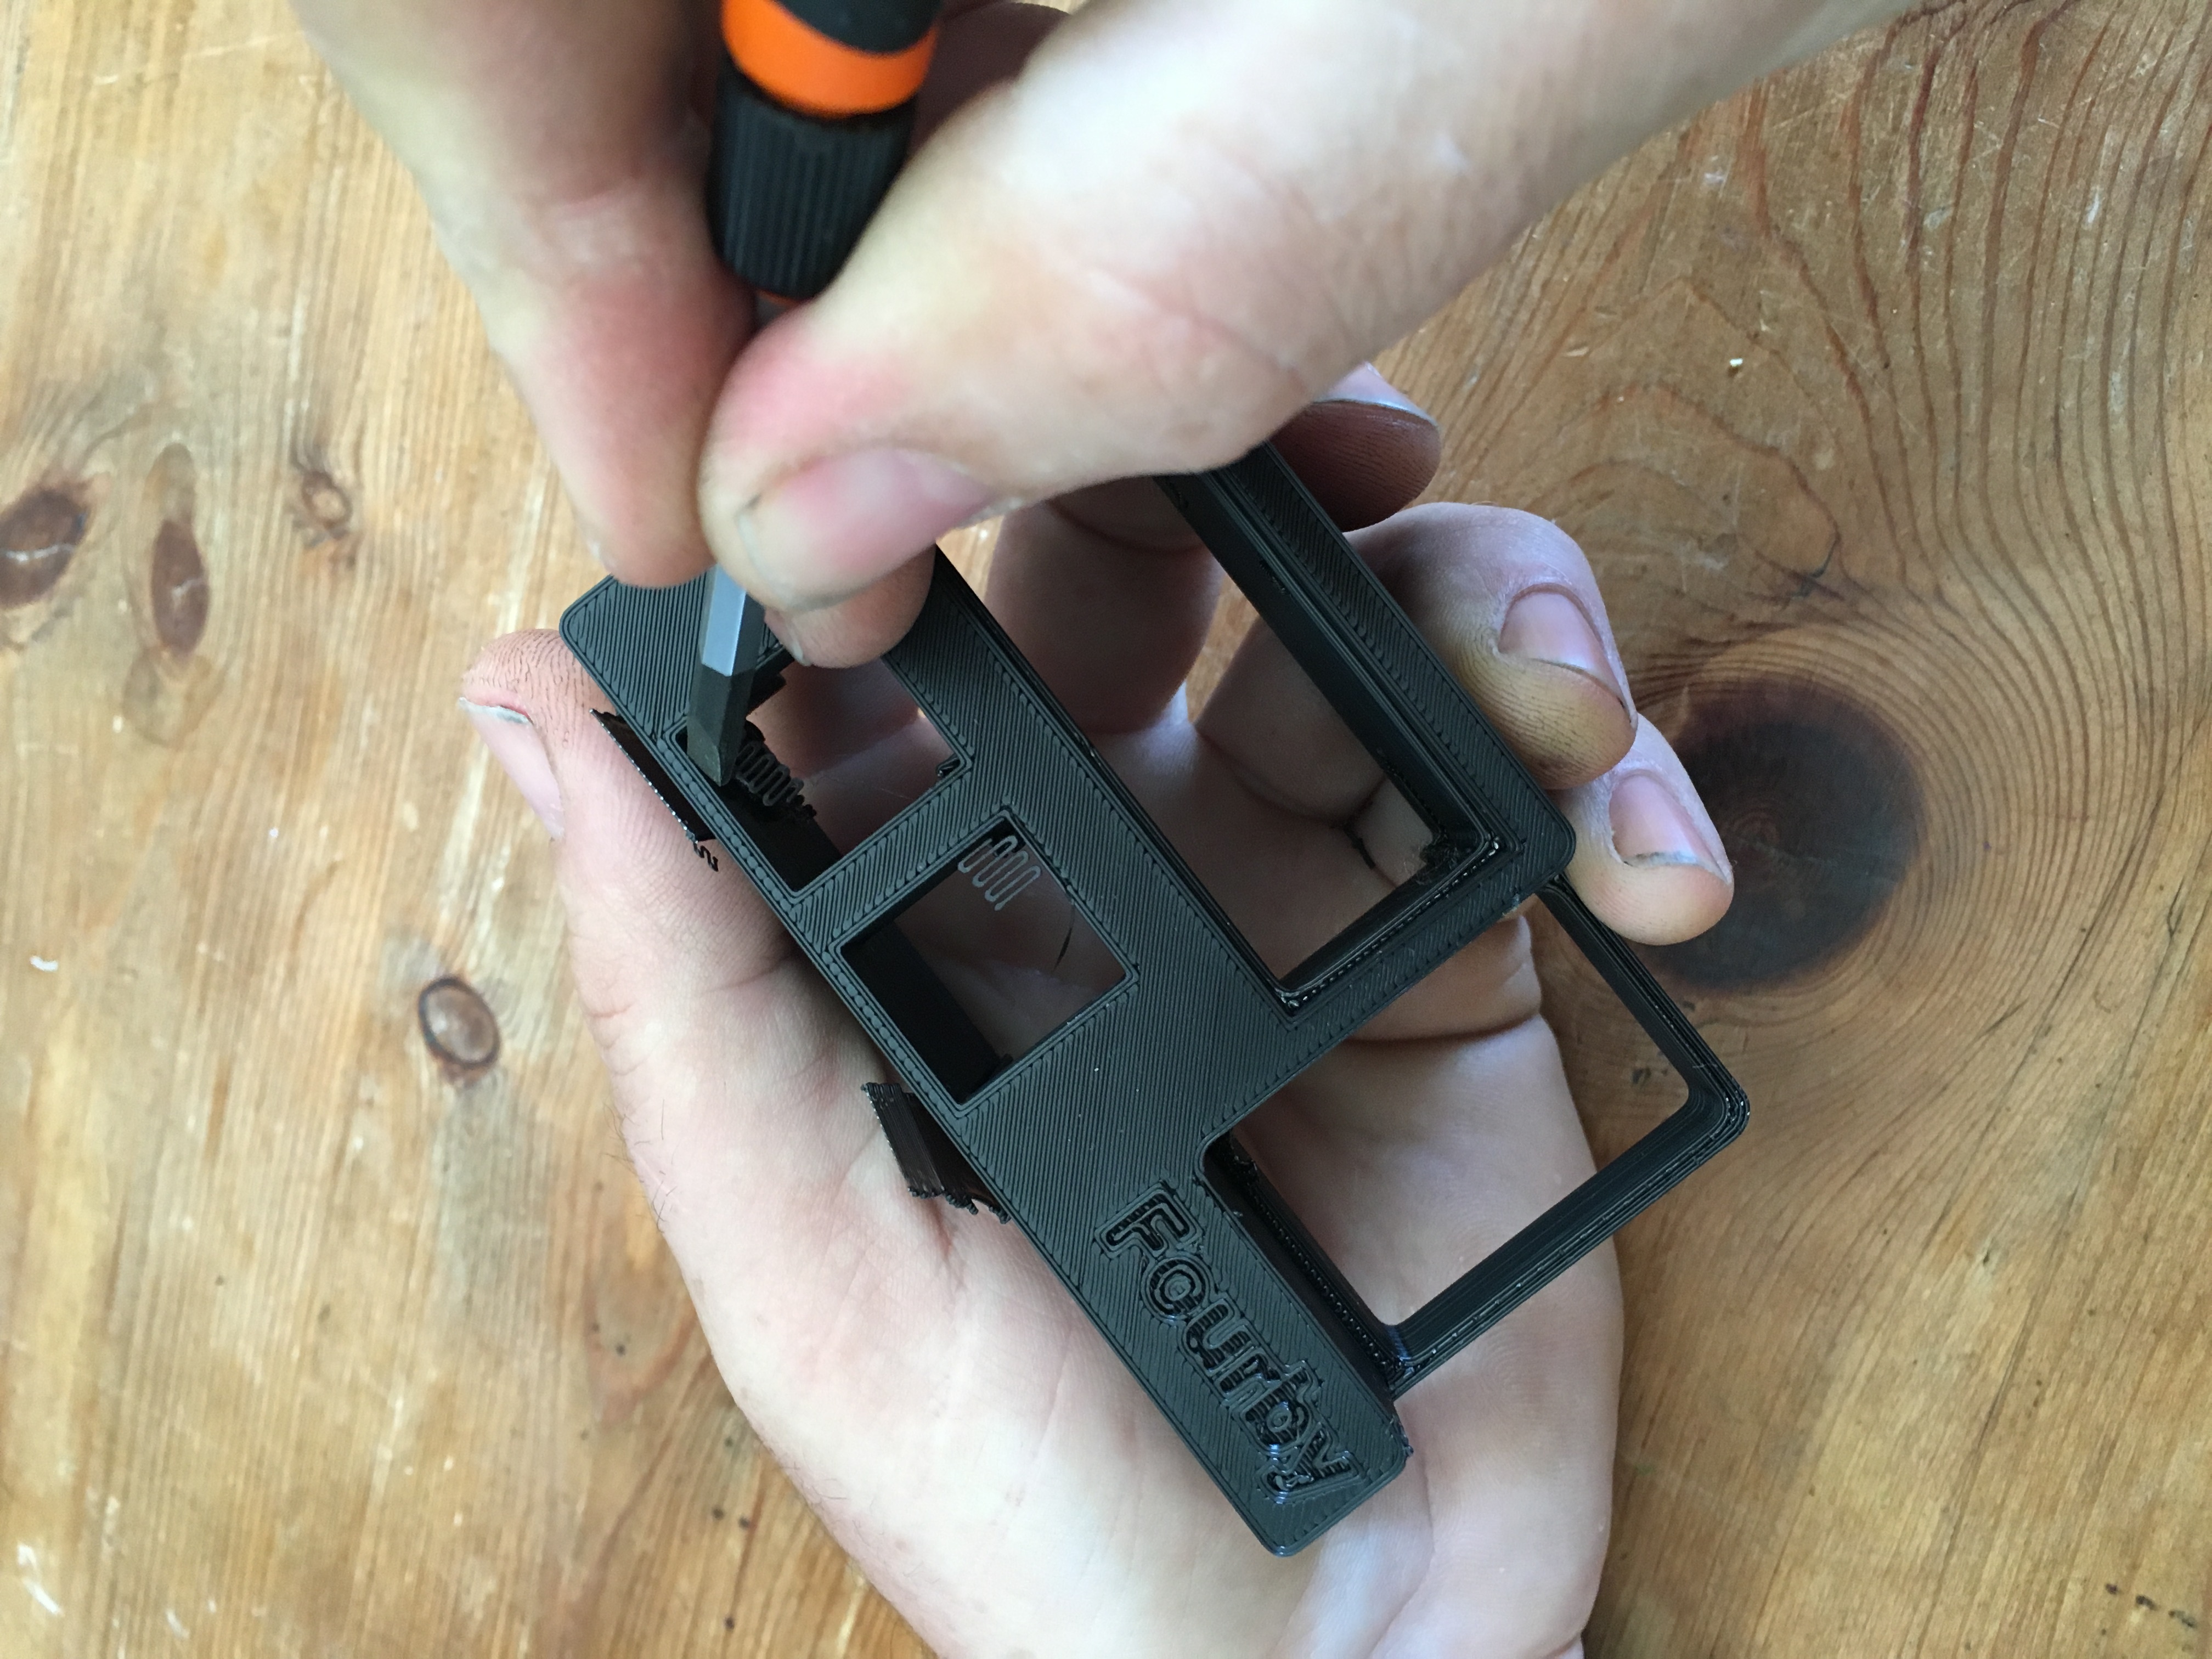
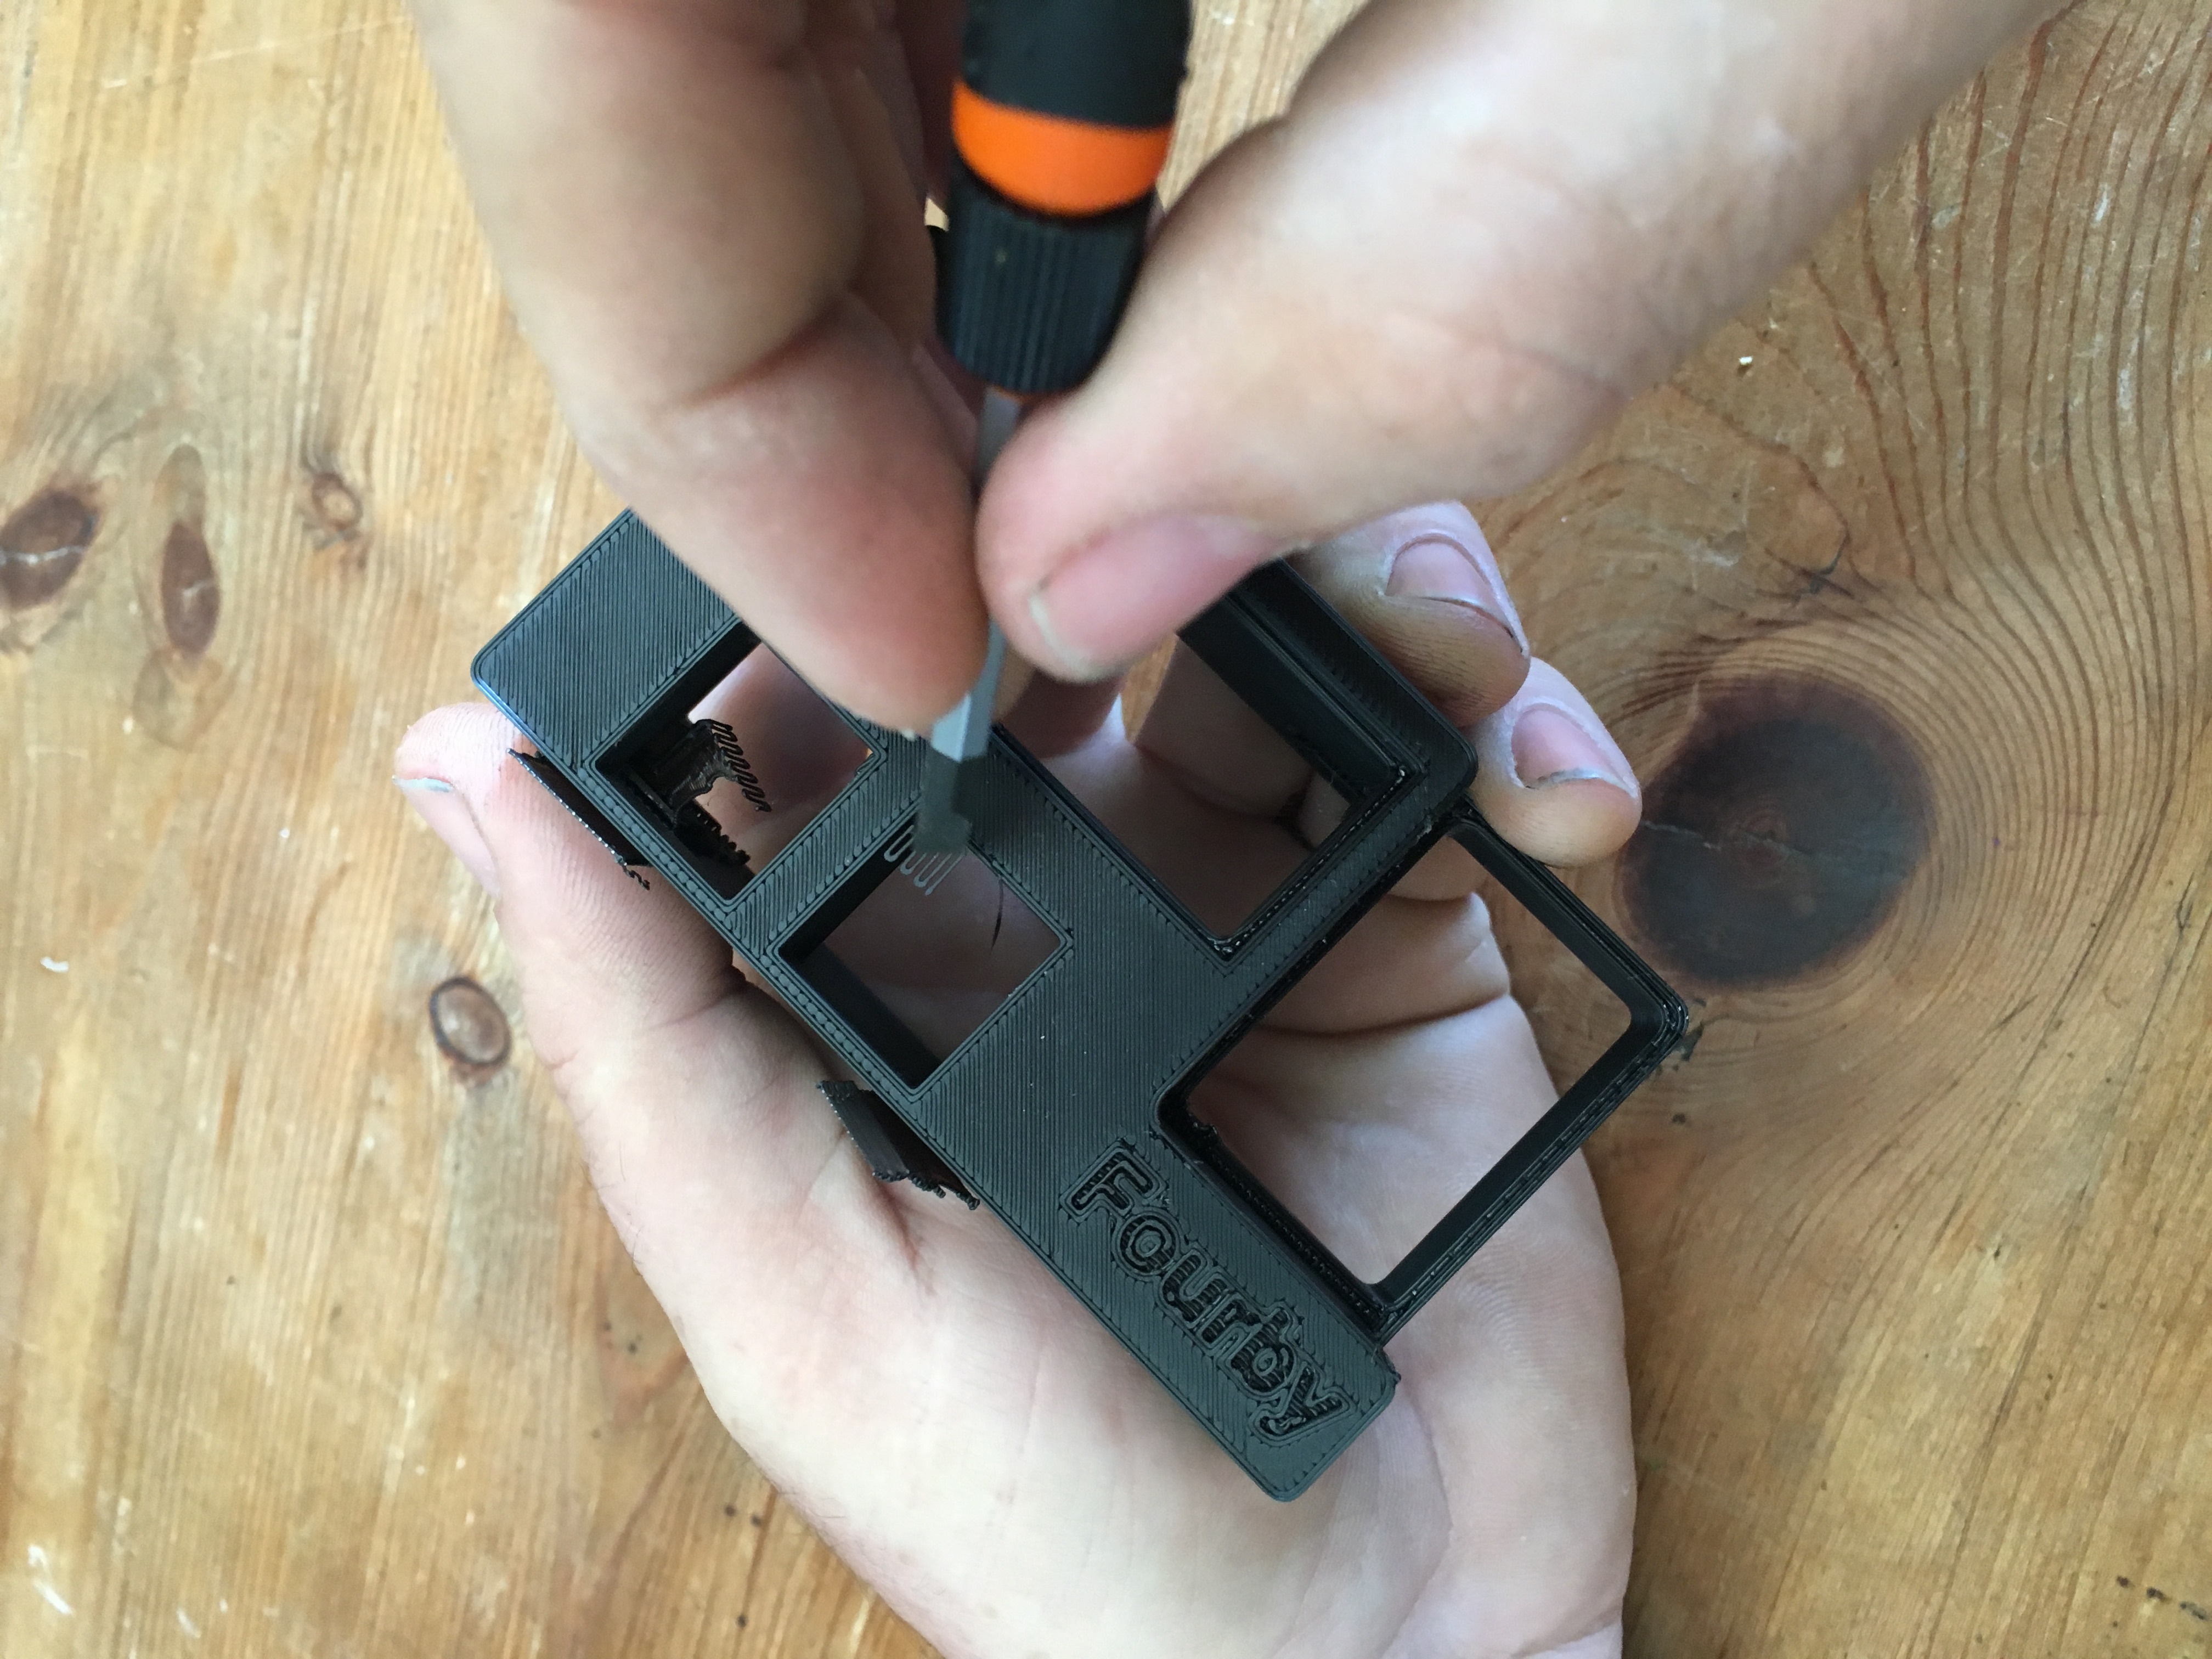
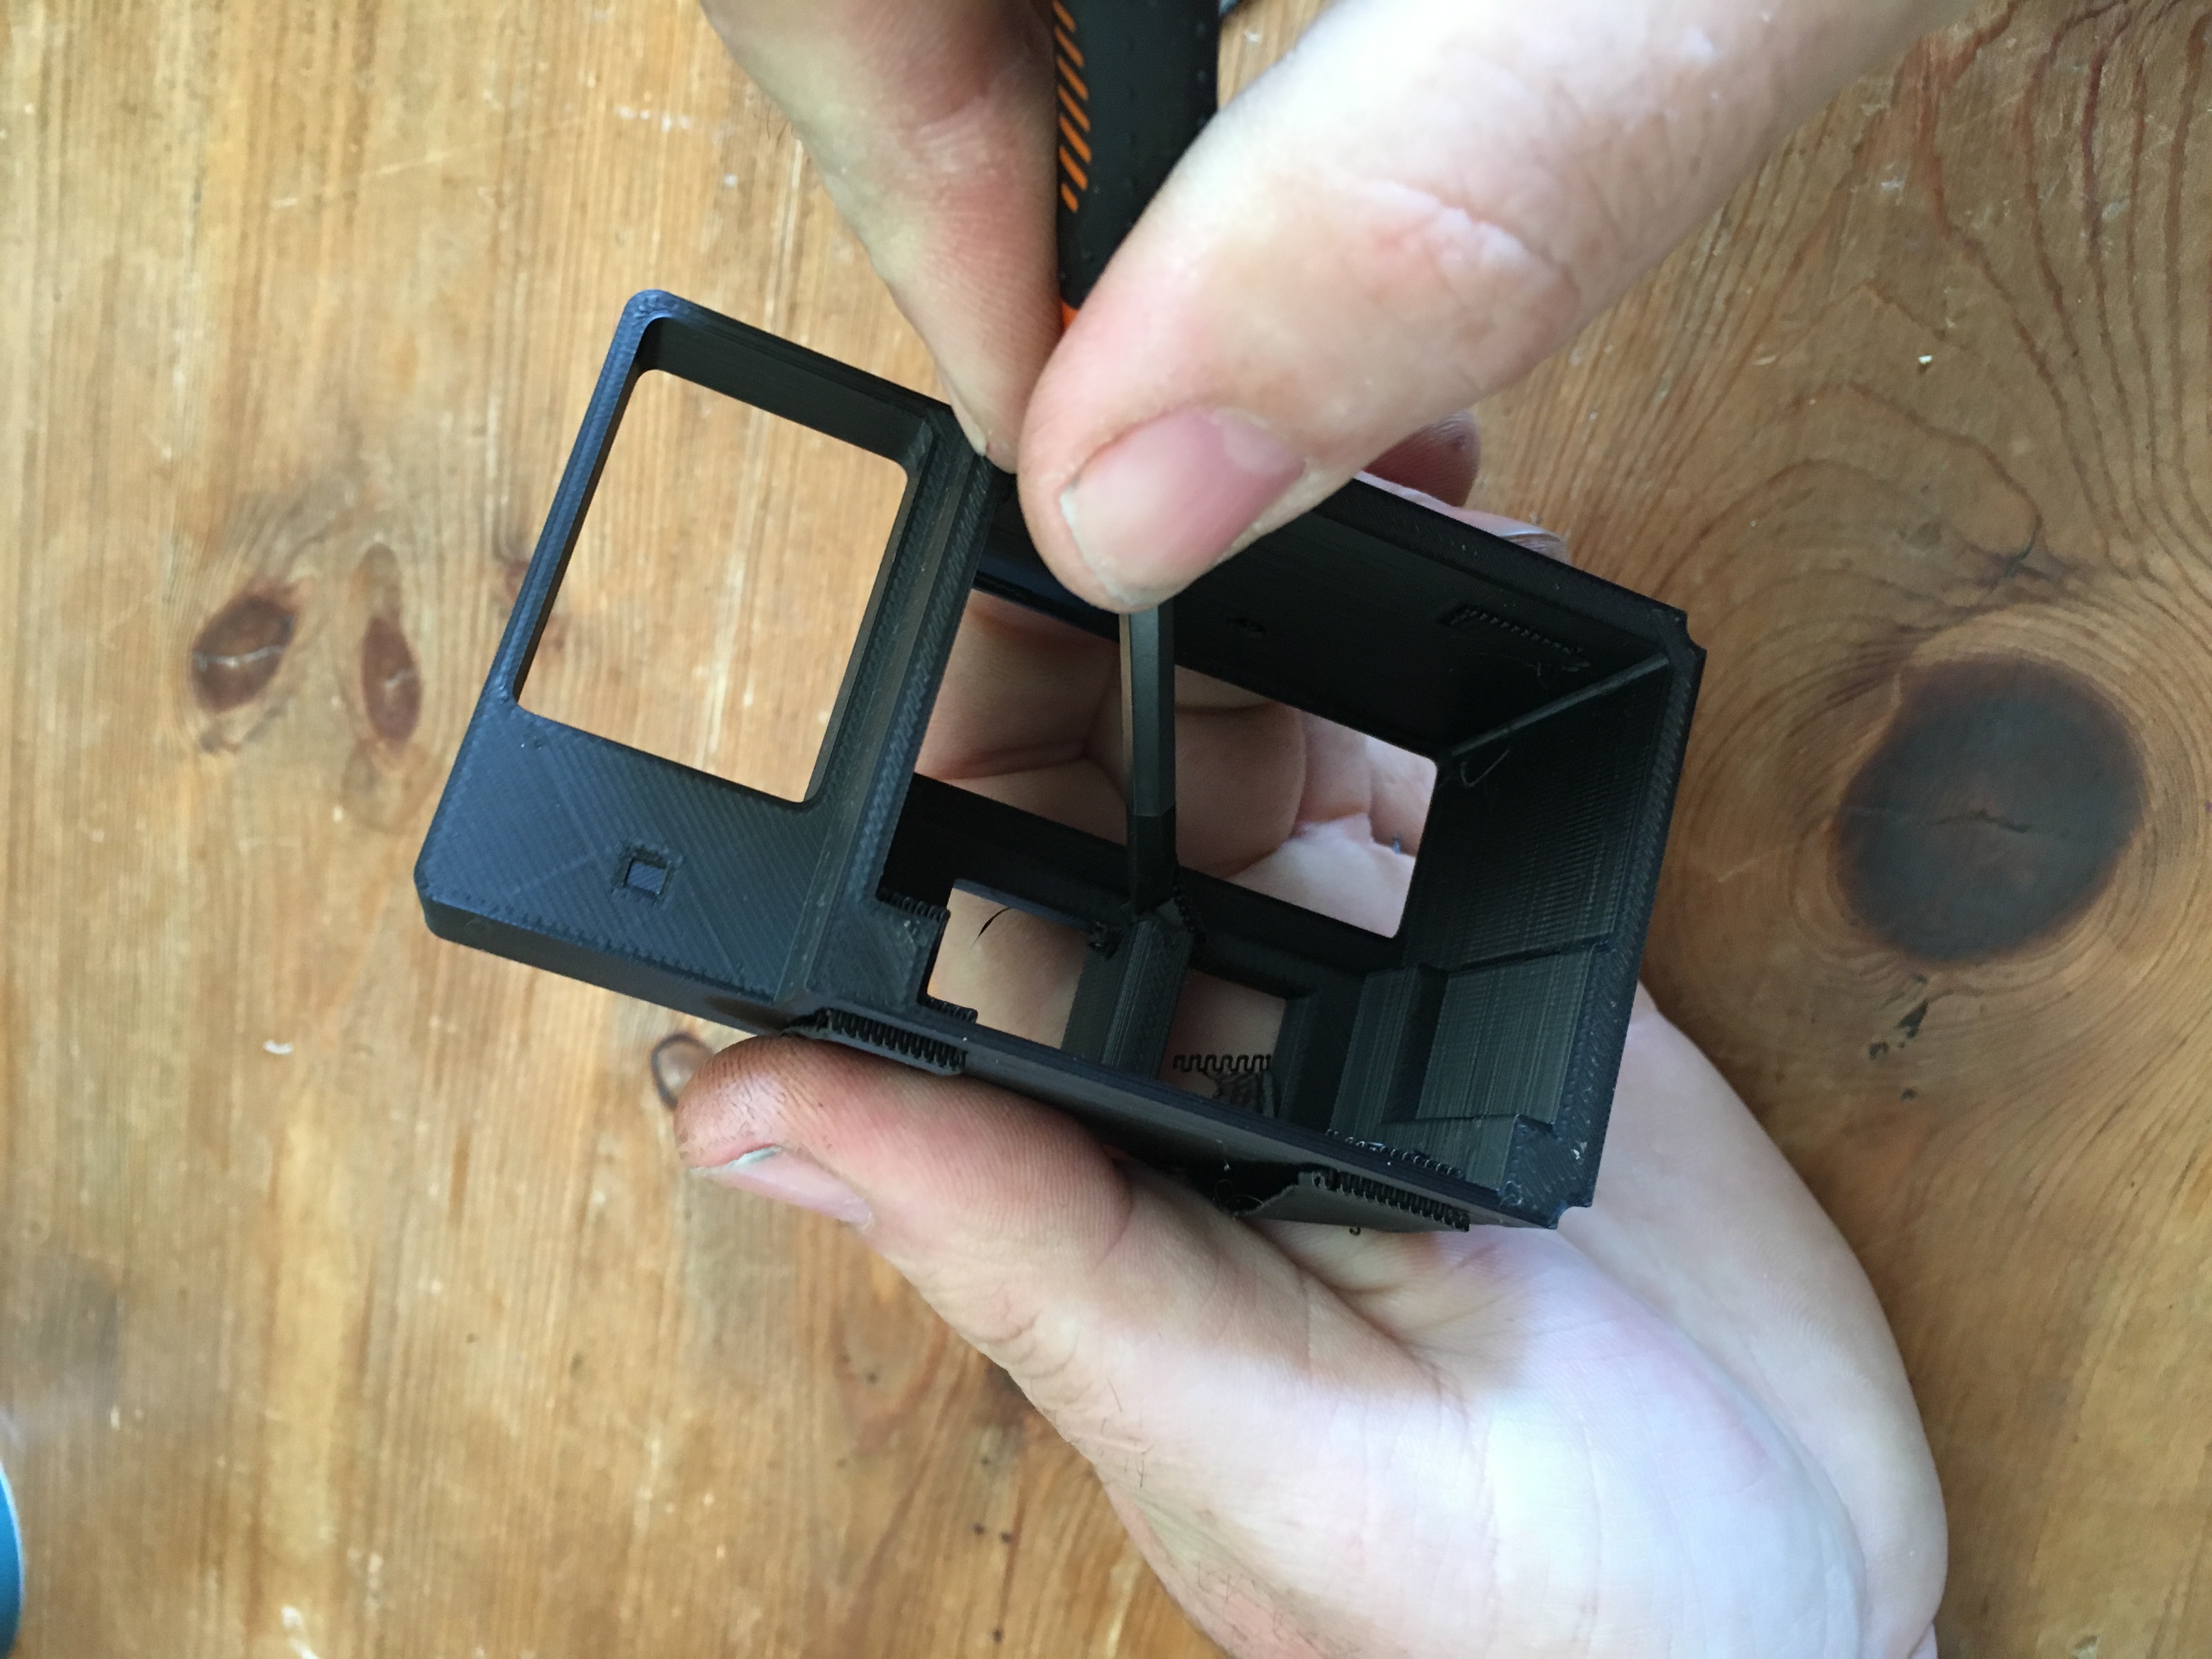
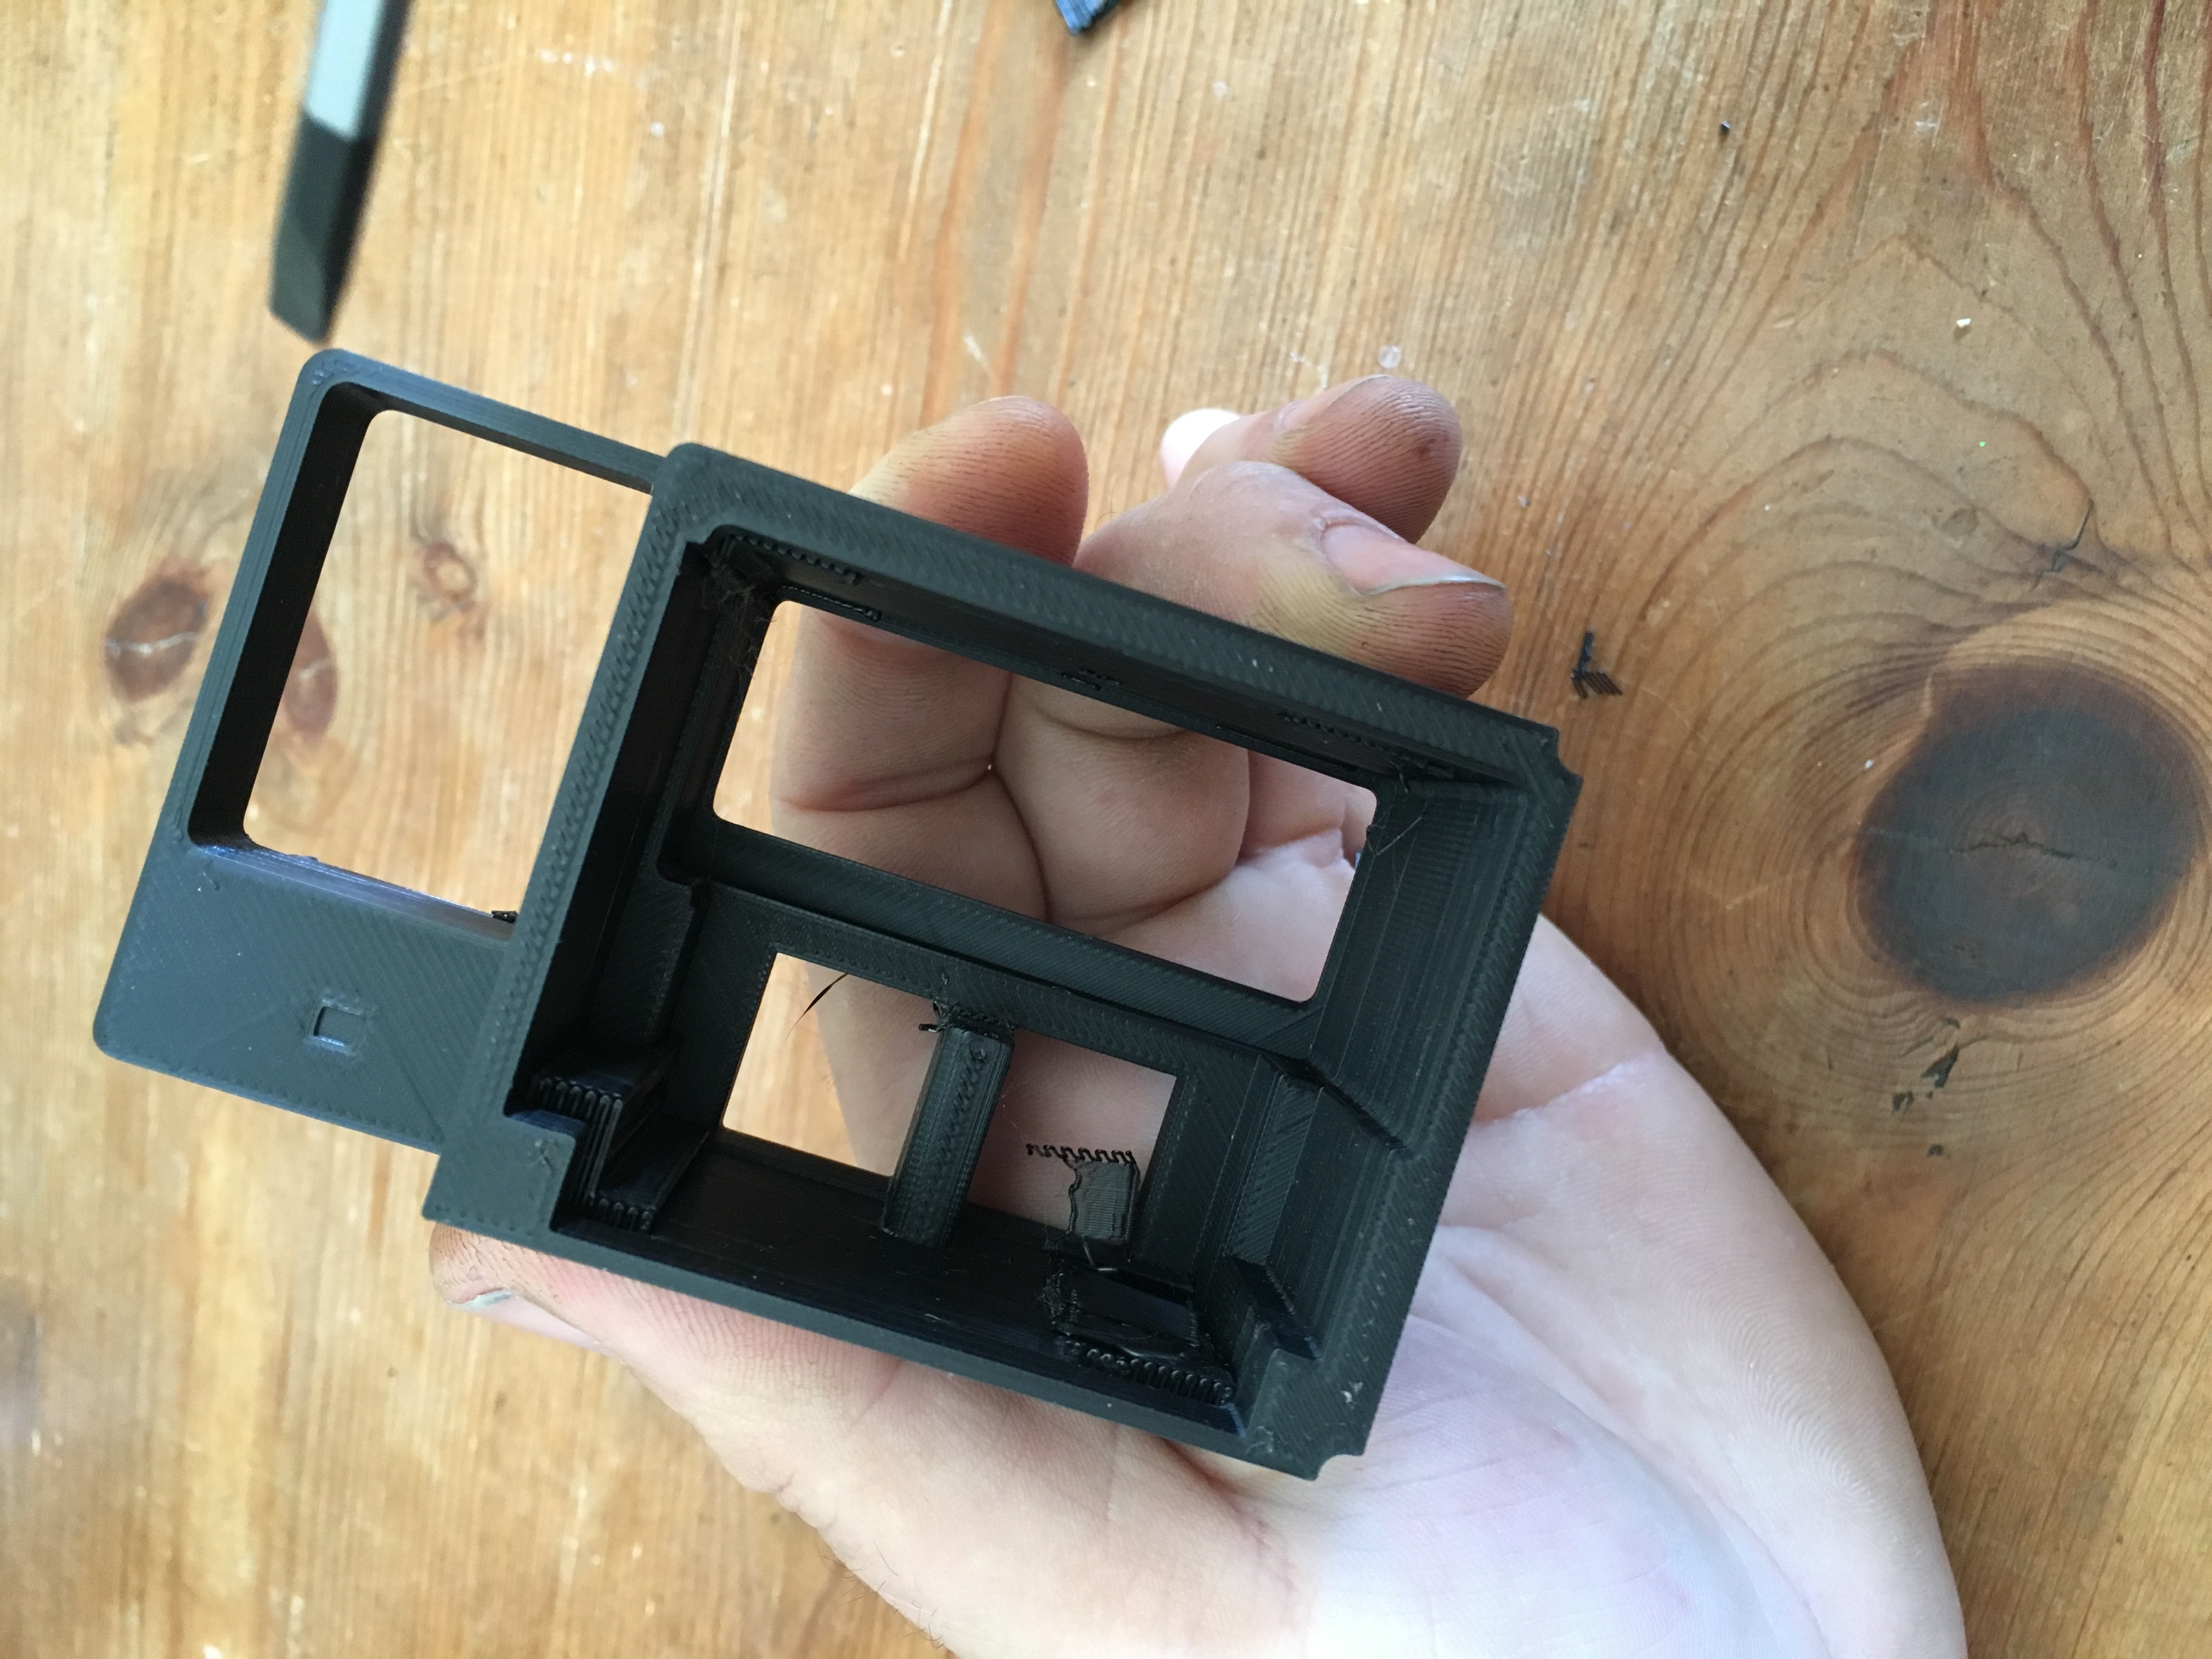
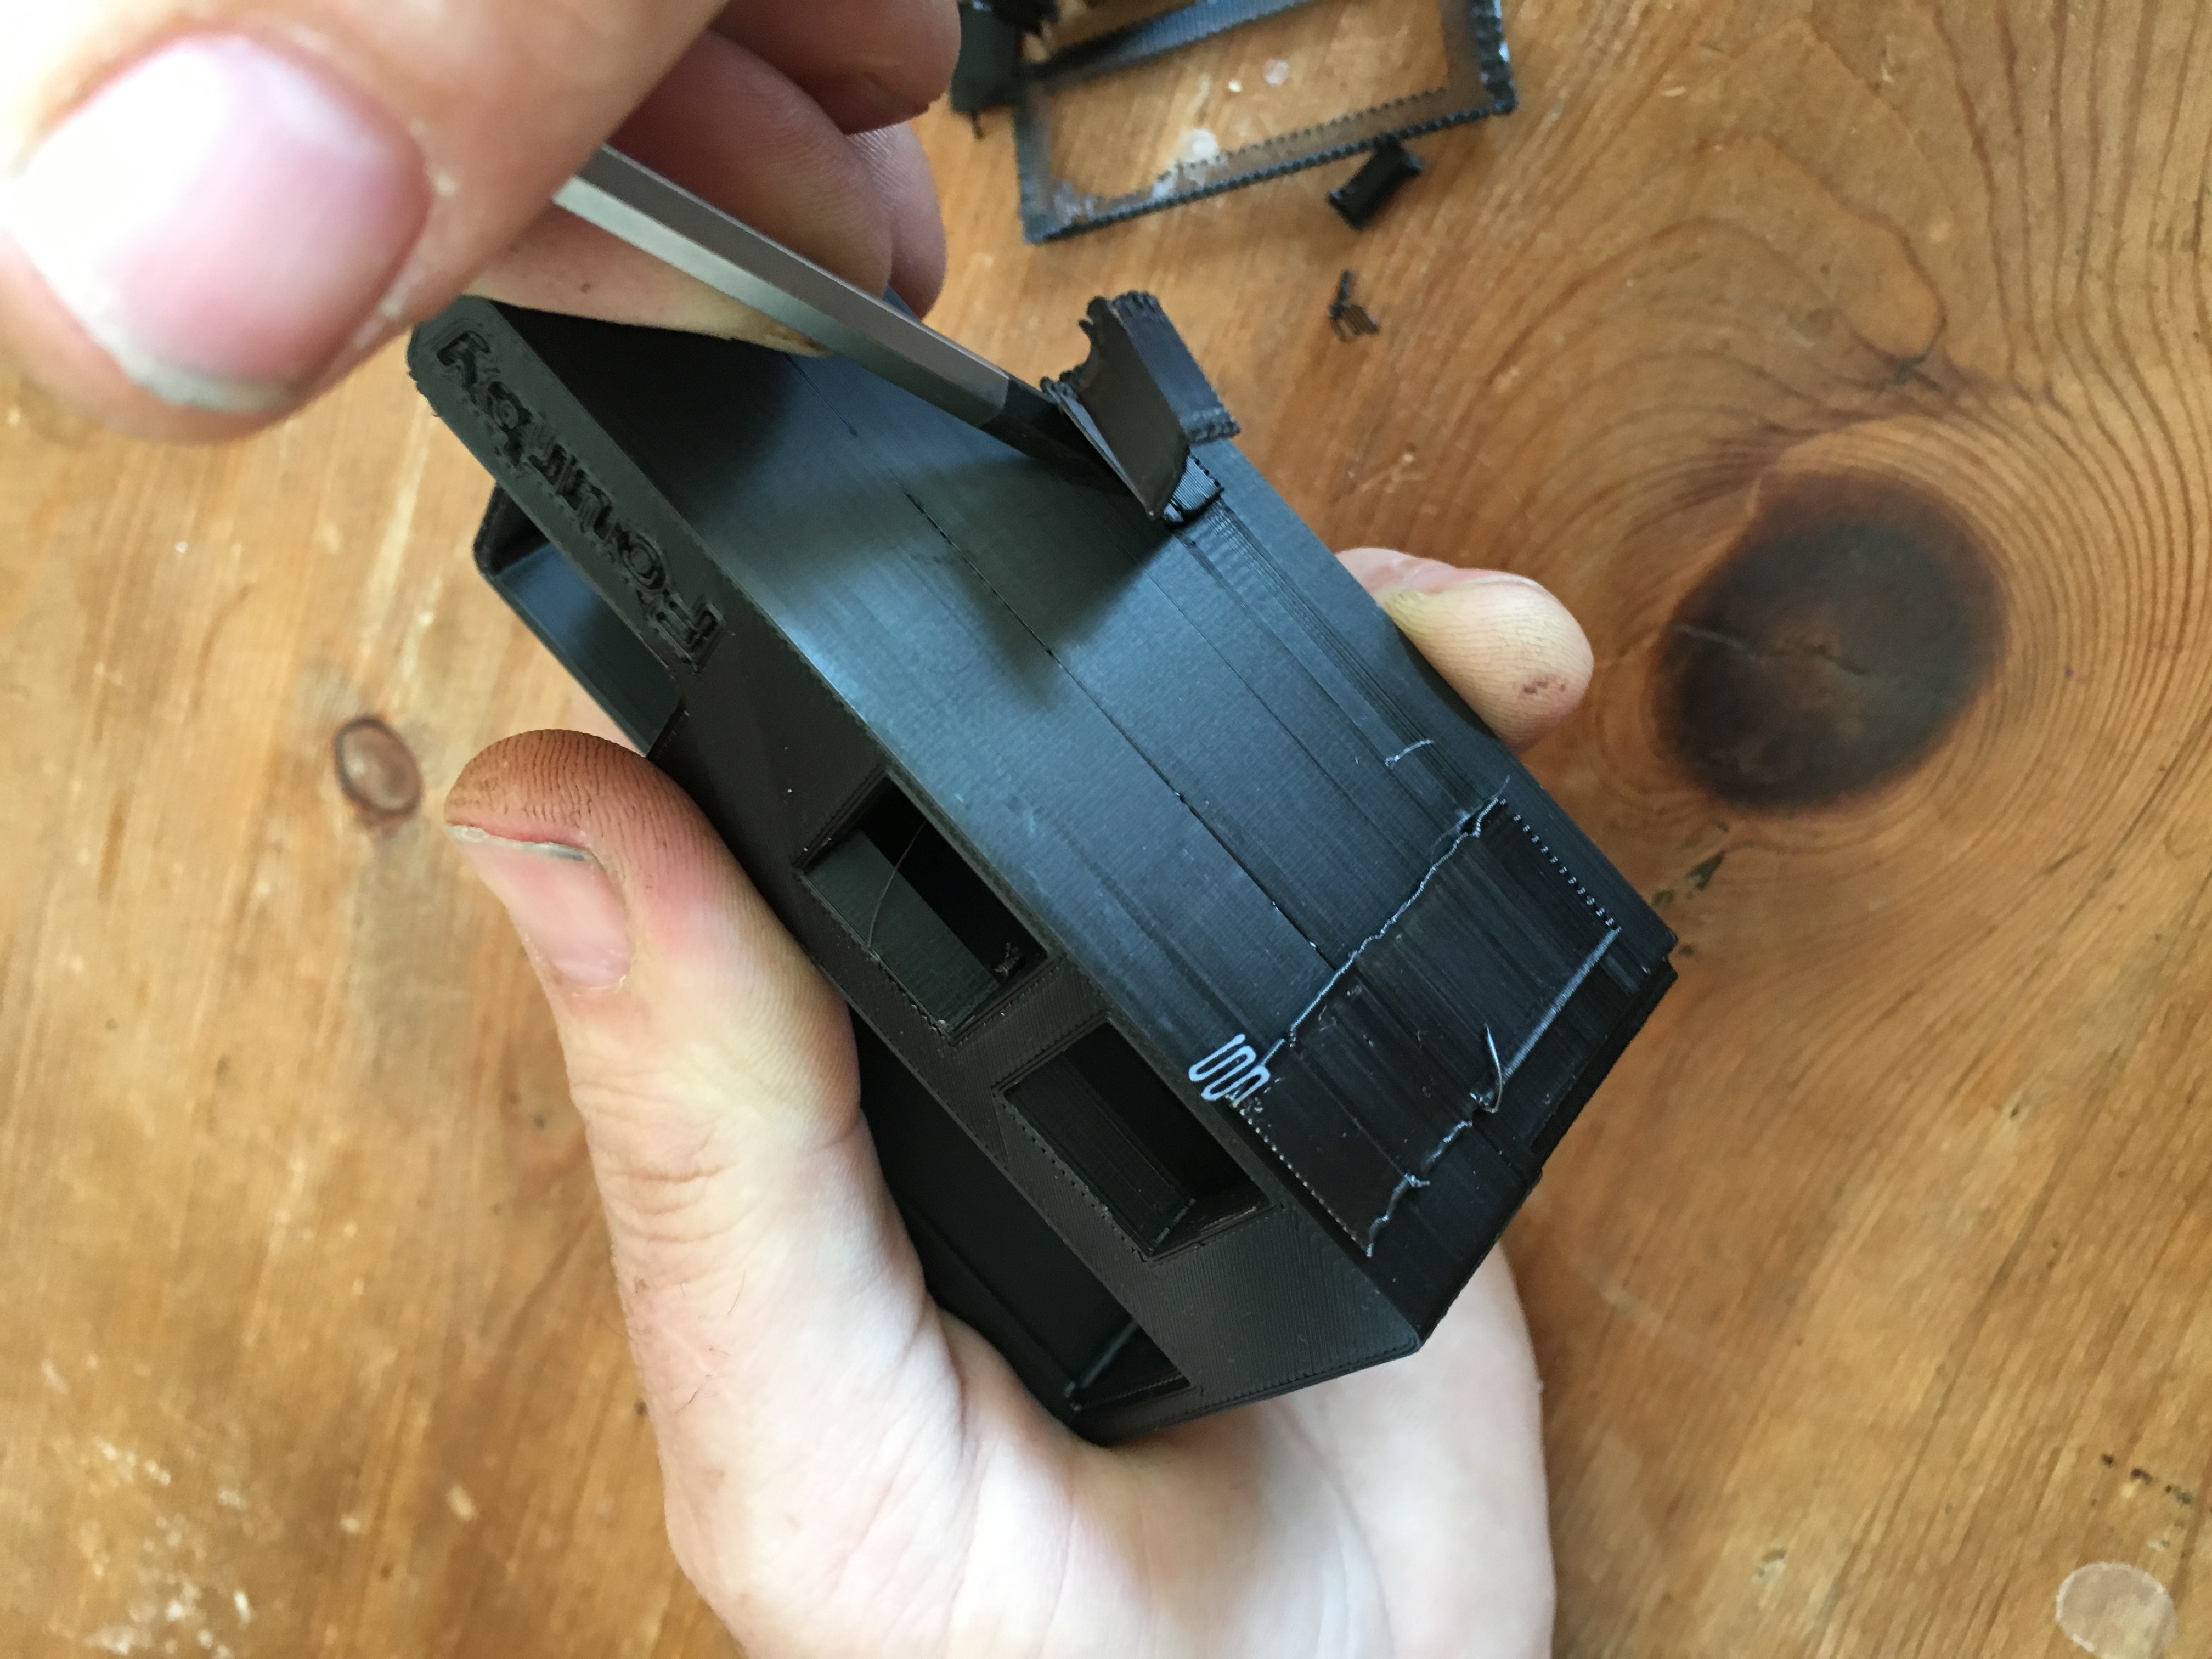
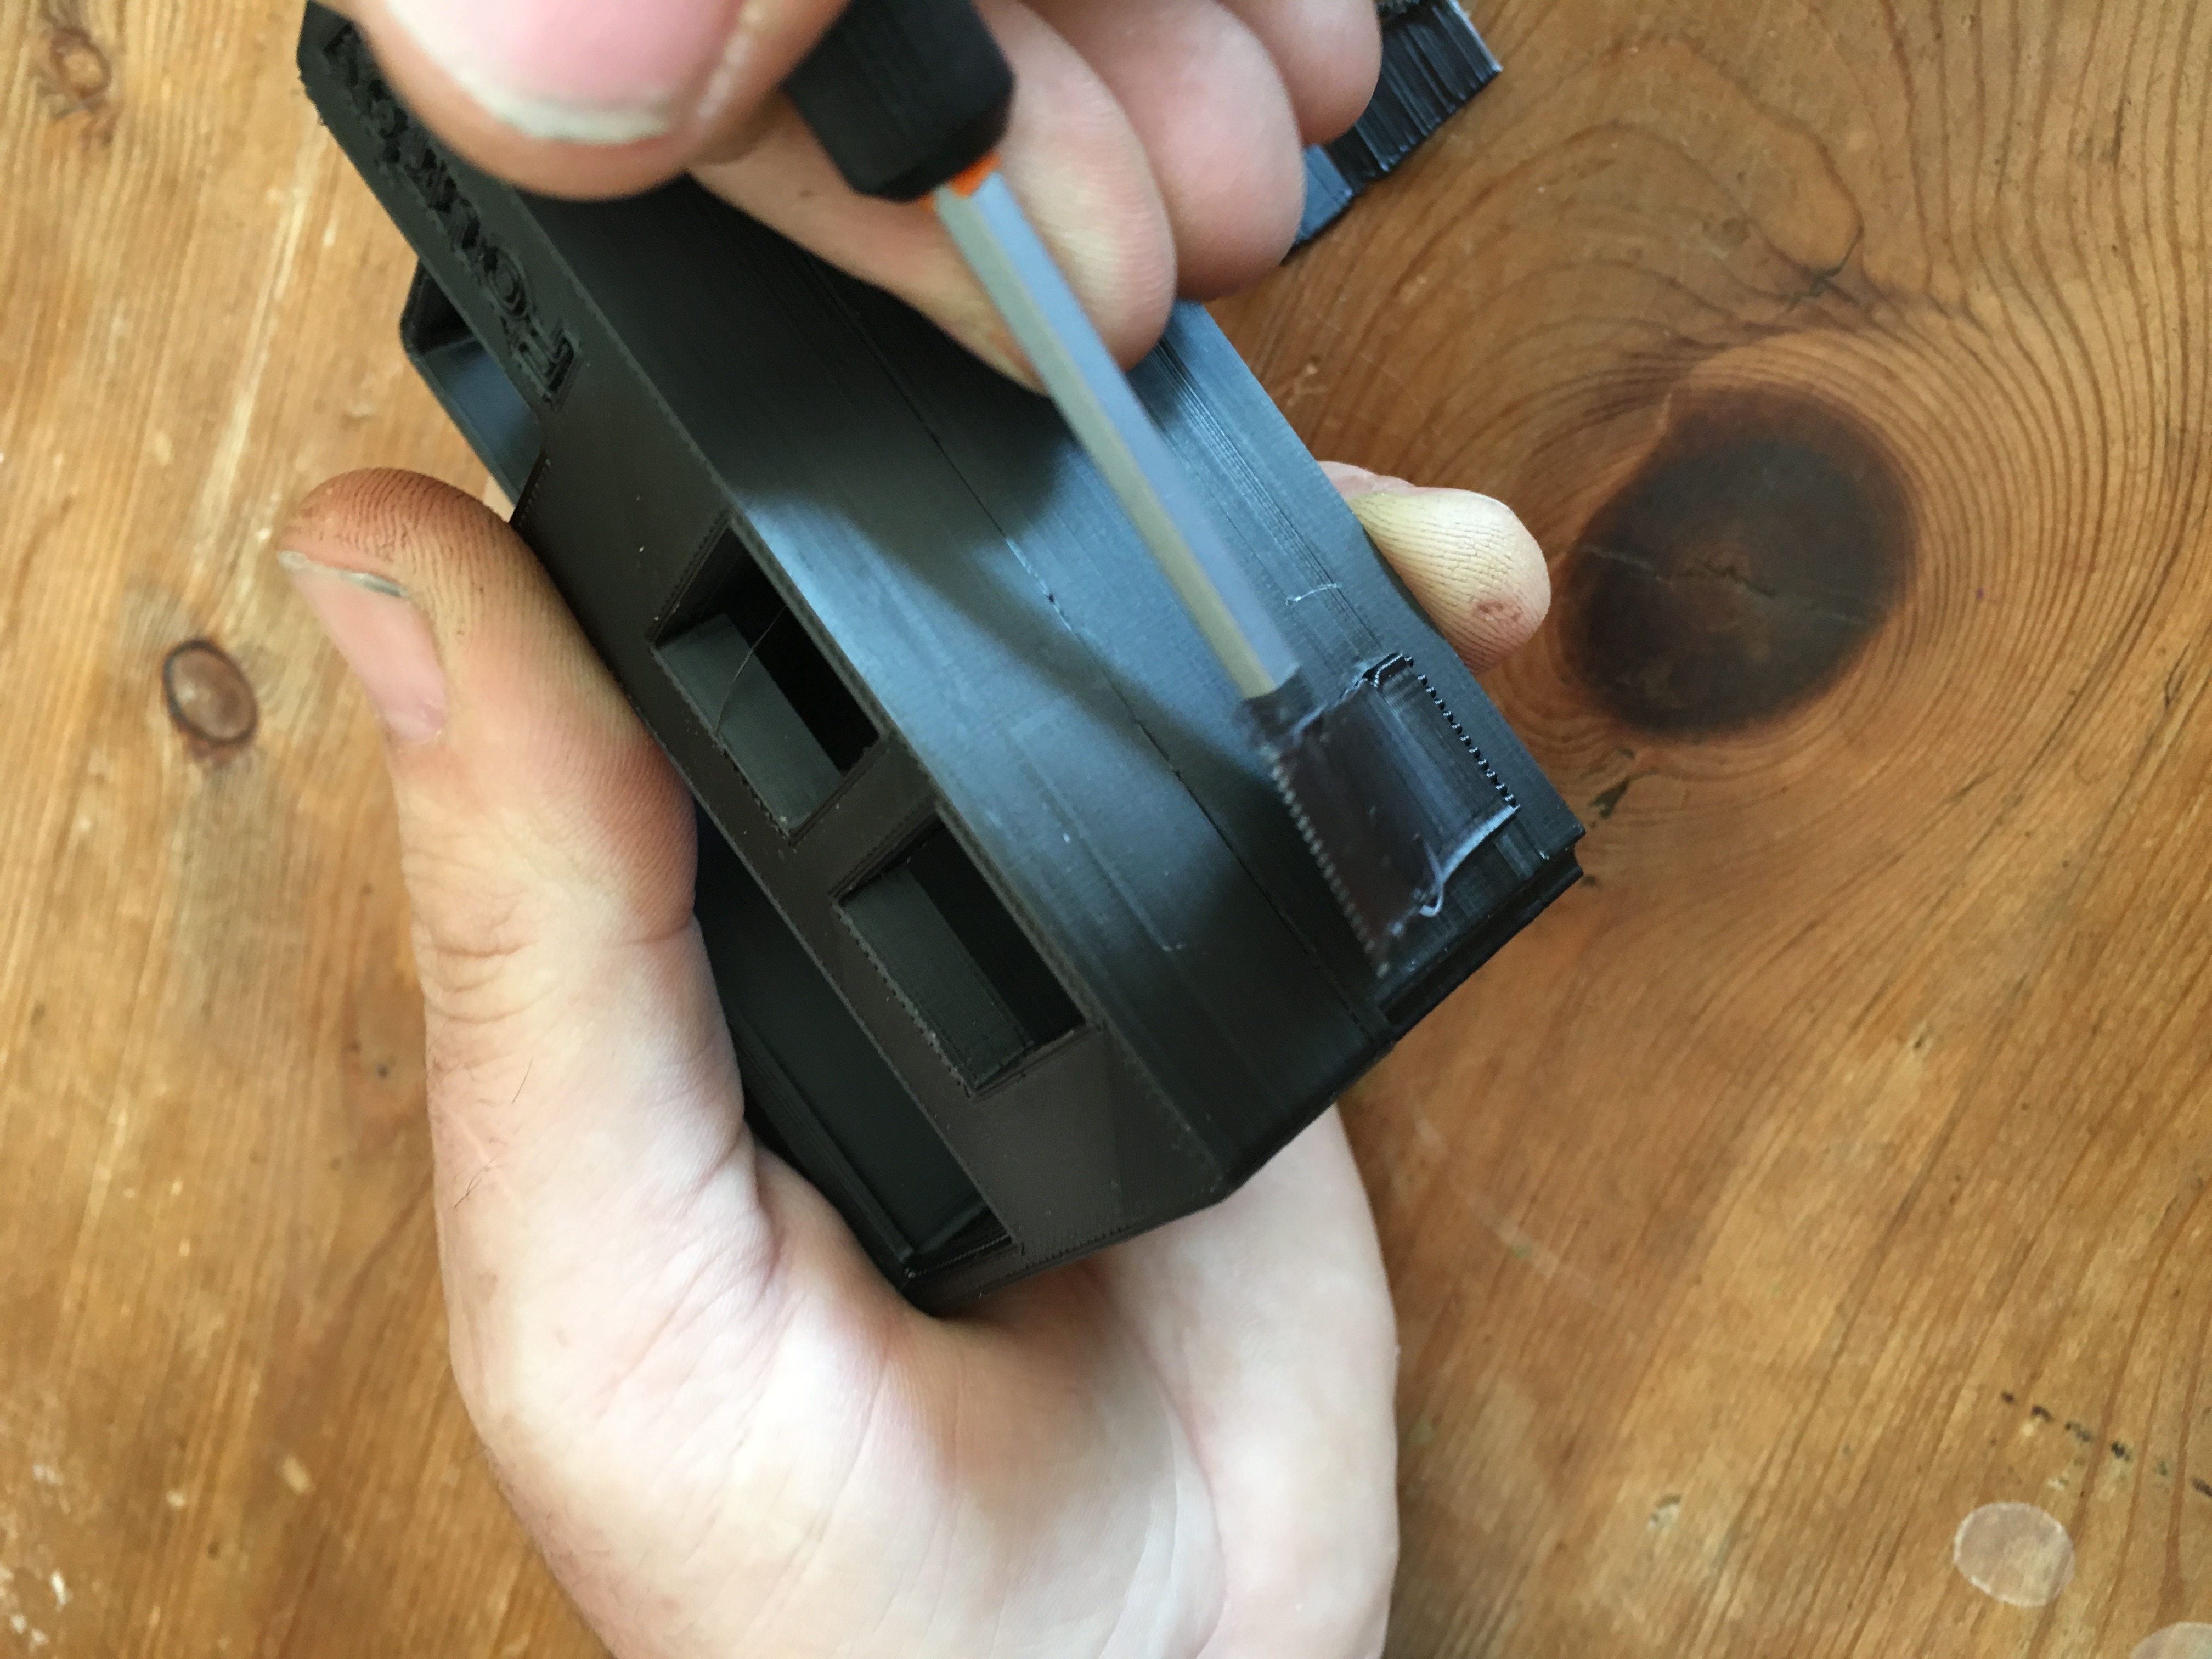
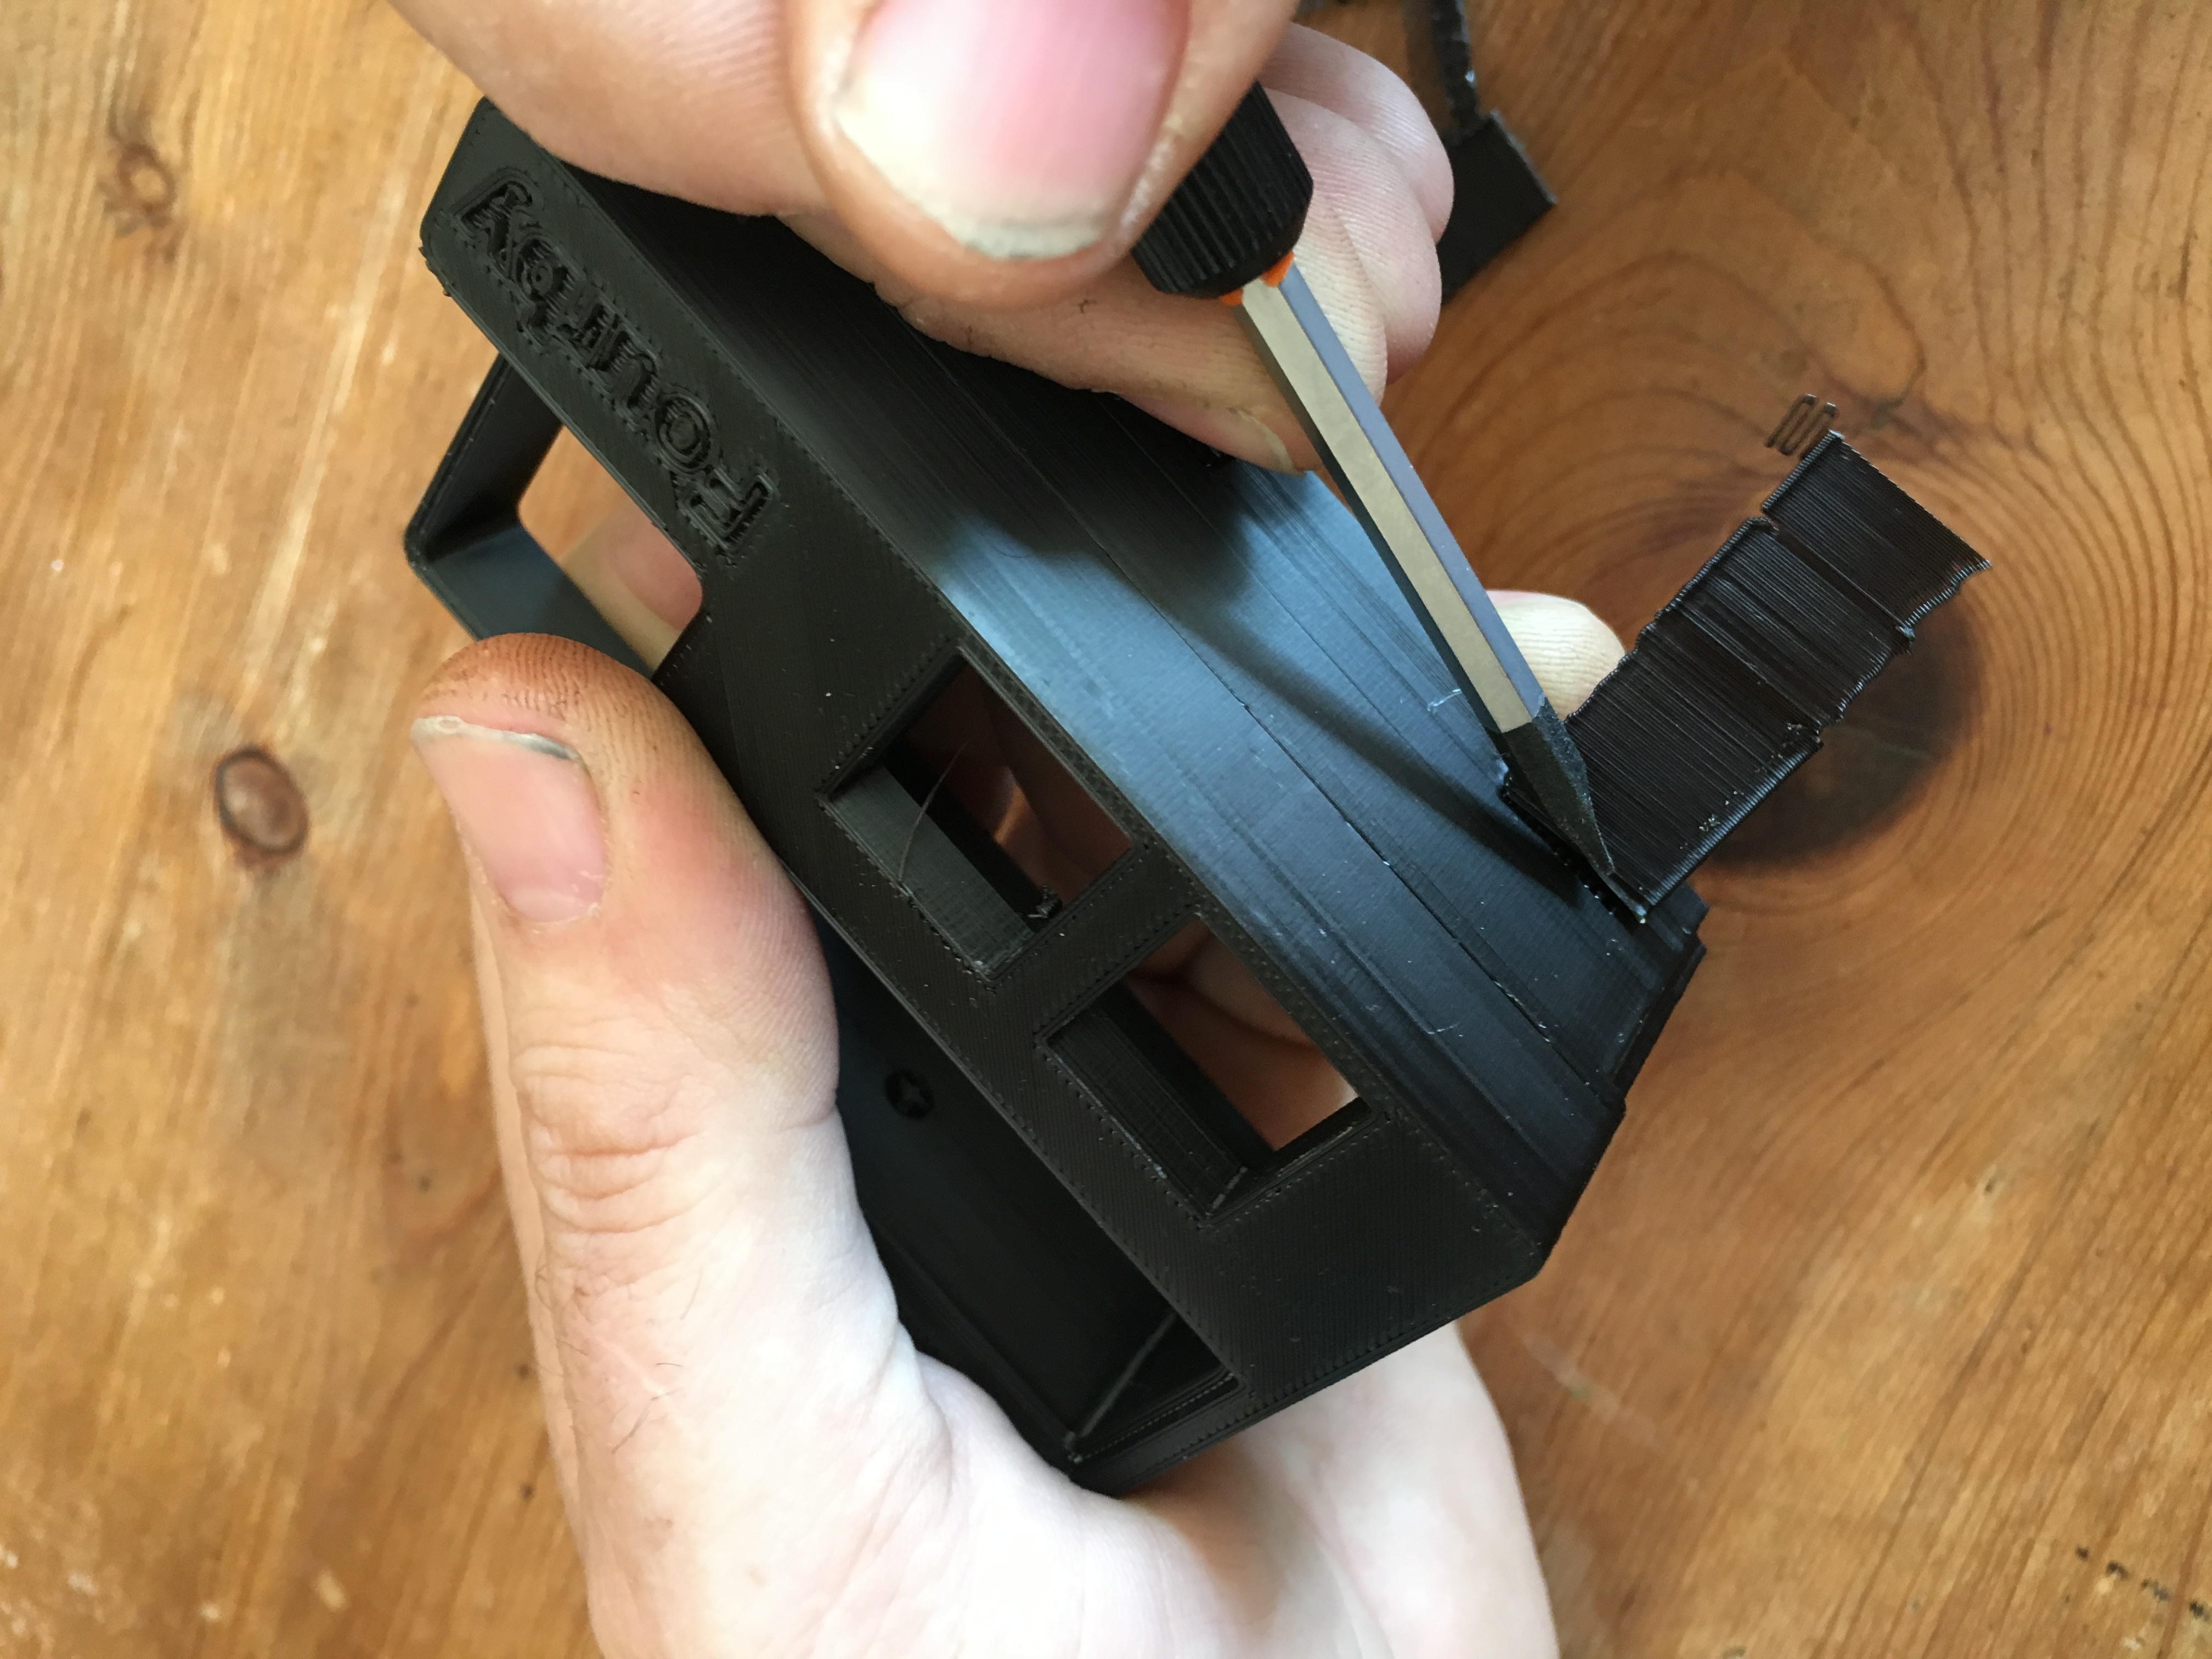
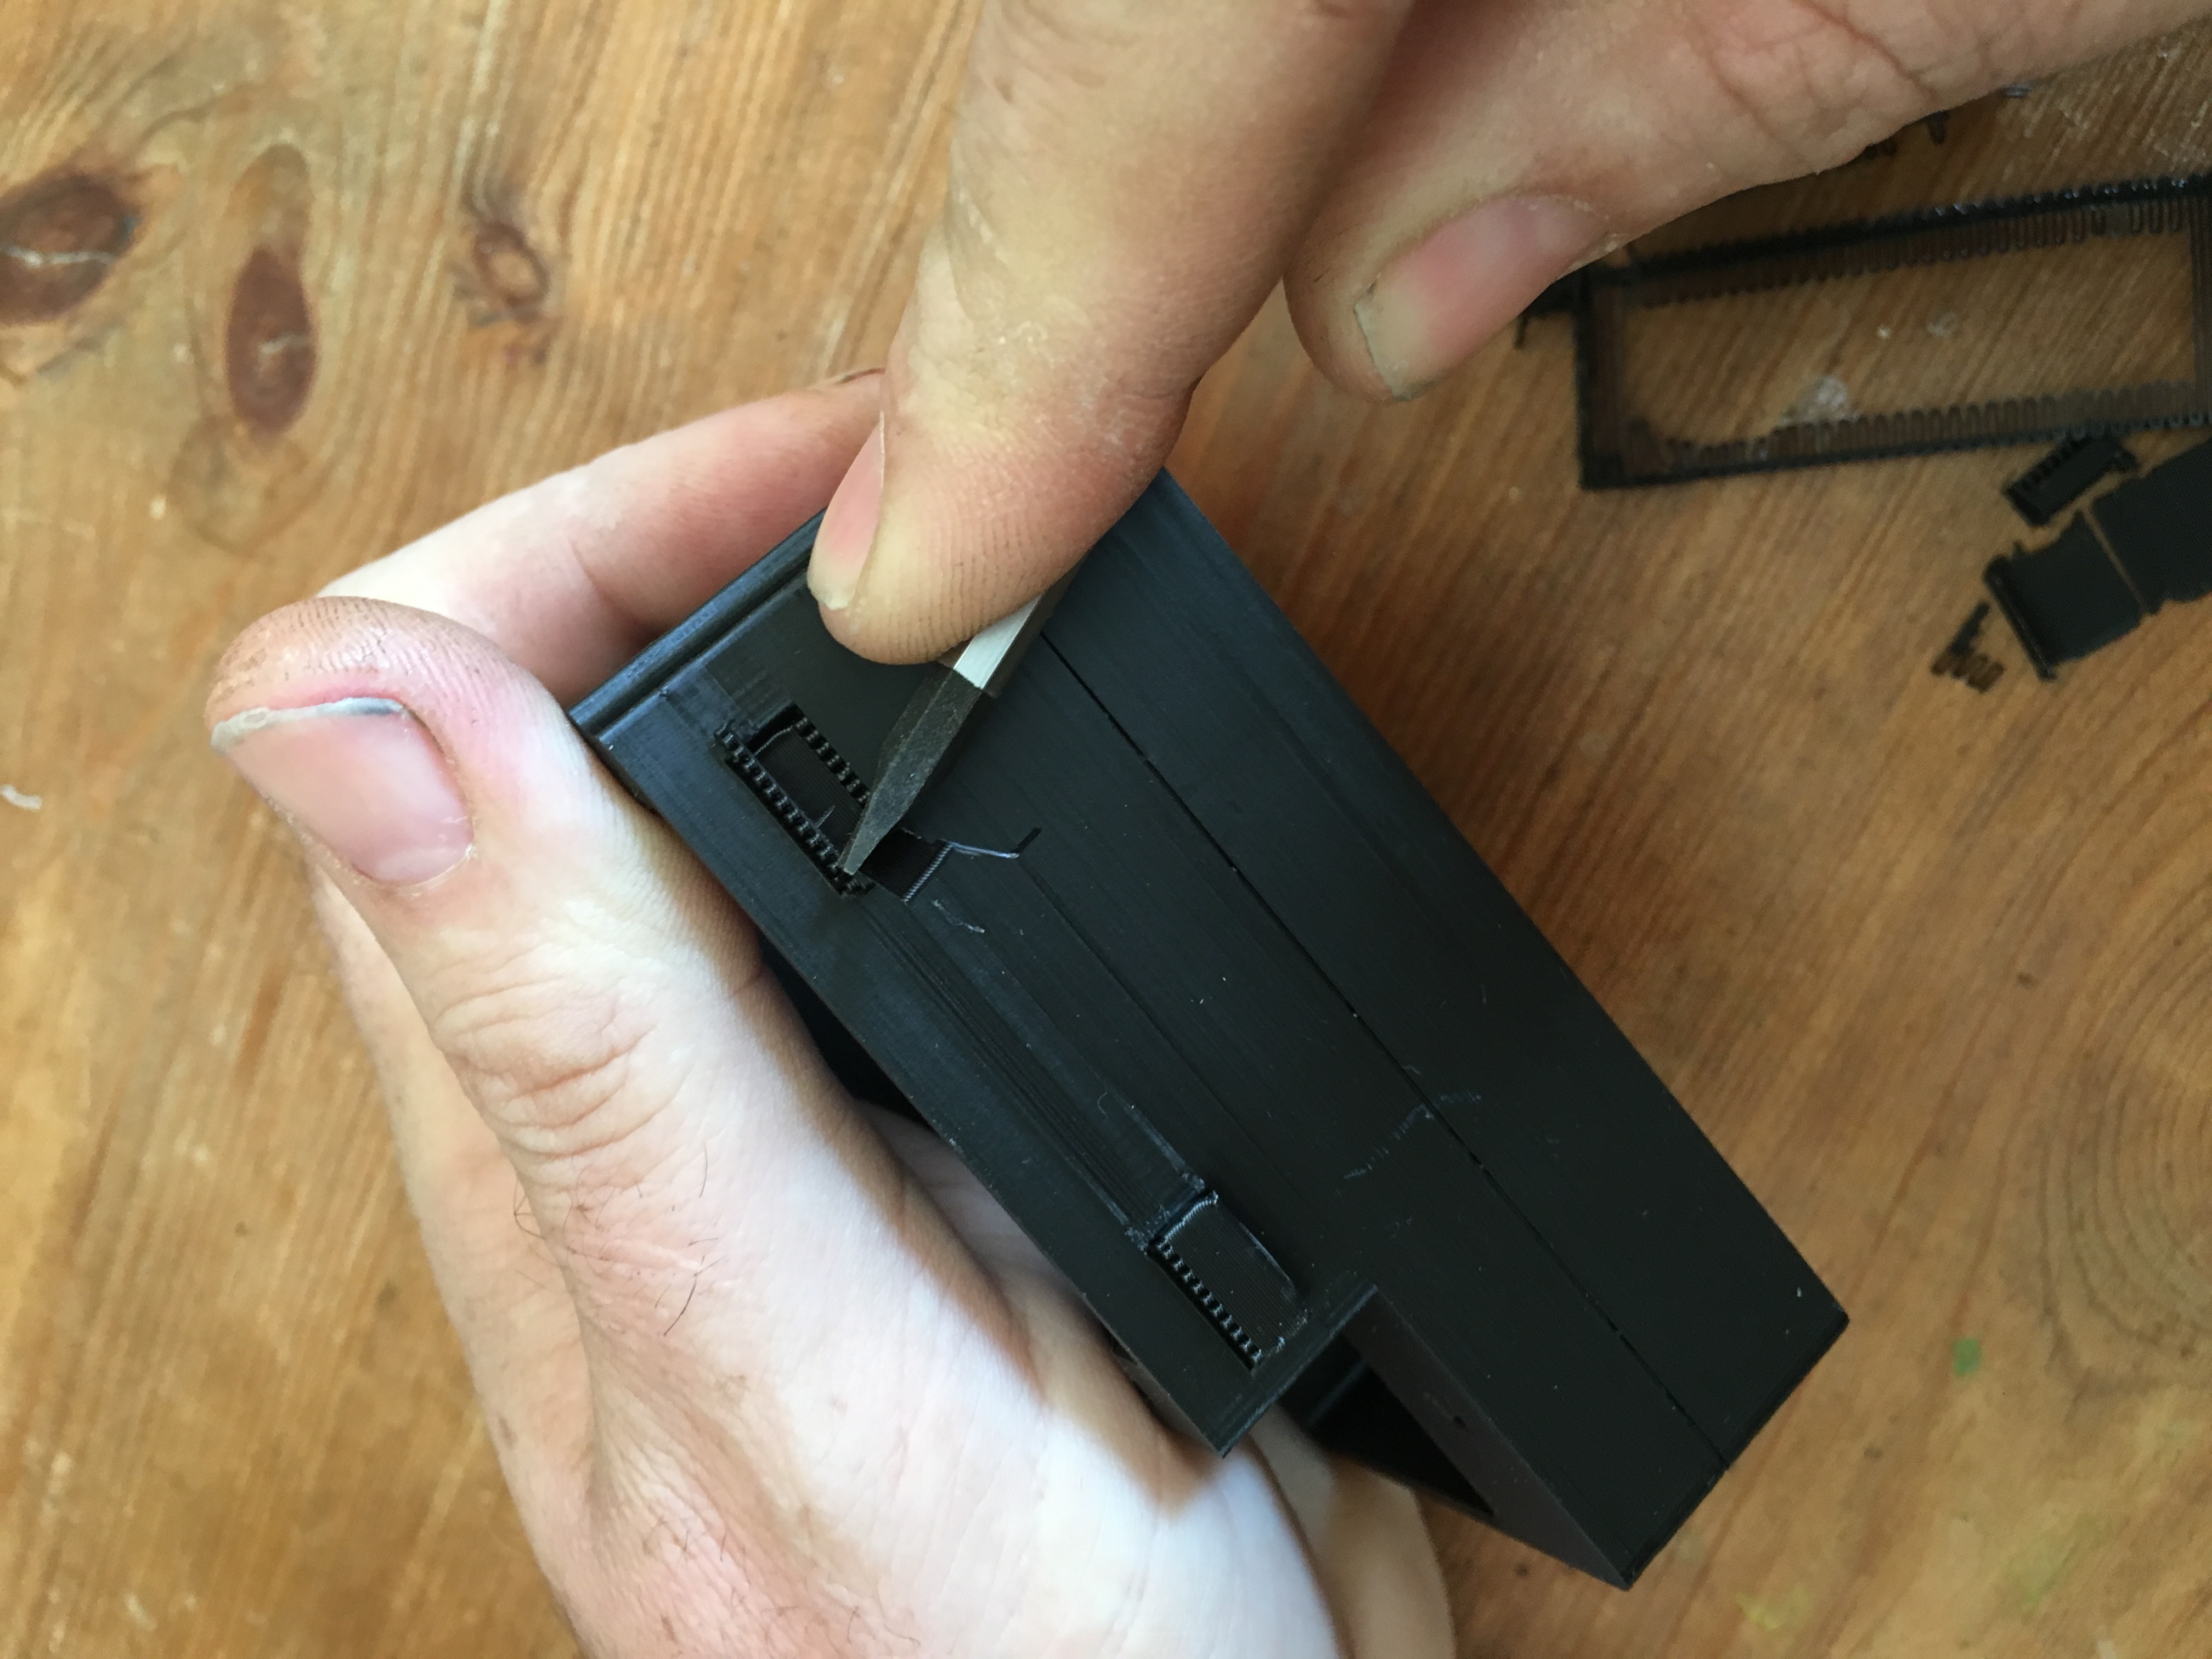

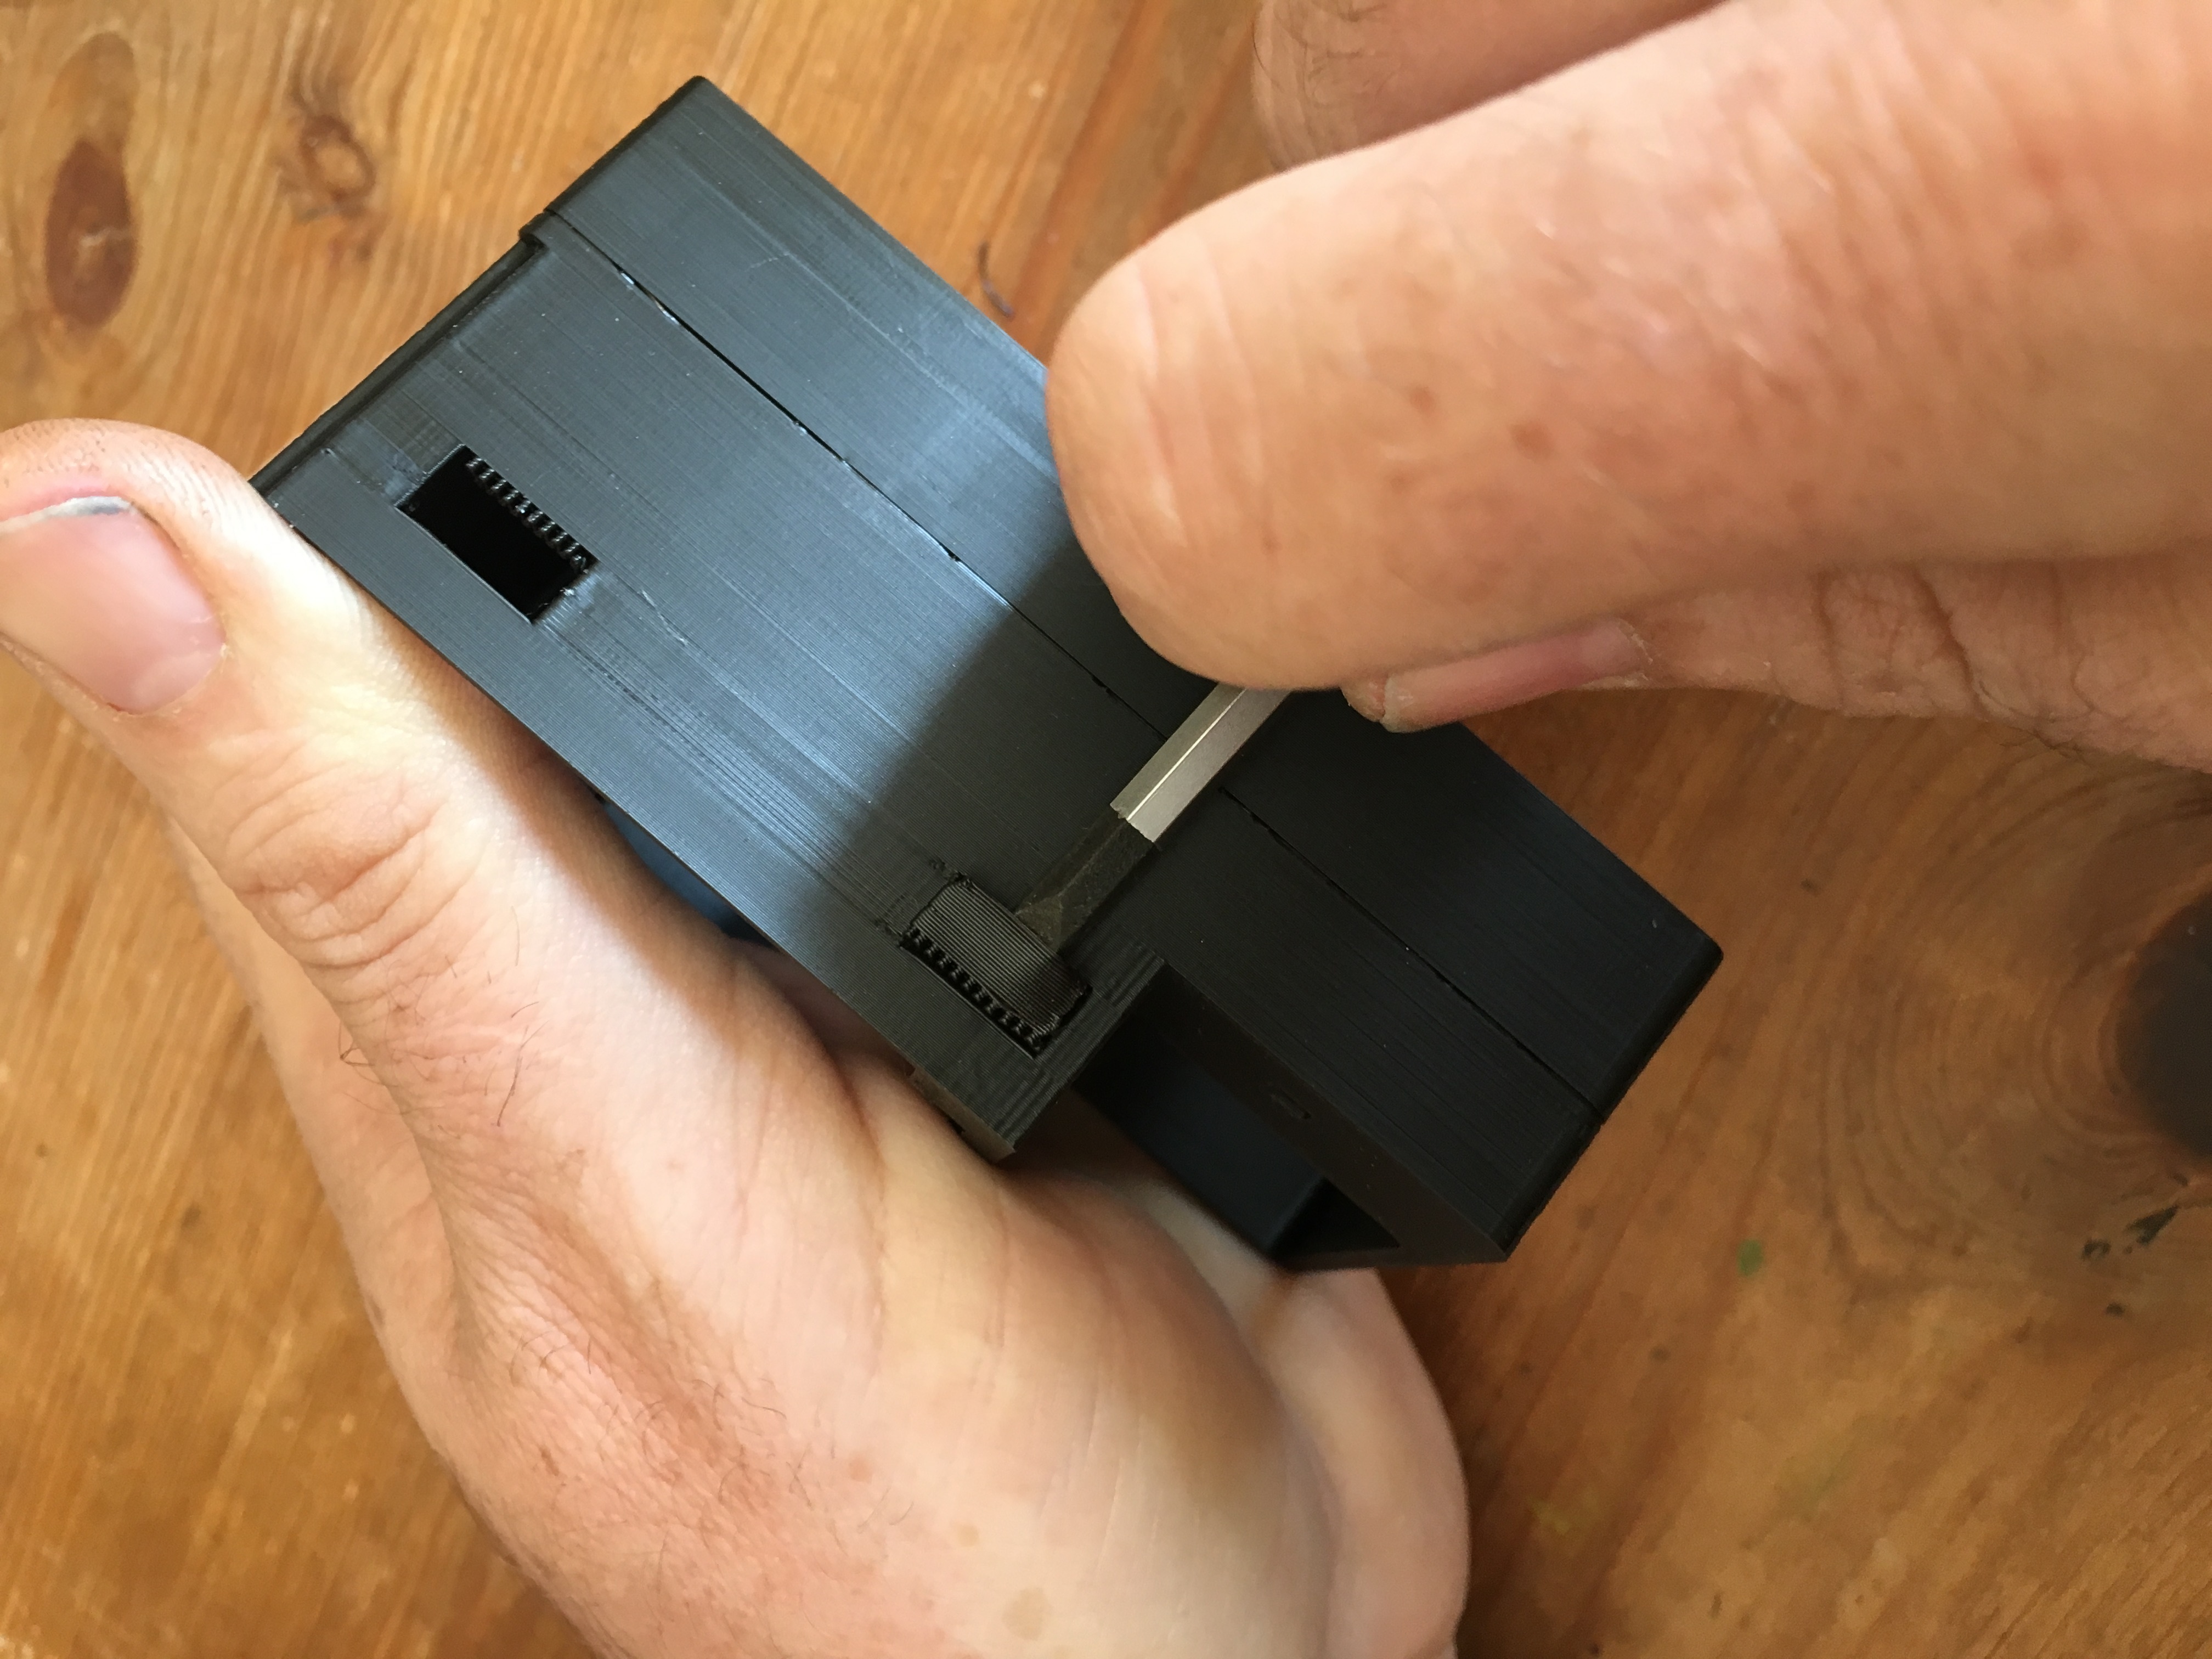
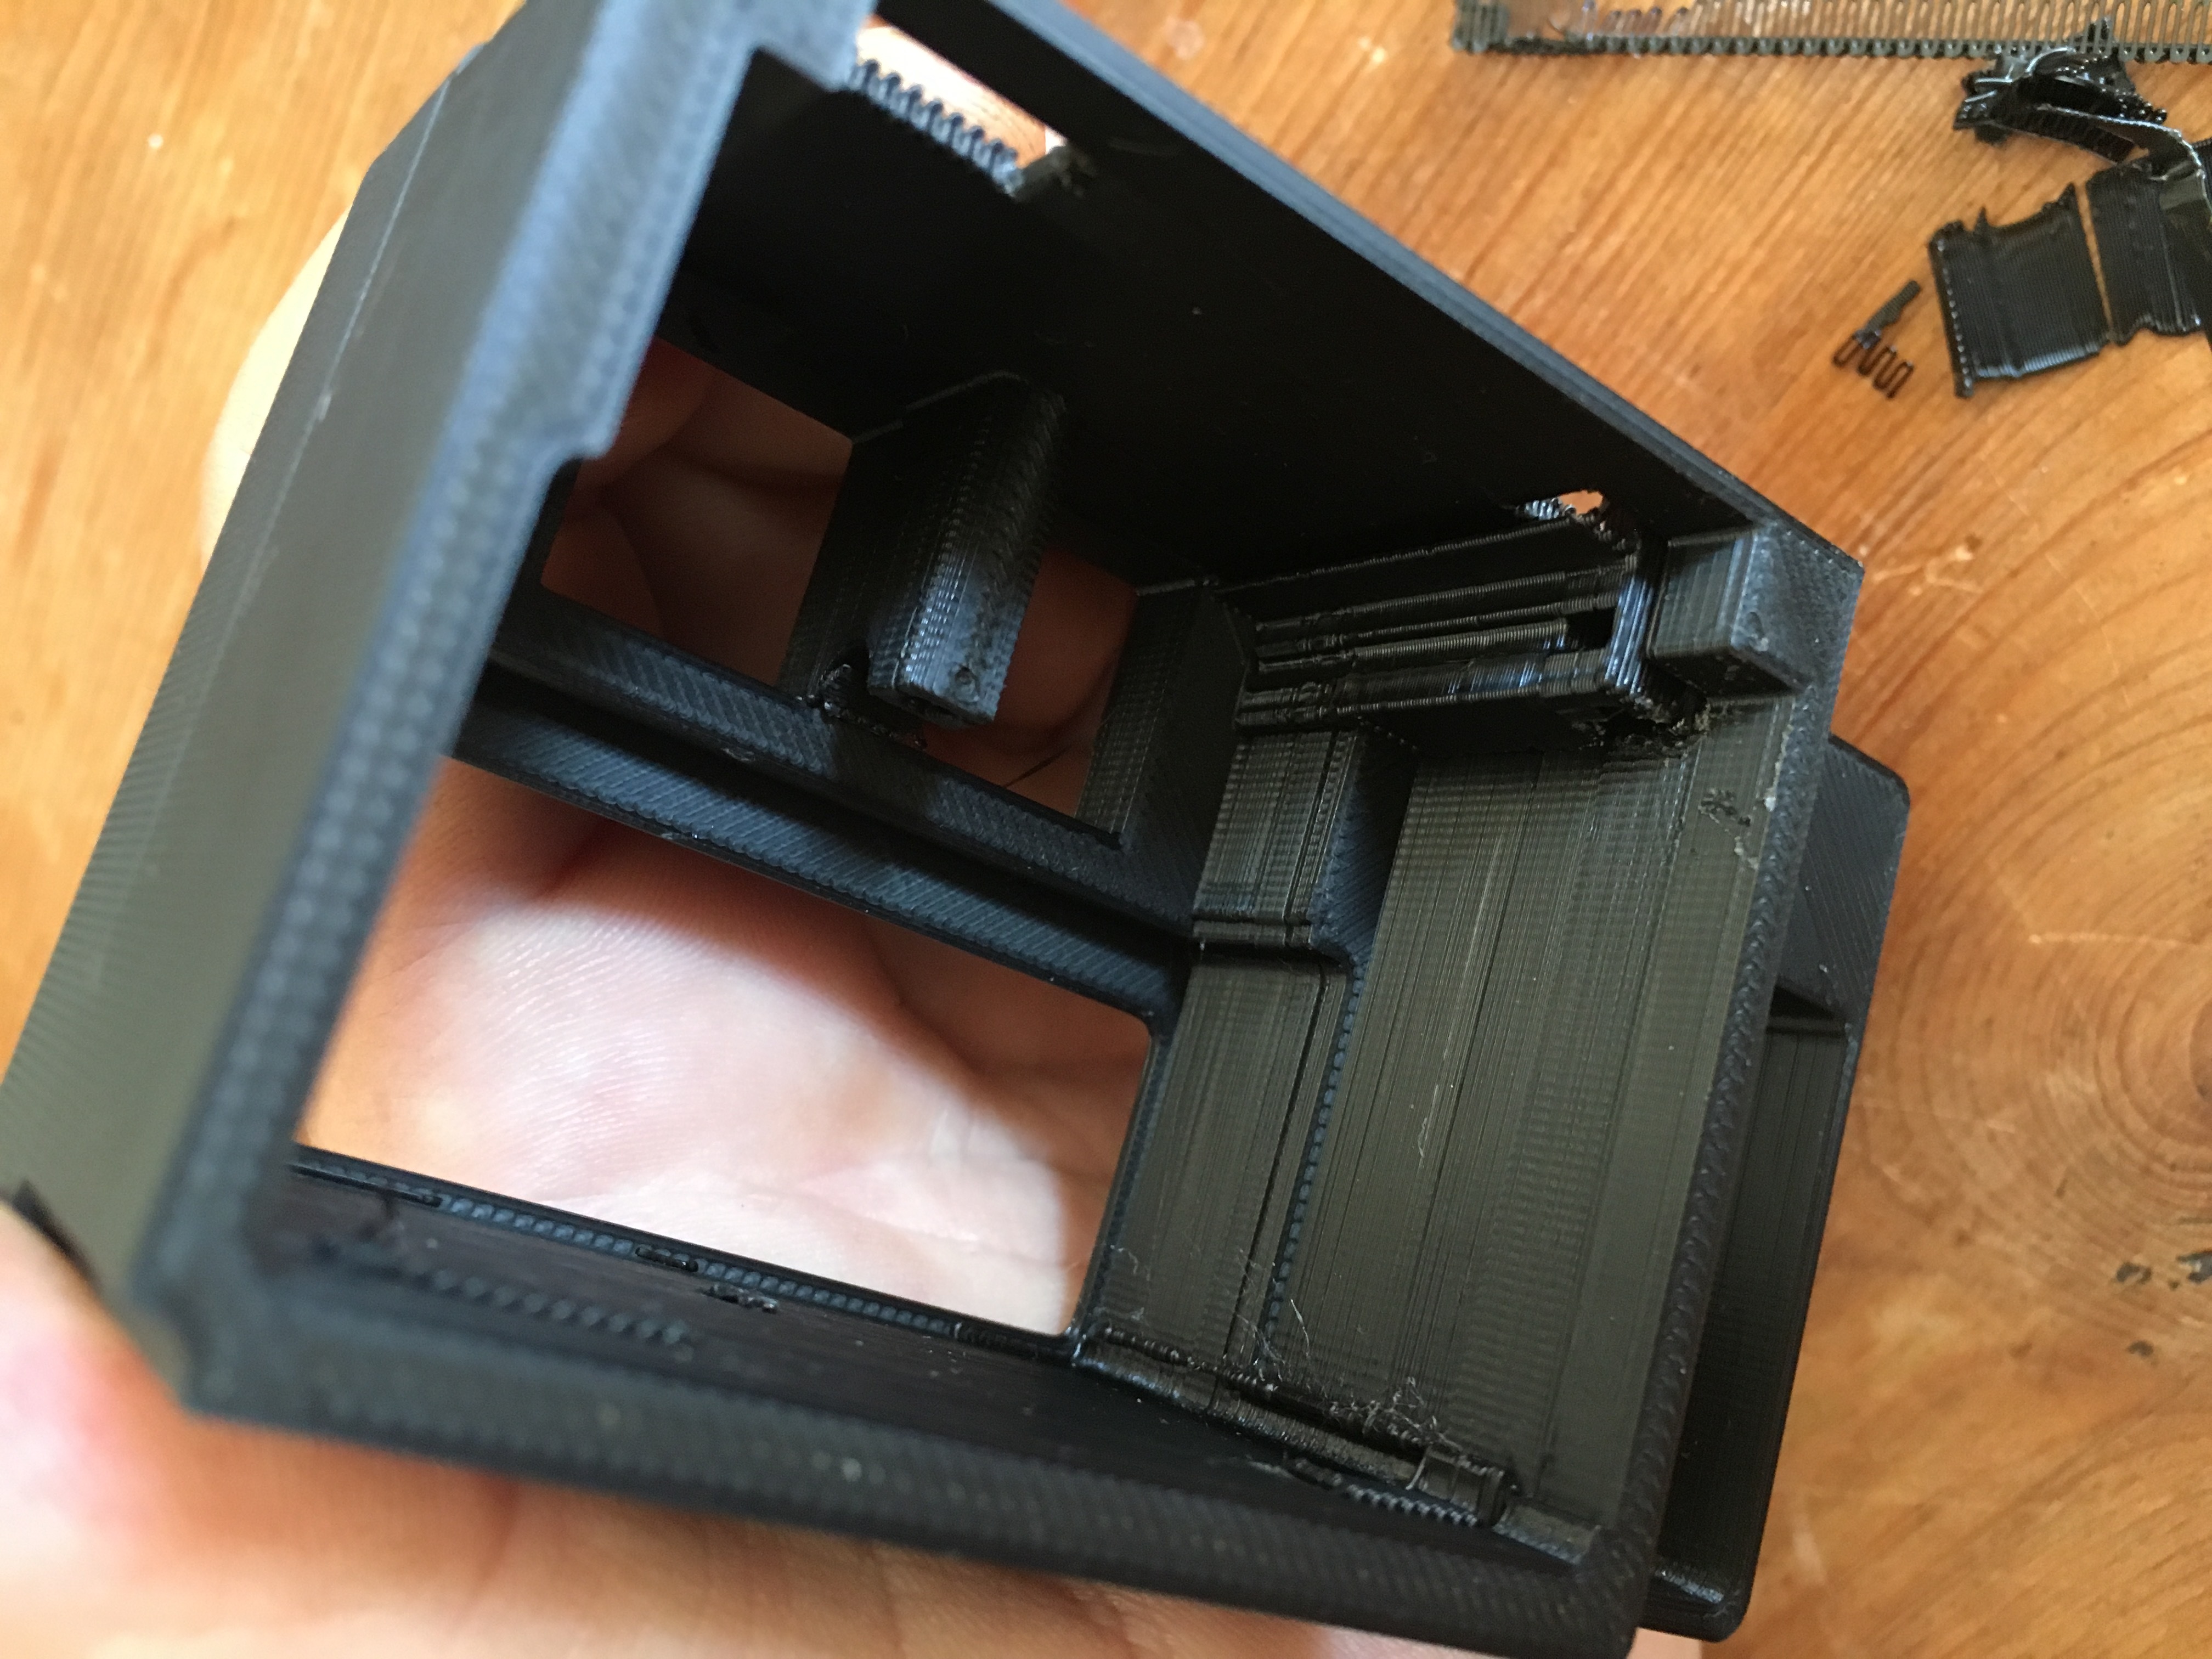
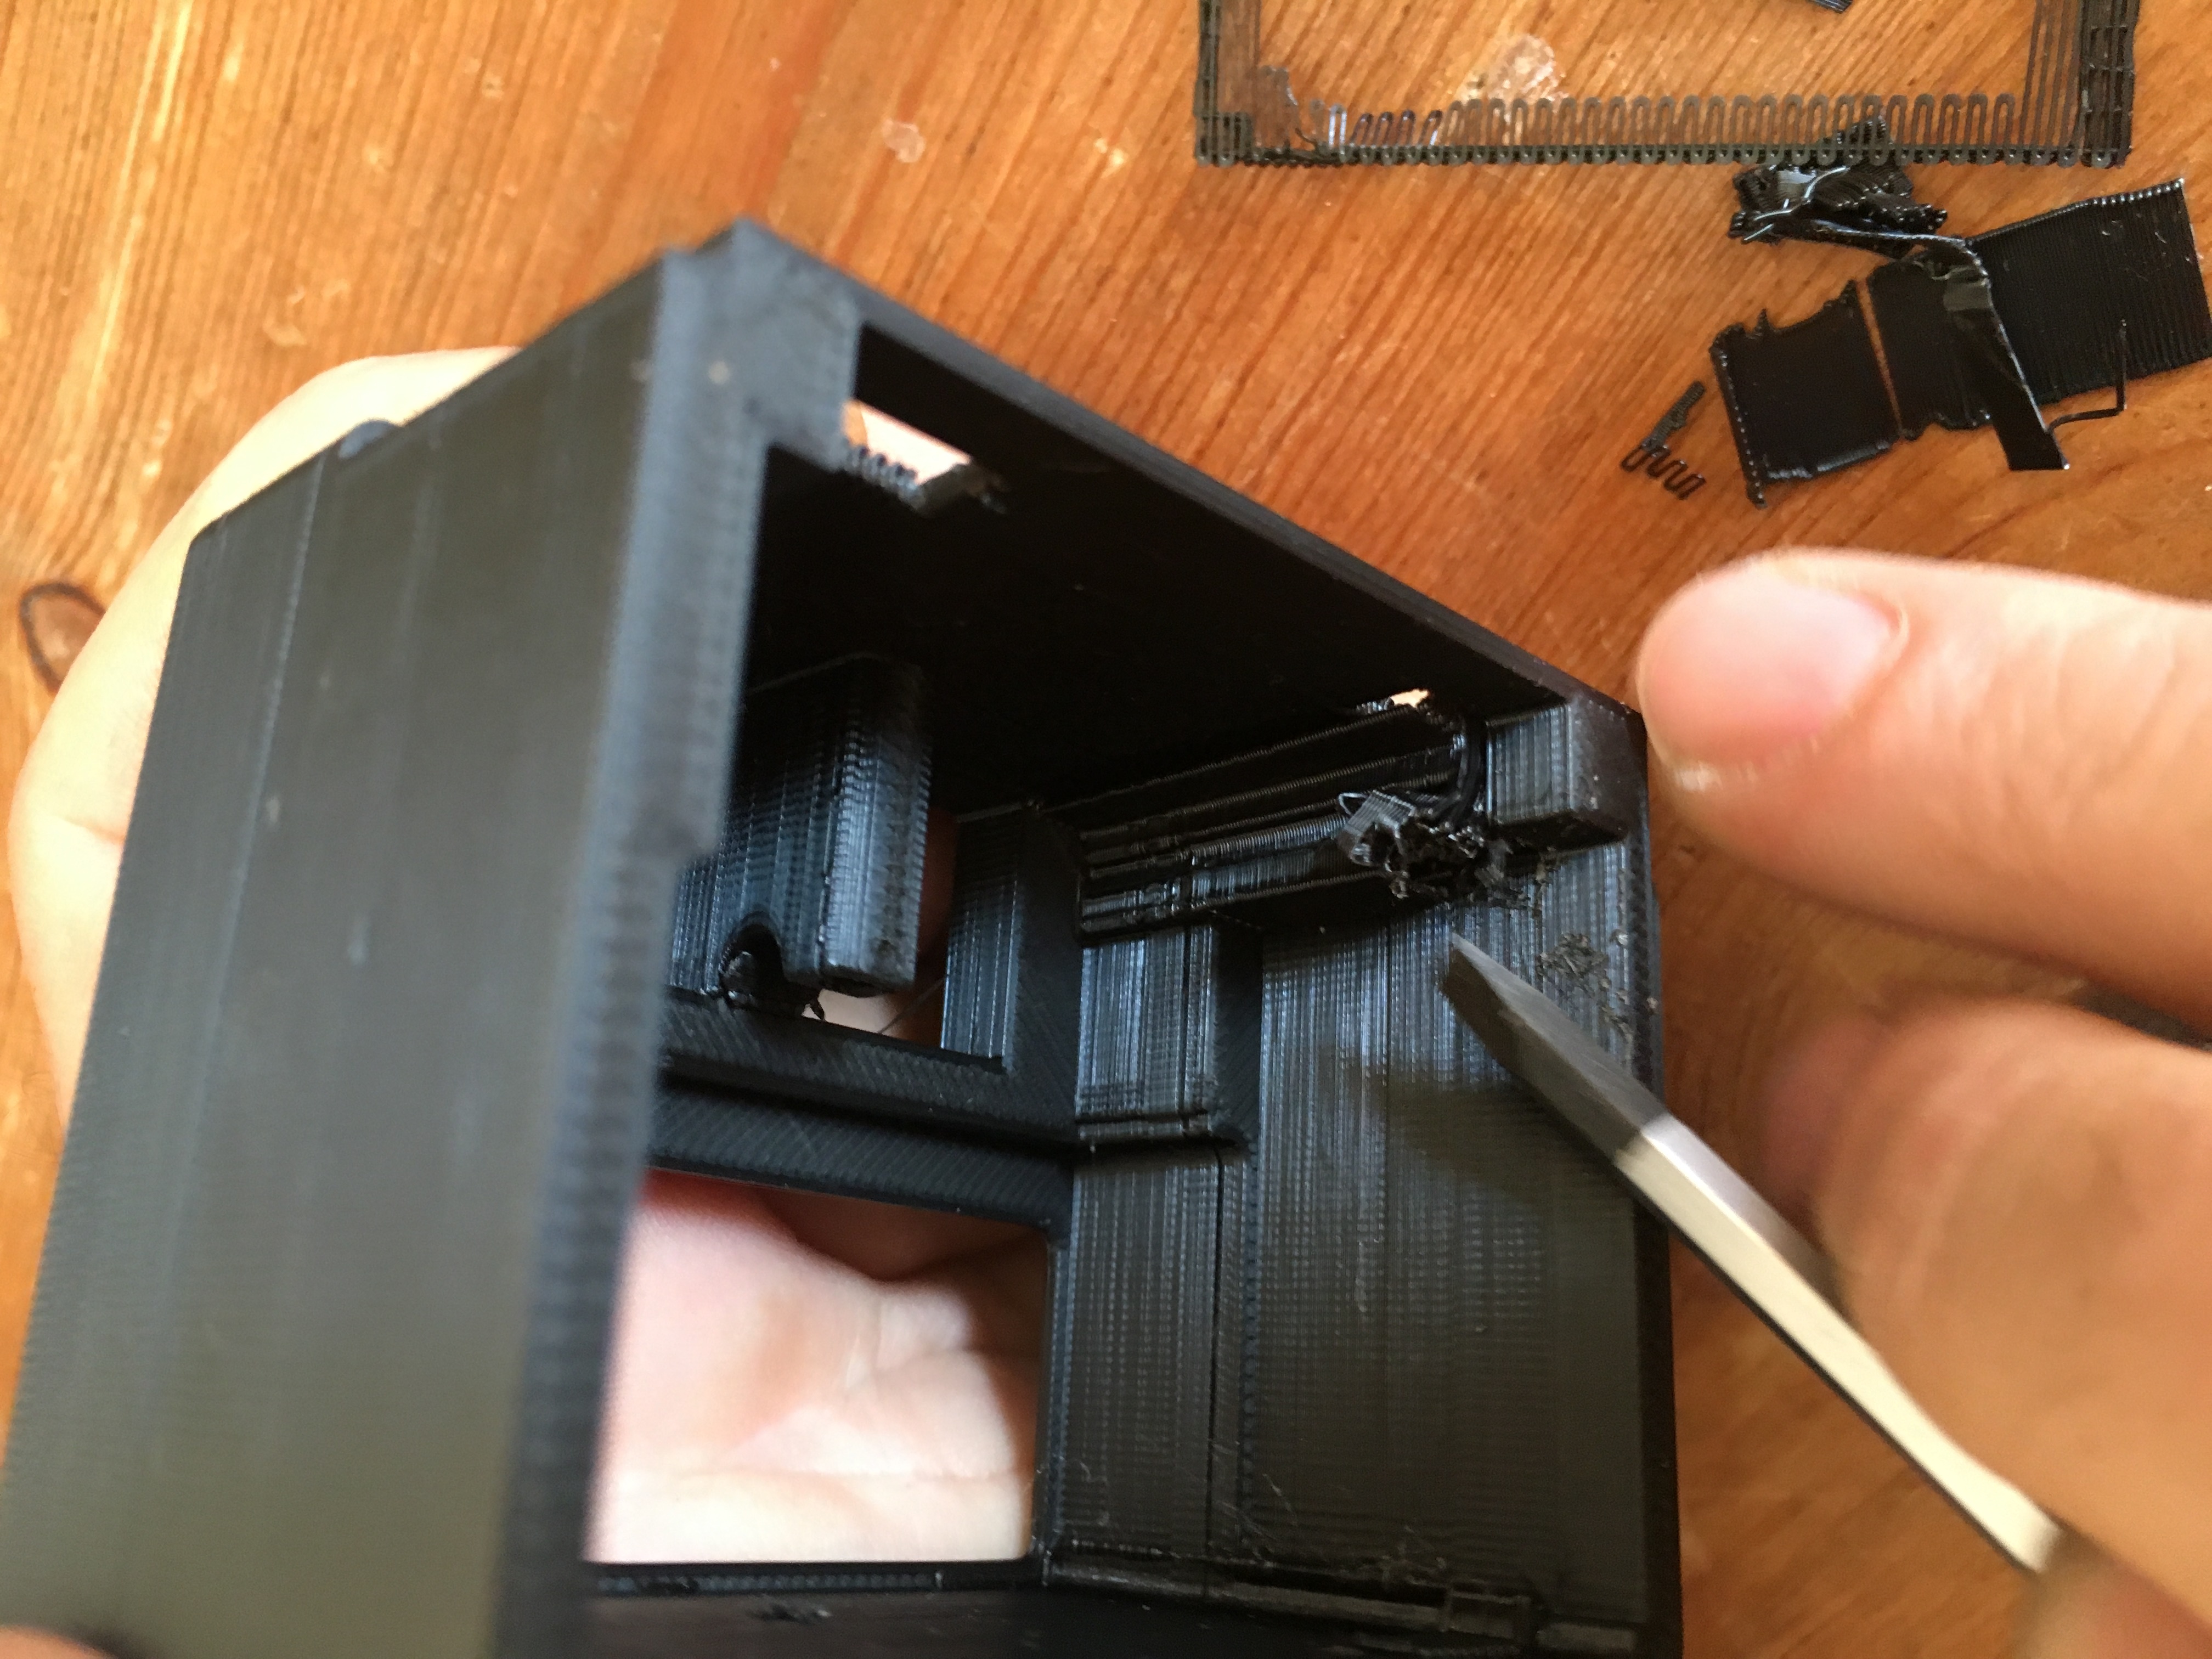
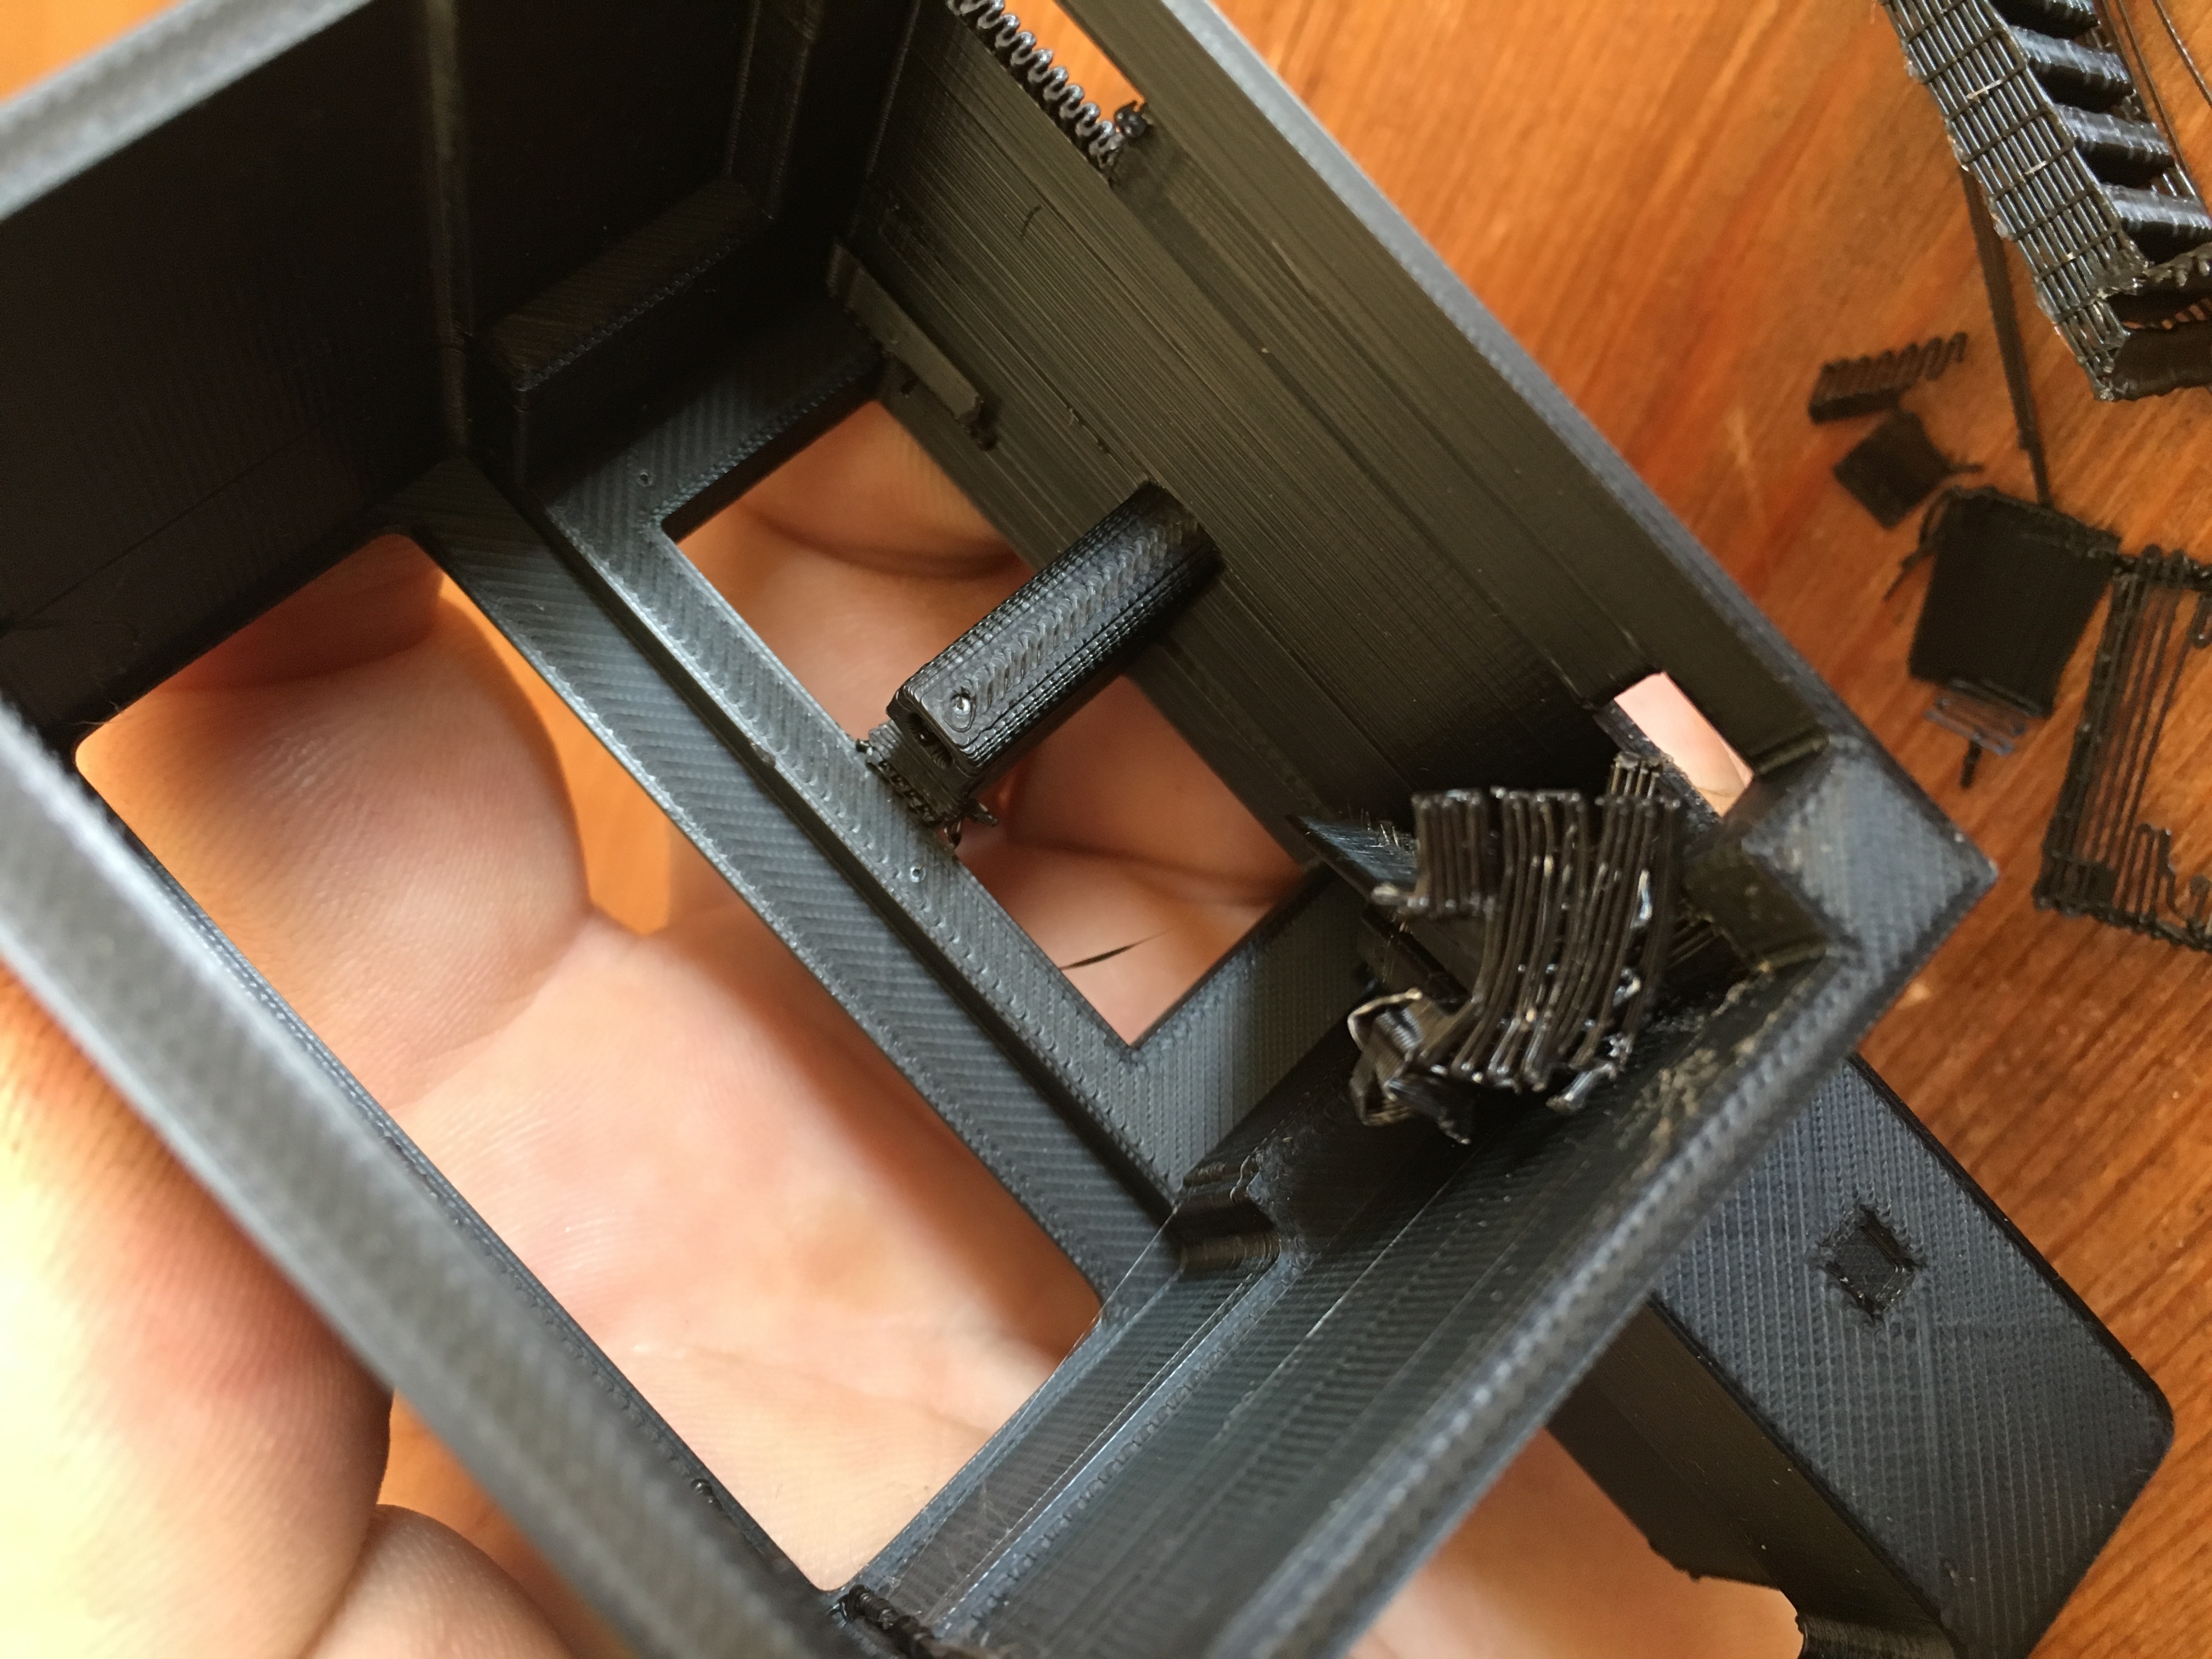
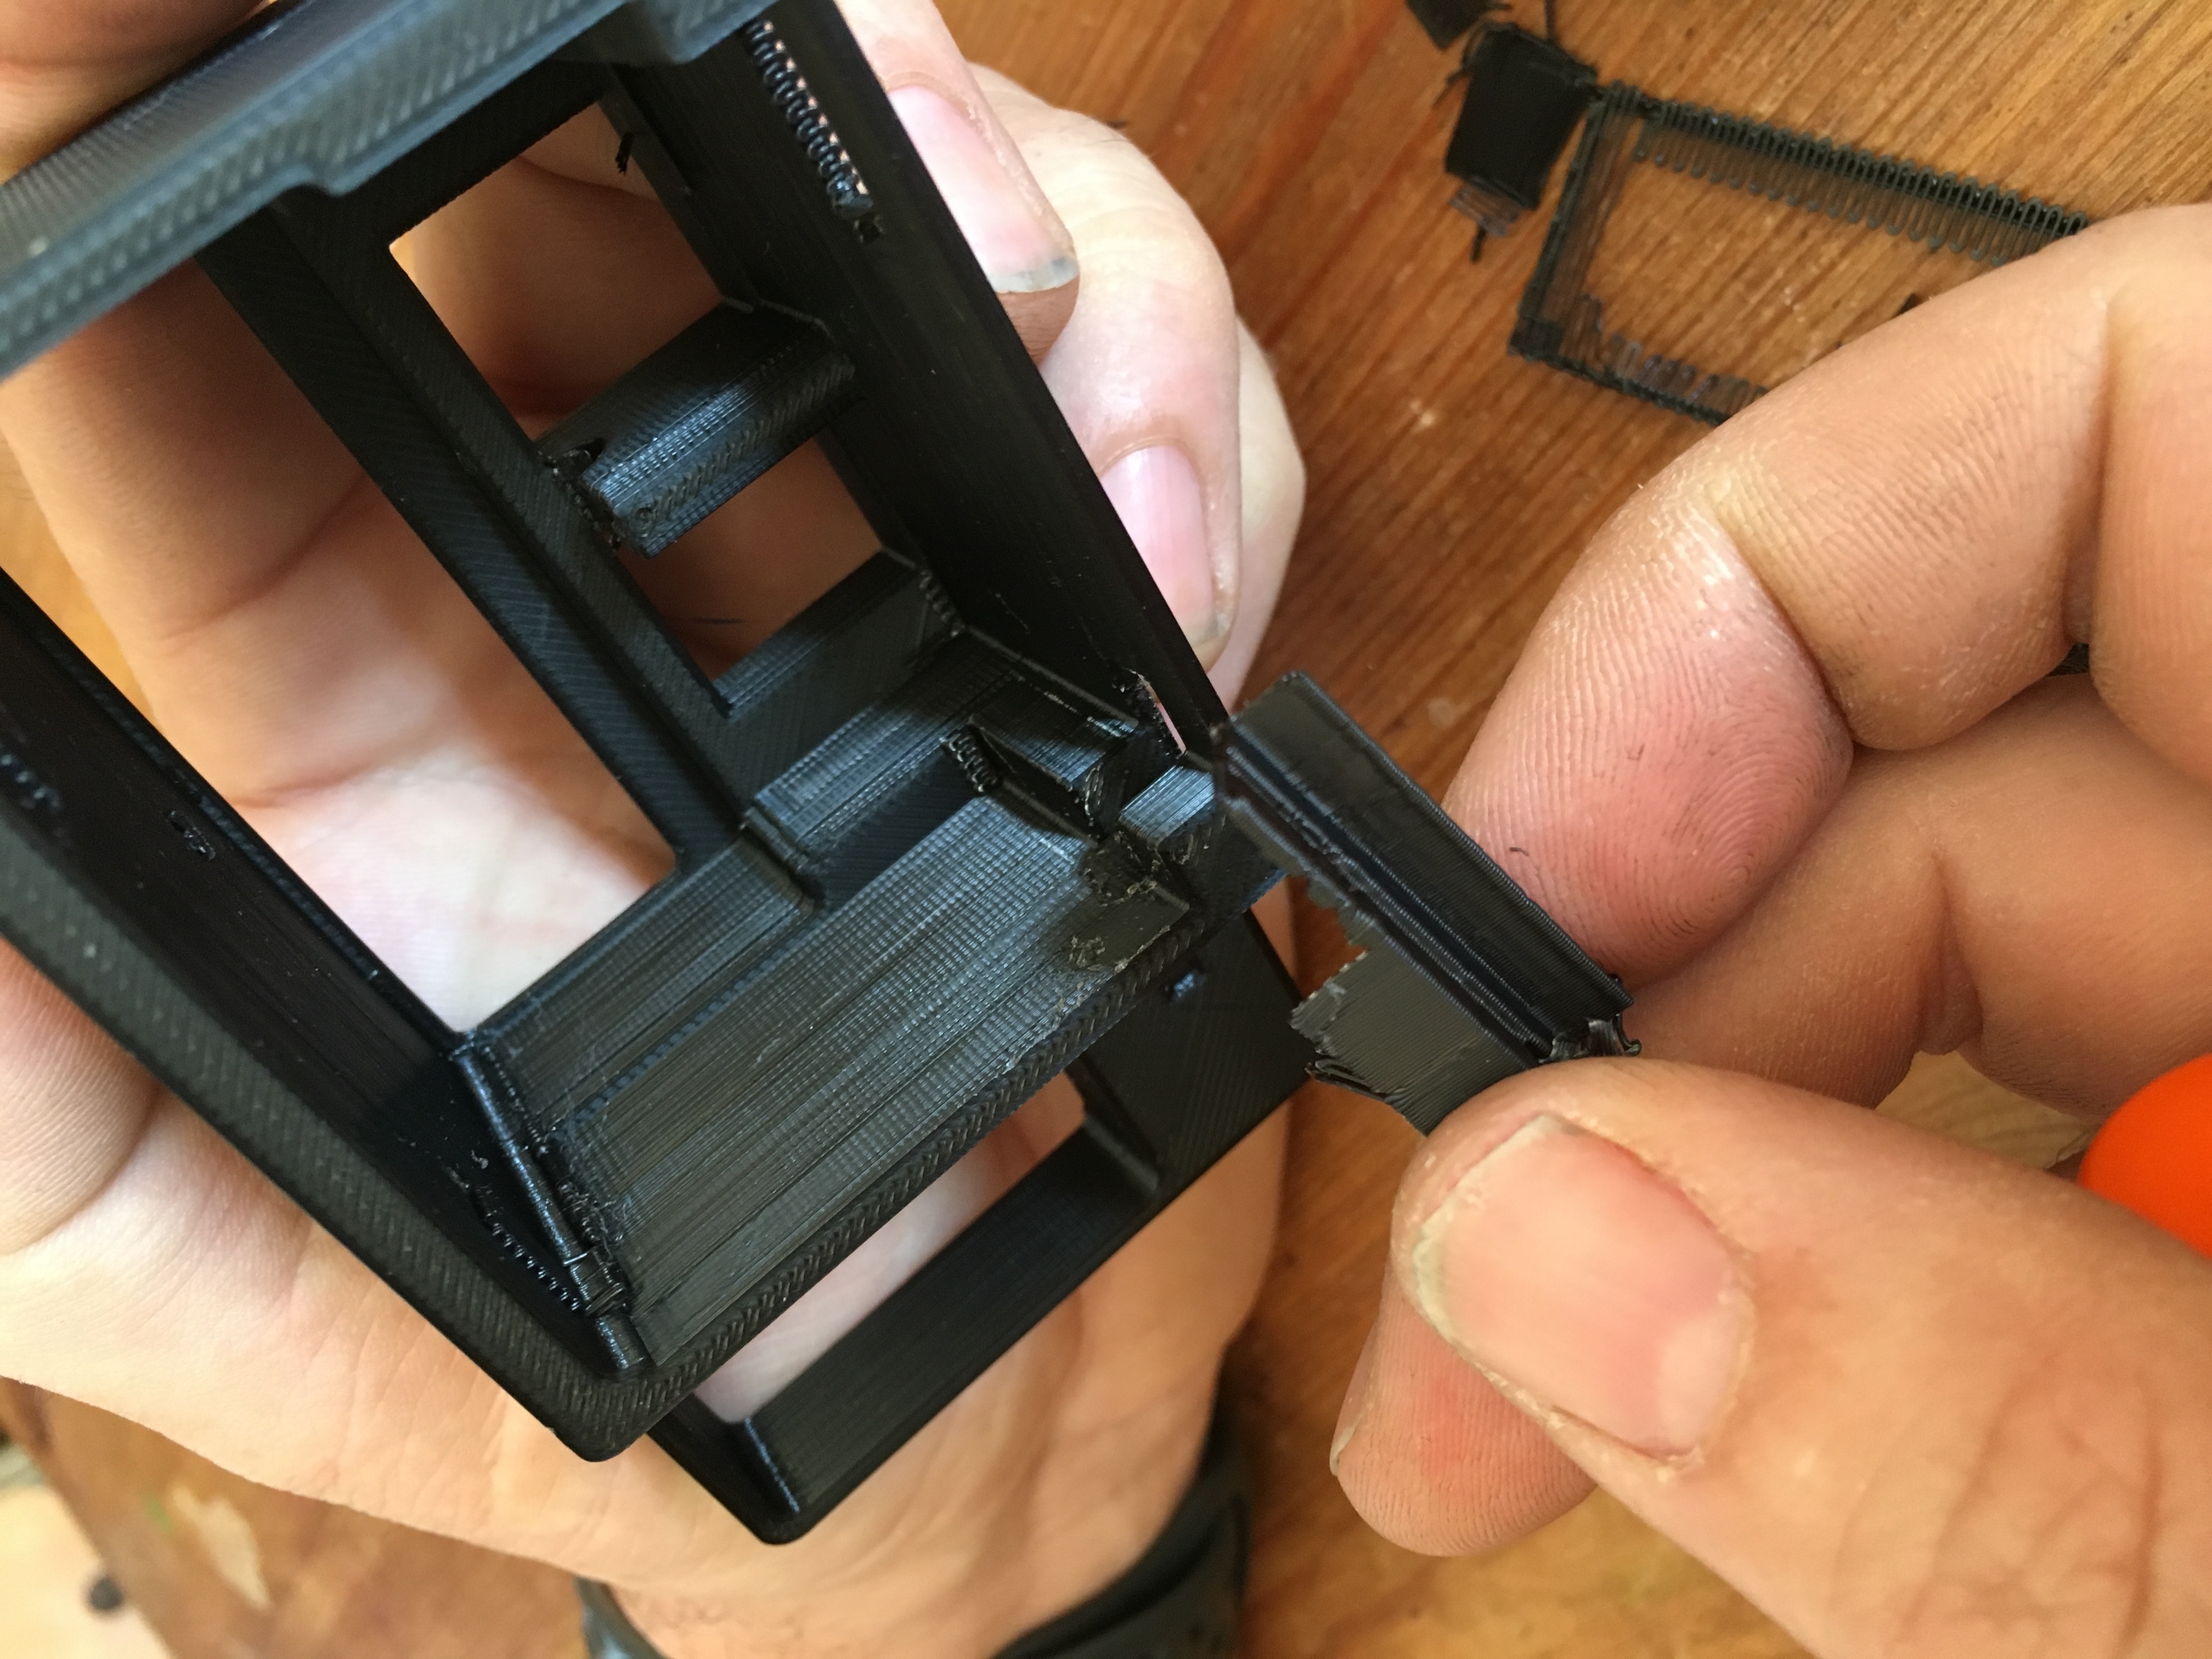
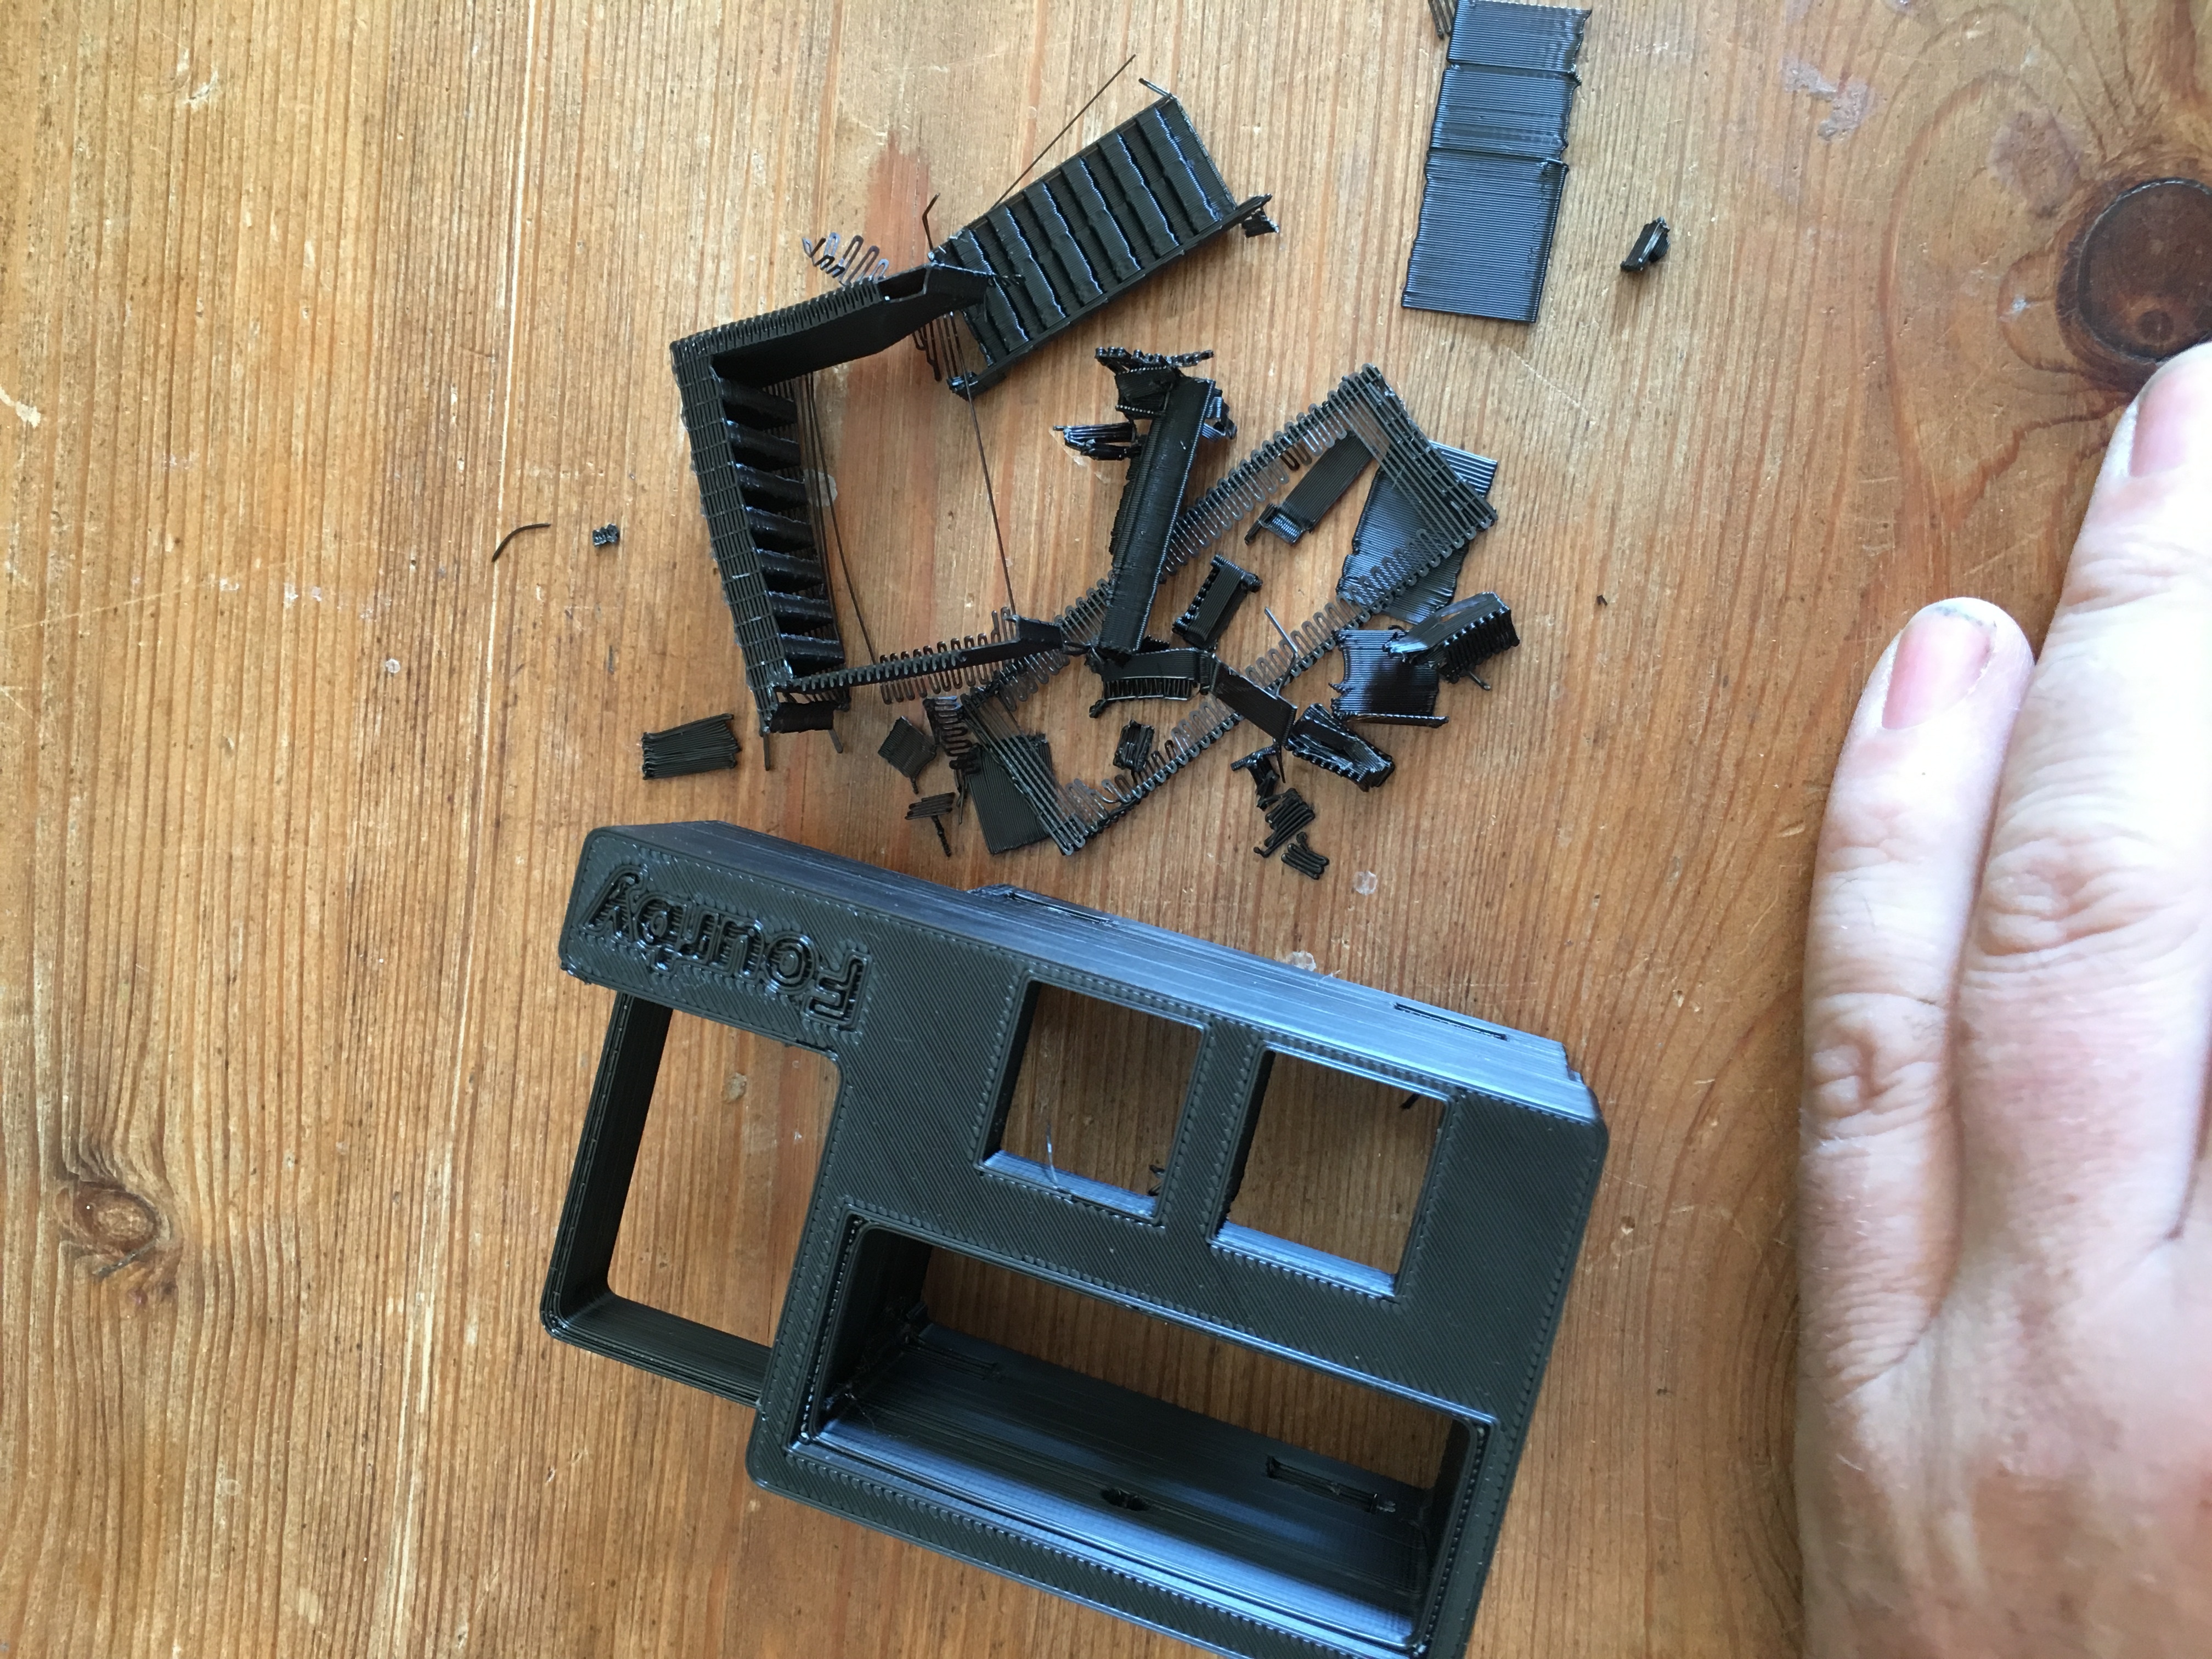
You should now be all cleaned up
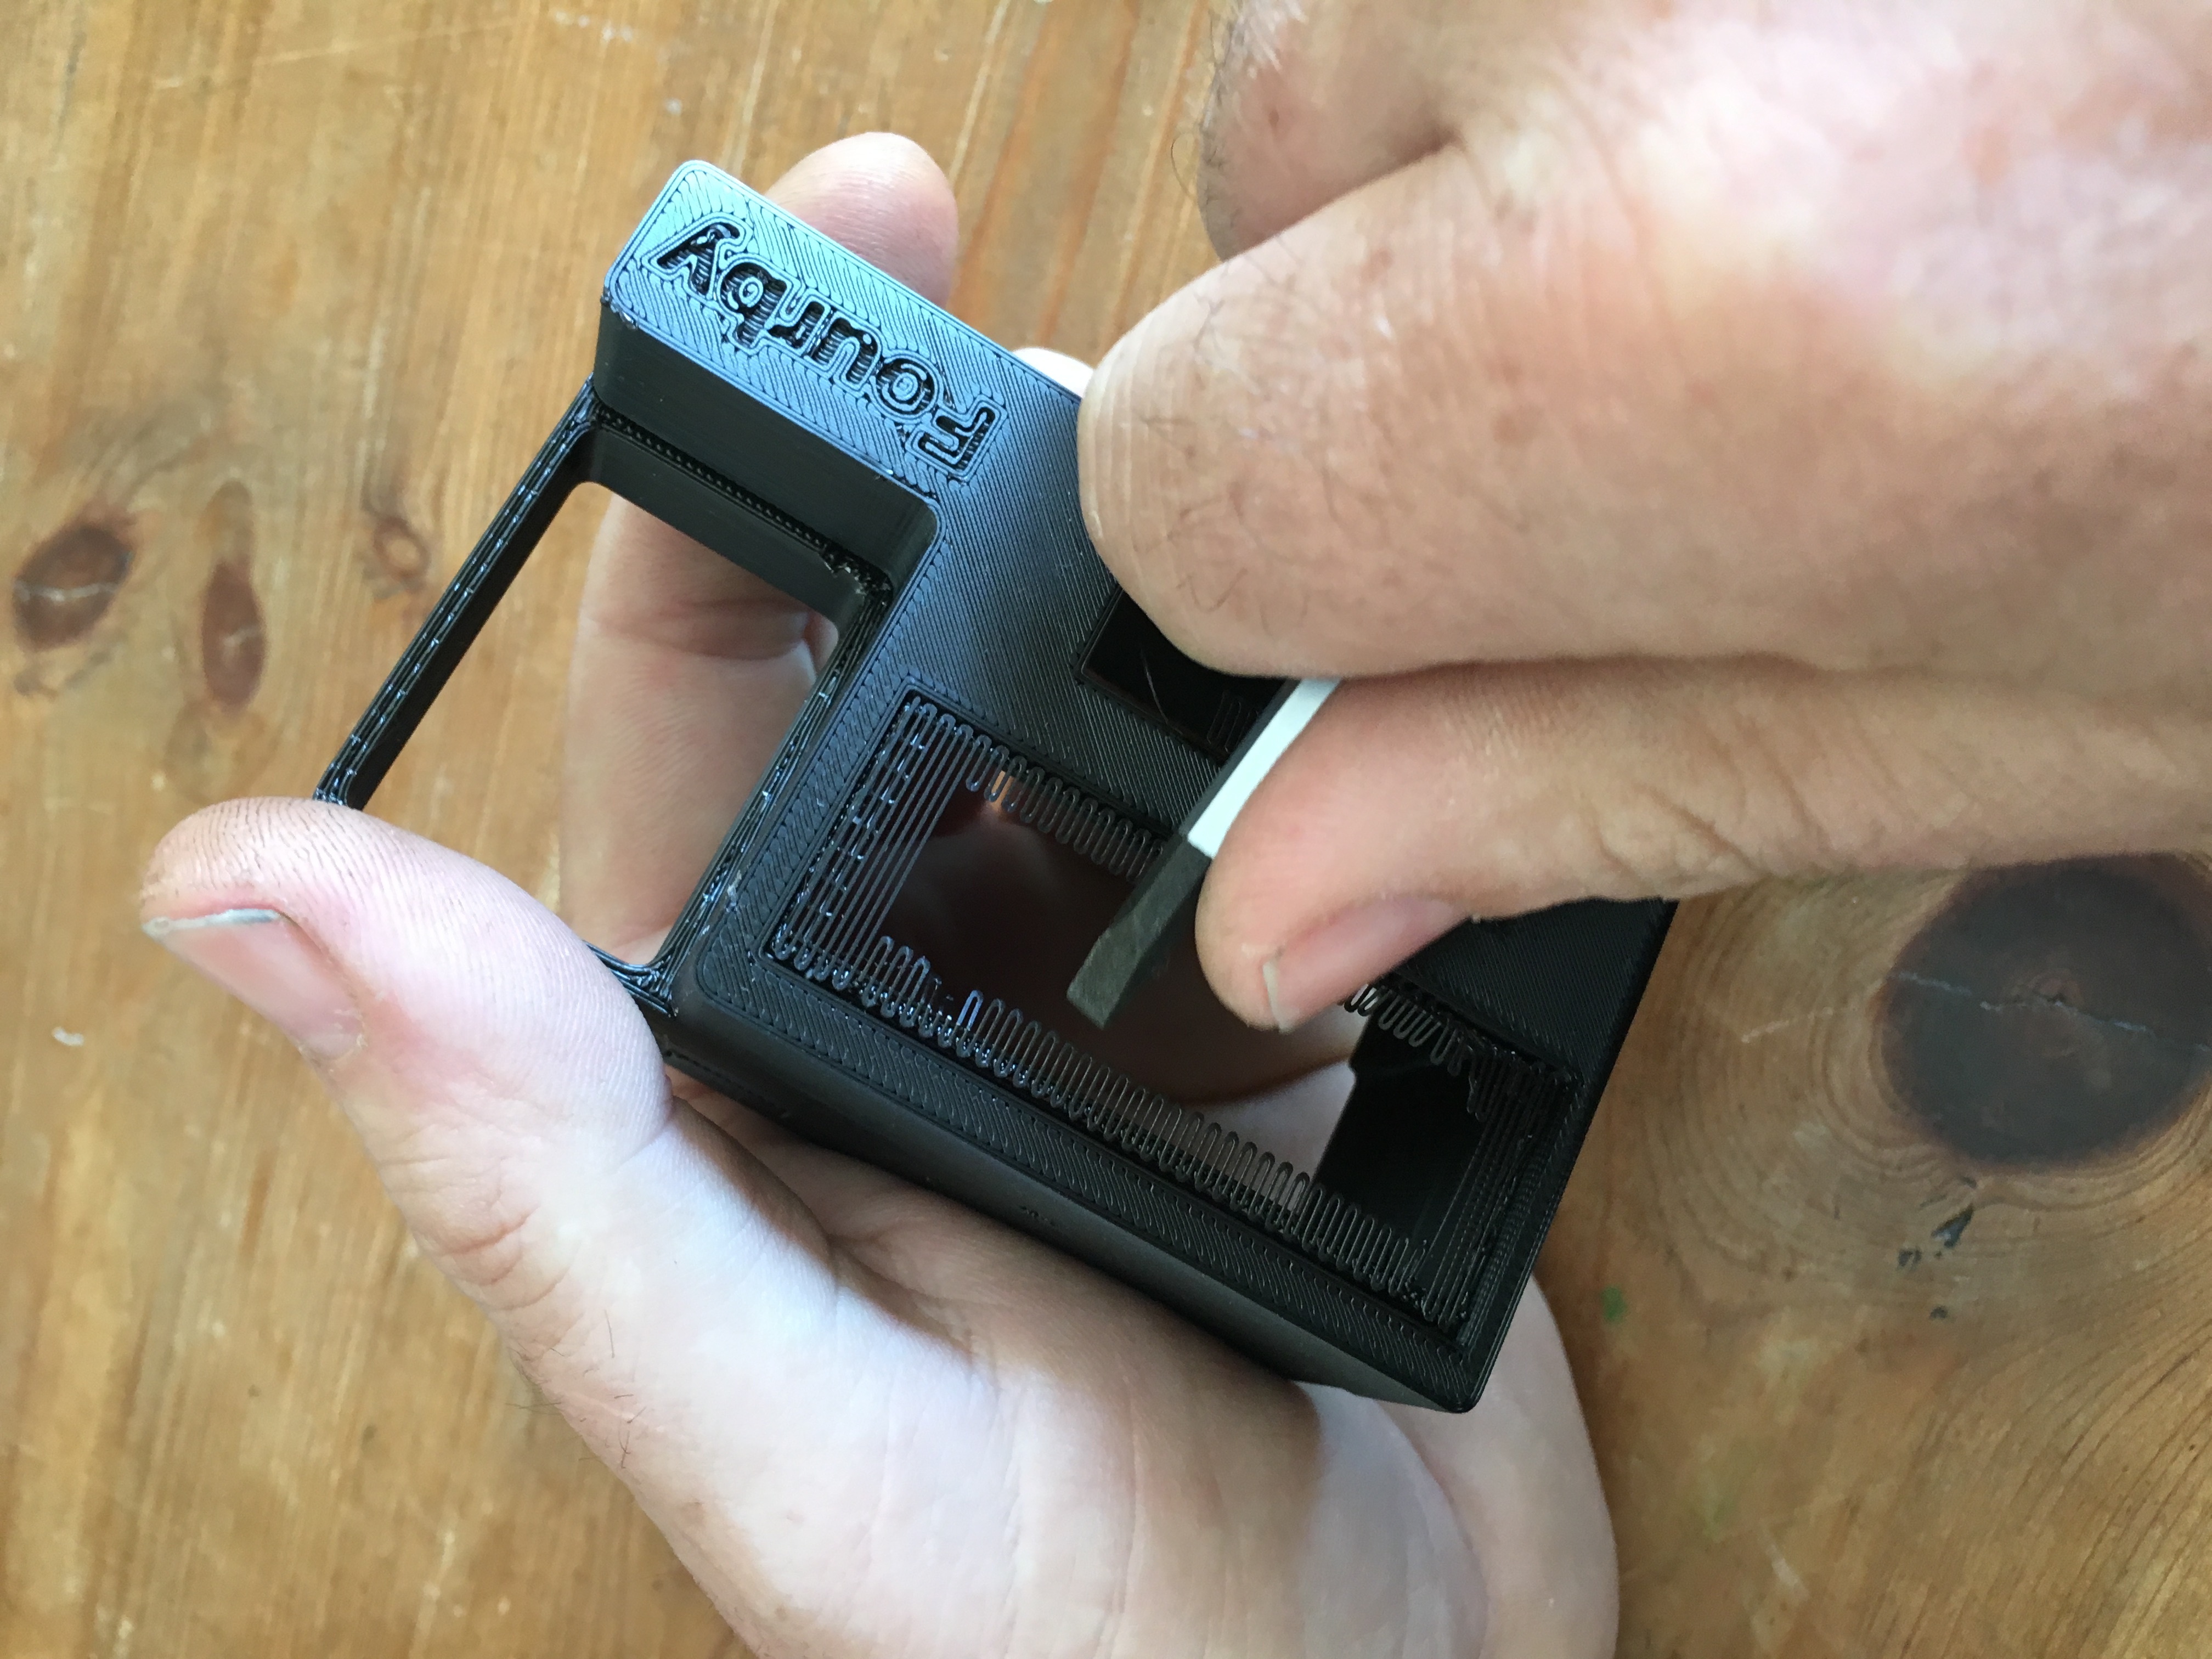
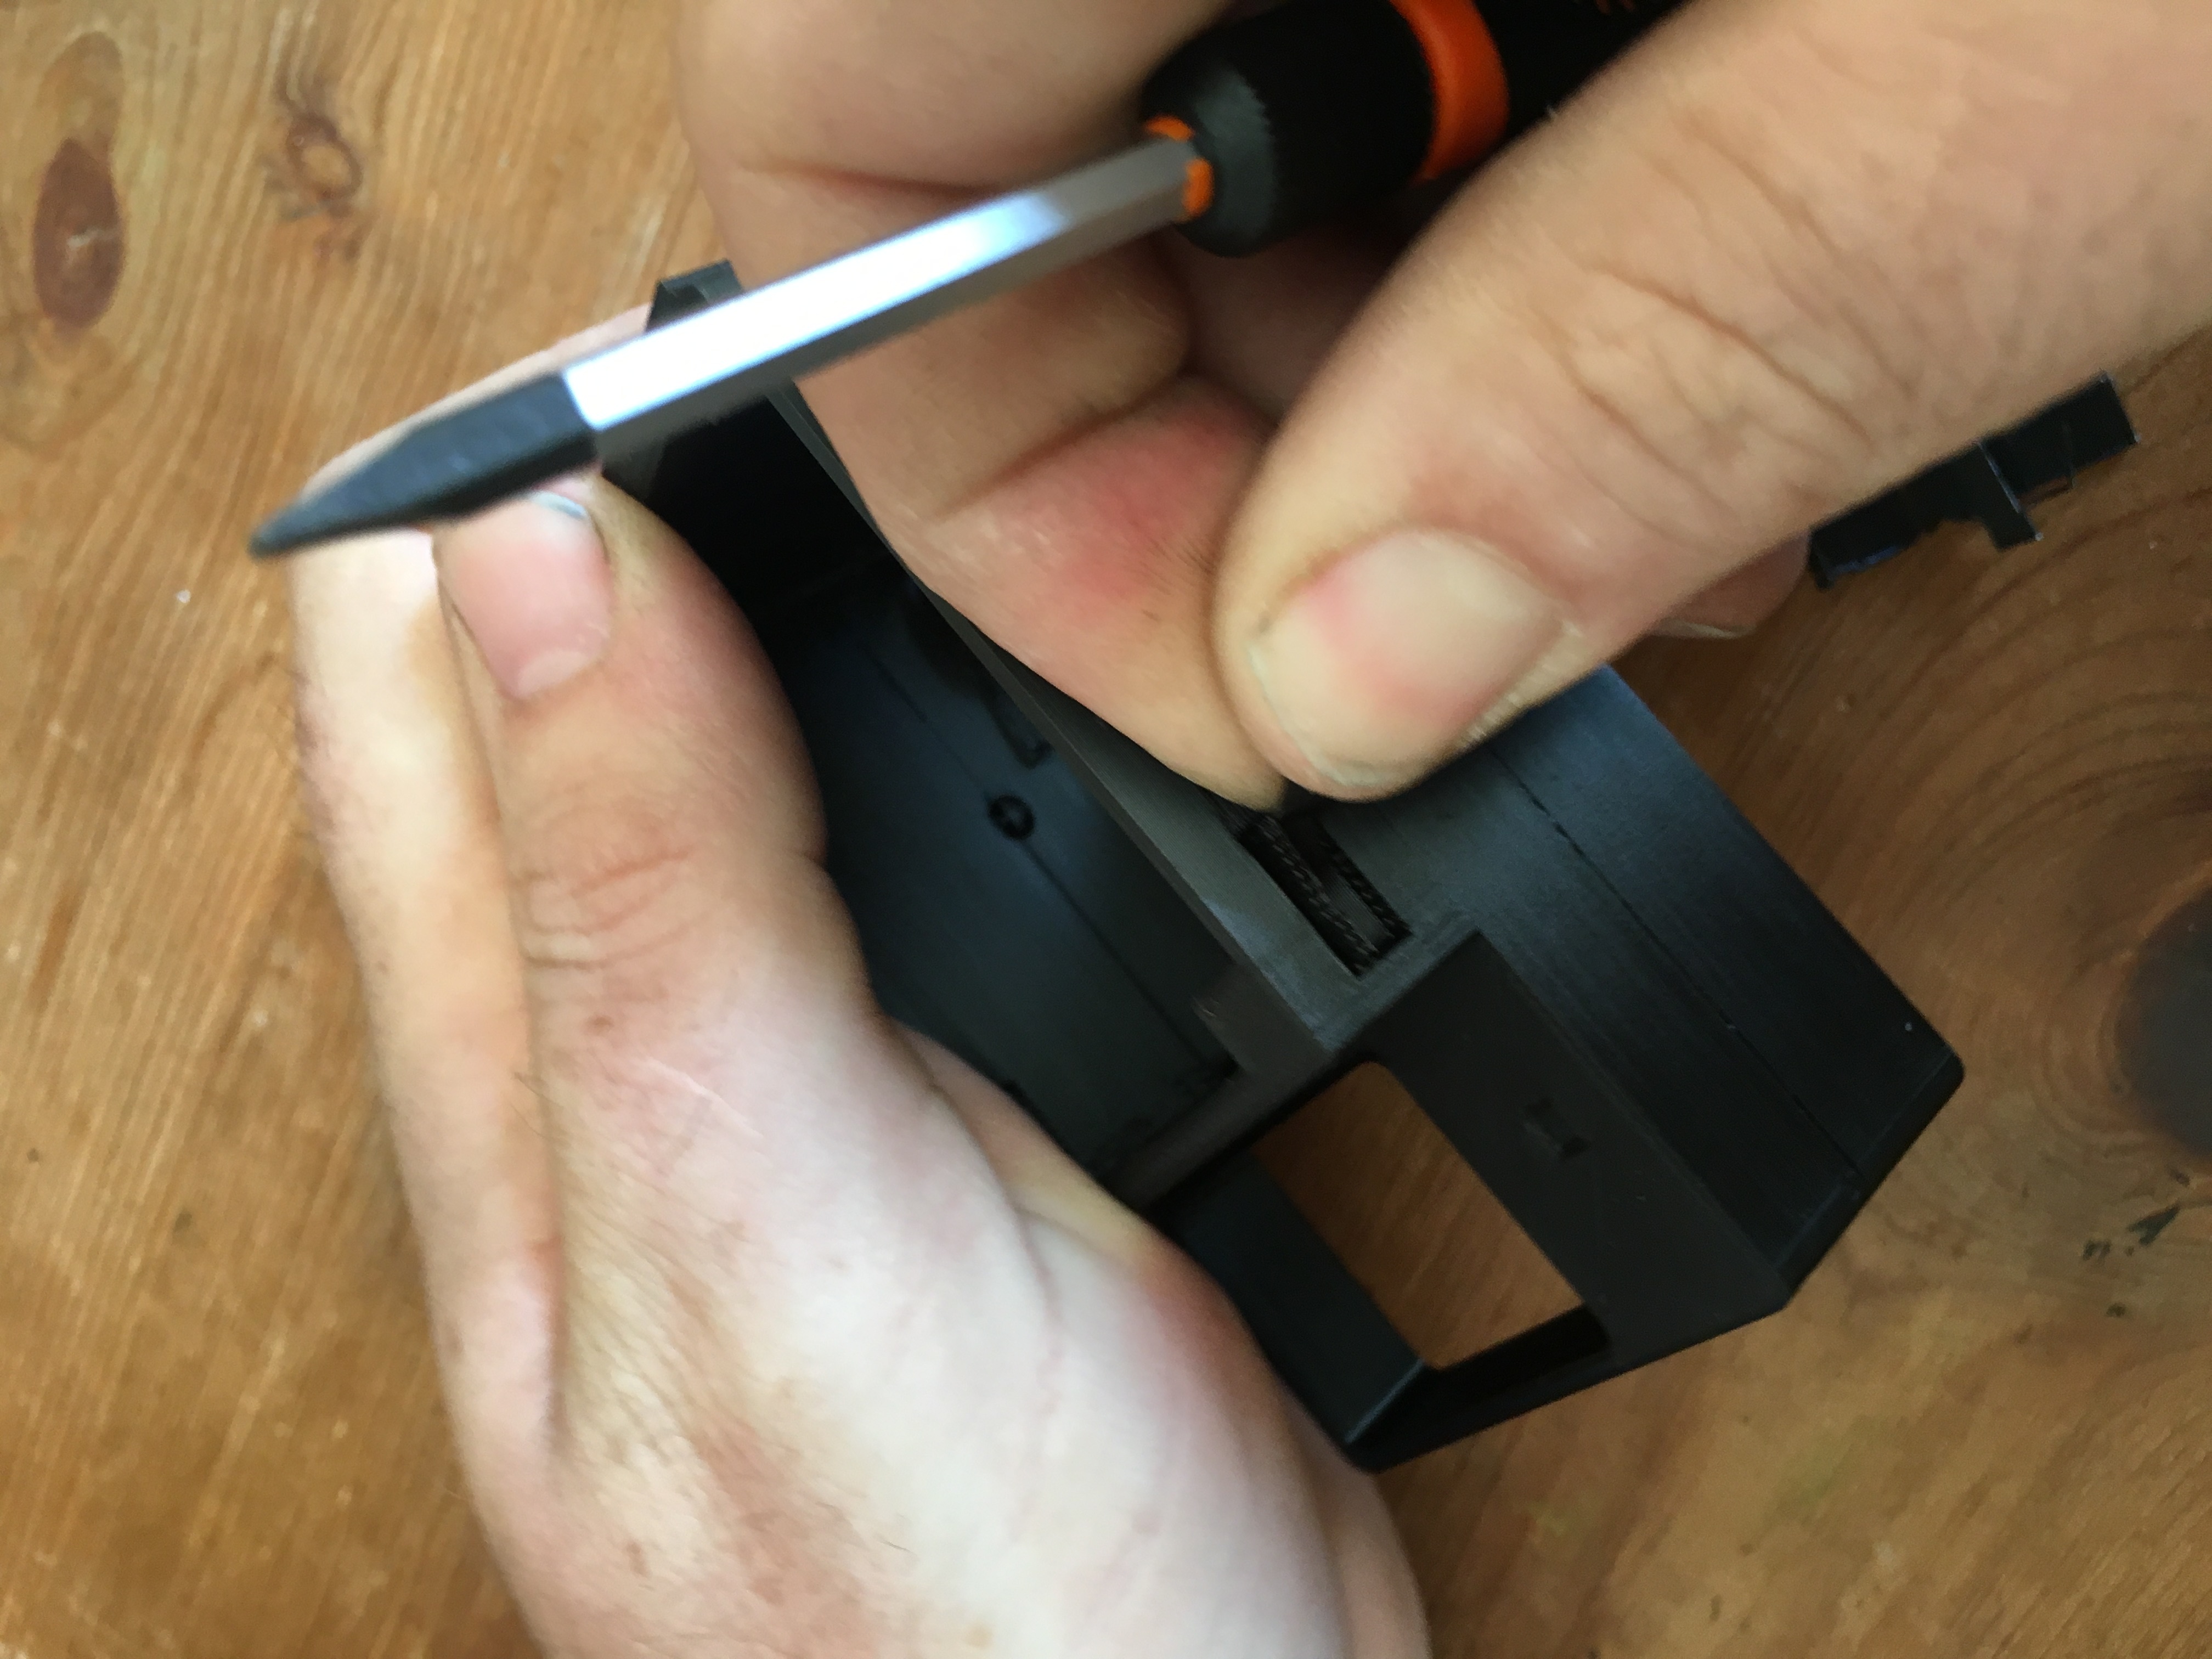
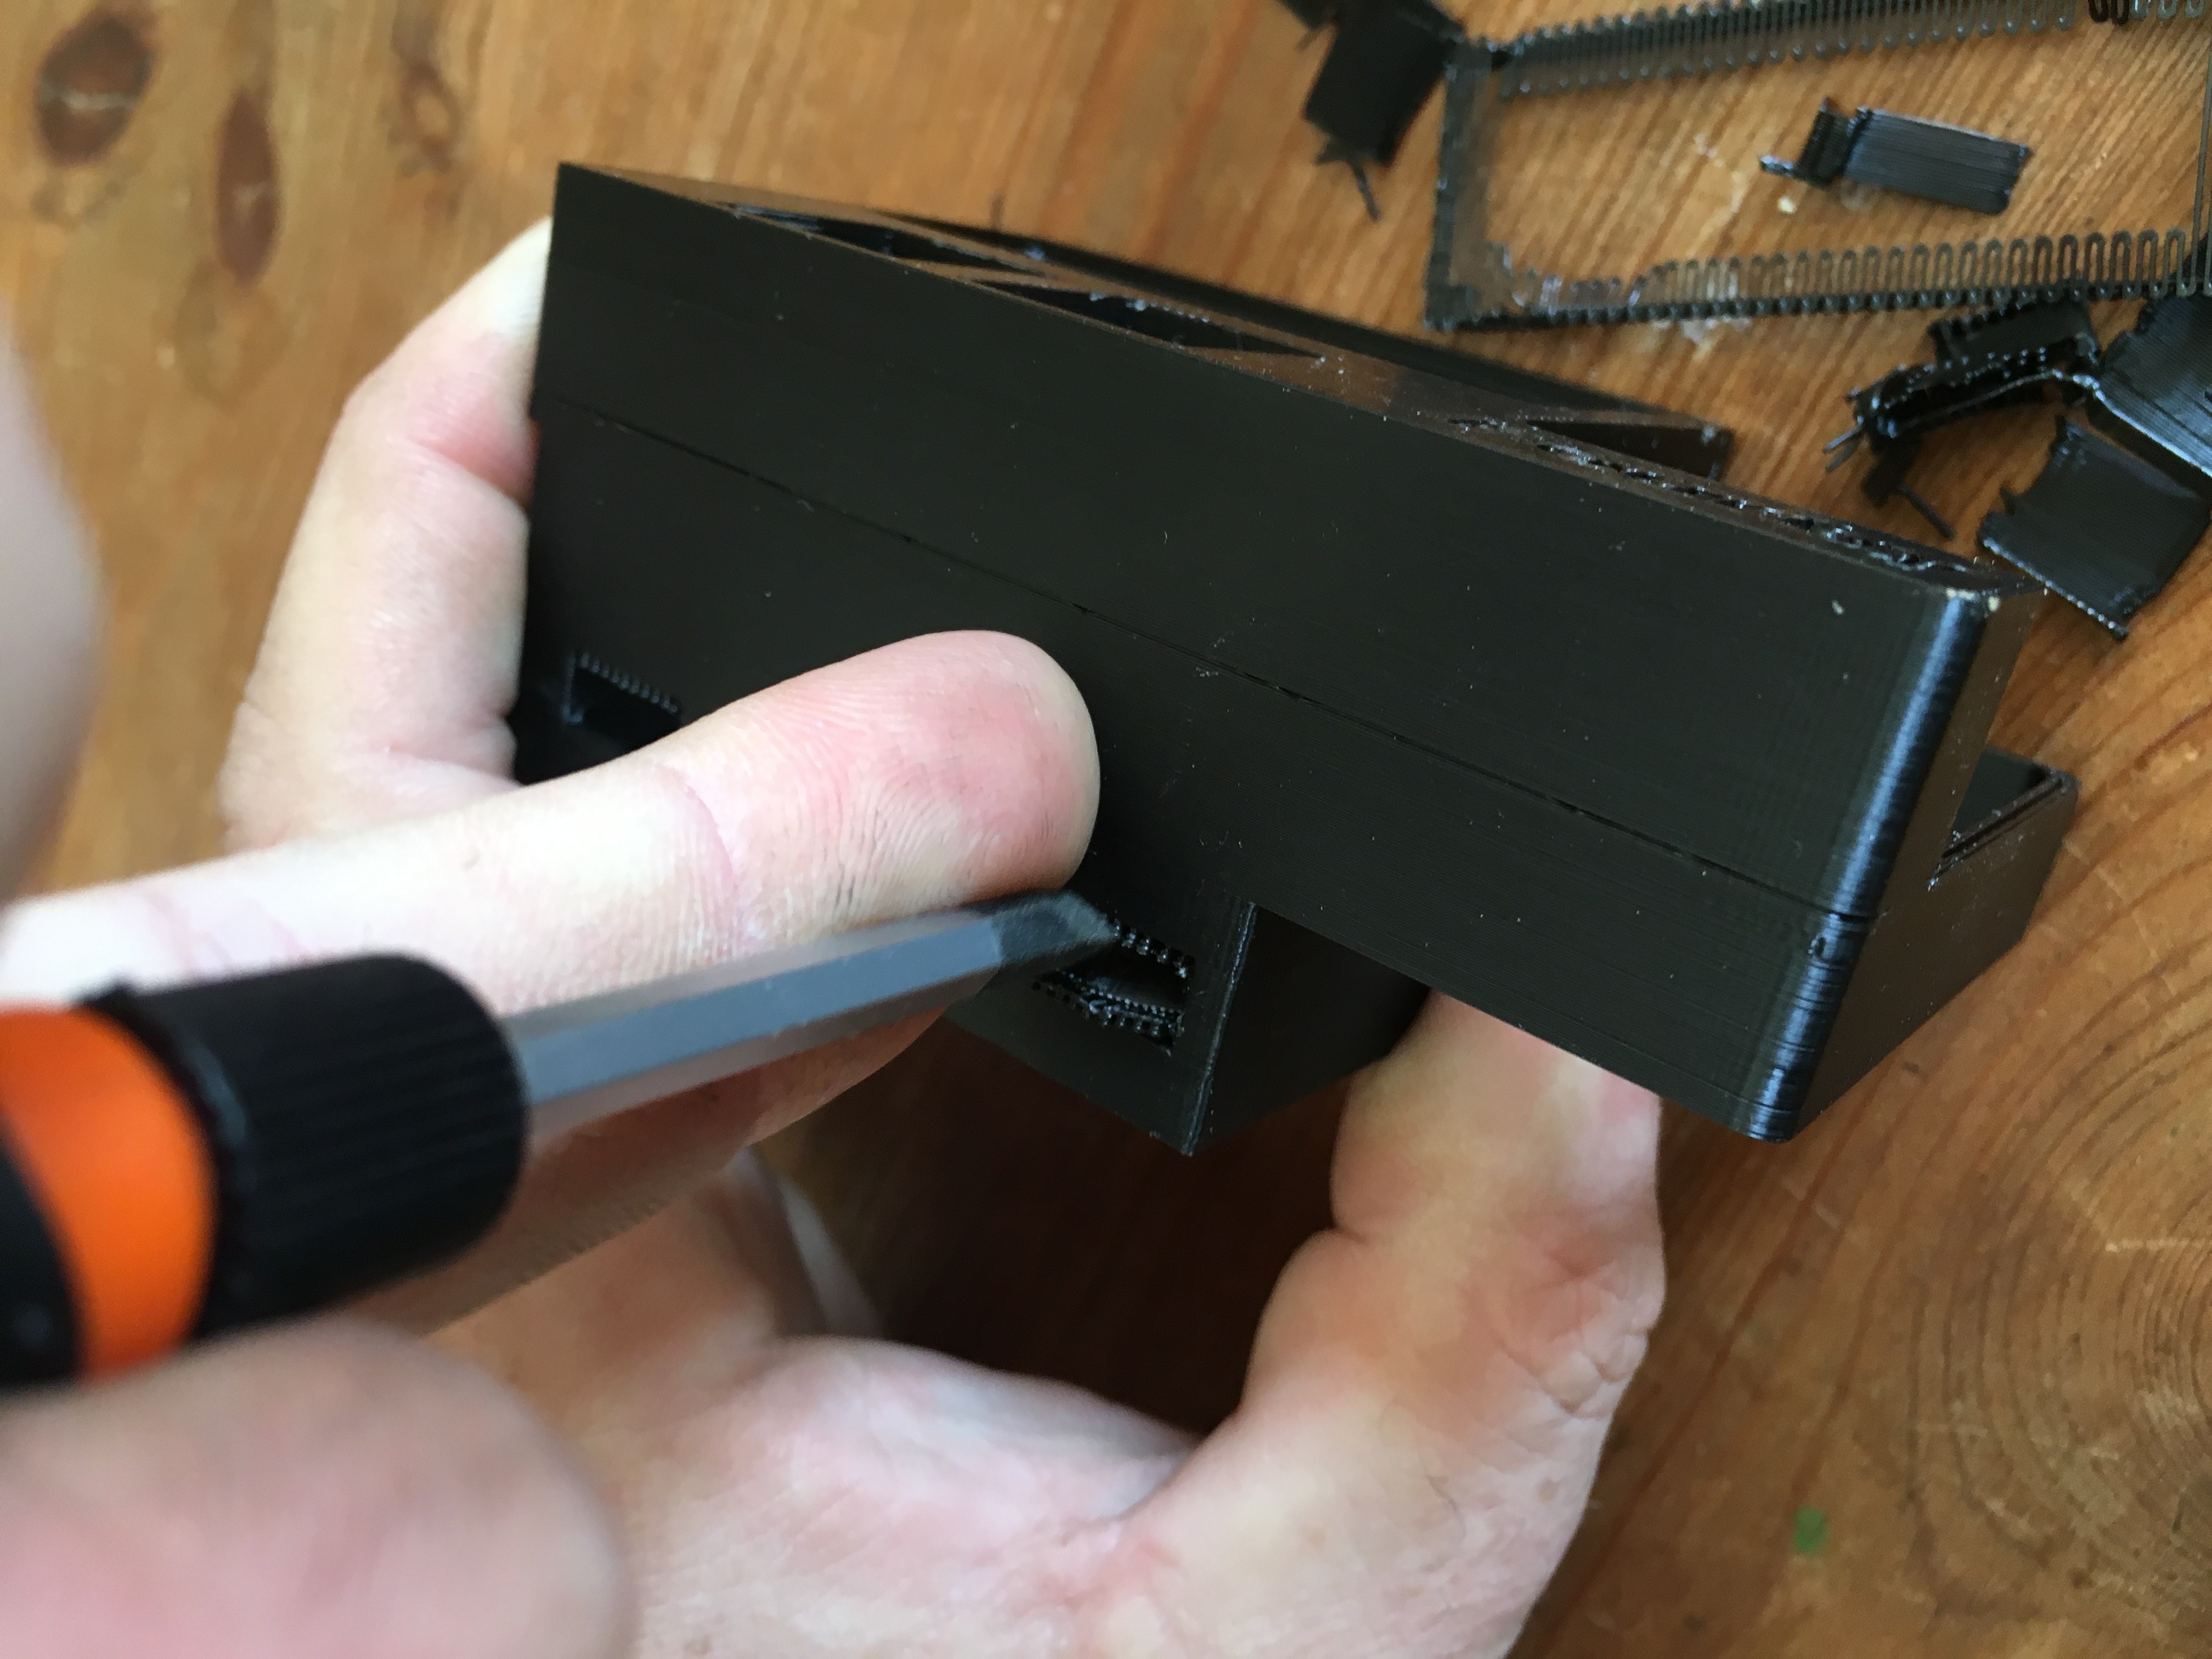
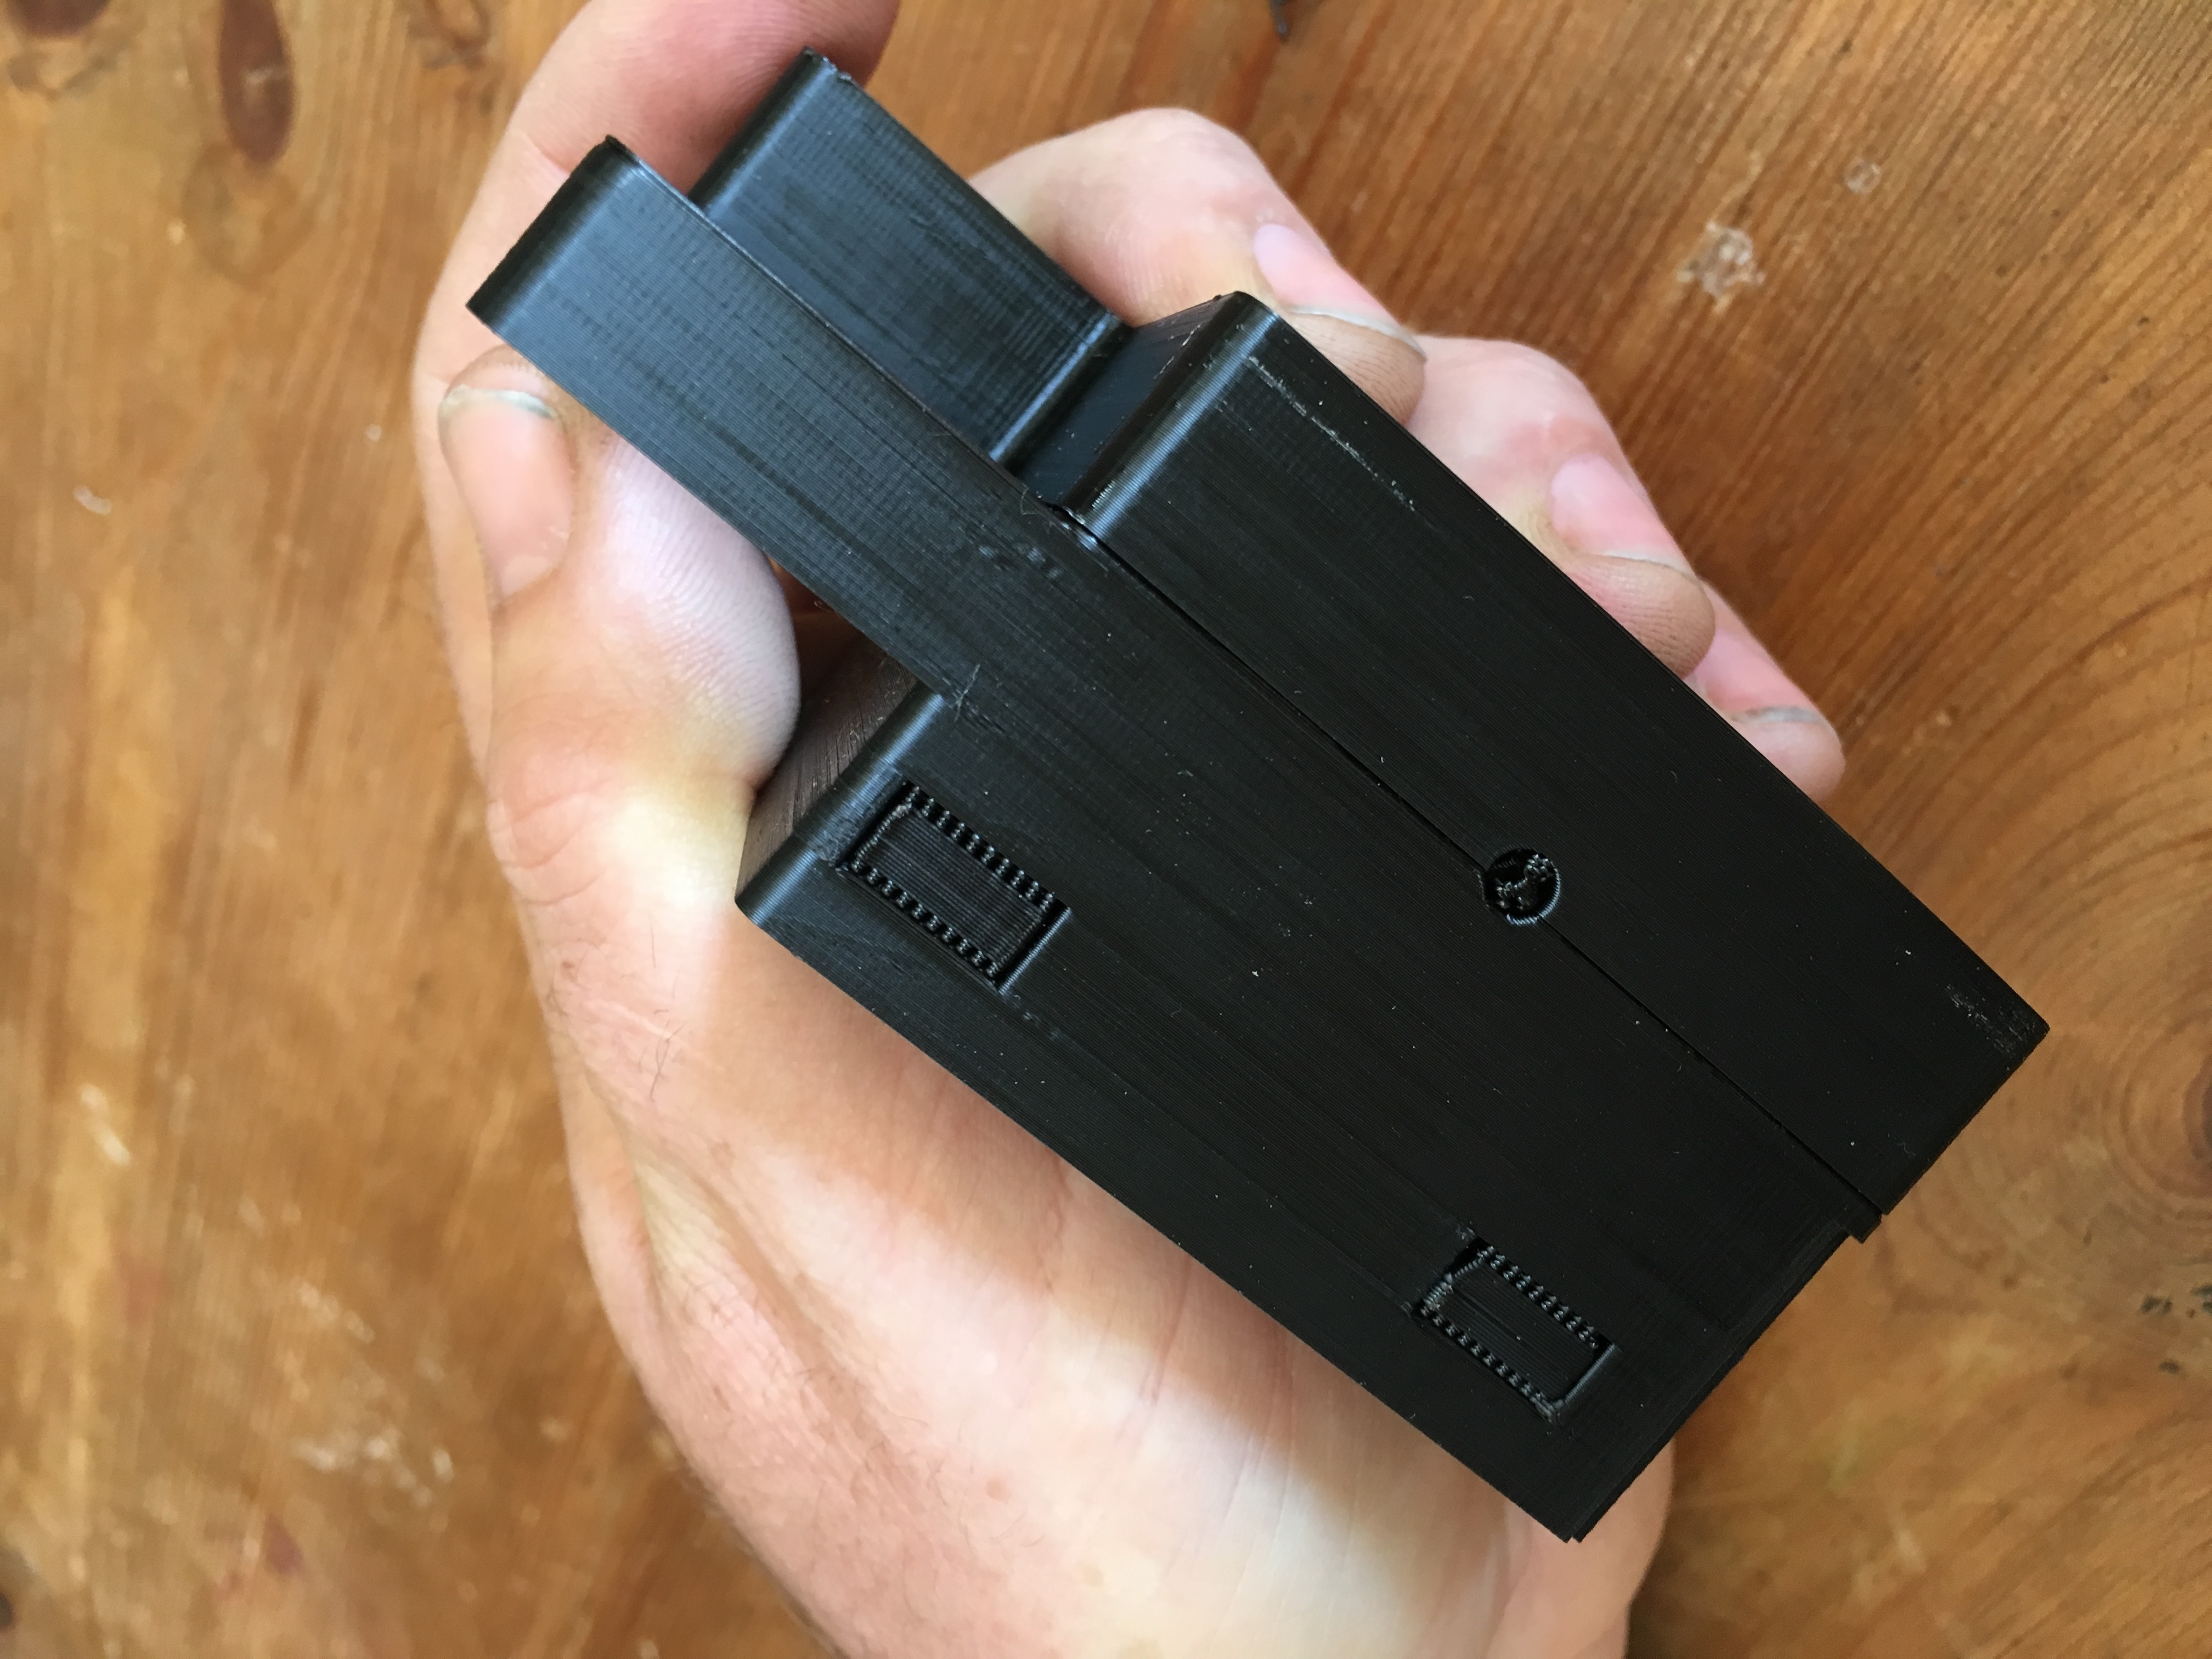
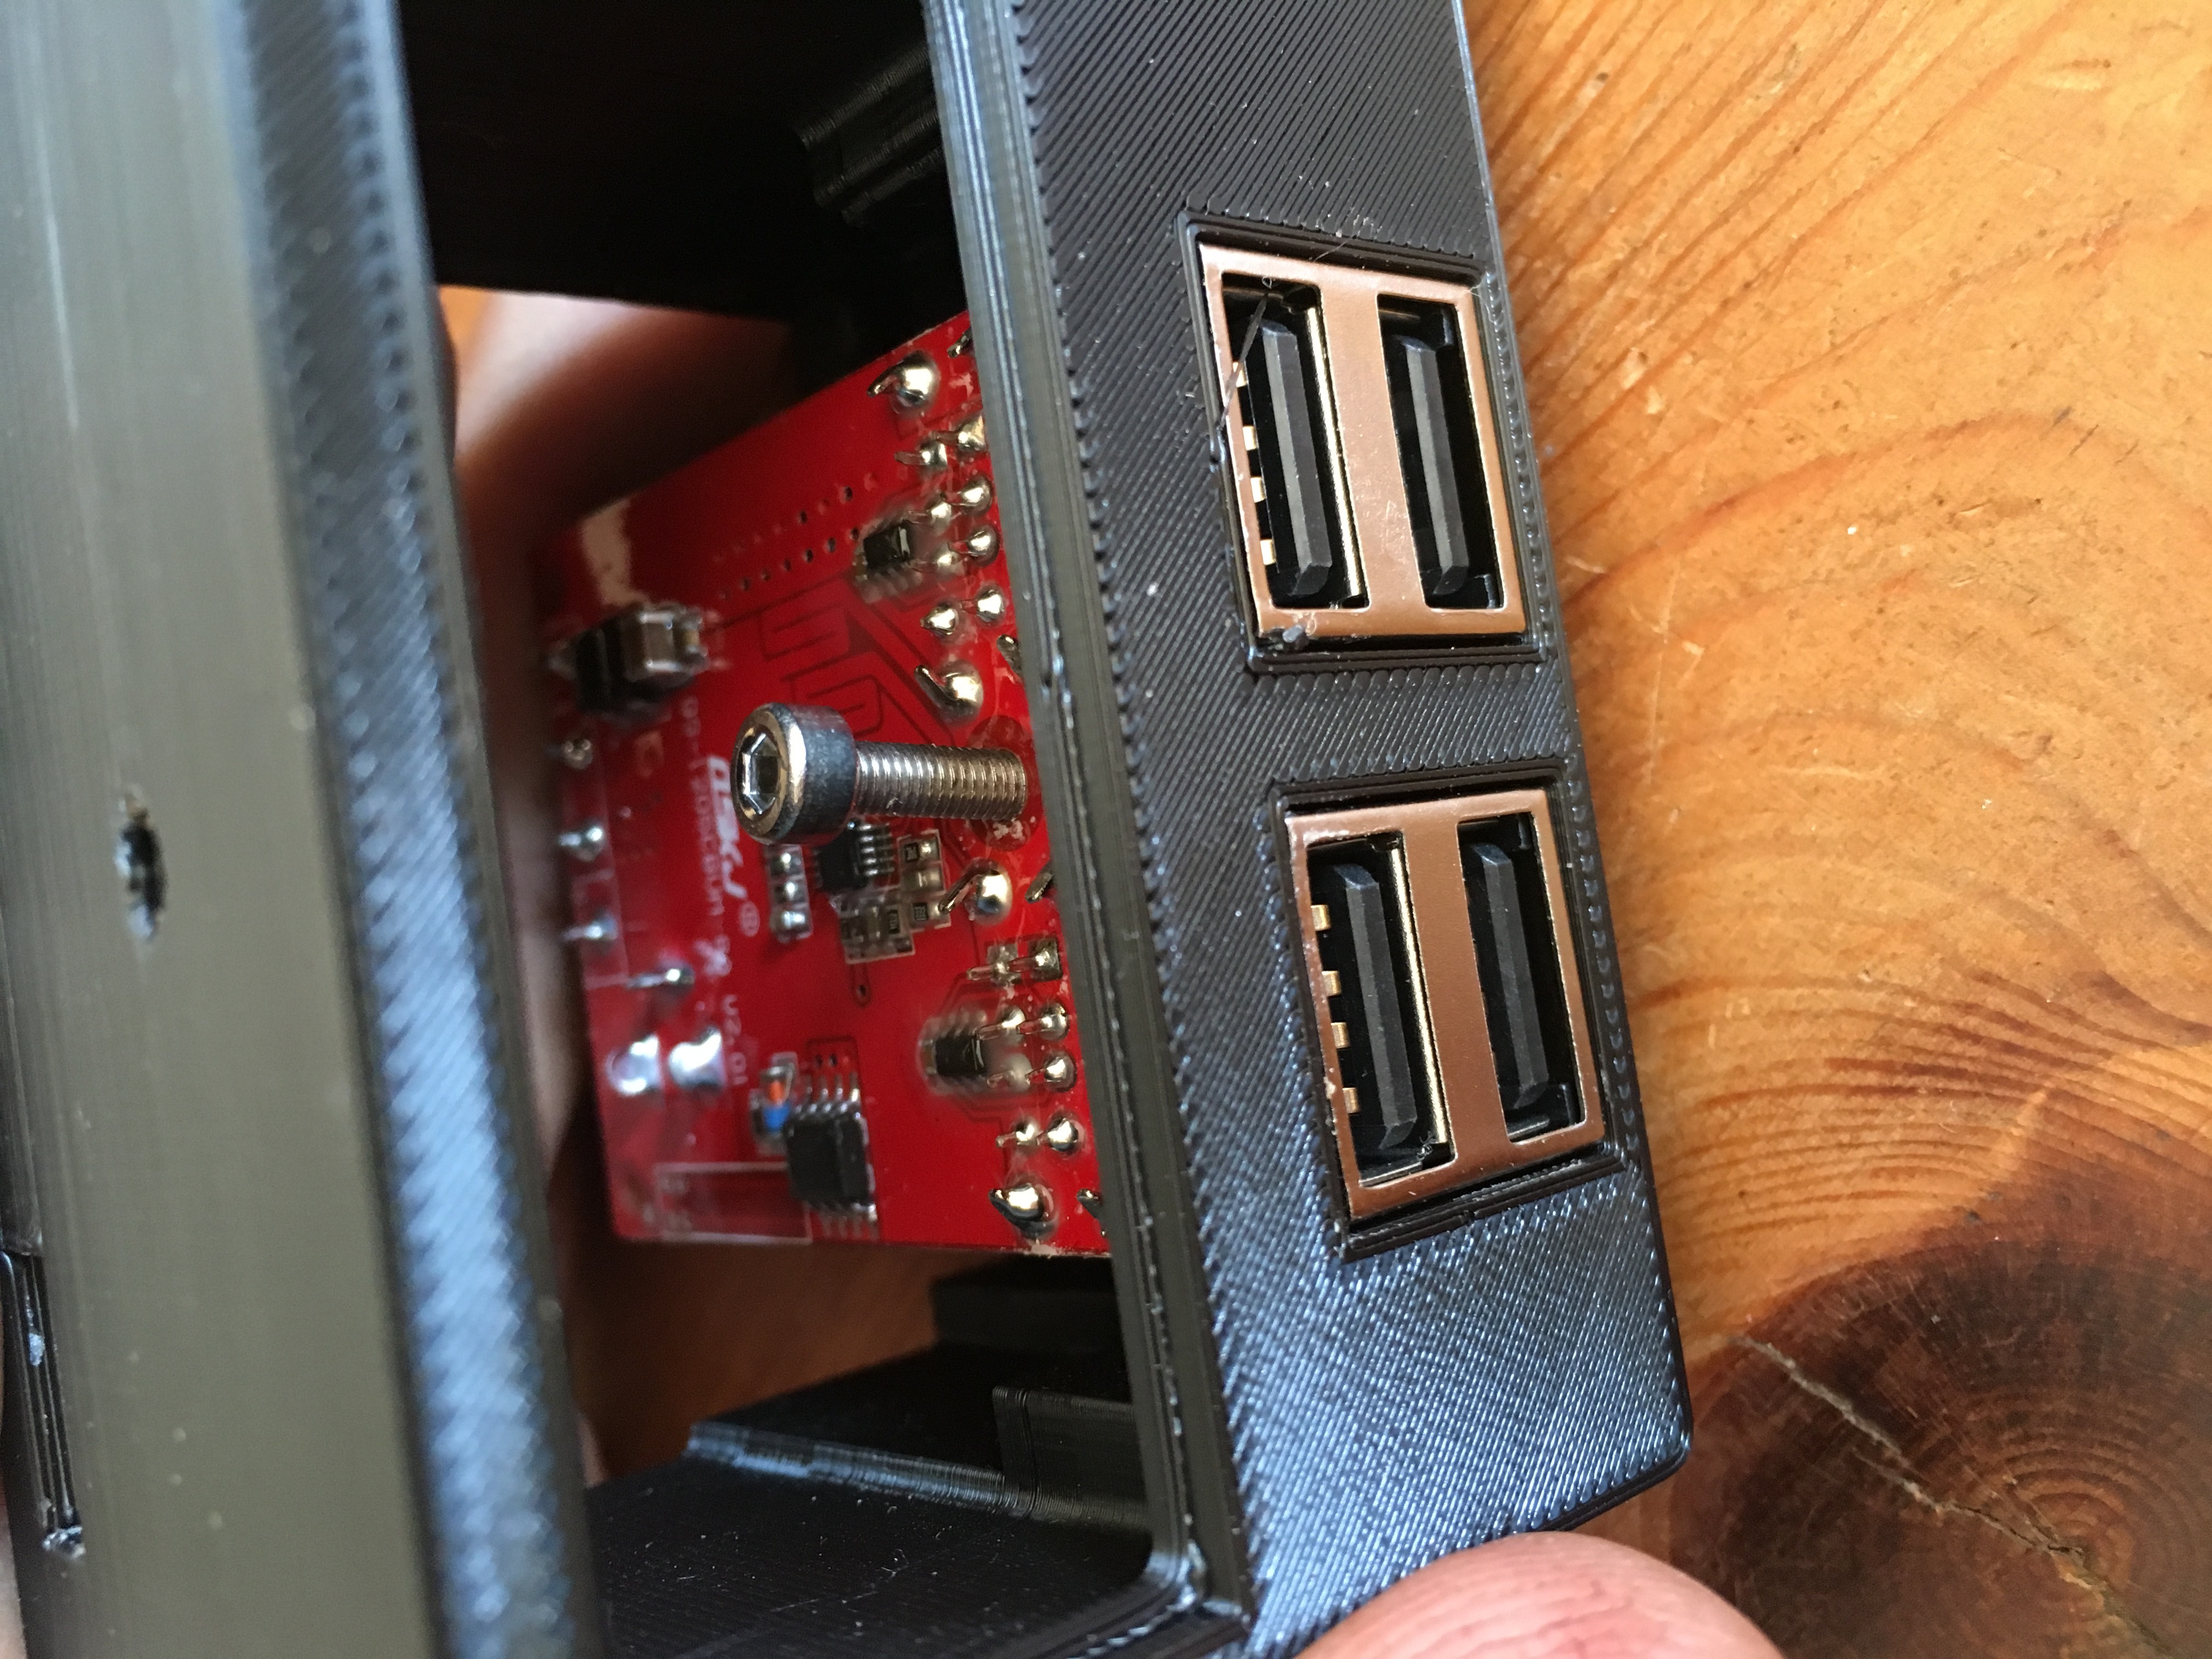
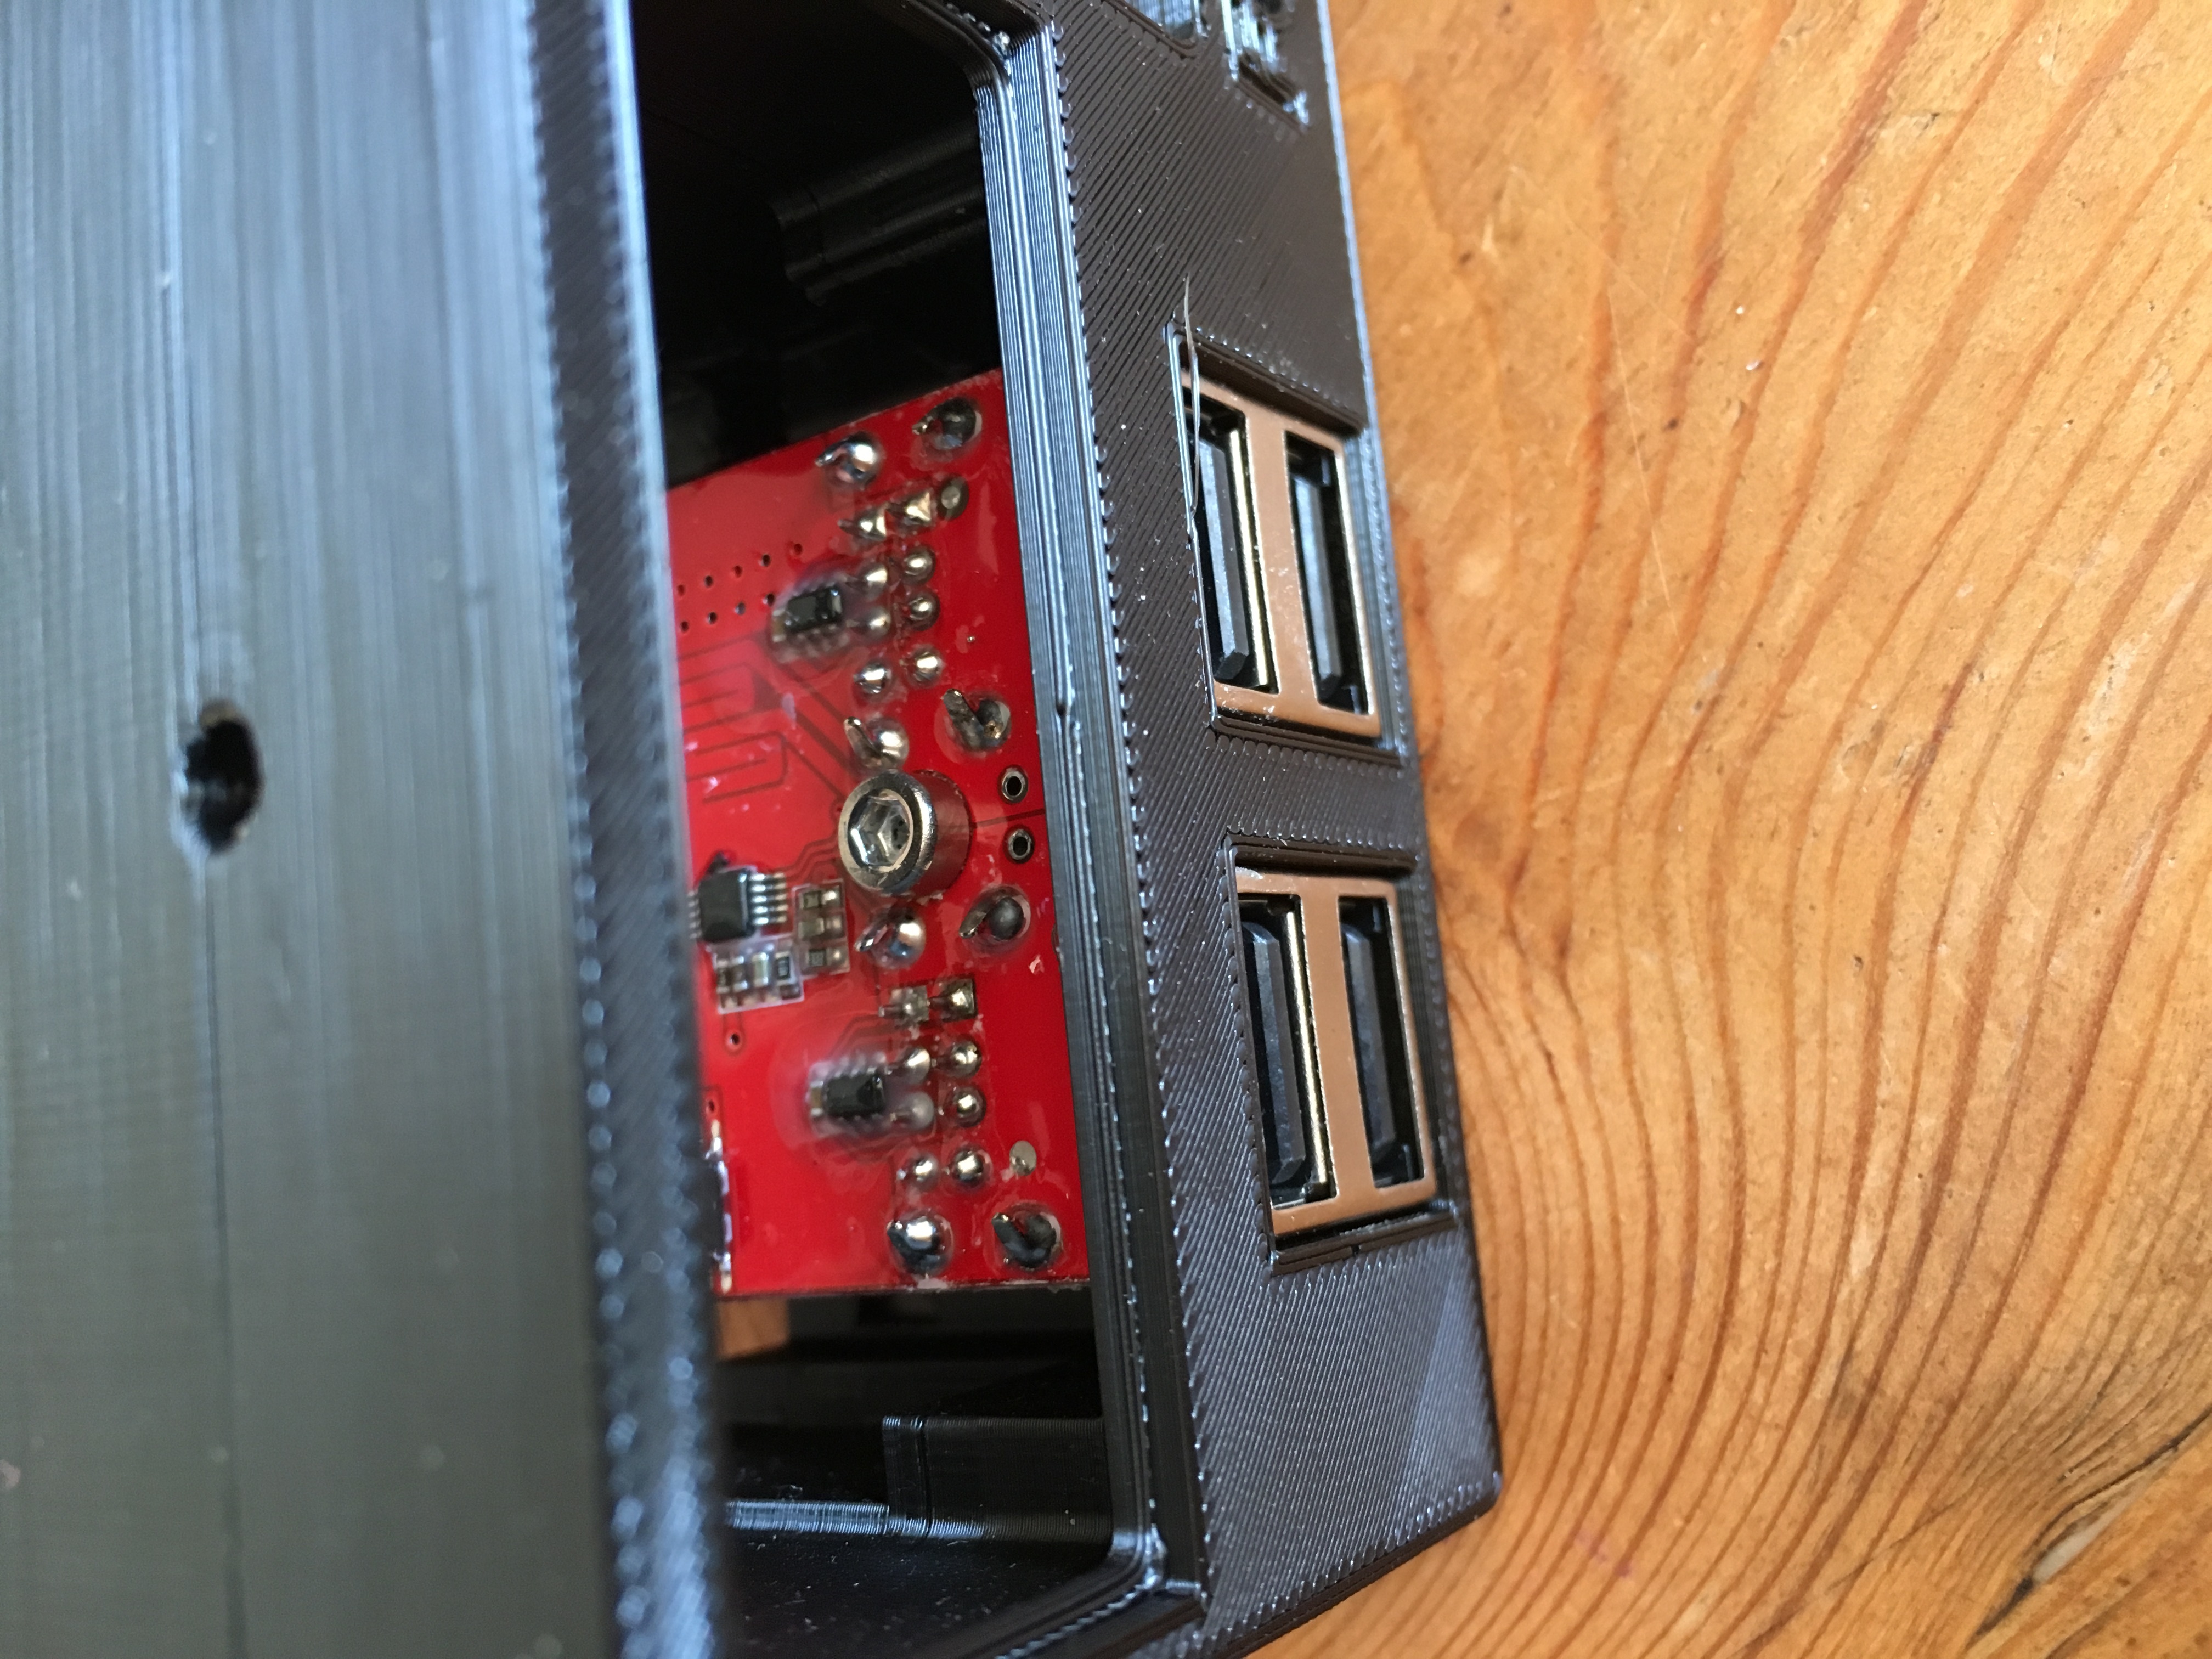
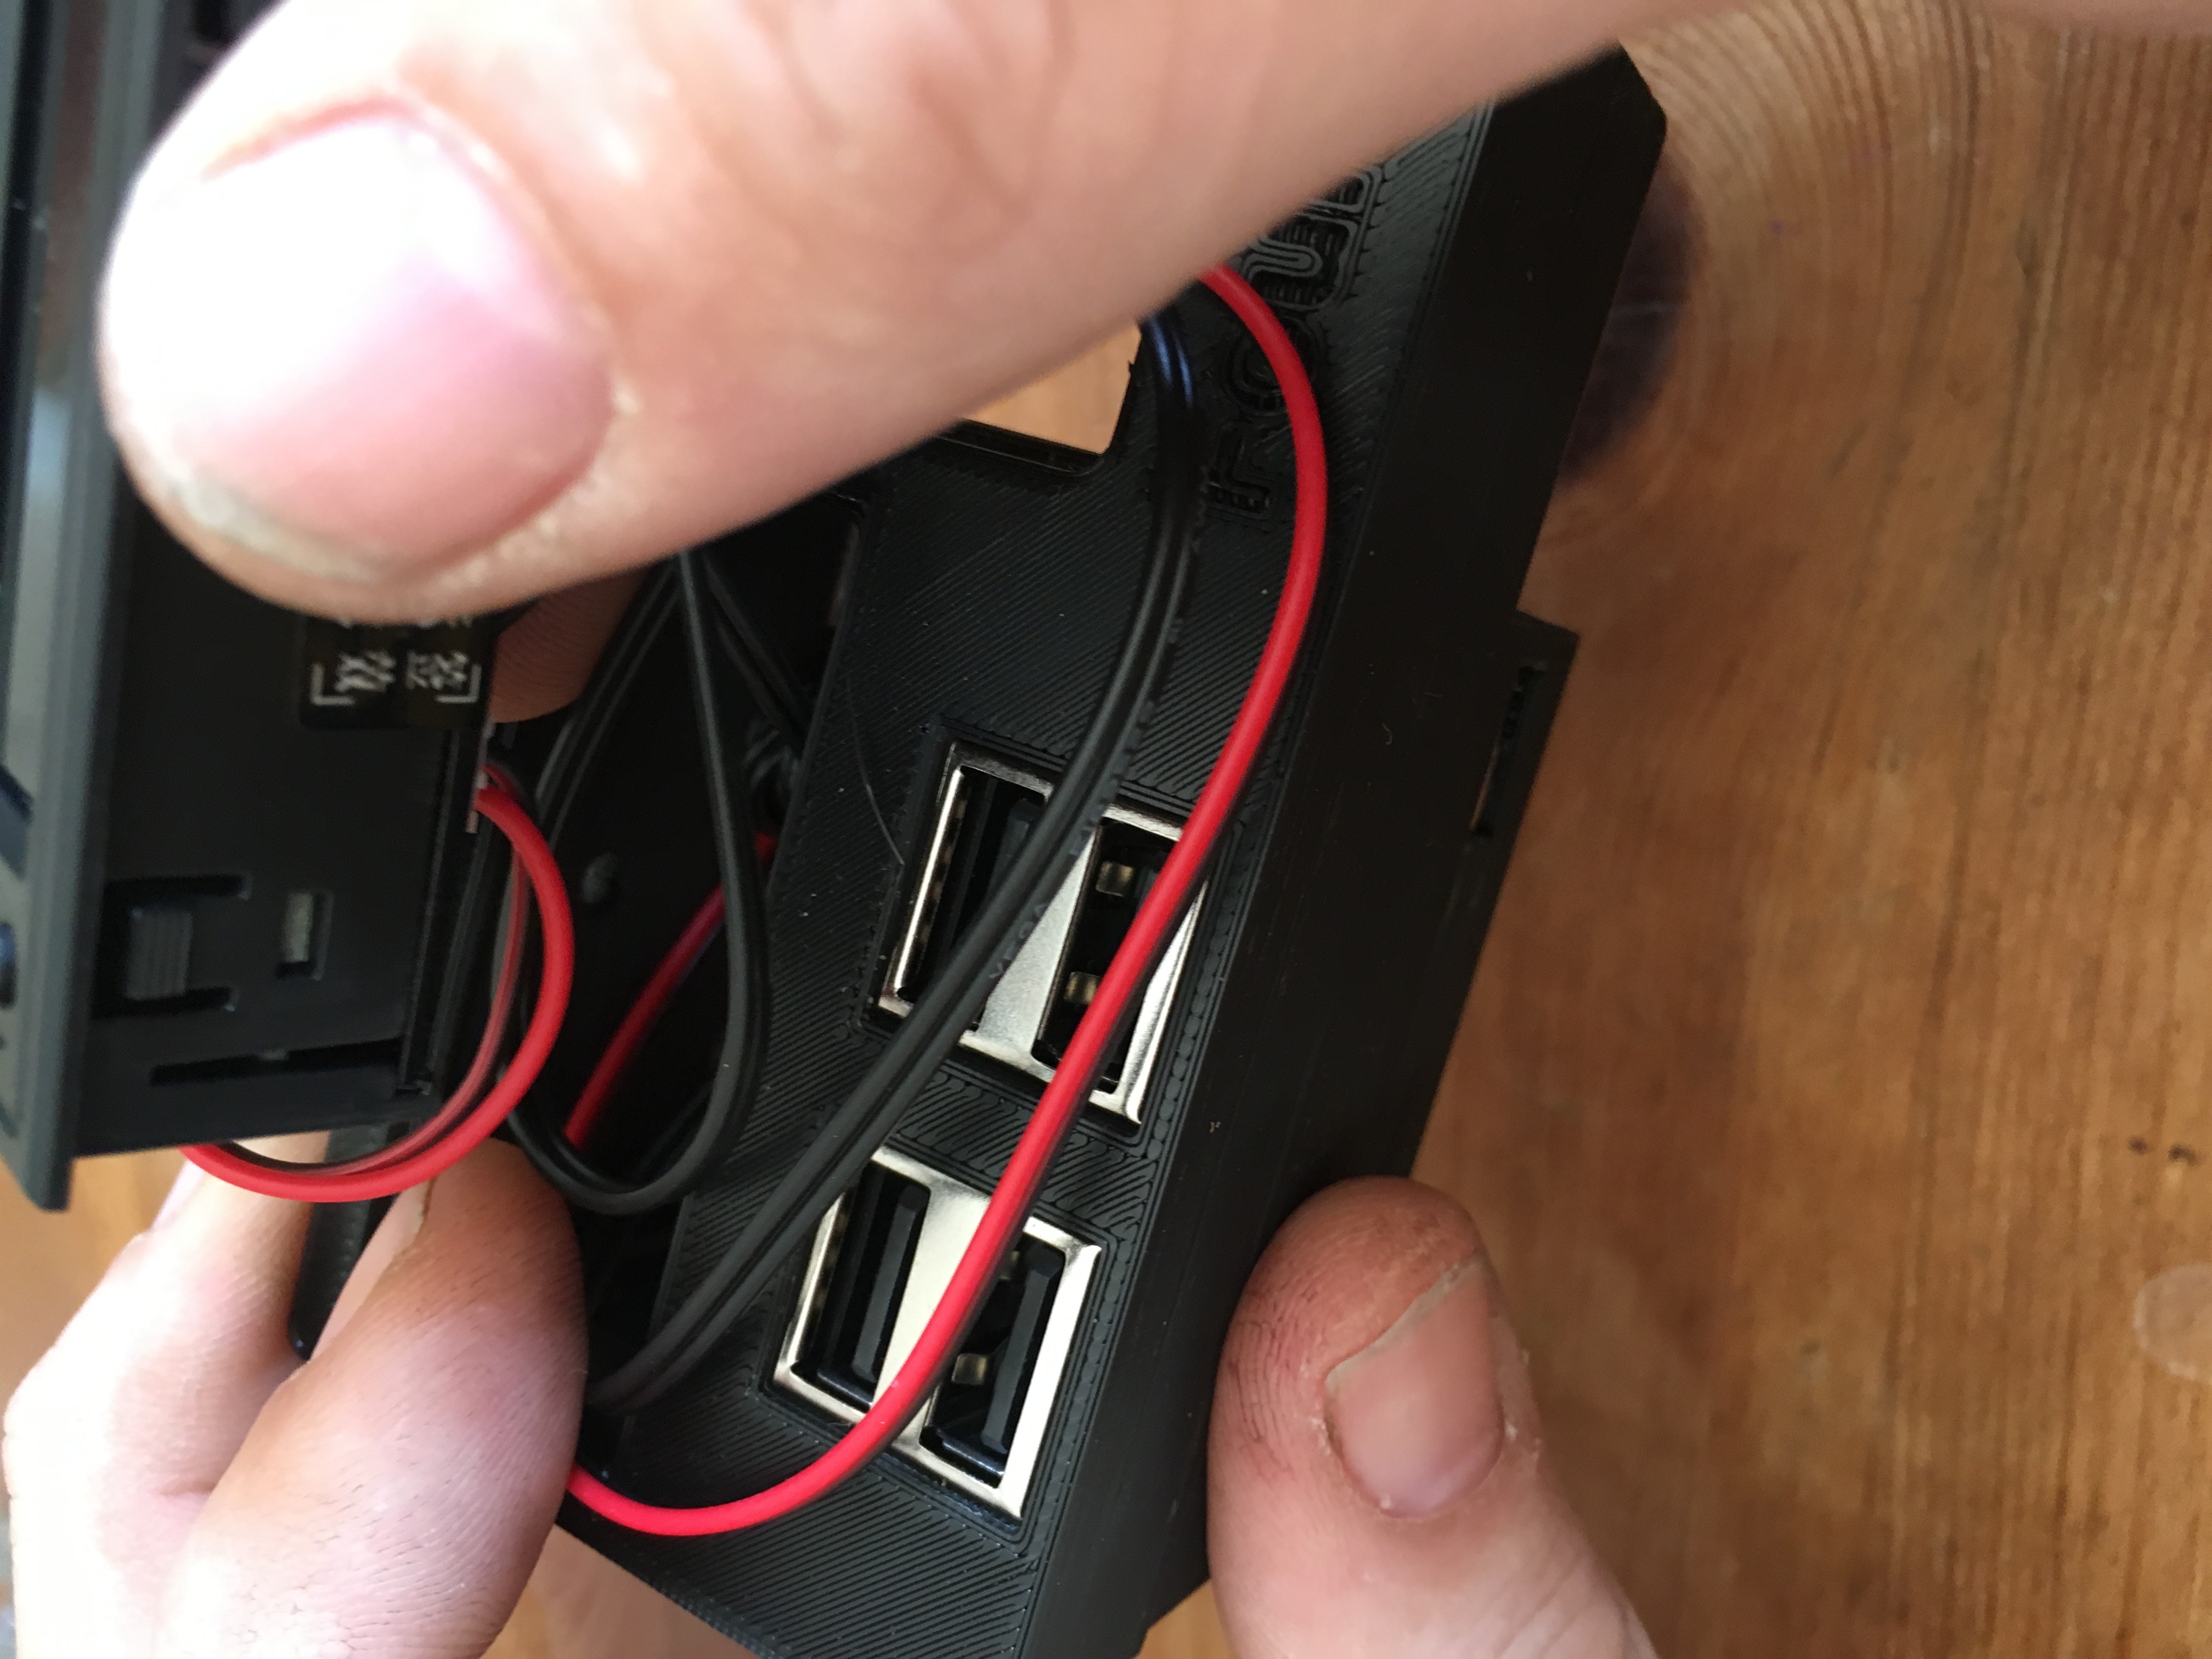
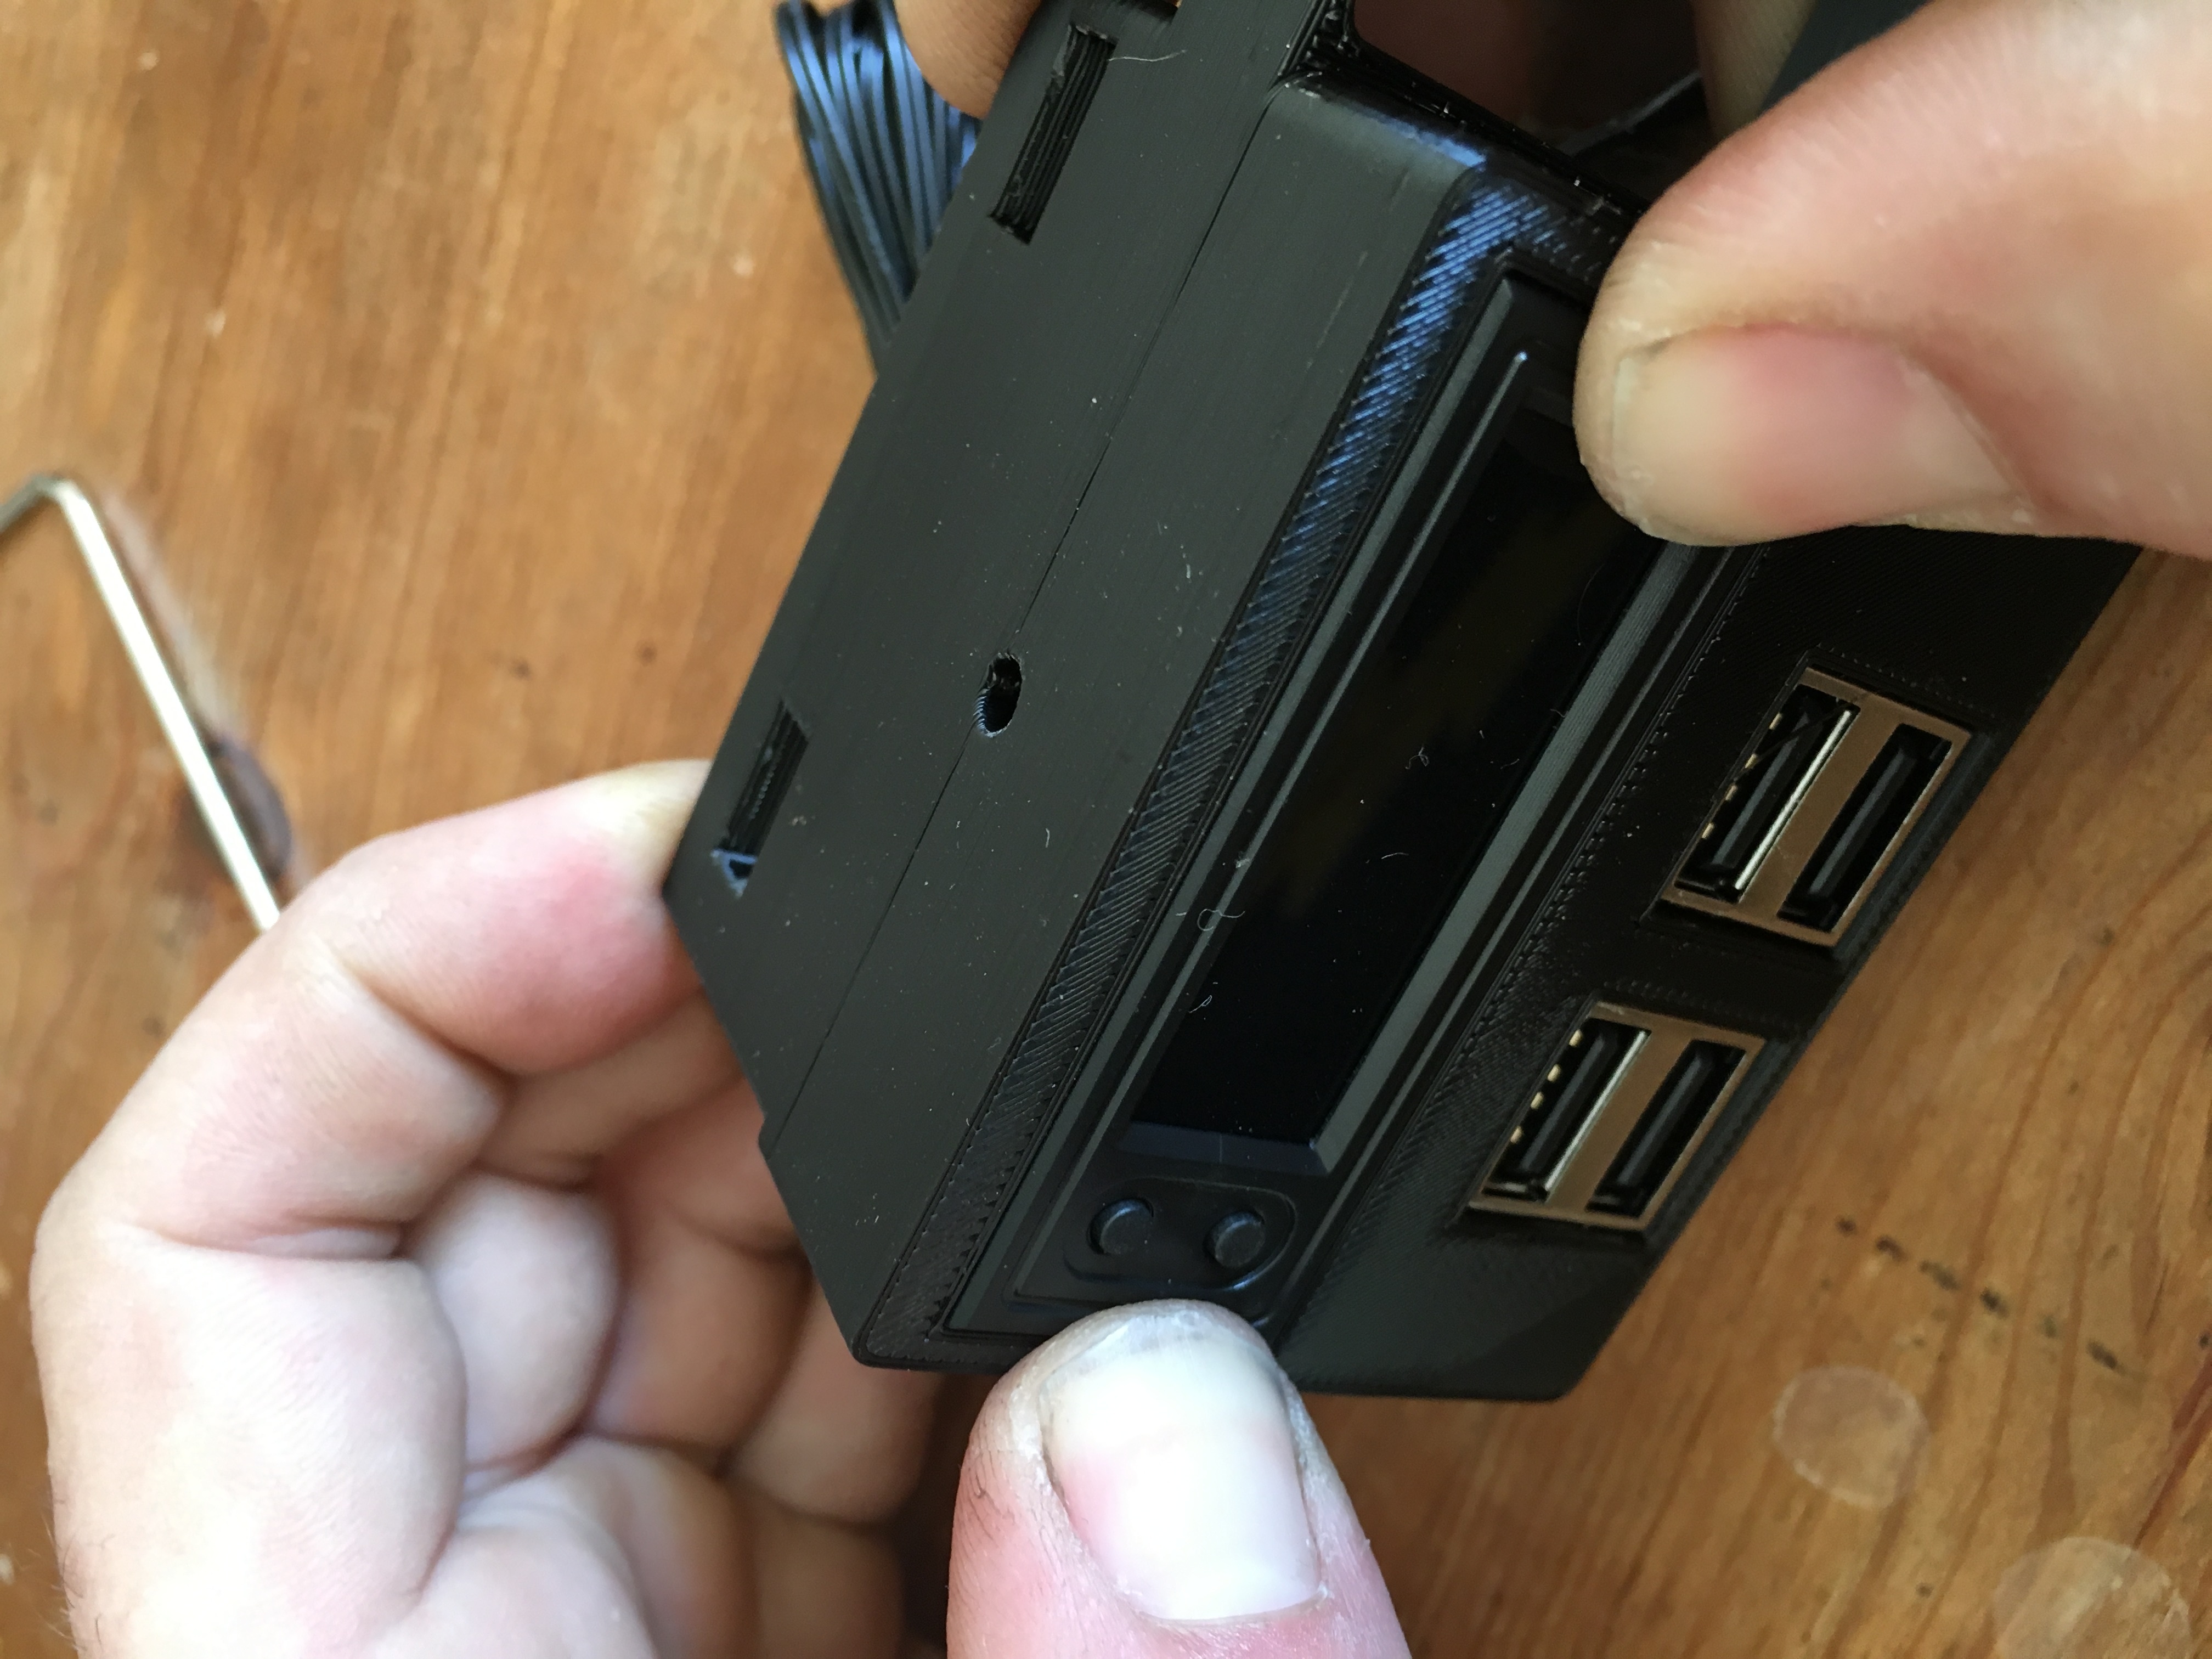
Next we add the USB module
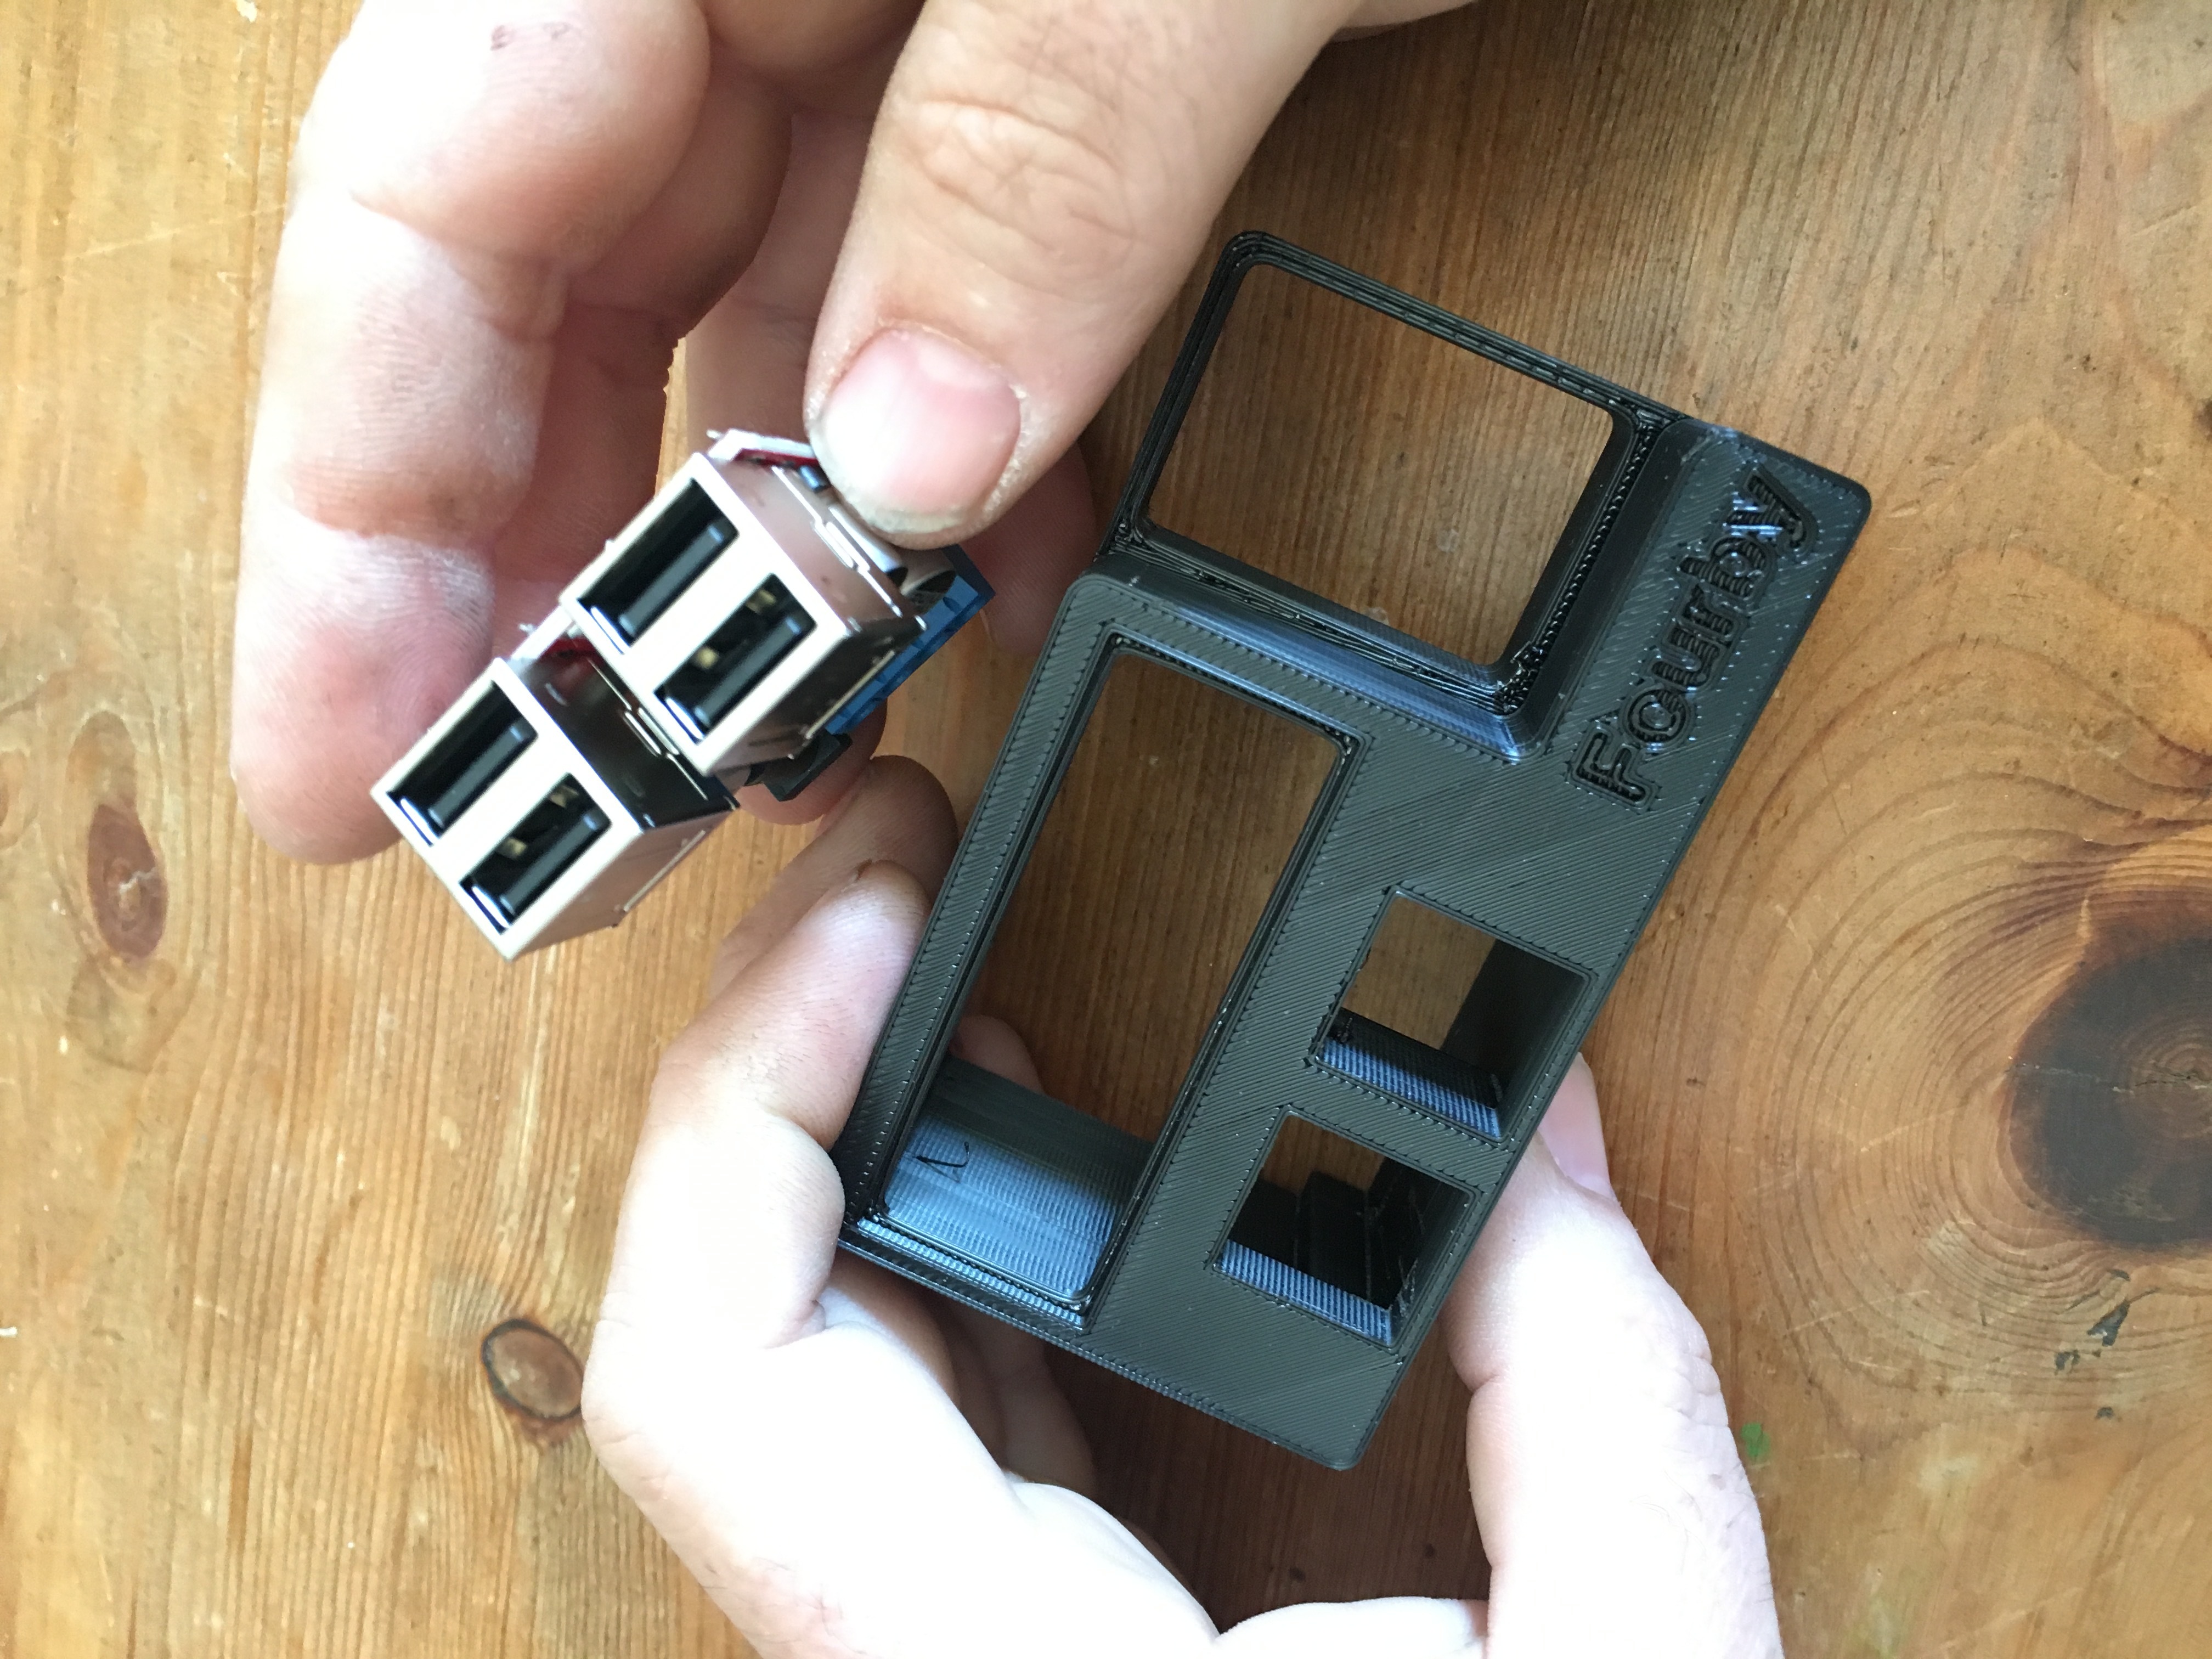
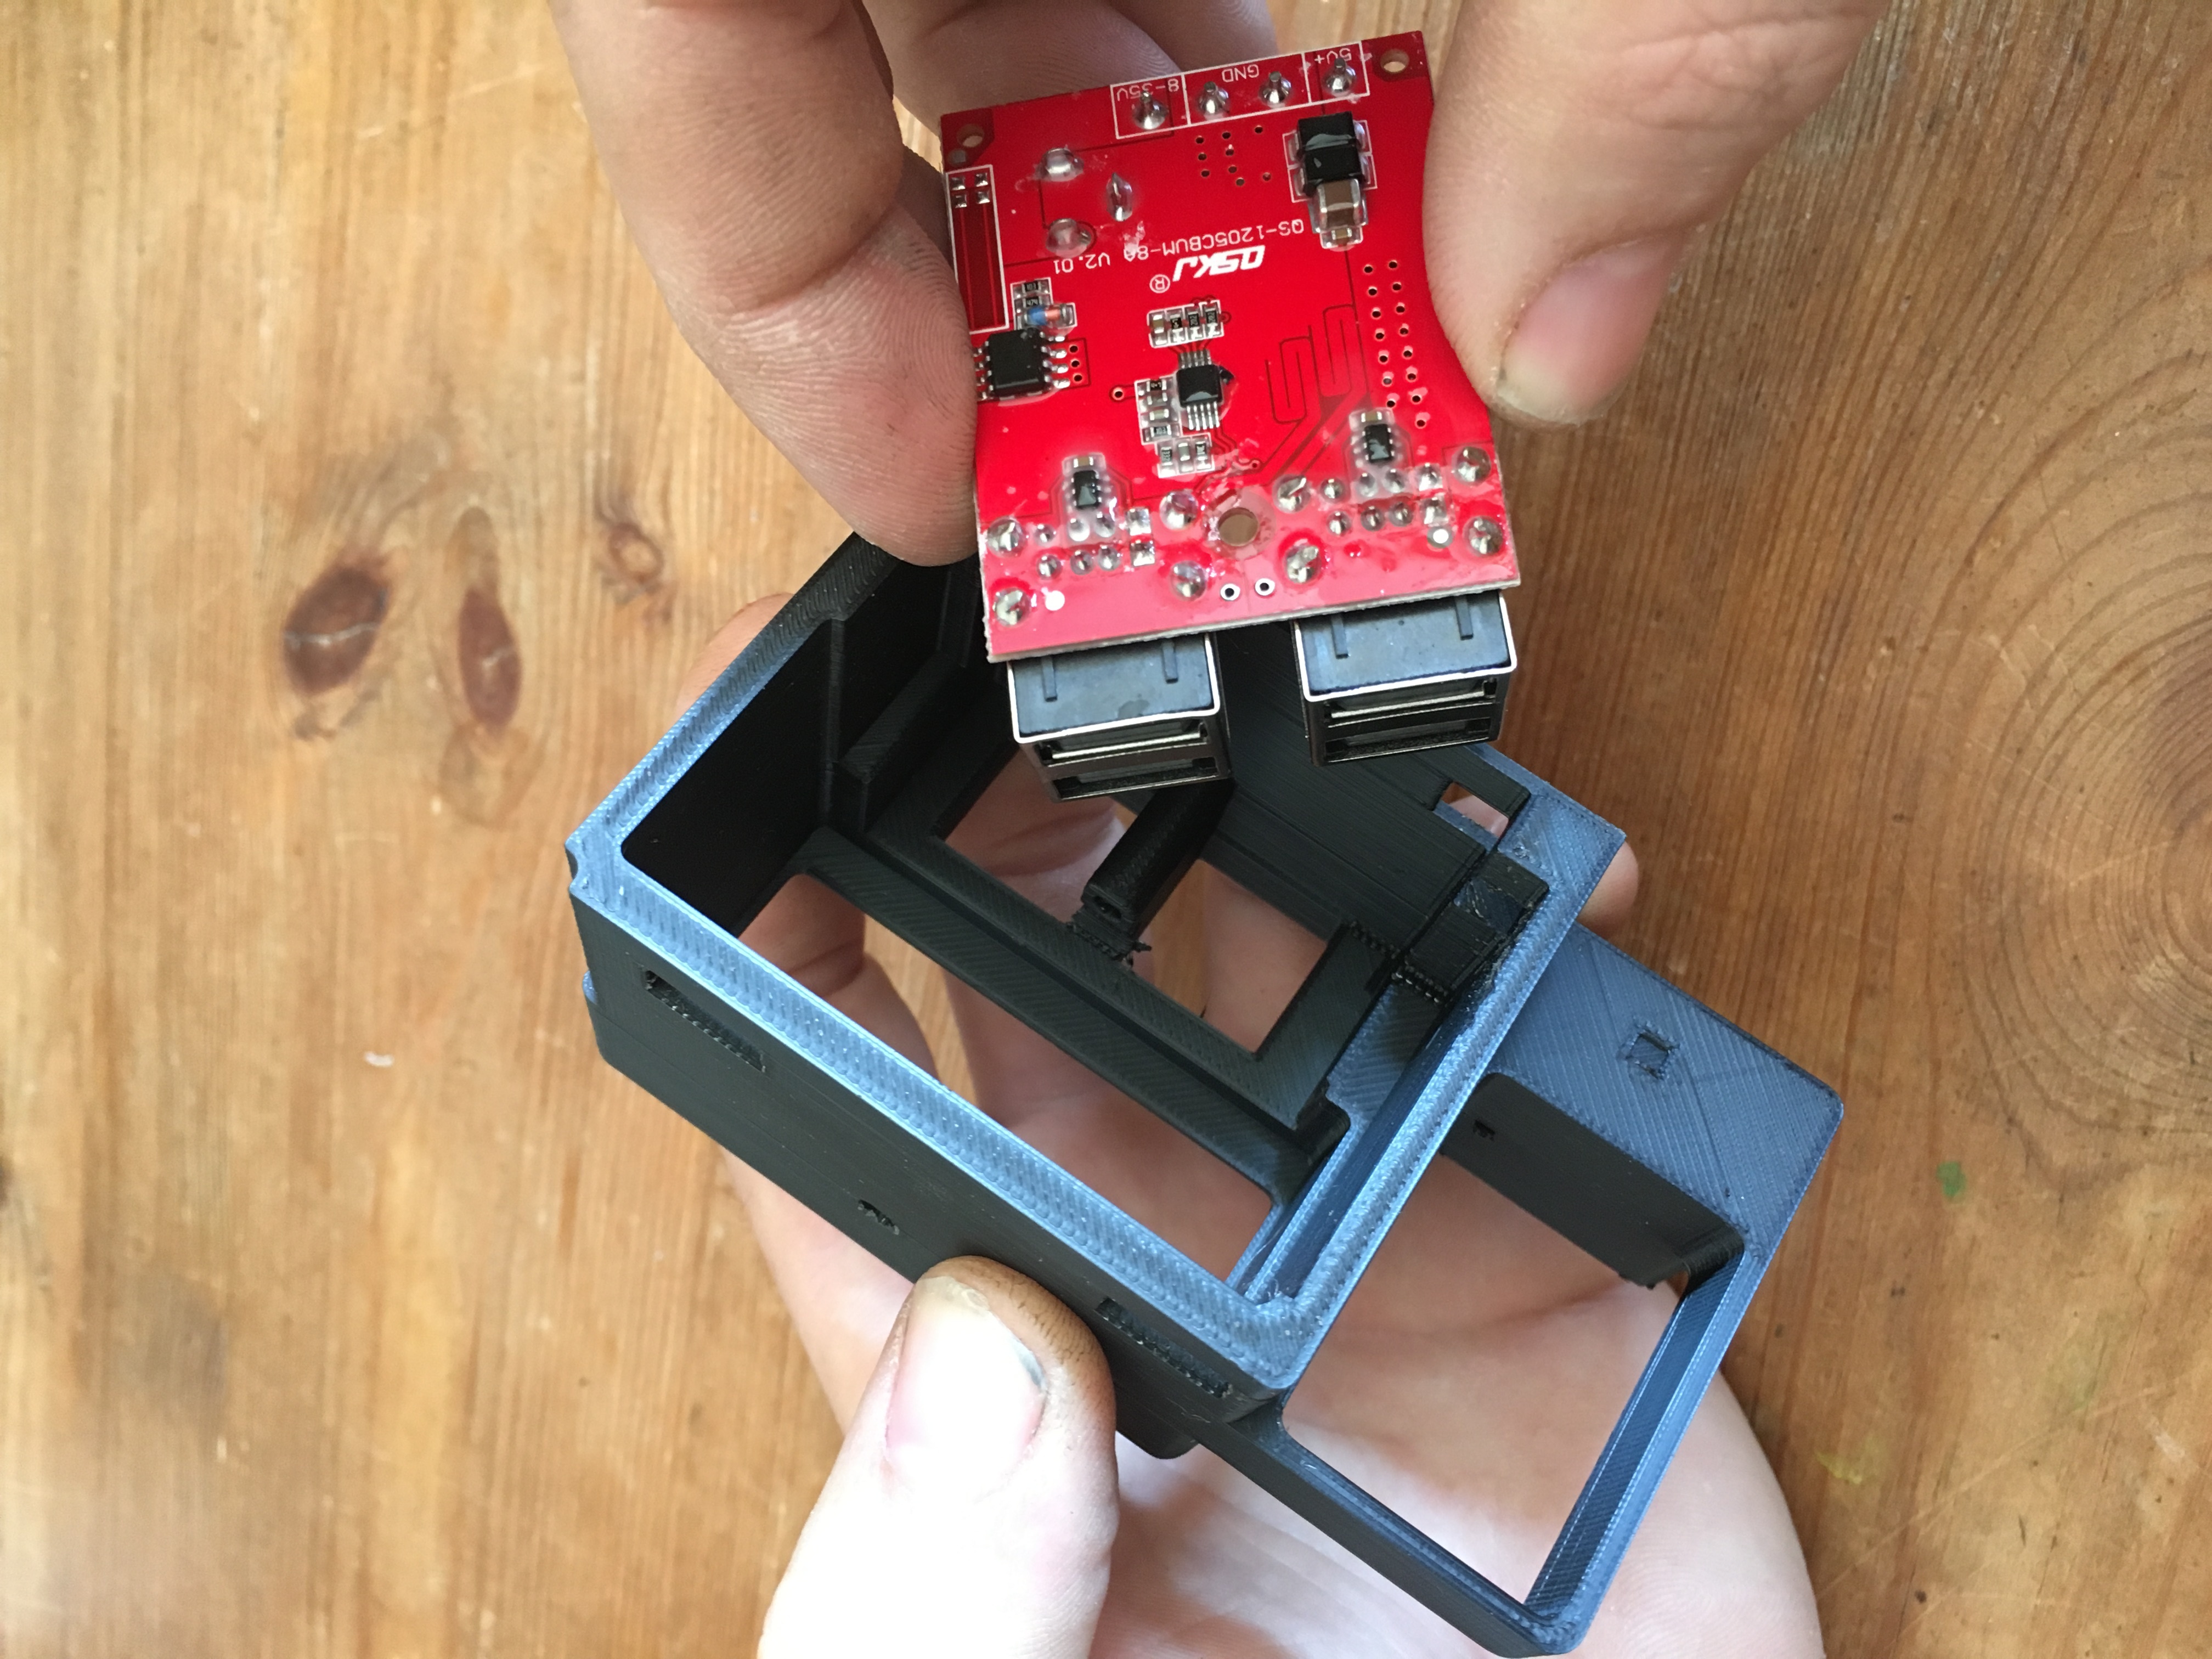

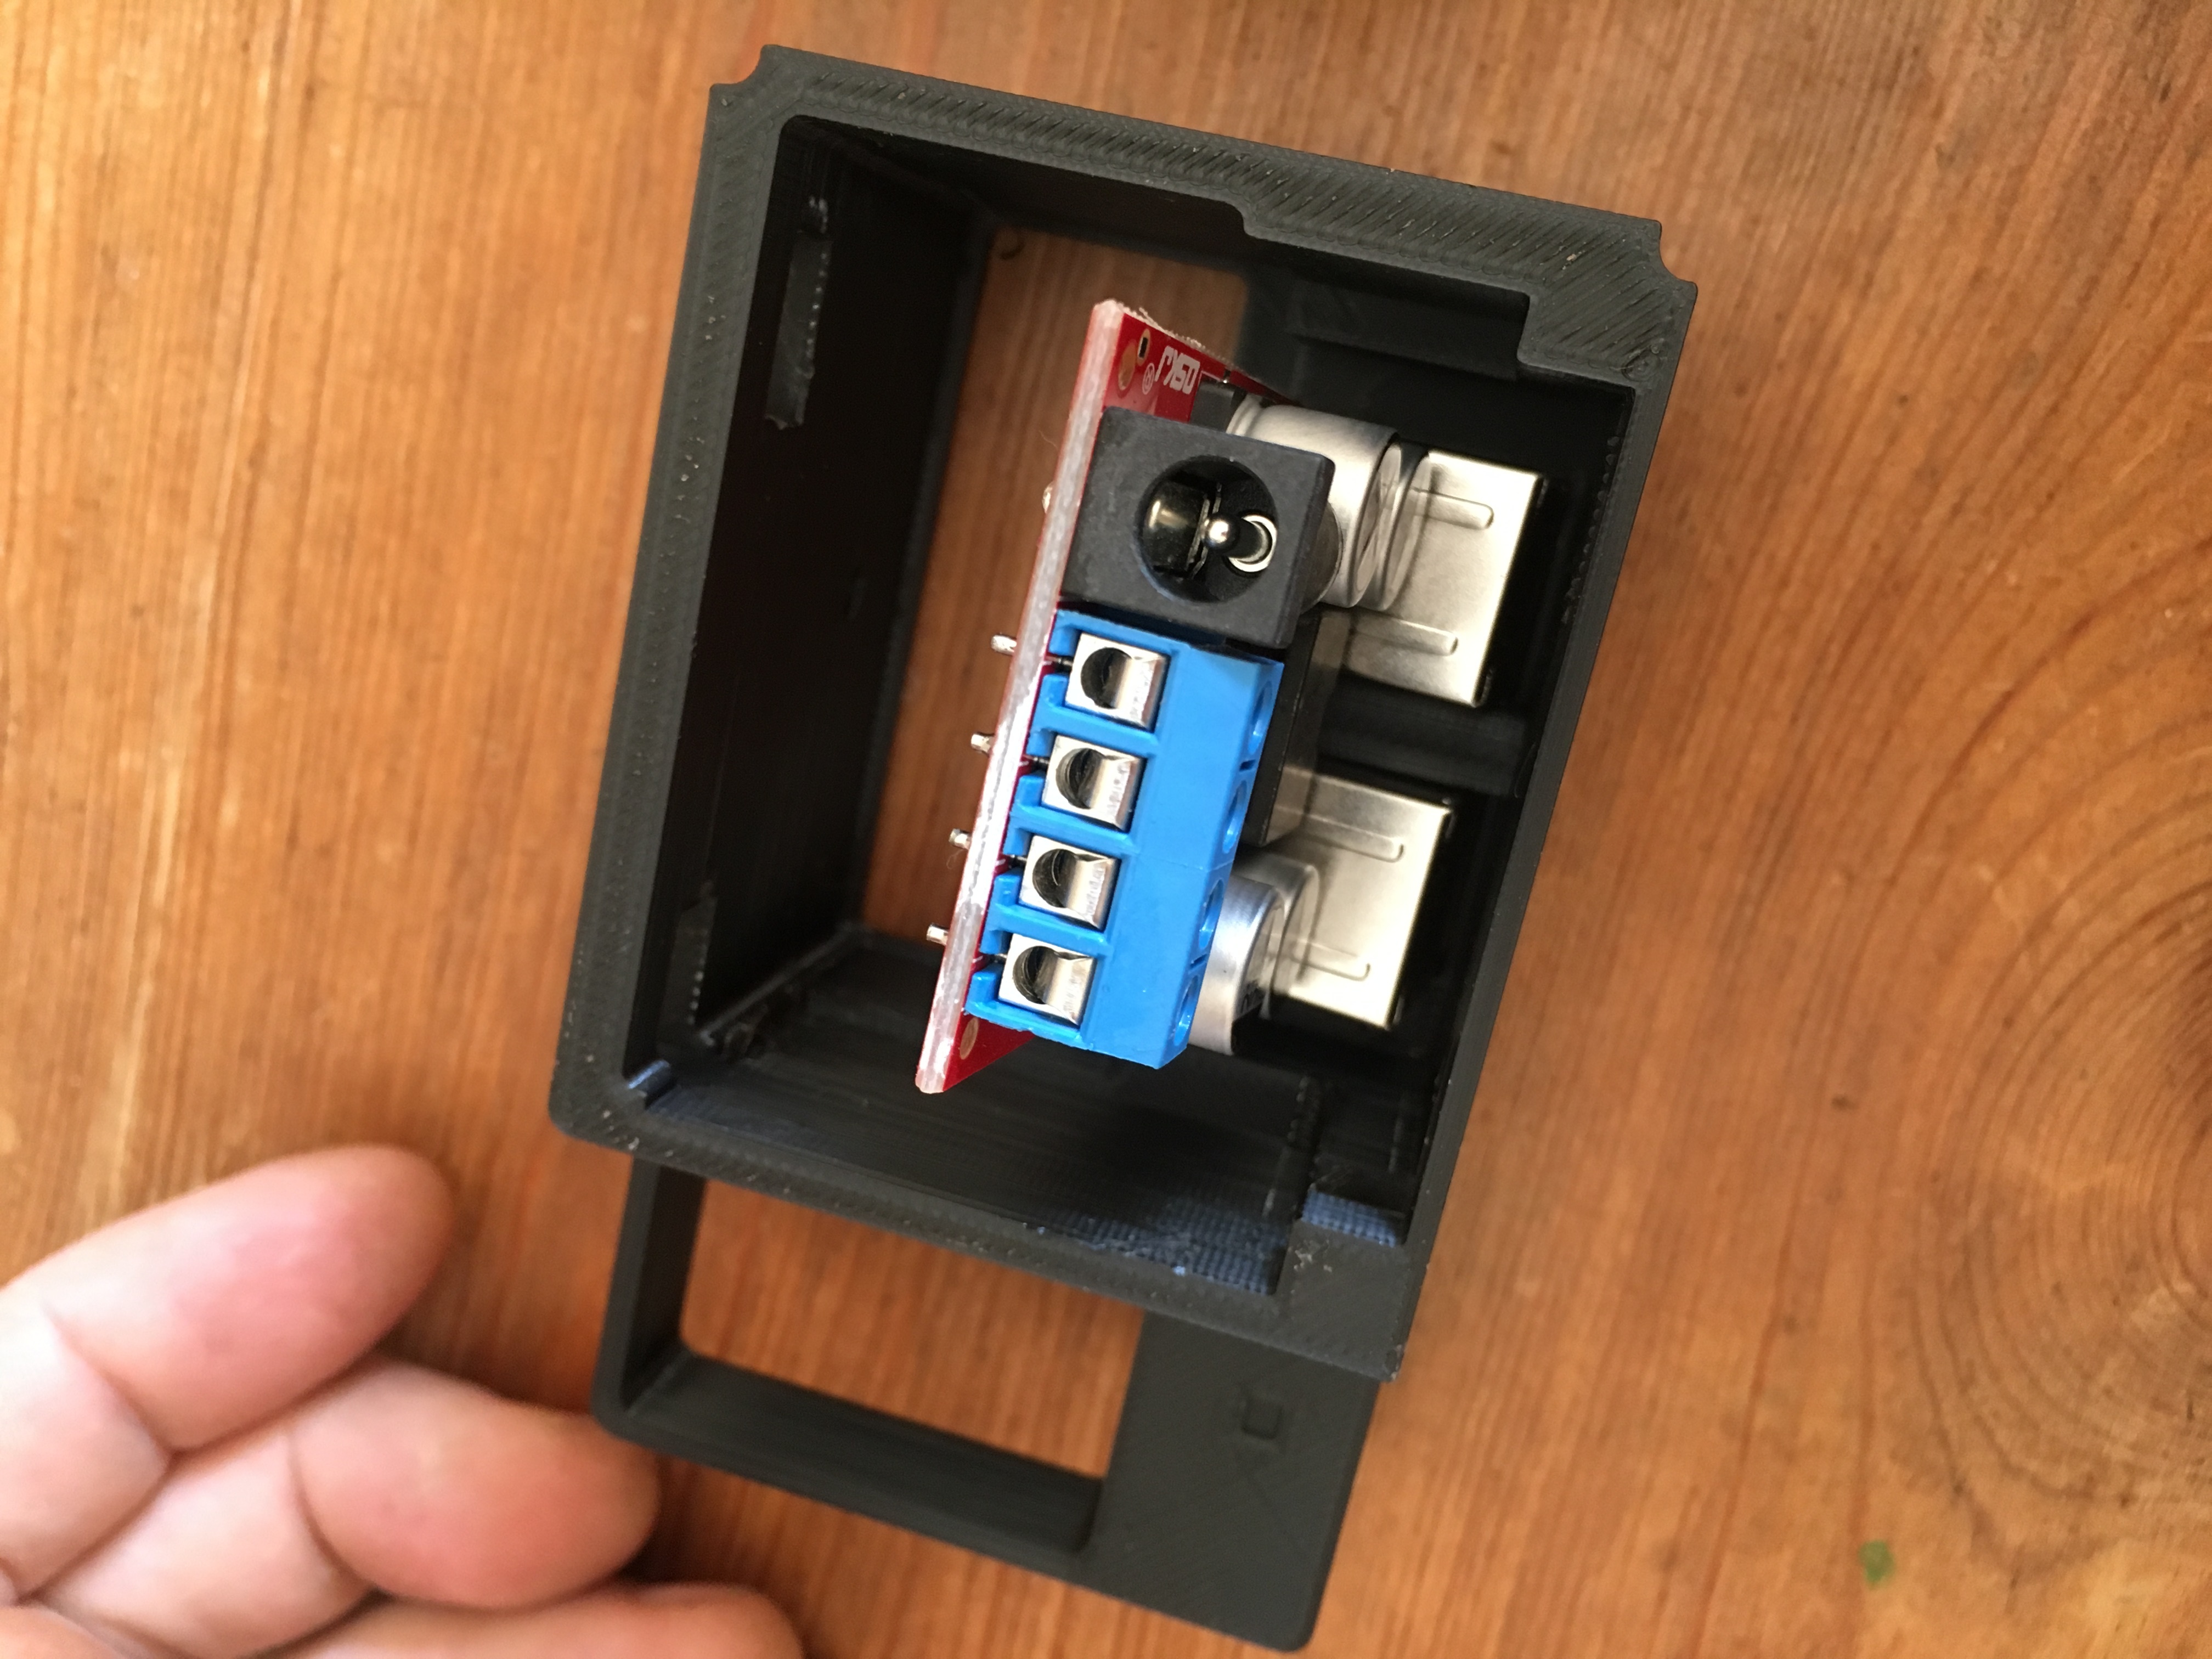
On a flat surface press the back of the module into place until it is flush with the front of the plastic.
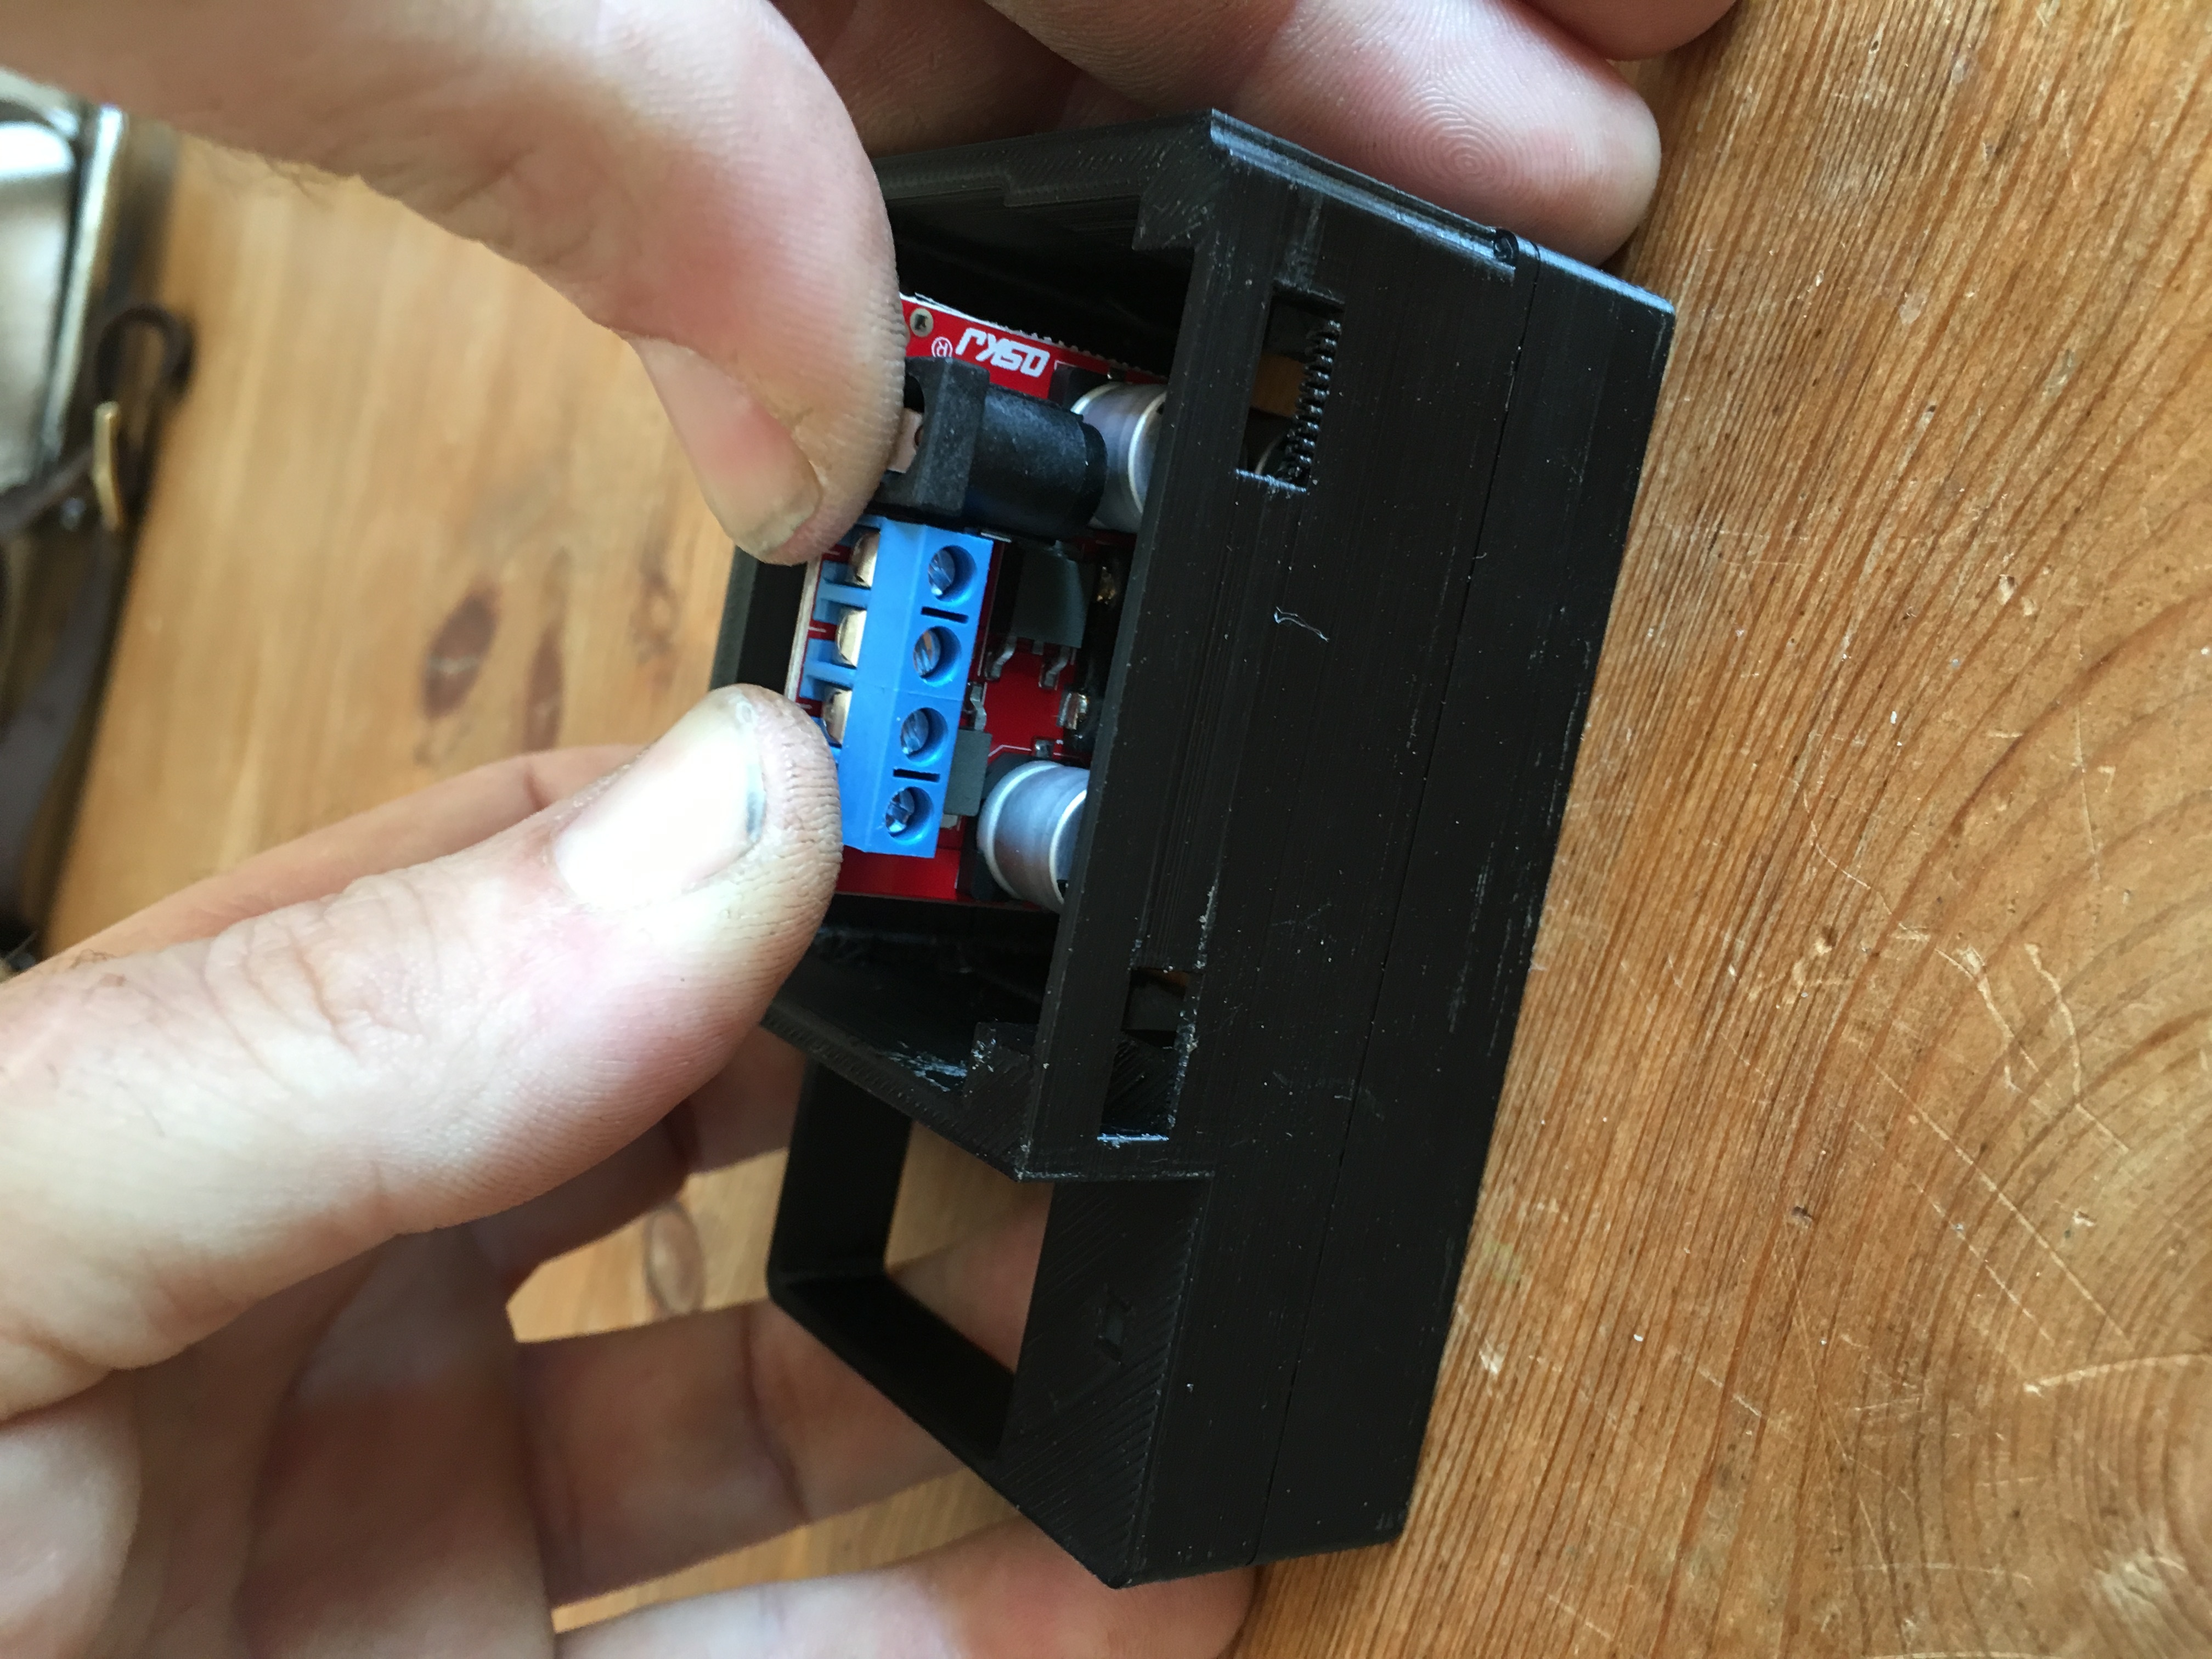
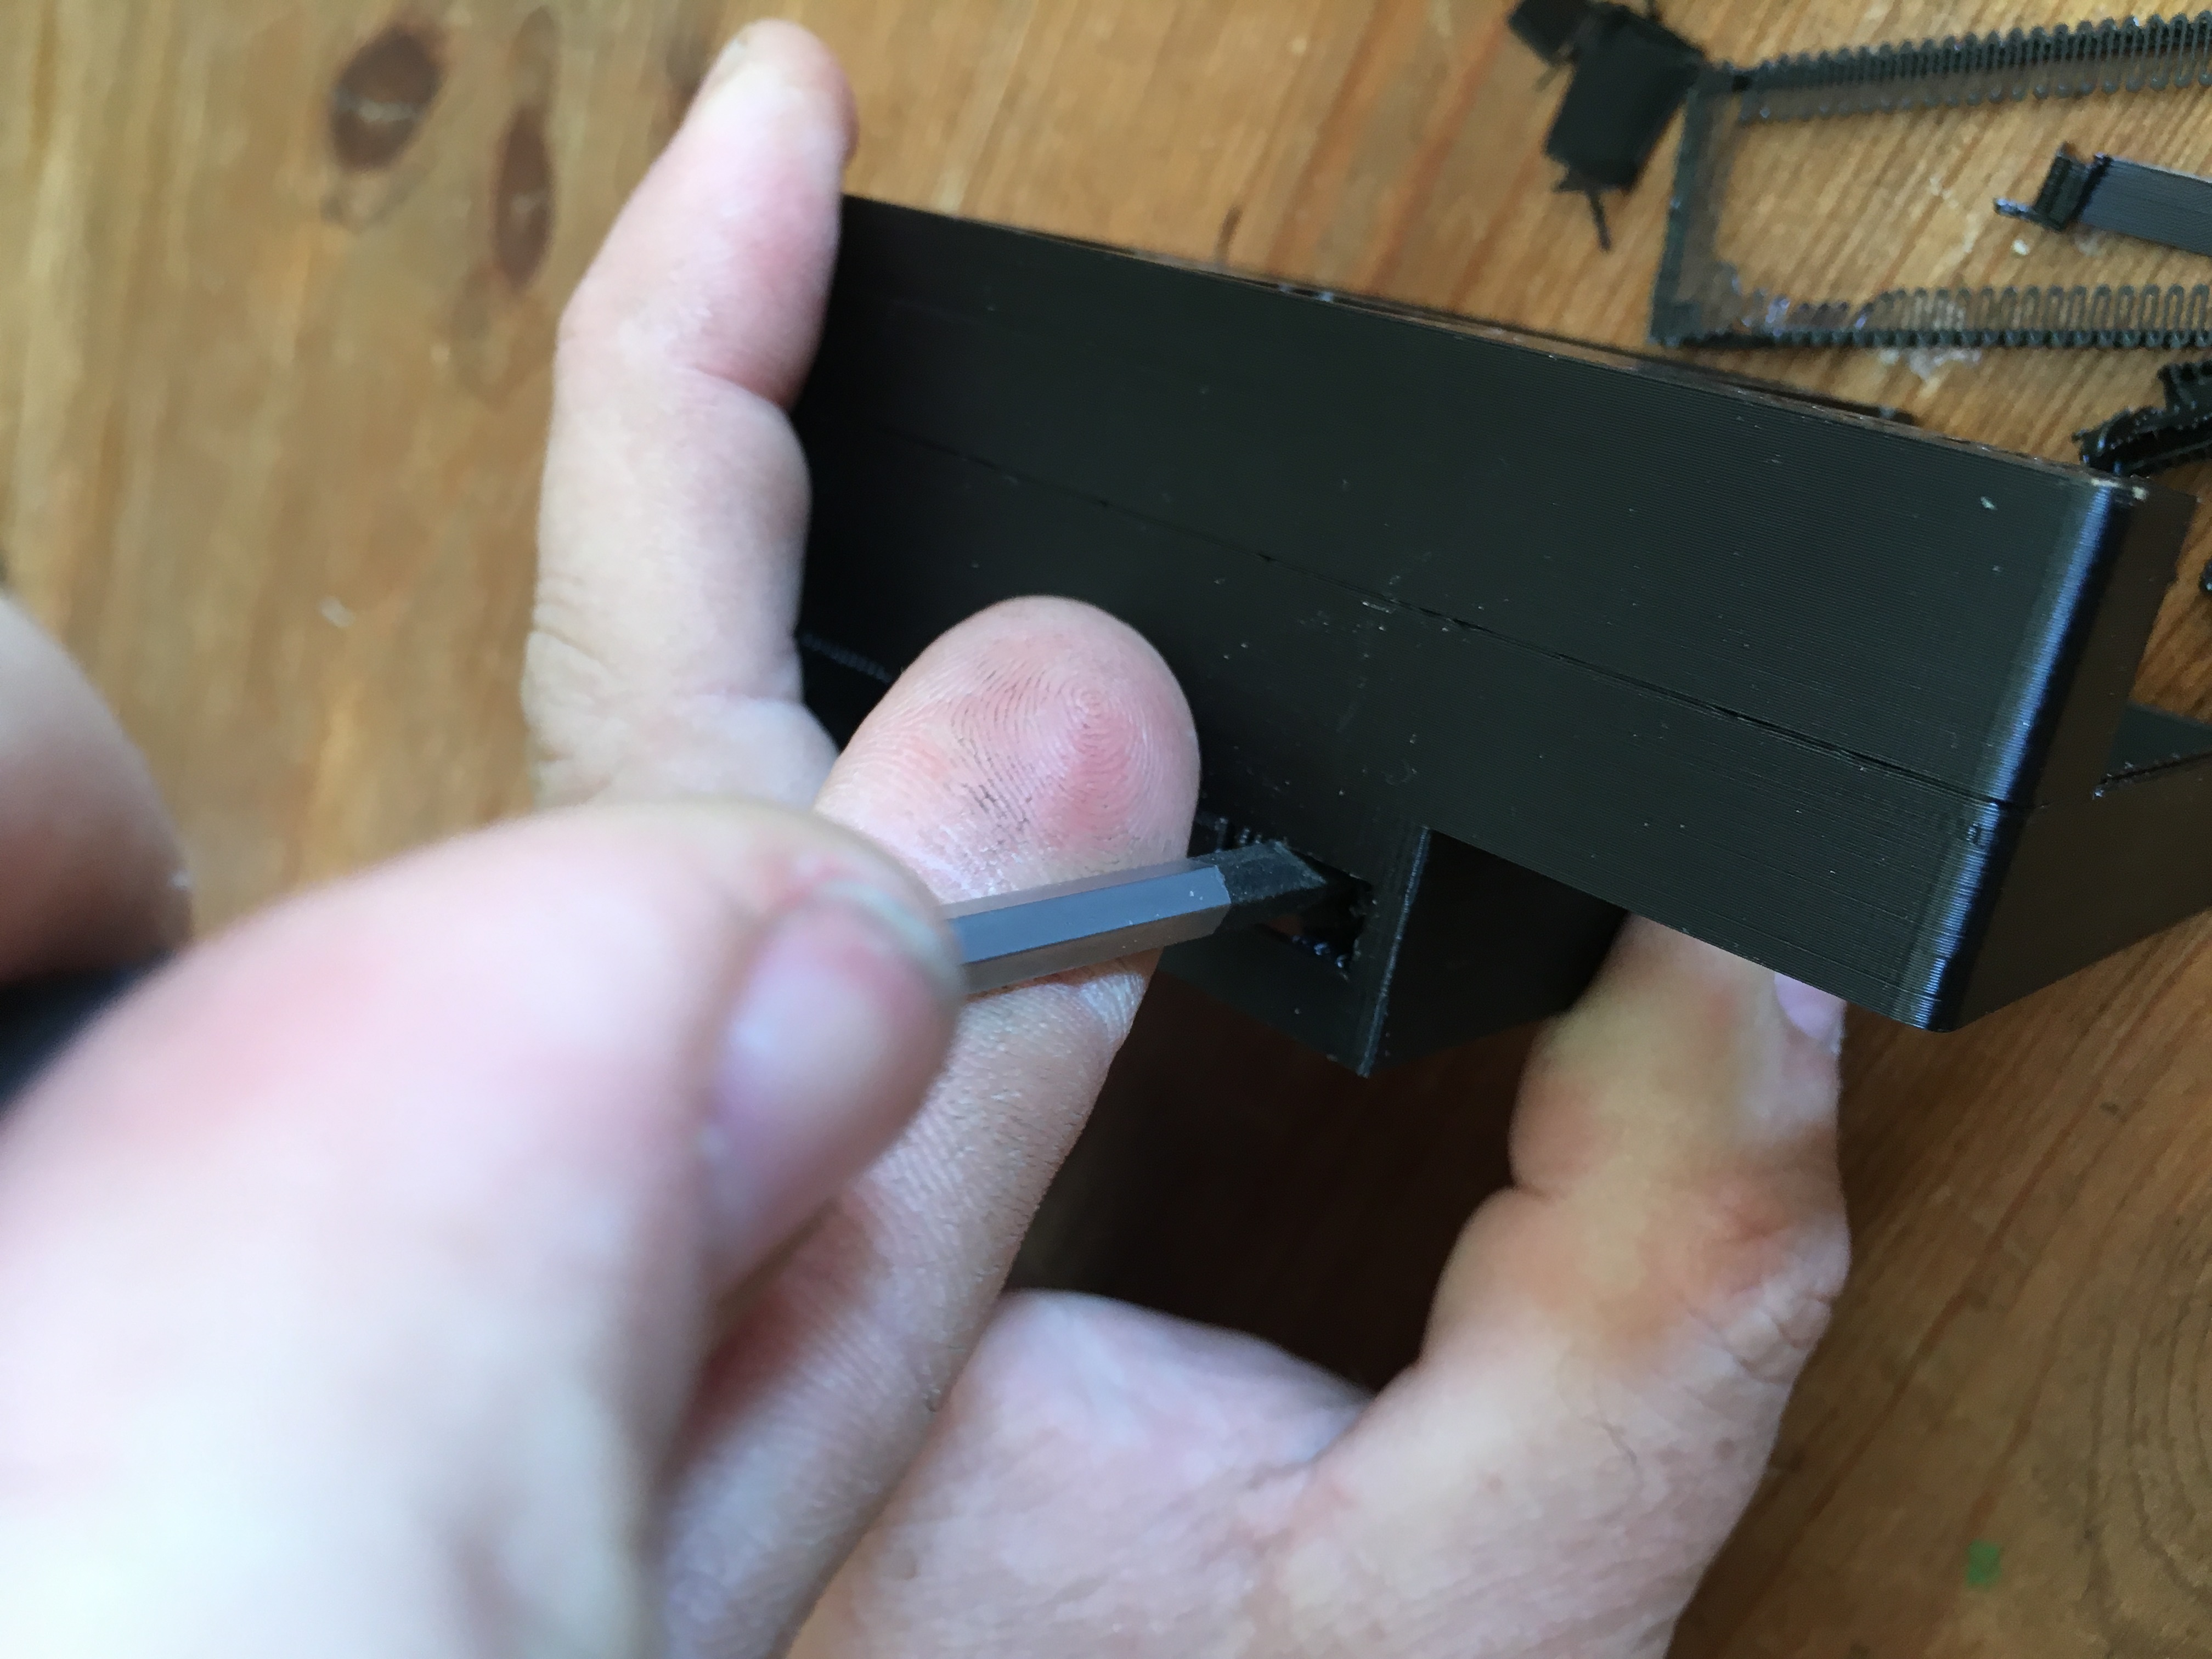
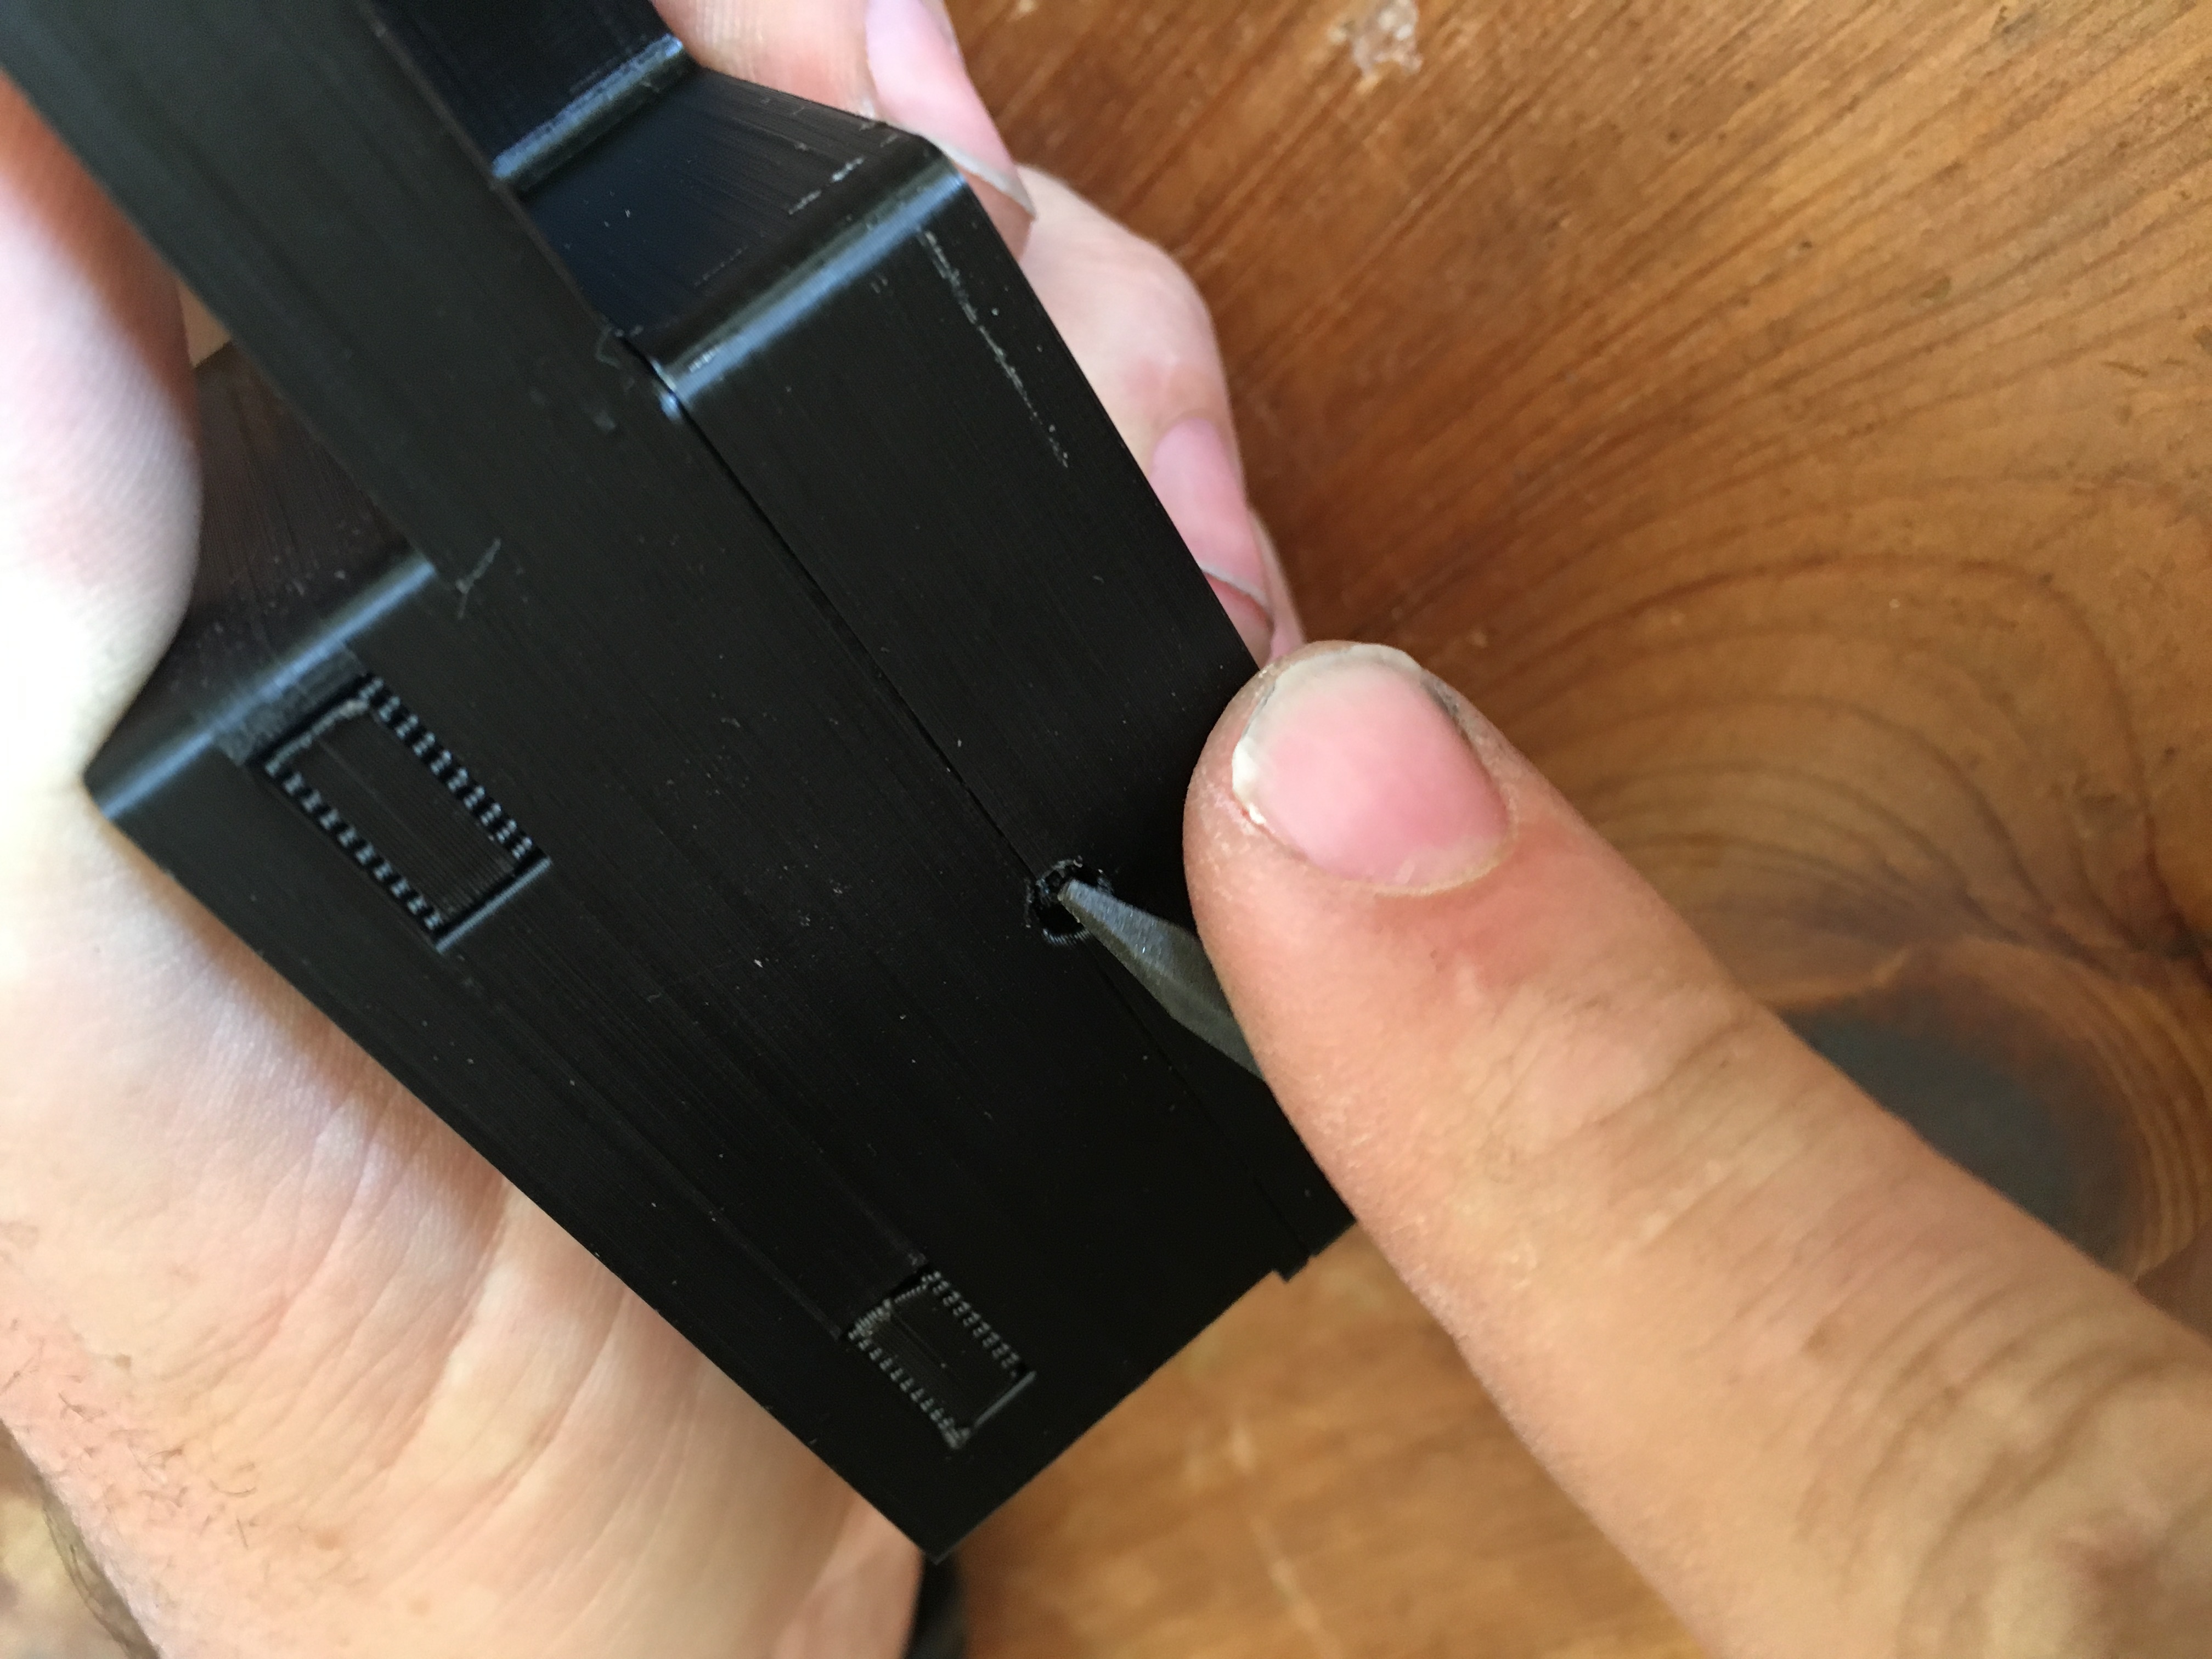
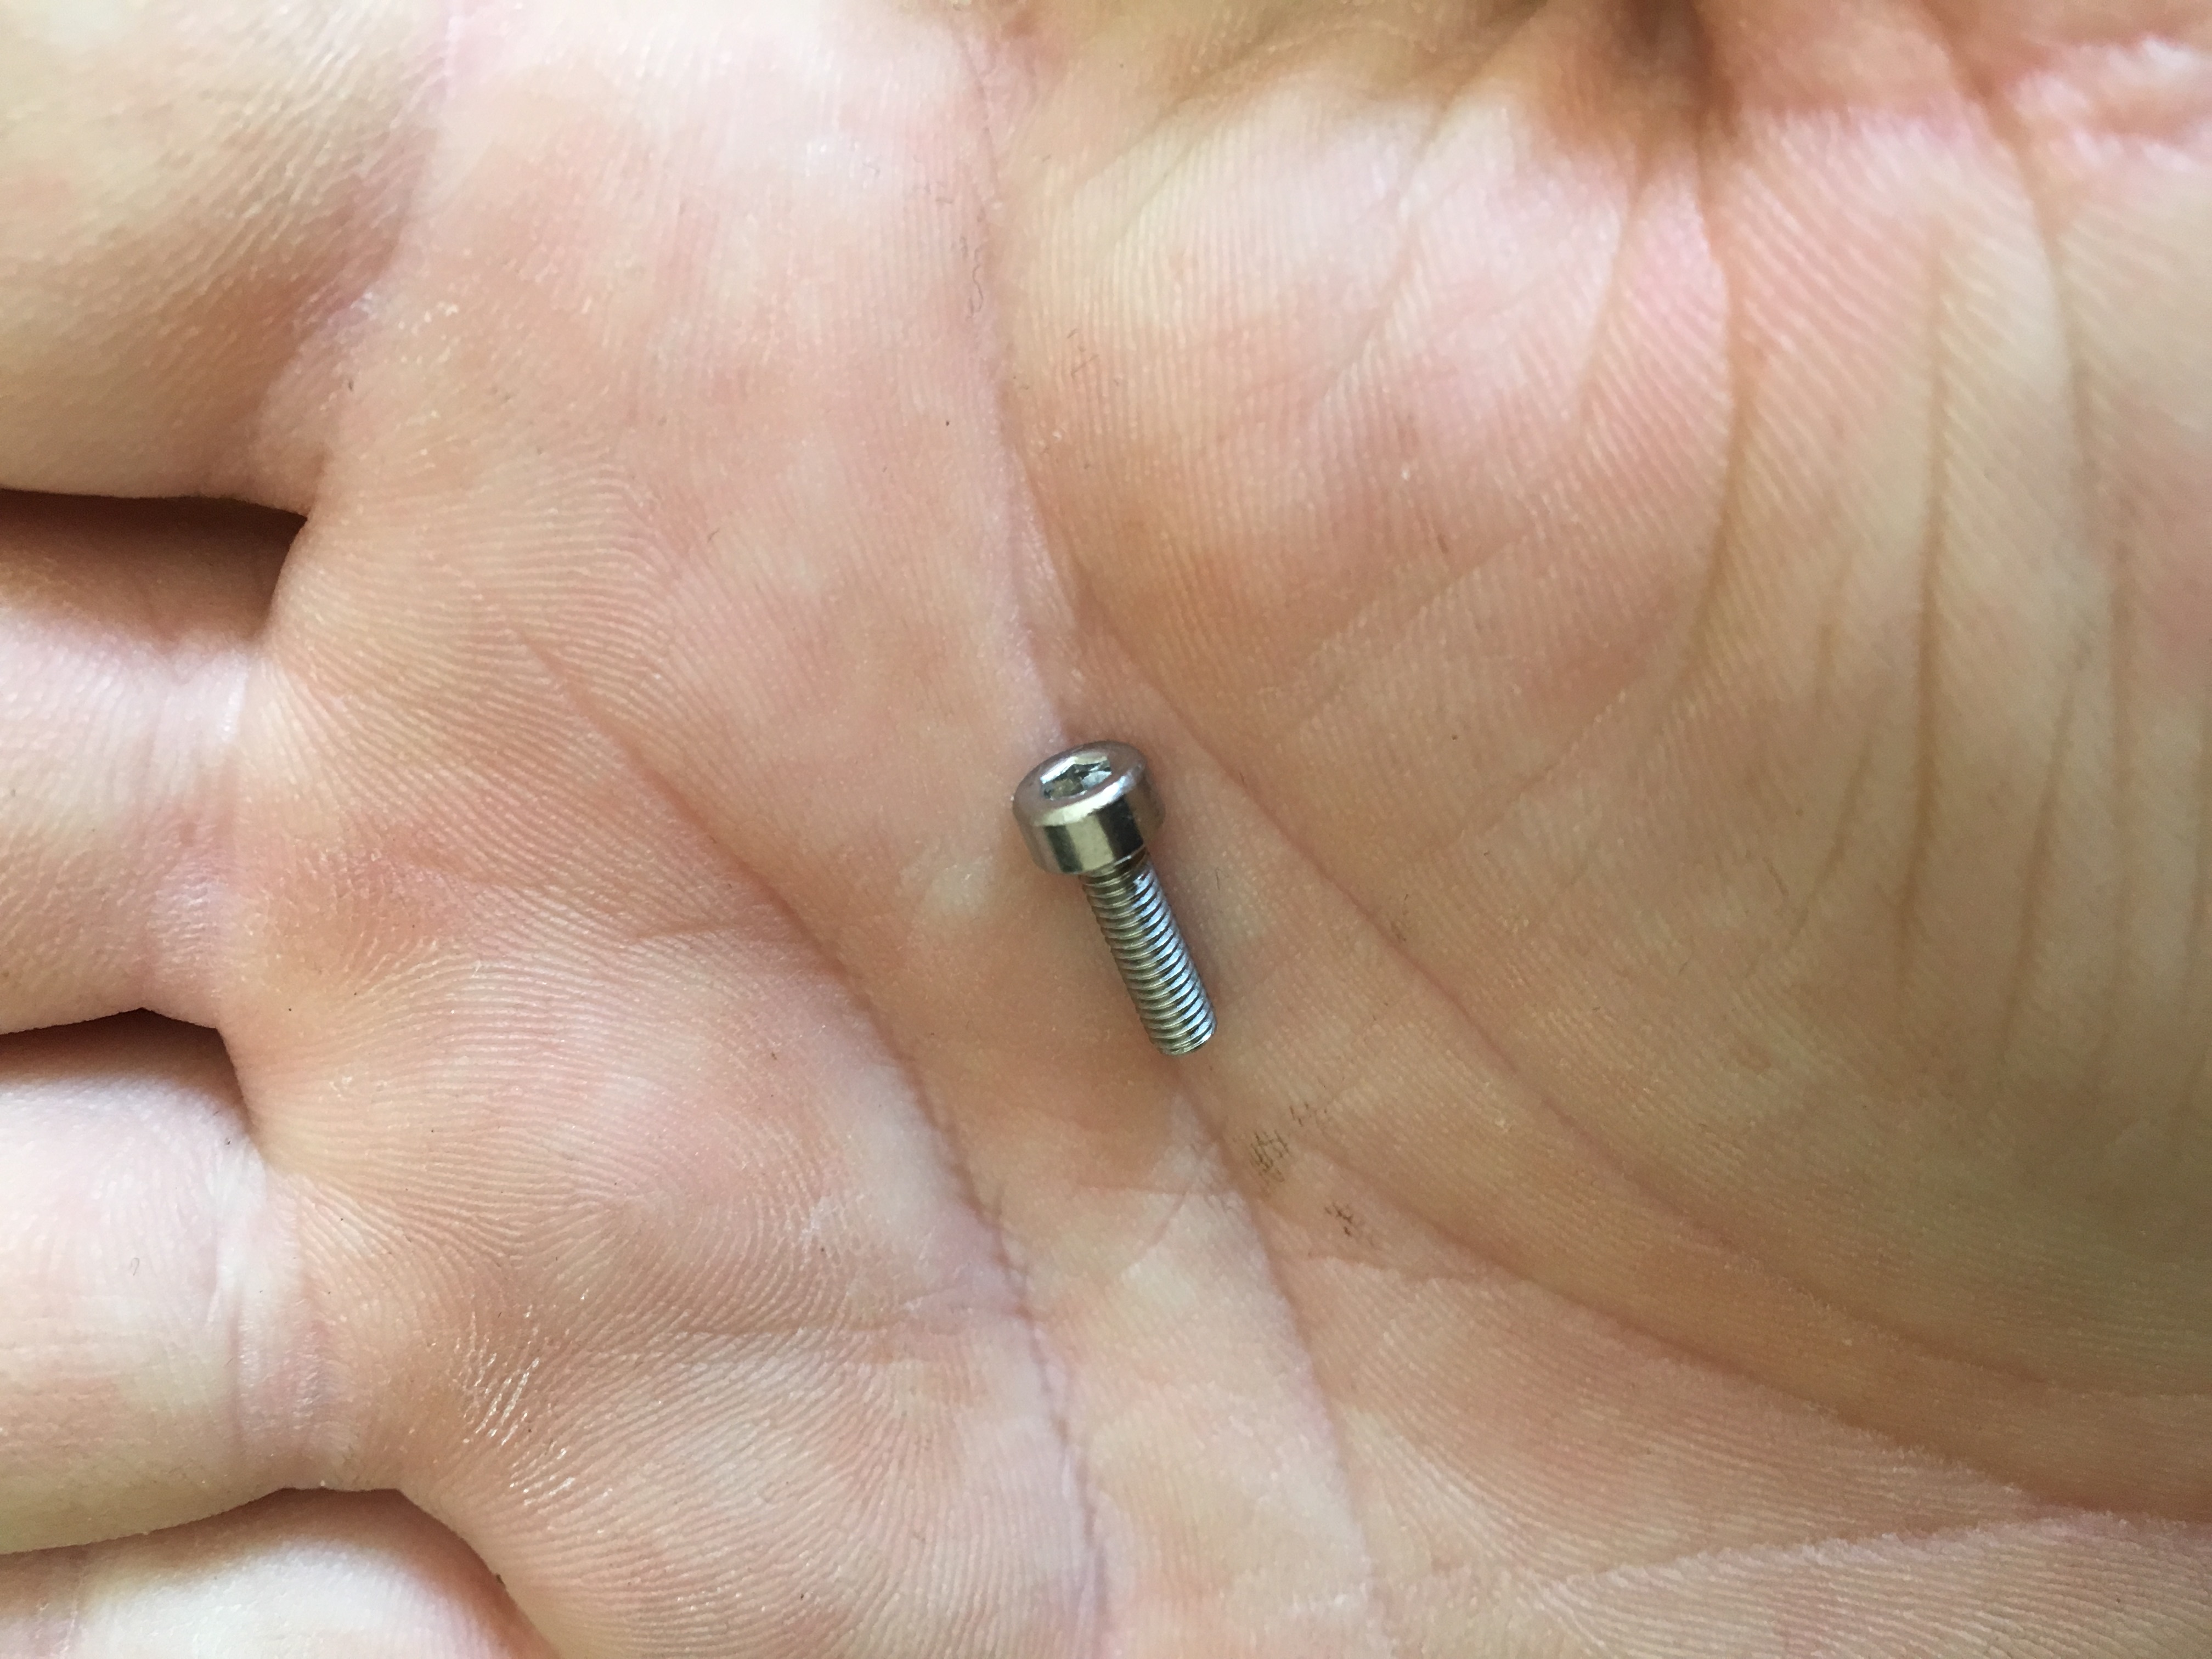
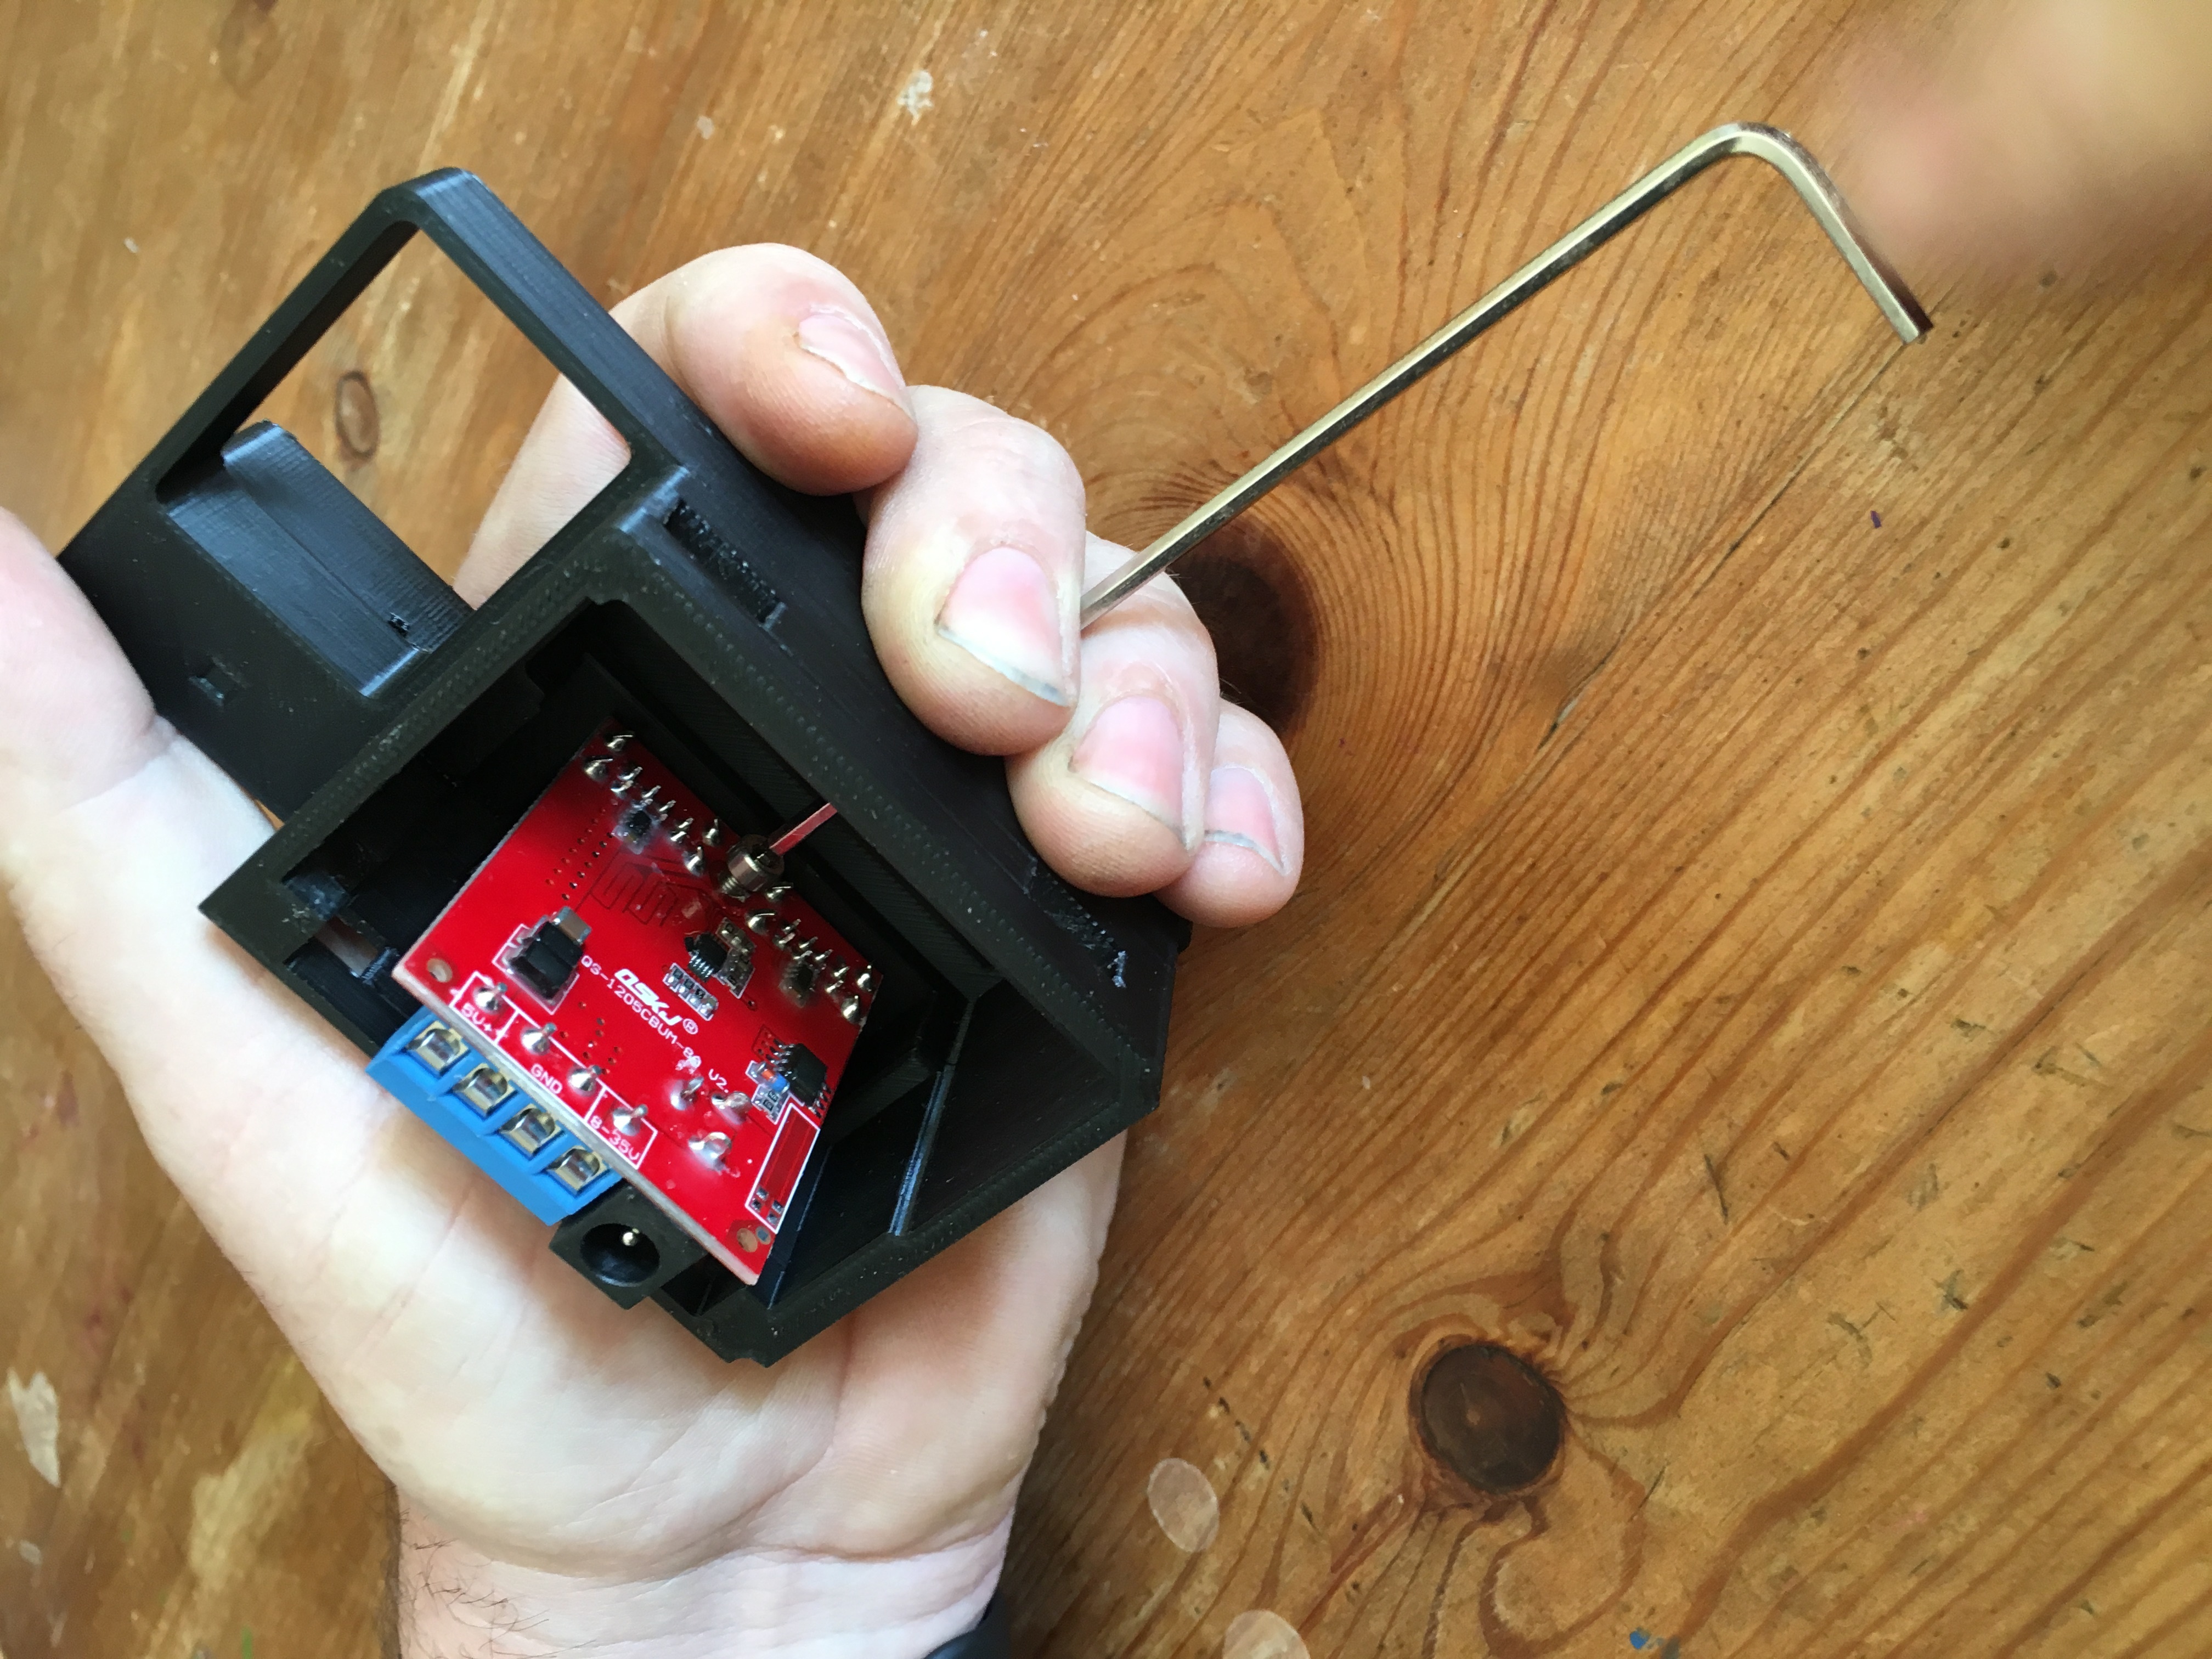
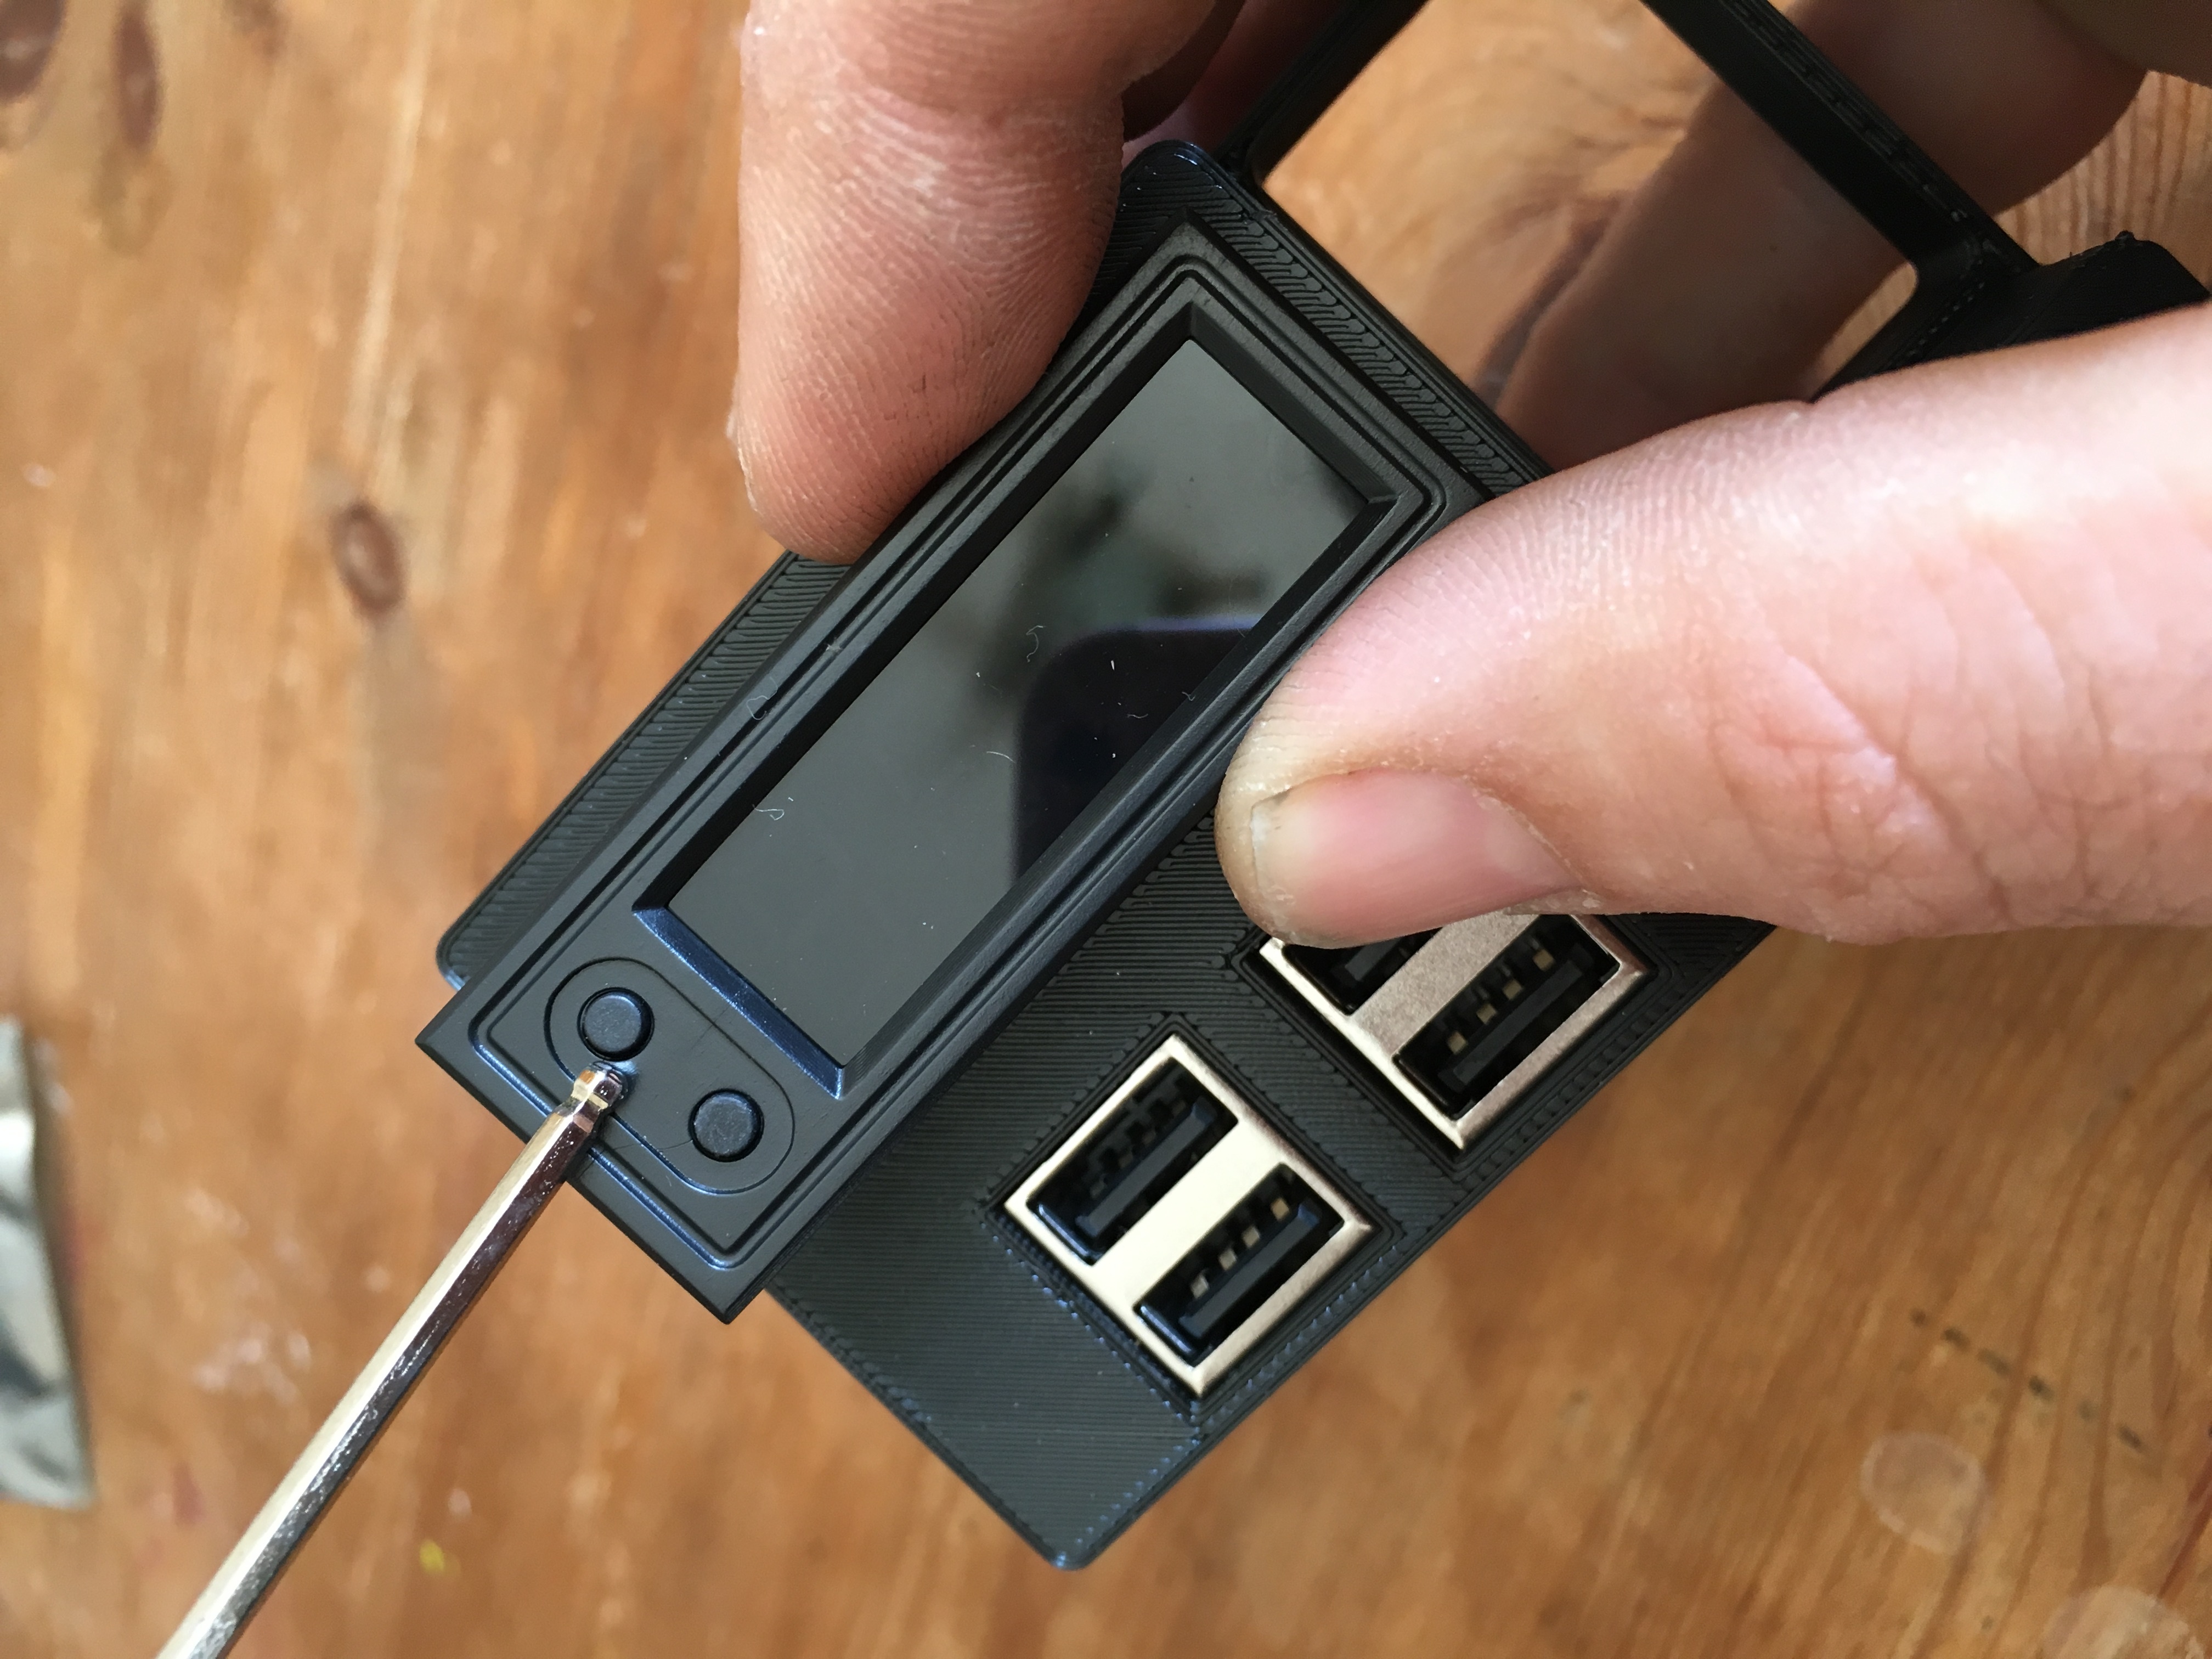
Find the retaining screw from your parts bag.
Be very carefull adding in the screw, the hole is perfectly sized for it but you may need to try to clean out the hole a little as it will contain support material from printing, the screw needs to cut its own threads to get started, be patient and it will catch, (be heavy handed and you may split the plastic).
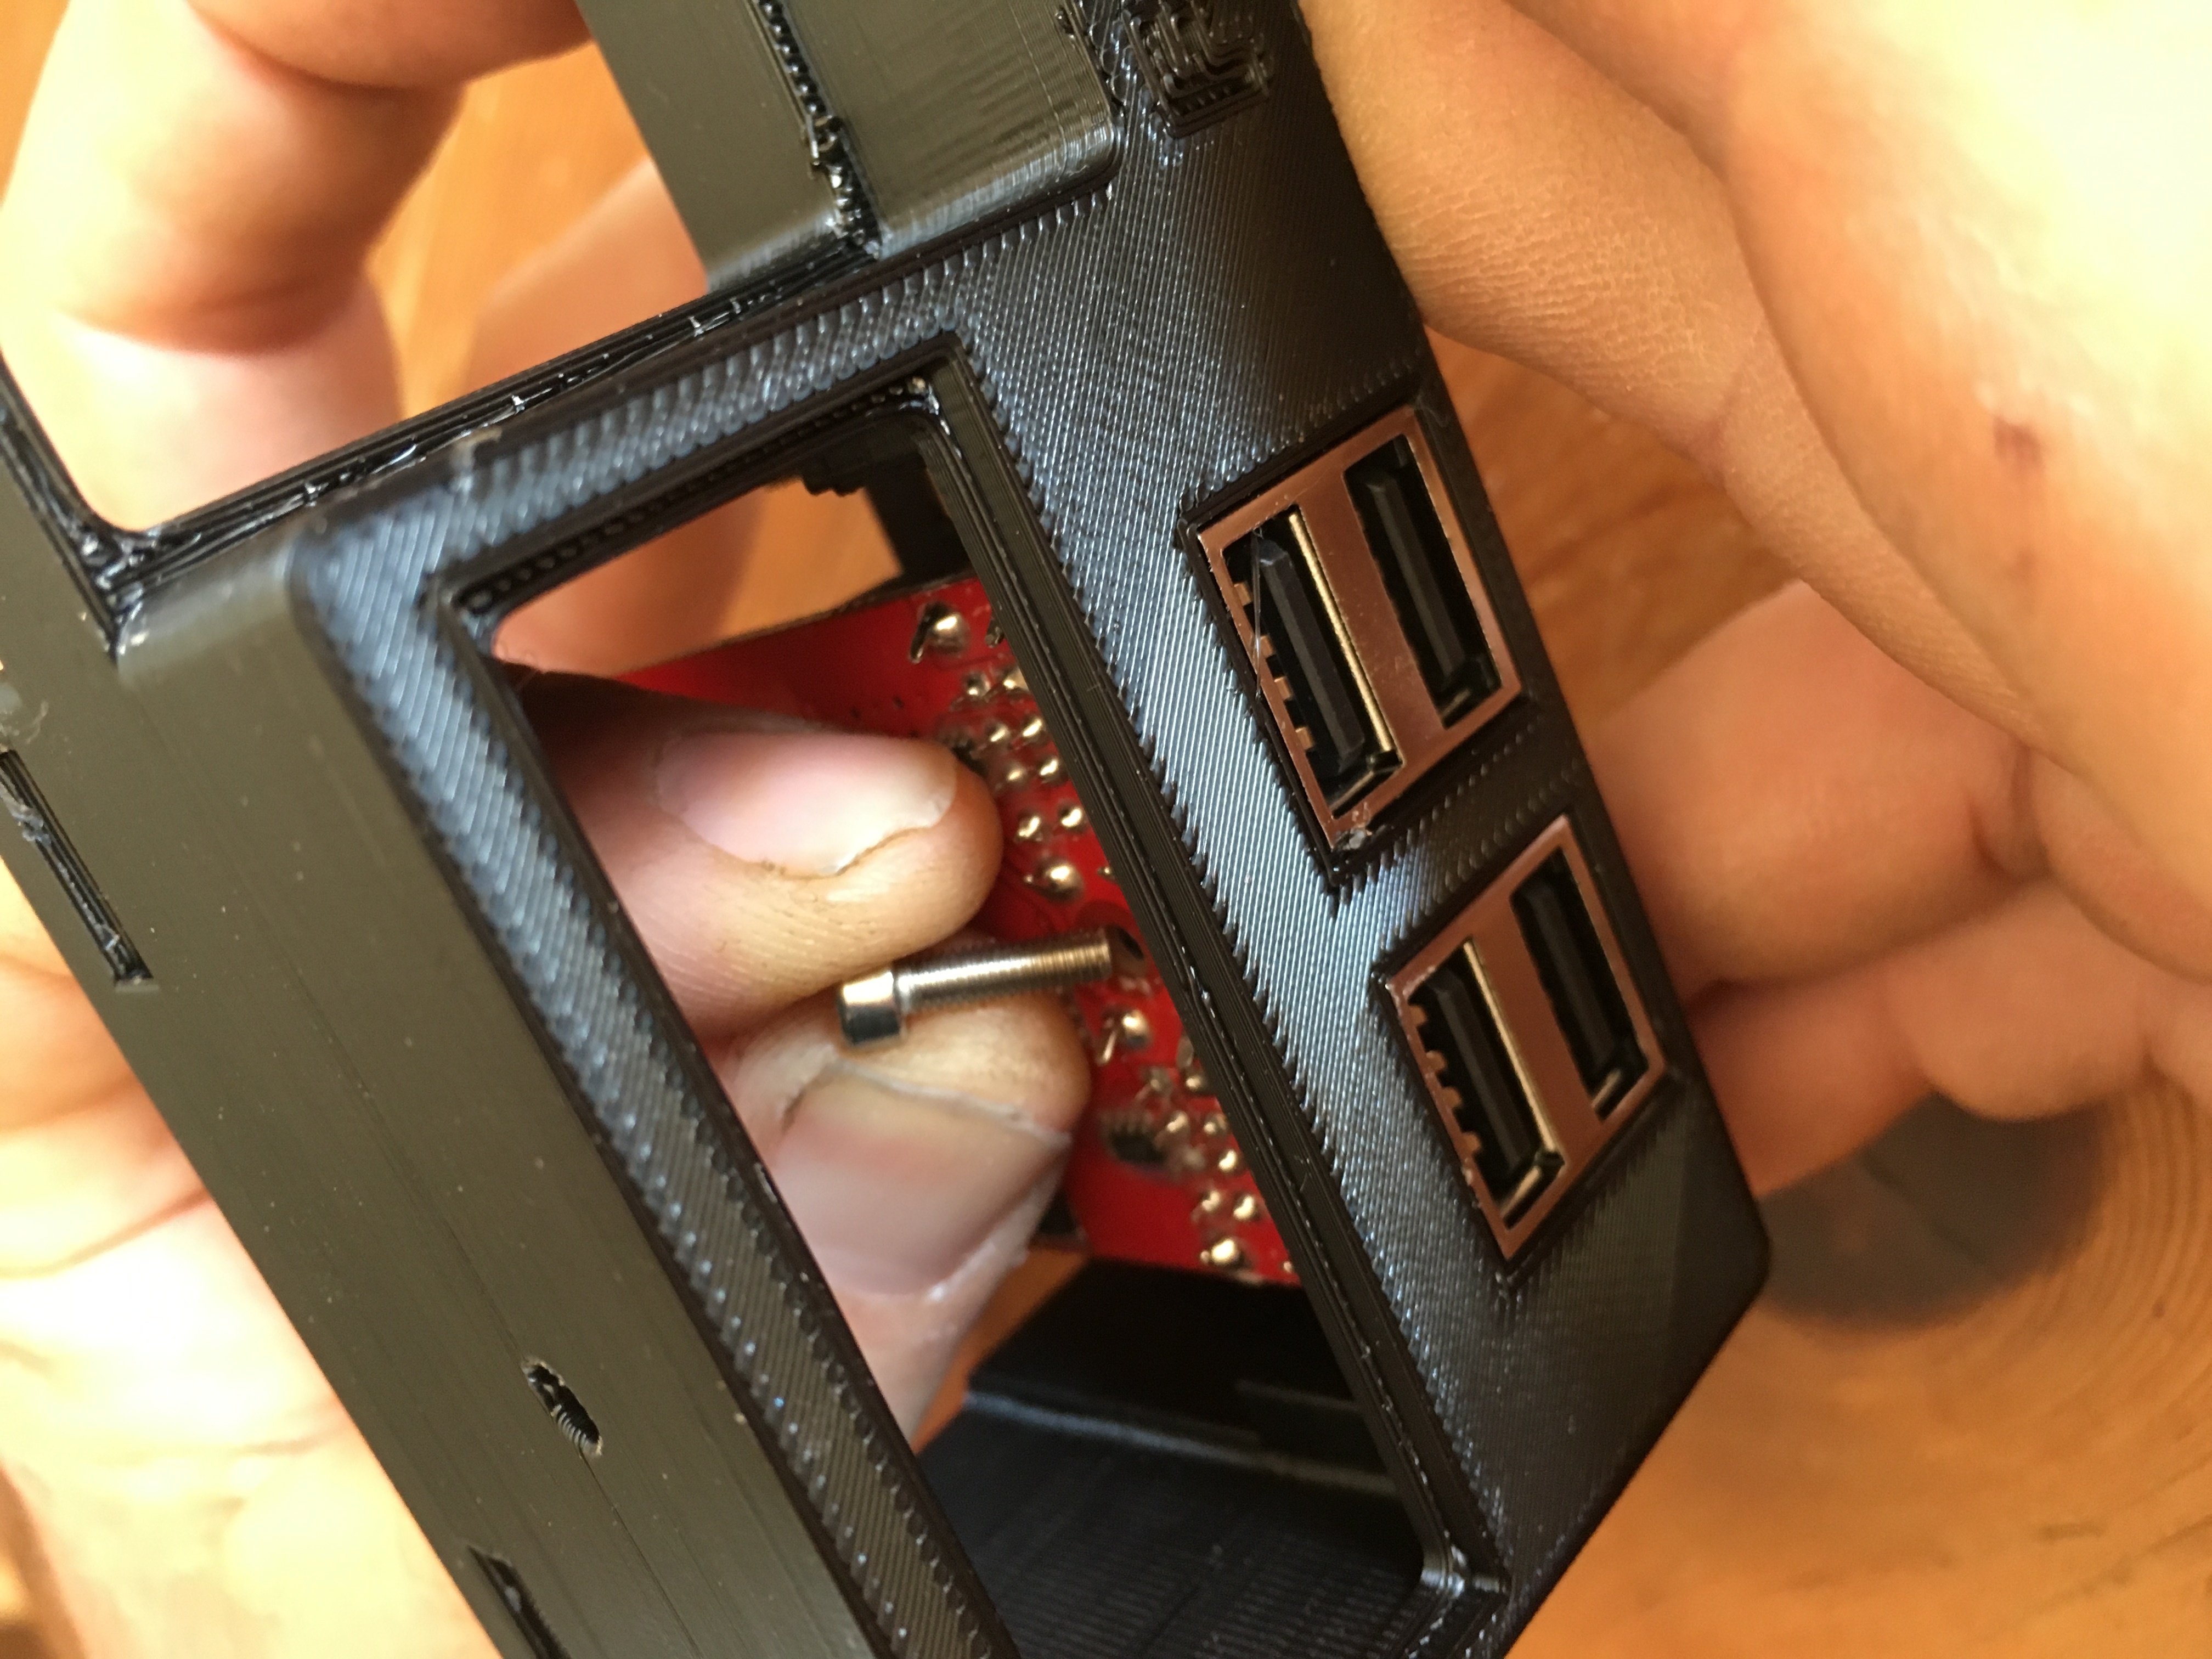

use an allen key though the hole to drive the screw (2.5mm Key)
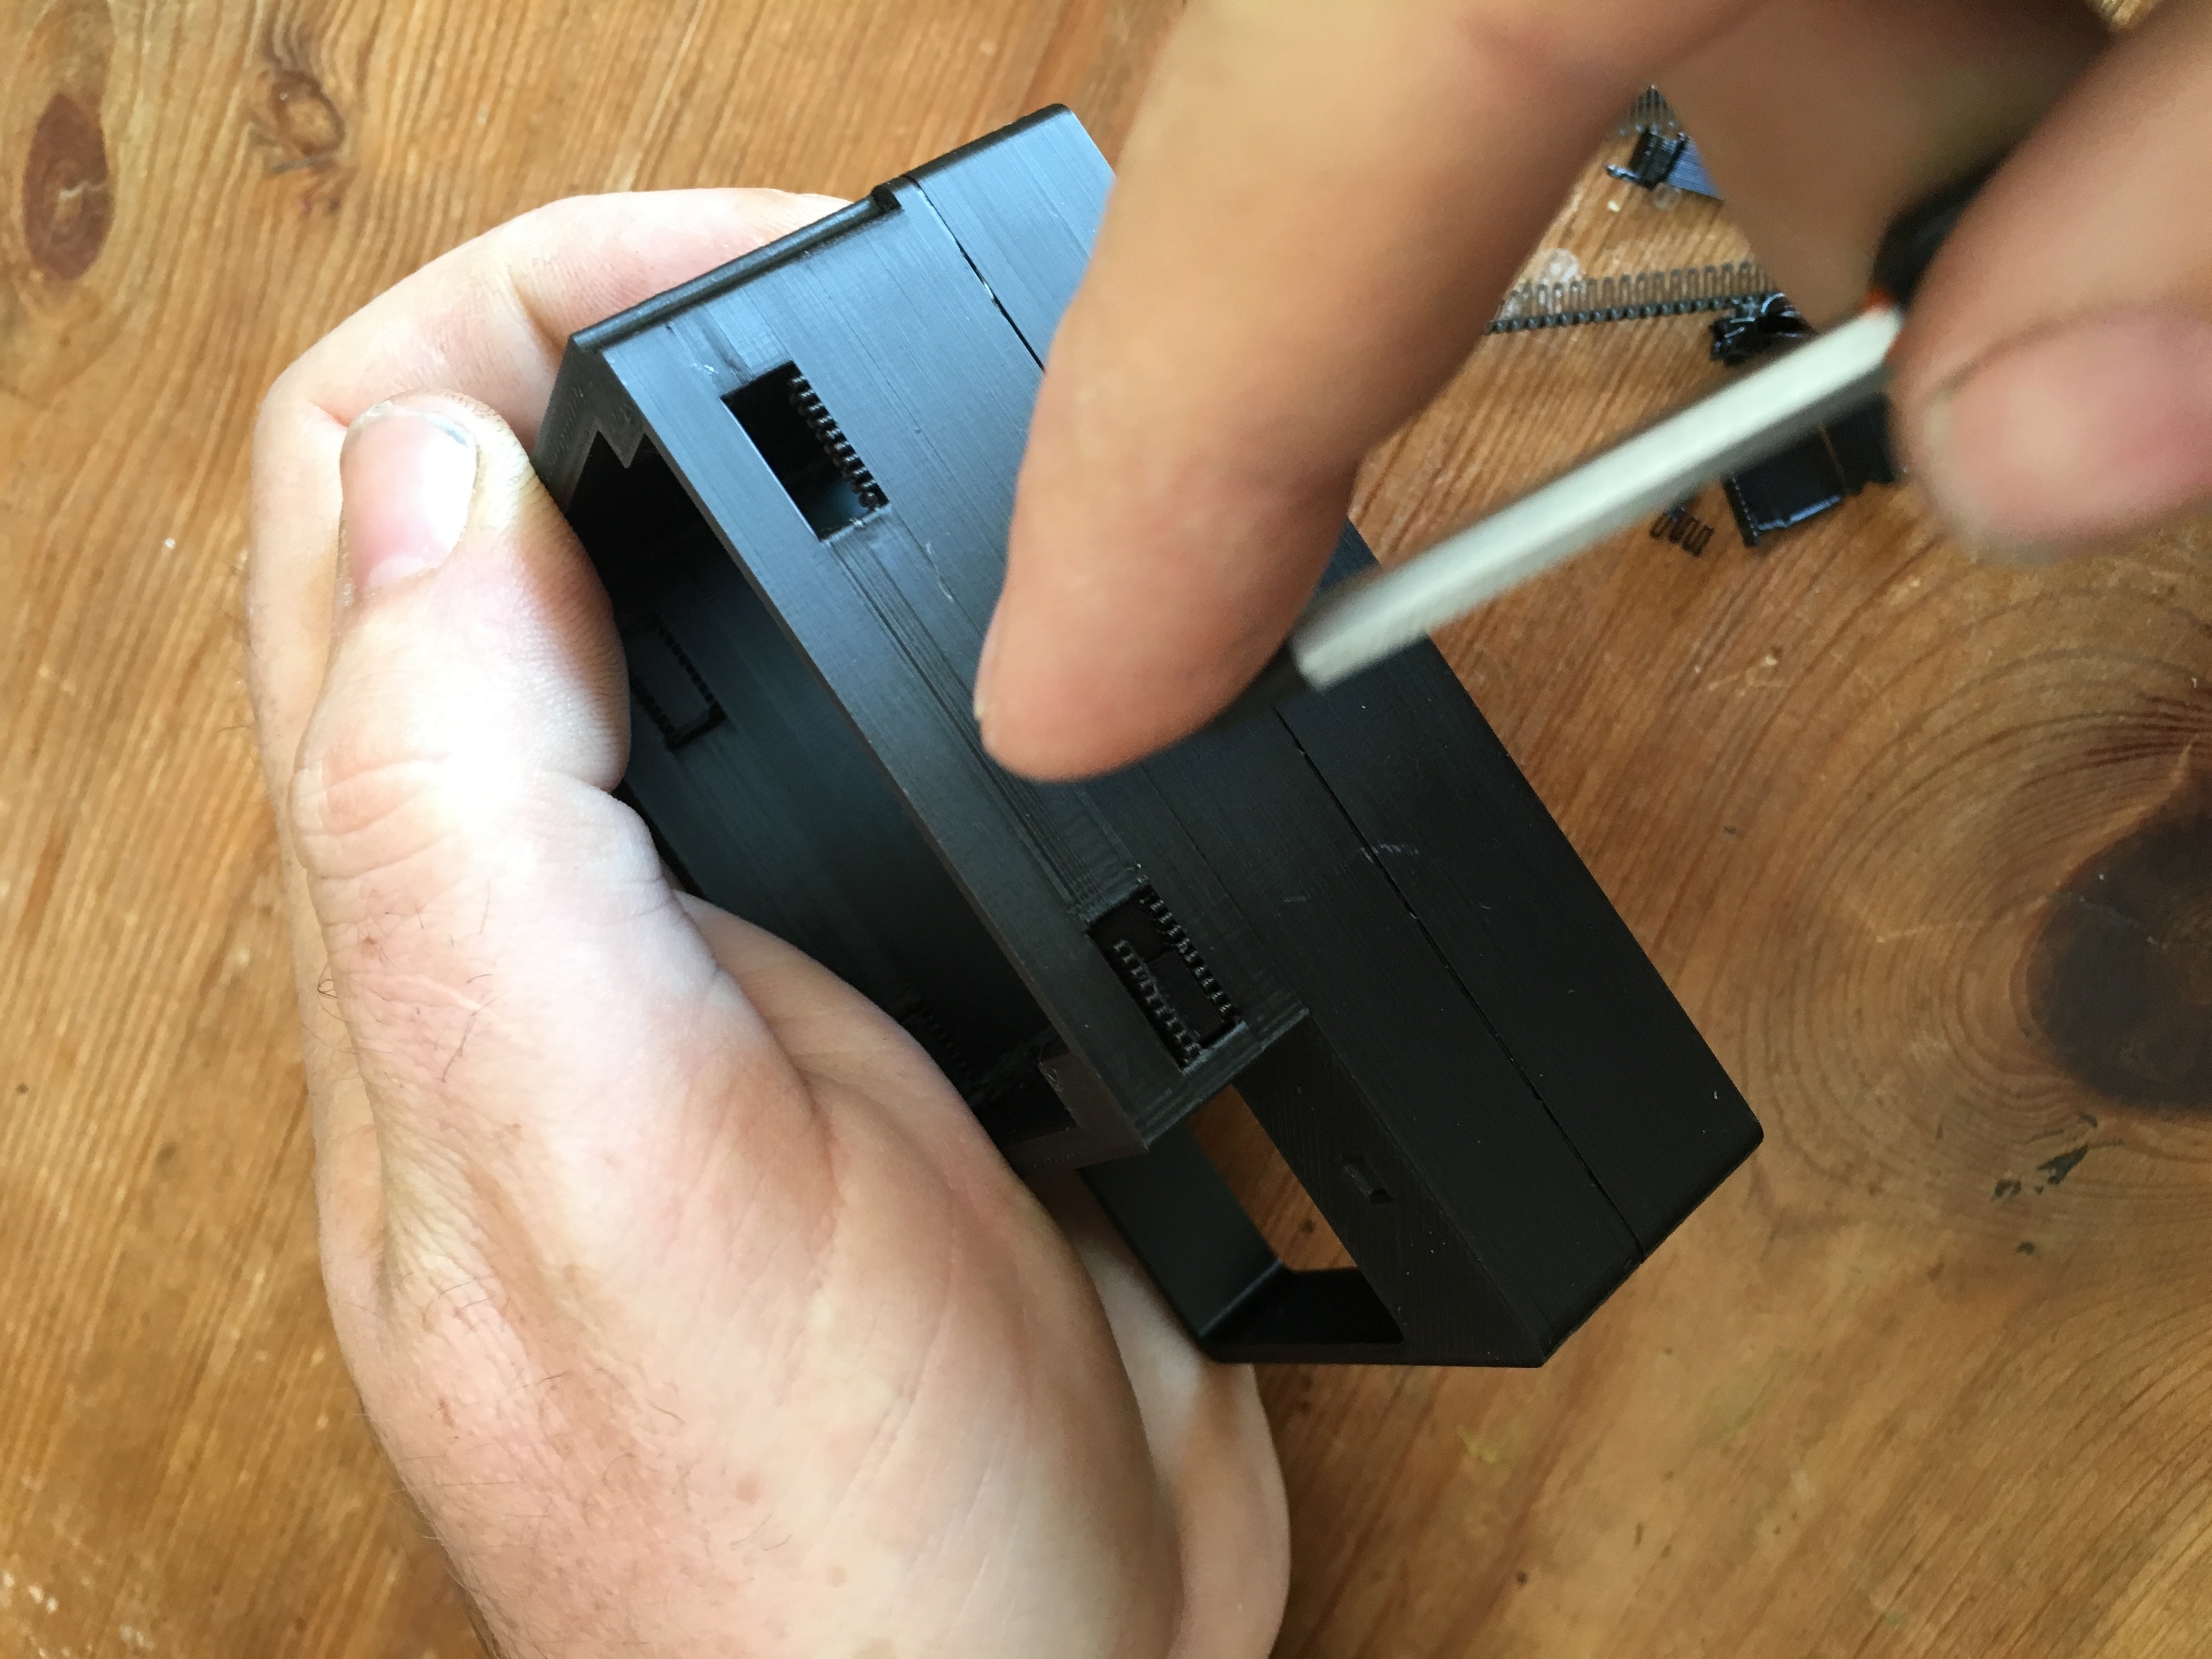
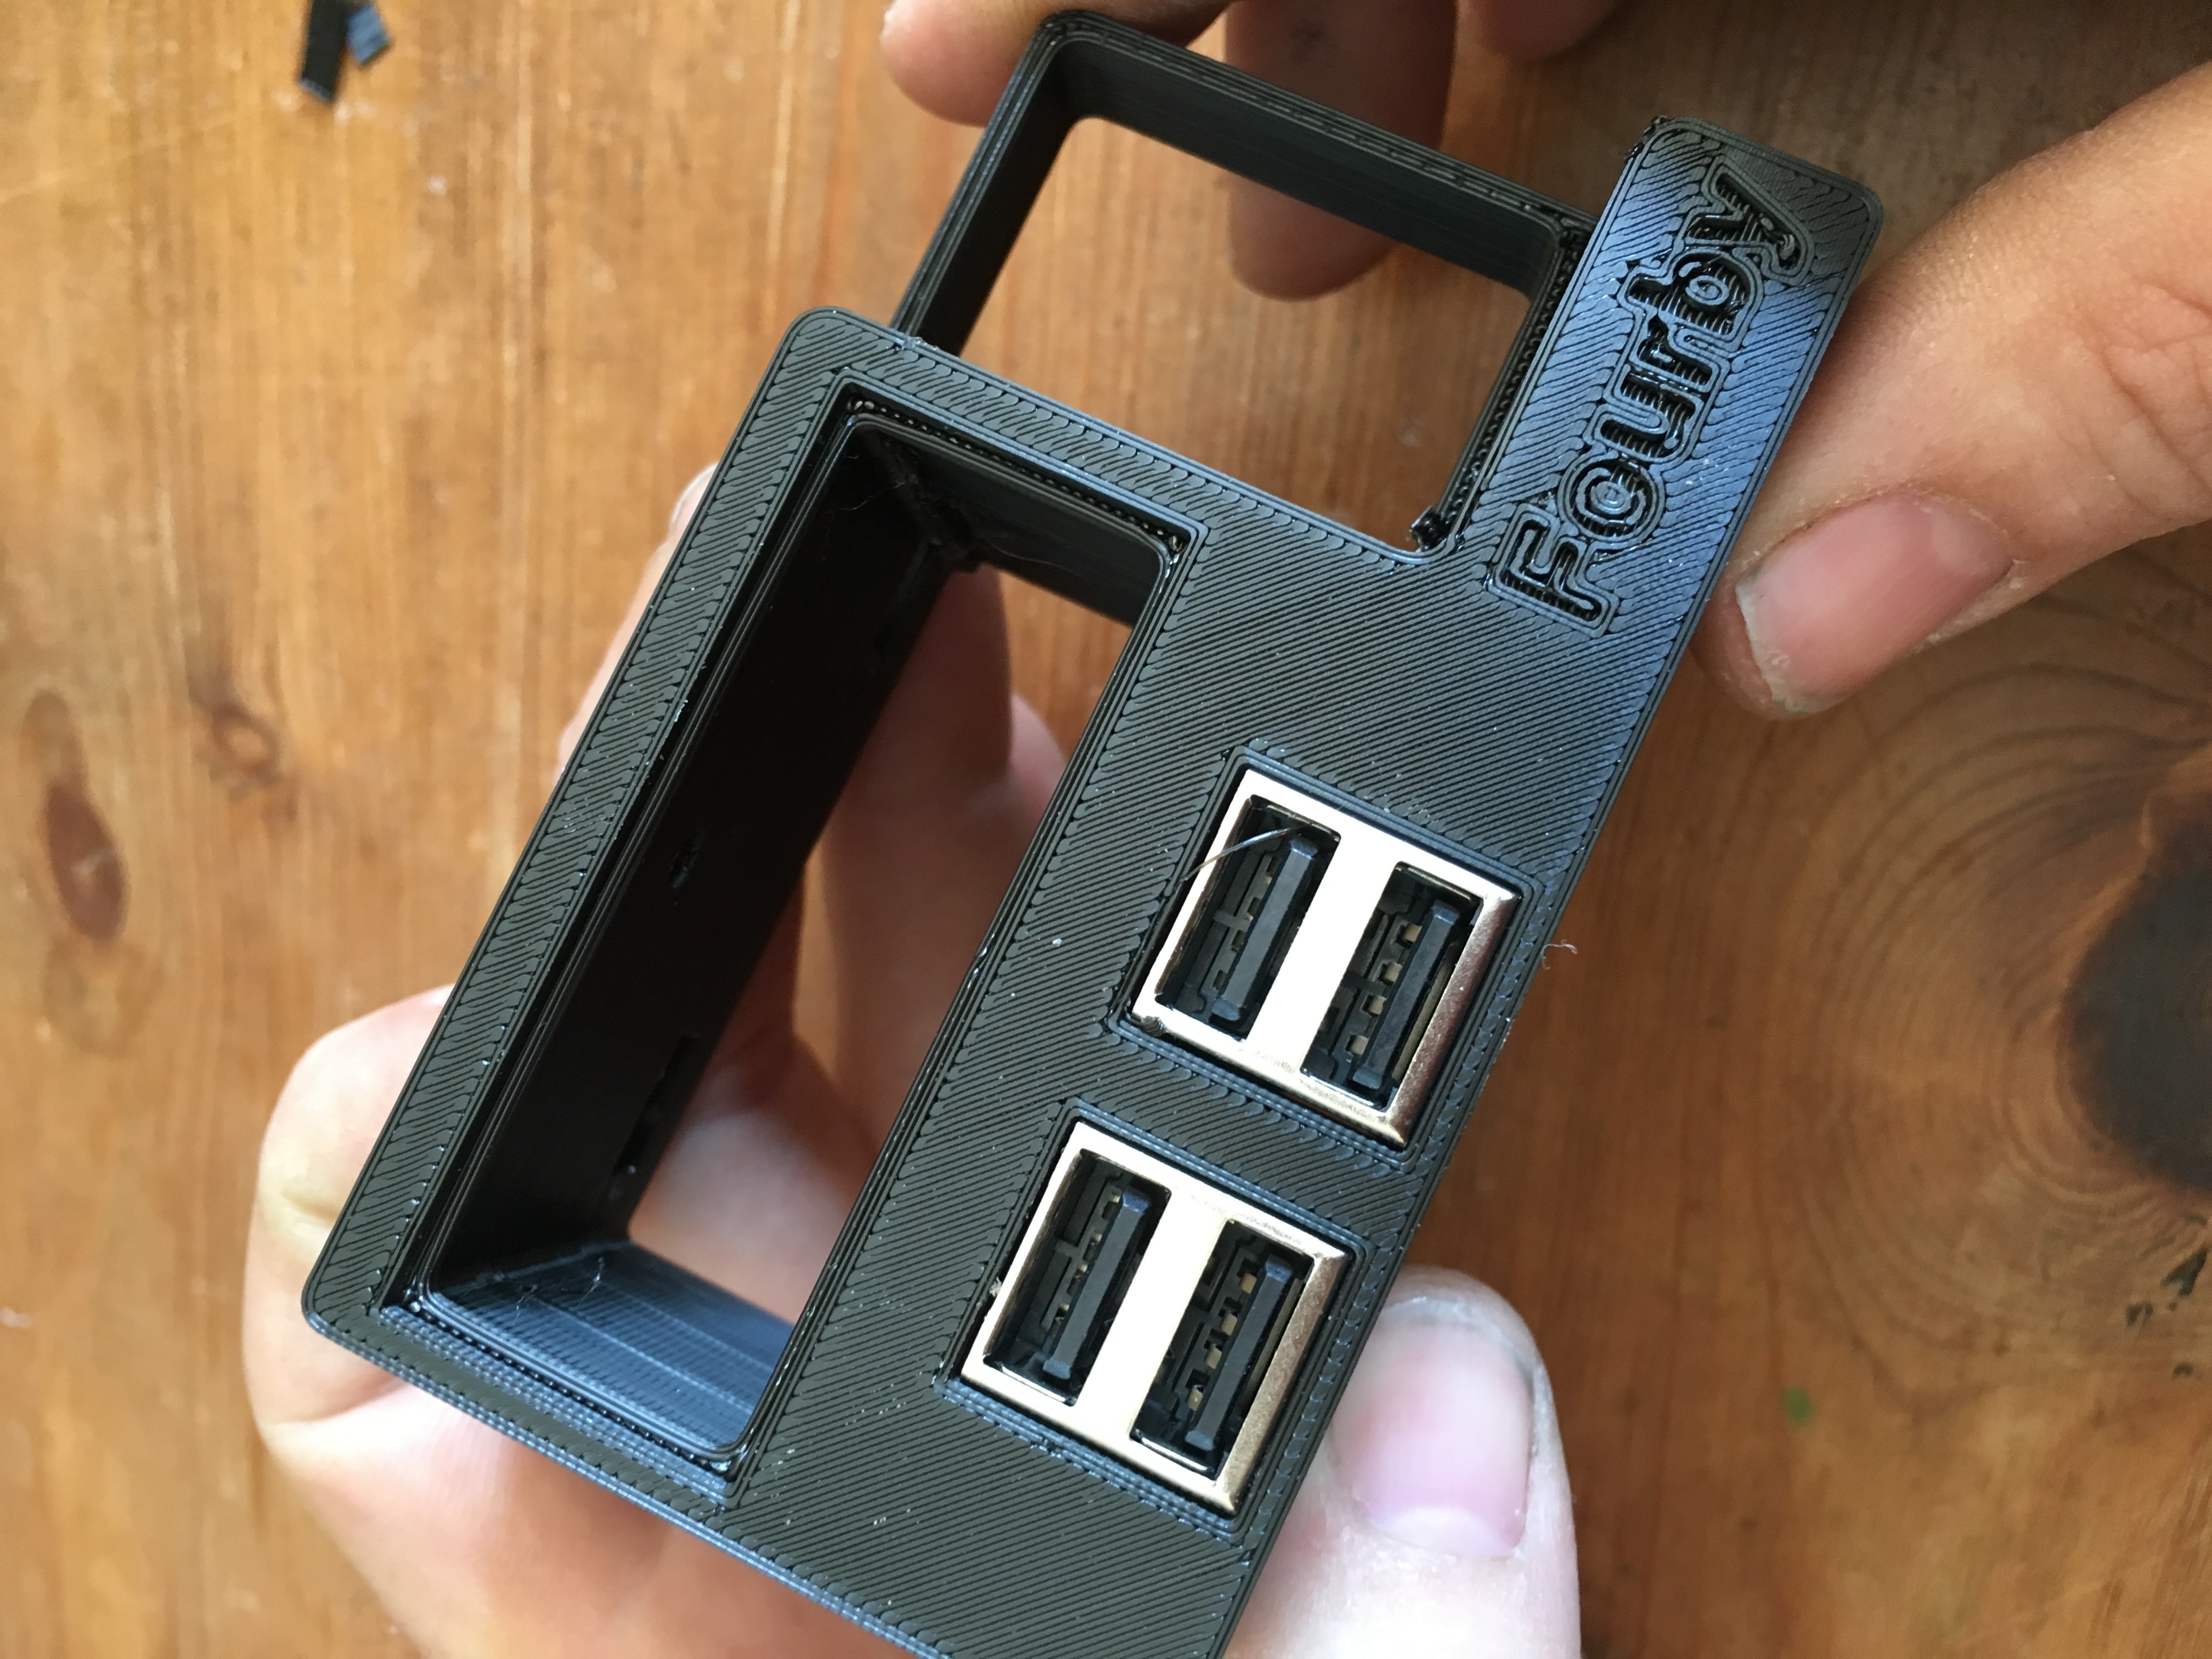
find the clock module from your parts
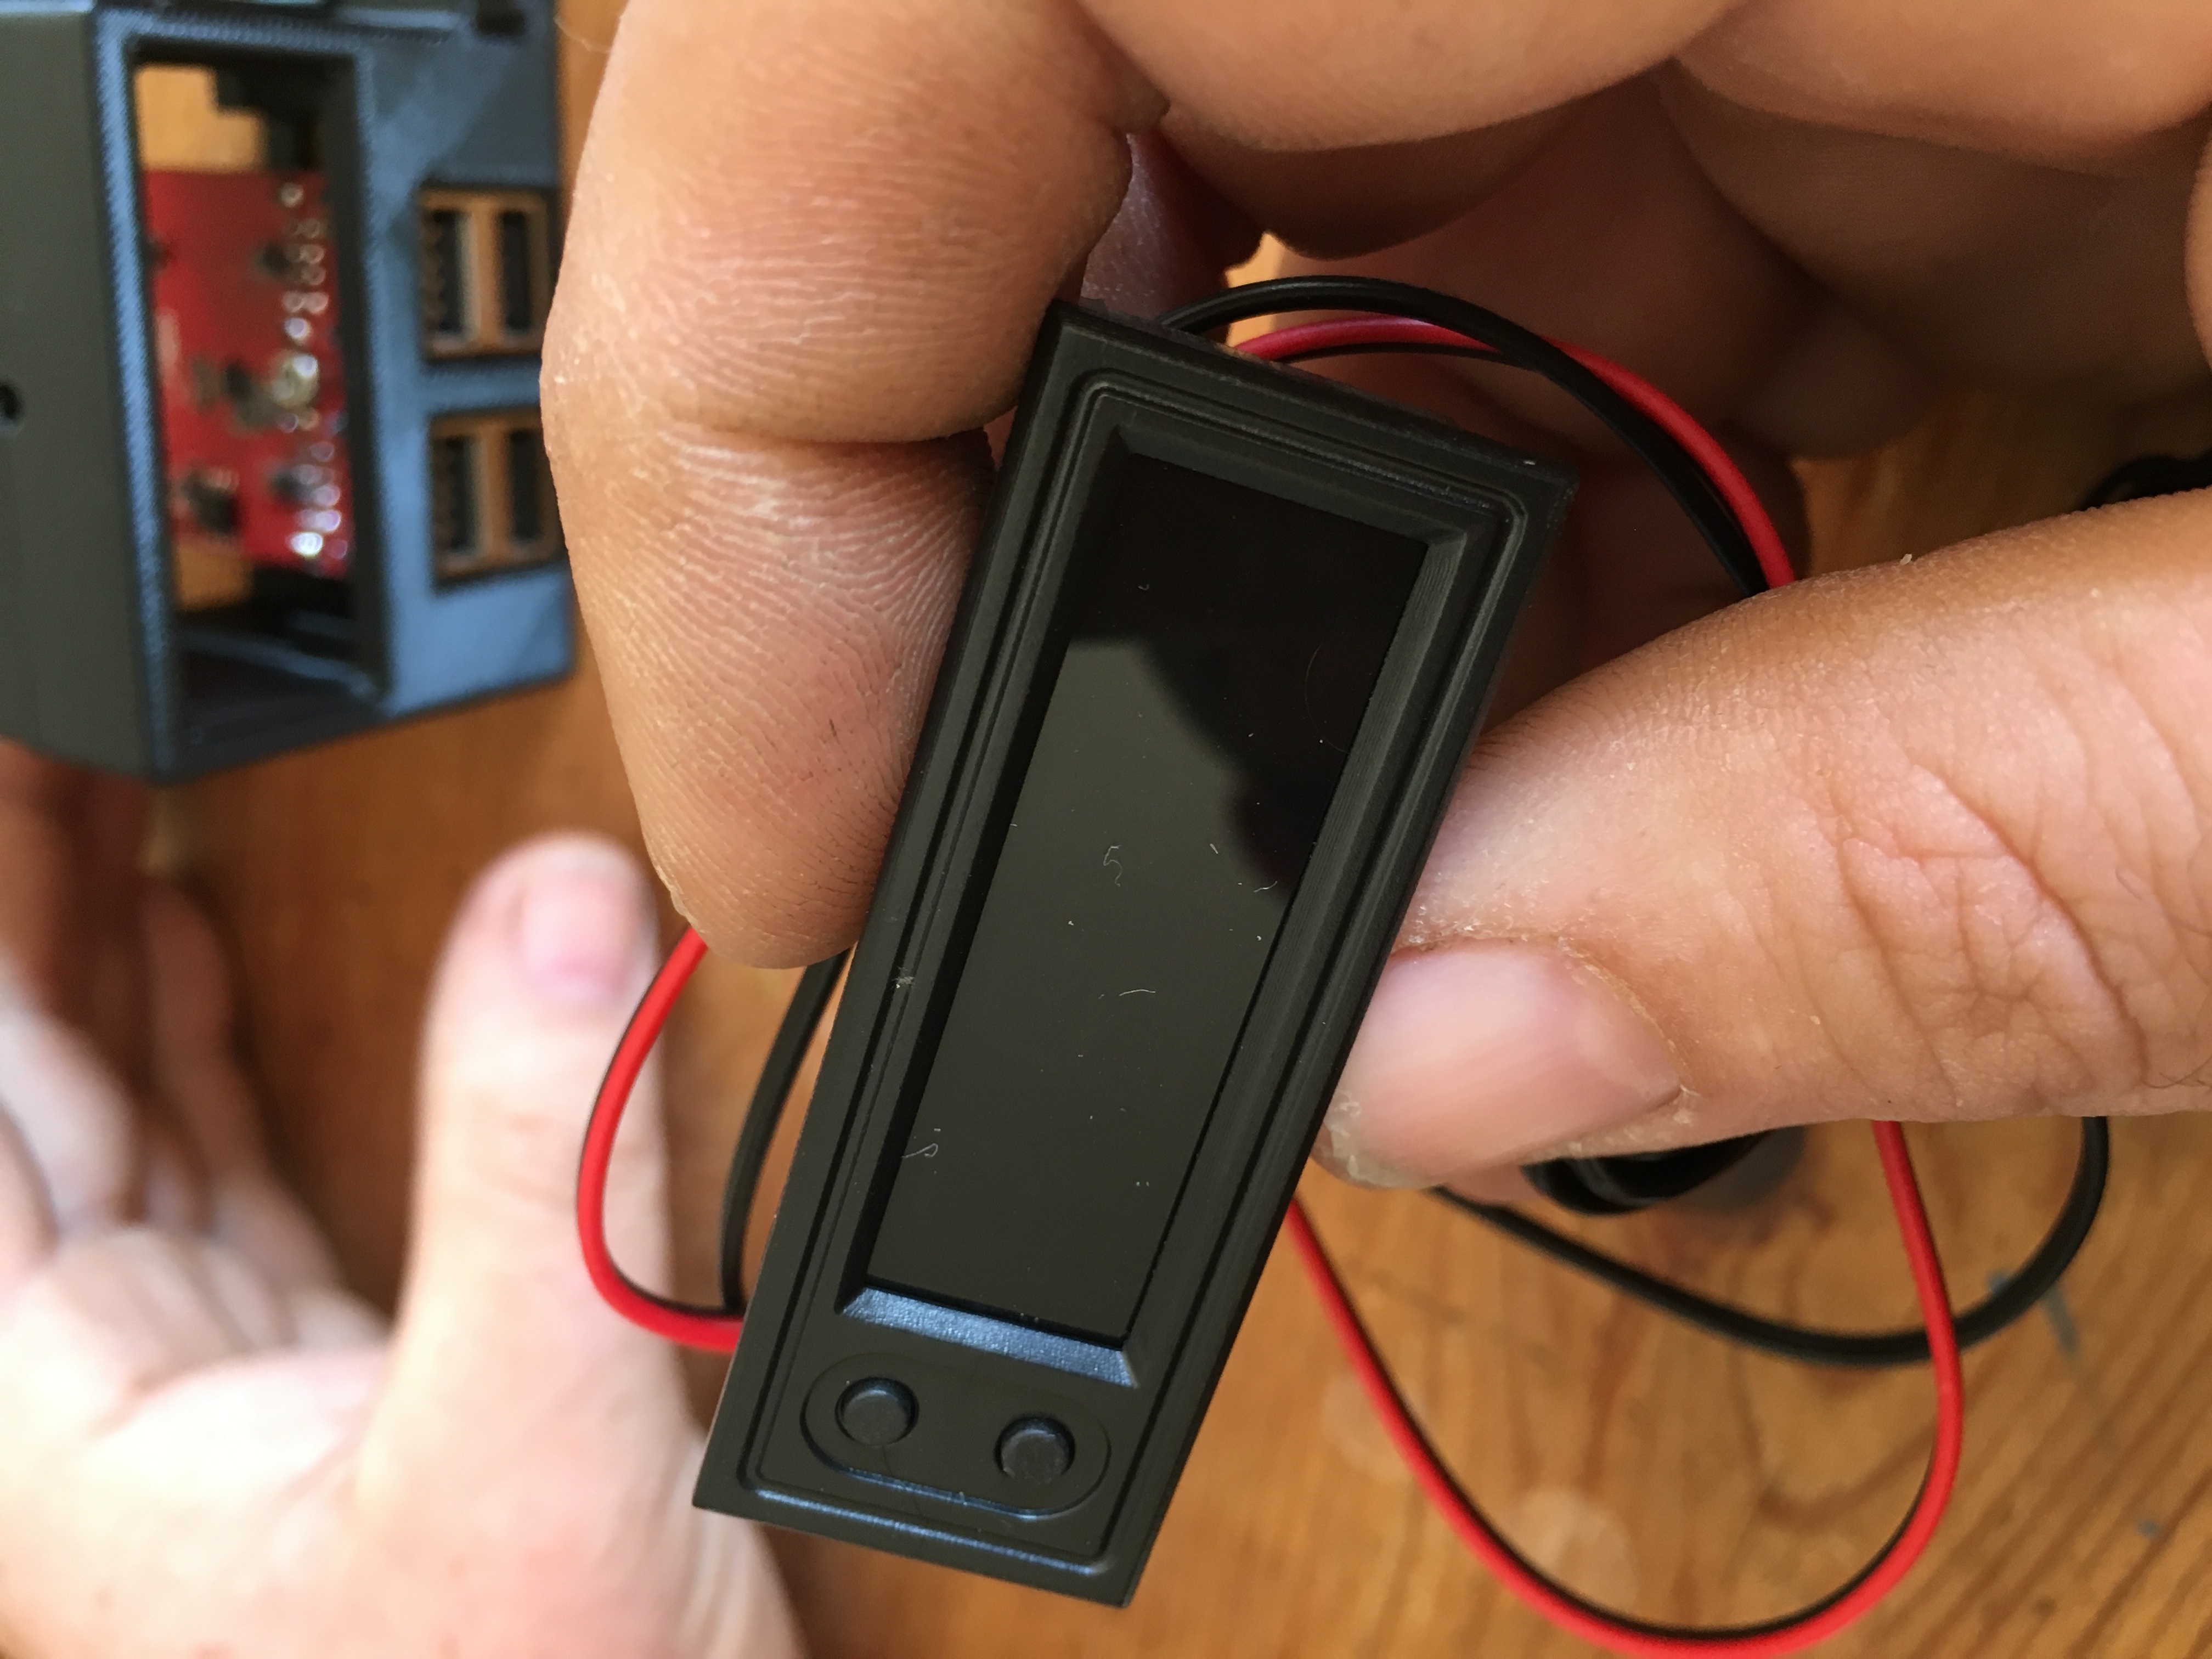
make sure you have the buttons in this location
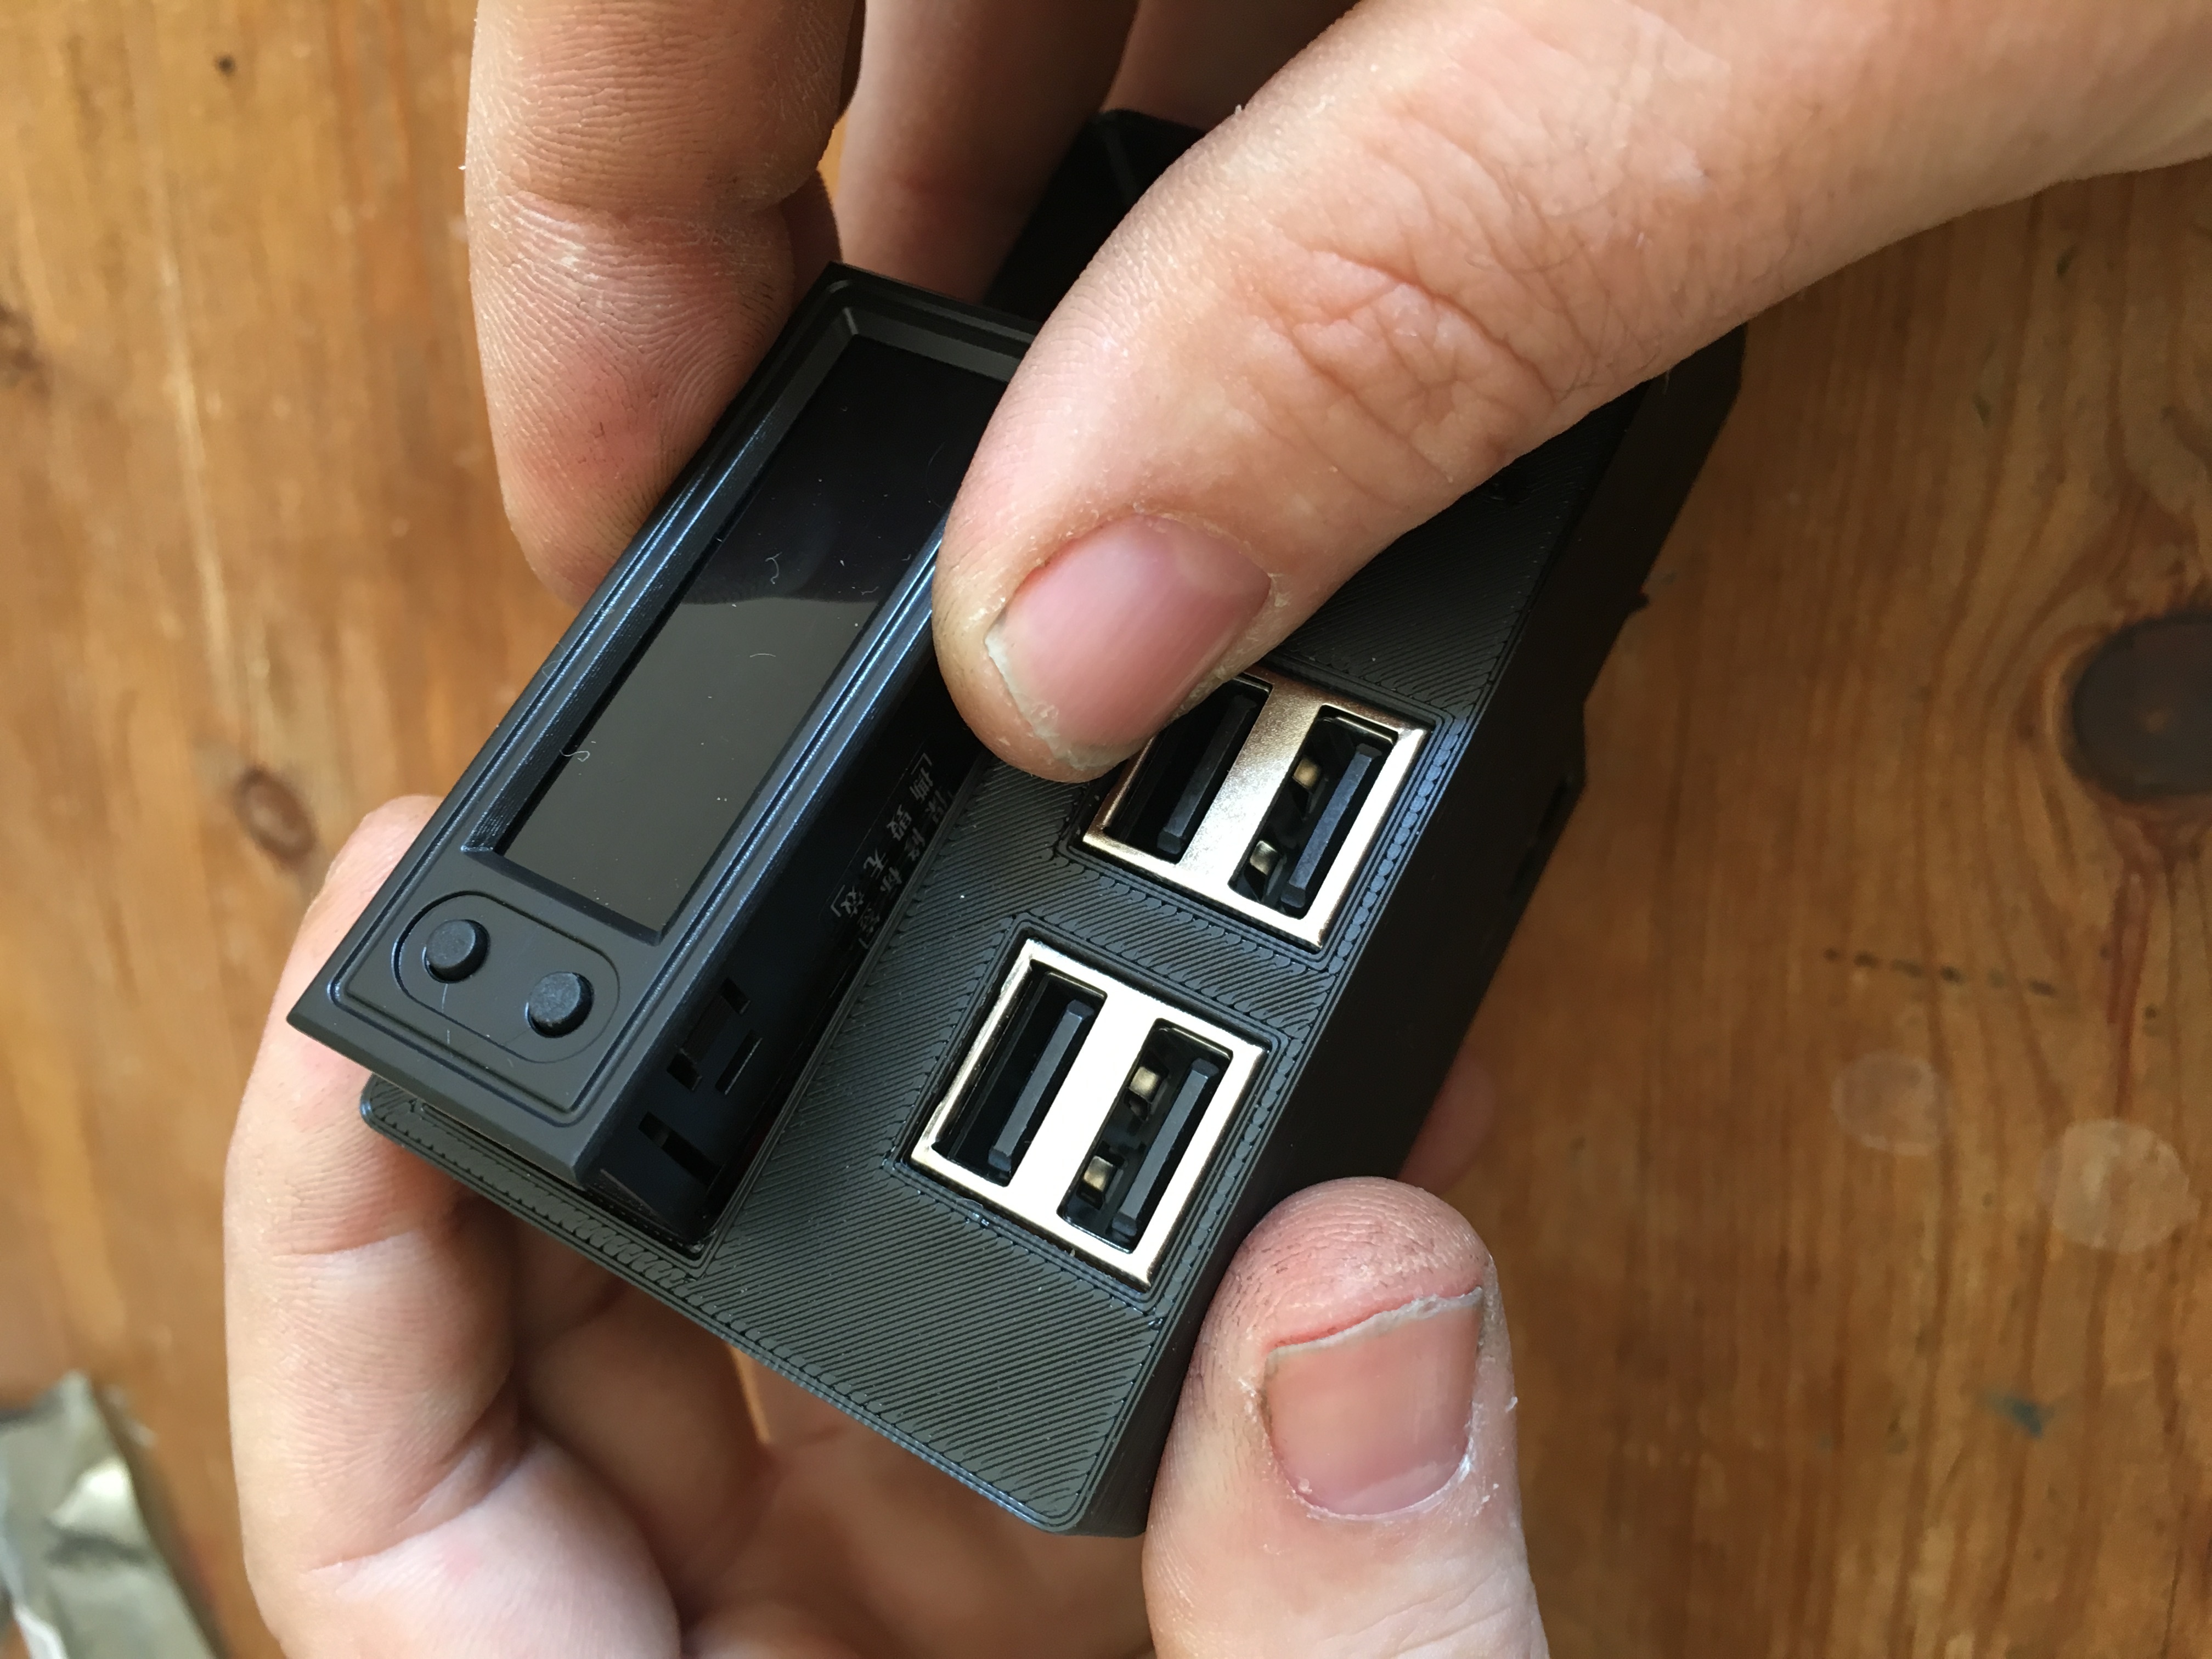
snap the module in.

Congratulations you can now reward yourself with a sweet
Your clock hardware is now built,
Next we will do the wiring....
Click here: Wiring Guide


")